How to Fix Lazy Eyes in Pictures (Detailed Guide)
Updated on
Summary: This article guides you on how to correct lazy eyes (eyes not aligned) in photos. It explores methods using professional software like Photoshop, user-friendly online tools like Fotor, and potentially other techniques. The guide likely includes tips for achieving natural-looking results and may briefly discuss common types of eye misalignment.
Lazy eyes, also known as strabismus, can significantly detract from the overall aesthetic appeal of a photograph. When one or both eyes are not aligned properly, it can create a sense of imbalance and distraction, drawing attention away from the intended focal point. This can be particularly problematic in portraits or other images where the subject's eyes are a central element.
Fortunately, with the help of modern photo editing software, it is often possible to effectively correct lazy eyes and restore the natural alignment of the eyes. By using tools such as the Liquify tool in Adobe Photoshop or similar features in other editing programs, you can gently manipulate the eye area to bring the eyes into proper alignment. This can help to create a more harmonious and visually pleasing composition.
Part 1. Types of Common Lazy Eyes in Pictures
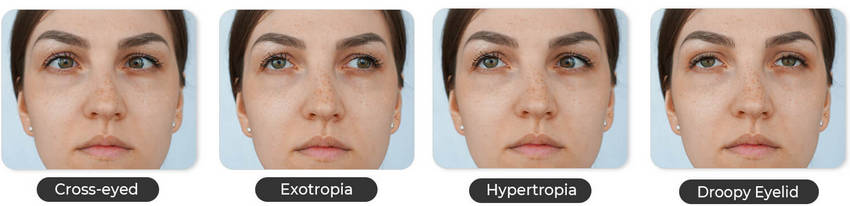
Lazy eyes, or strabismus, occur when a person's eyes appear to drift away from each other. This condition is often genetic and may not be correctable. However, it doesn't mean people with lazy eyes should avoid taking photos. Lazy eyes can impact photos in various ways, depending on the underlying cause and how the condition manifests. Common issues include:
- Uneven eyes: The eyes may not be aligned properly, creating a distorted appearance.
- Head tilt: The person may tilt their head to compensate for the misalignment.
- Squinting or closing eyes: The person may squint or close one eye to reduce the double vision caused by lazy eyes.
Photographers should be aware of these potential issues and learn how to work with them effectively. Here we go for fixing lazy eye in pictures.
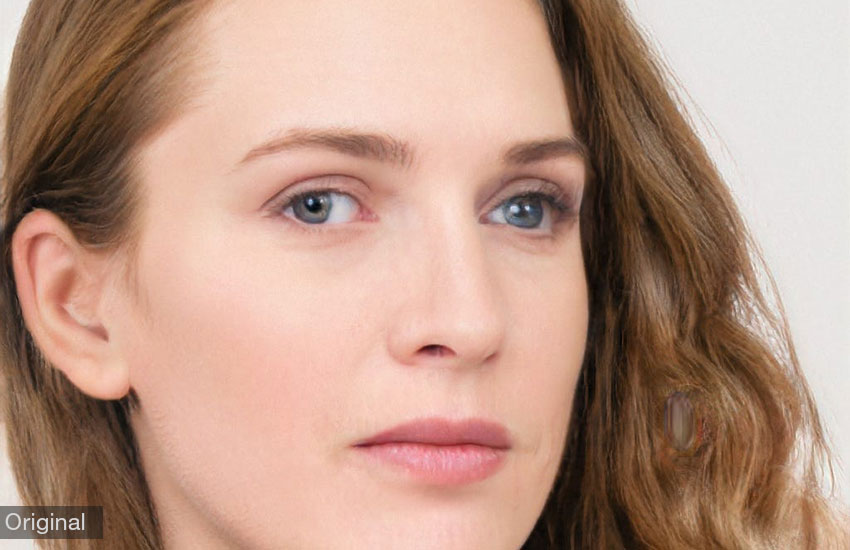
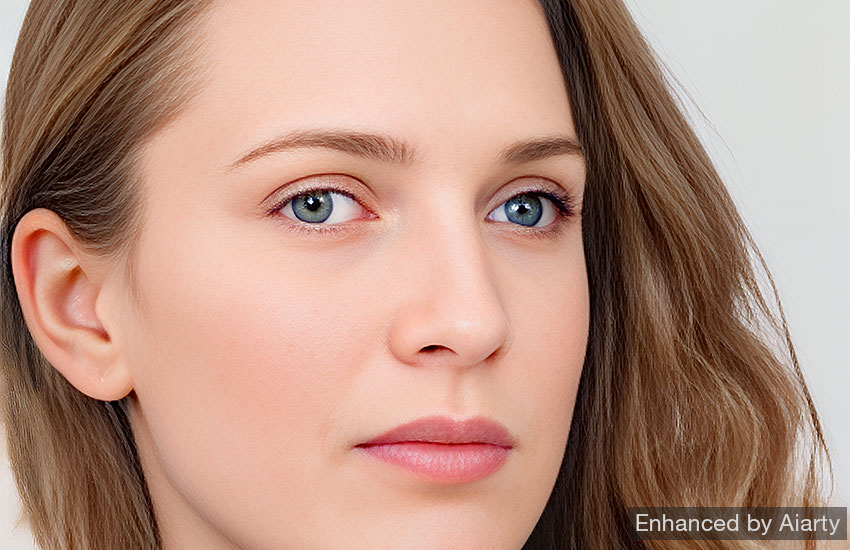
Tired of dealing with the distraction of lazy eyes in your photos? Aiarty Image Enhancer offers powerful and user-friendly tools to easily correct lazy eyes and restore a natural, balanced look. Try Aiarty Image Enhancer today and see the difference!
- Upscale images to 4K/8K/16K/32K or by 2x/4x/8x with realistic details, even for challenged hair or furs.
- Auto AI inference to denoise, deblur, fix compression artifacts, restore faces and enhance images easily.
- Achieve max quality for print and display, 800% zoom in without pixelation.
- 3 AI models for any image. Optimized for Nvidian/AMD/Intel/CPU
Tutorial on fix lazy eyes with Aiarty Image Enhancer in one click
Step 1. Free download the AI image enhancer, install and launch it. Load the pictures that have lazy eyes issue.
Step 2. Set the AI model, Upscale scale and tick on the box of Face Restoration. Then wait for the inference.
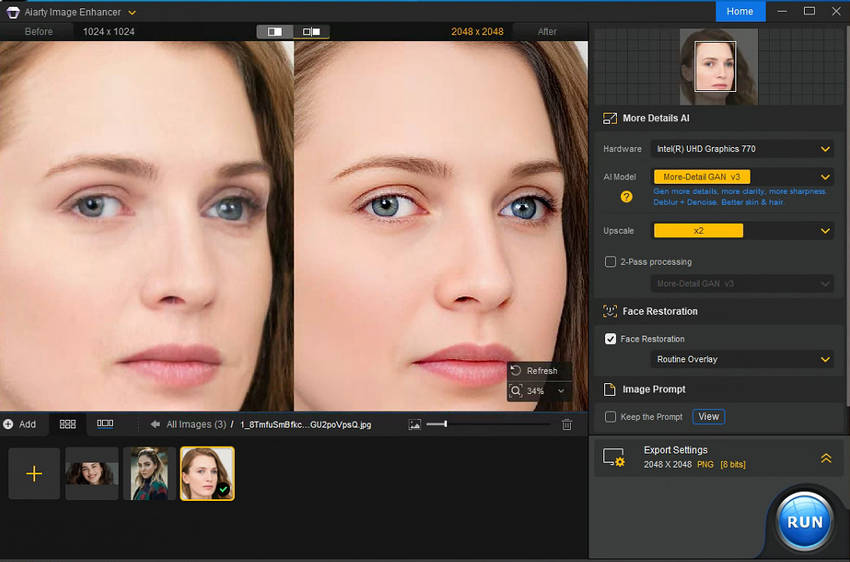
Step 3. Expand the Export Settings, set the output format, quality and folder path.
Step 4. Tap the RUN button to export the fixed pictures.
Part 3. How to Fix Lazy Eyes in Photoshop
Adobe Photoshop is a powerhouse for photo editing, and it excels at fixing lazy eyes in pictures. Its advanced features and precision tools make it the ideal choice for tackling this common photographic challenge. With Photoshop, you can employ a variety of tools to rectify lazy eyes. The Liquify tool allows for gentle manipulation of the eye area, bringing the eyes into perfect alignment. For blending and correcting inconsistencies in the whites of the eyes, the Clone Stamp tool is invaluable. Additionally, the Marquee and Lasso tools provide precise selection capabilities for targeted adjustments.
By mastering these techniques, you can effectively eliminate the distractions caused by lazy eyes, resulting in more visually appealing and professional images. Let's delve into the step-by-step process of correcting lazy eyes in Photoshop.
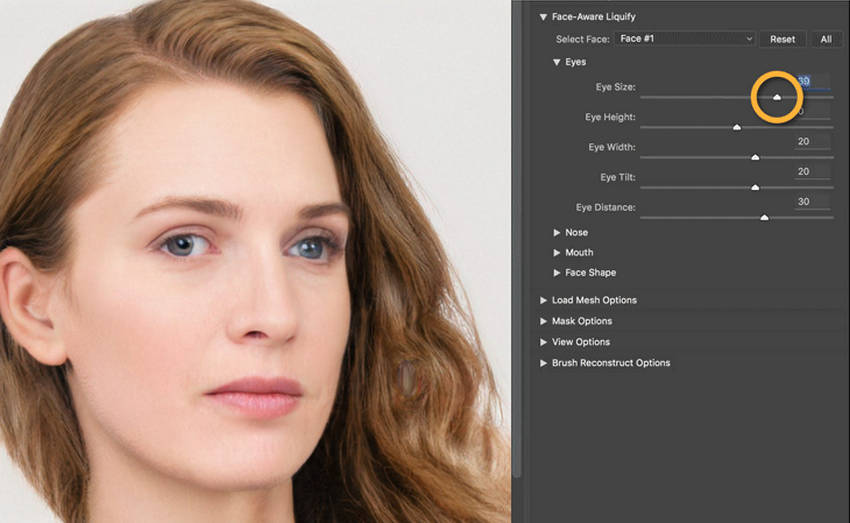
1. Use the Liquify Tool
Step 1. Open your image in Photoshop, ensure the image is high-resolution and well-lit for optimal results.
Step 2. Select the Liquify tool in the Filter menu or by pressing Shift+Ctrl+X.

Step 3. Choose a brush size that is appropriate for the size of the eye and the desired level of correction.
Step 4. Determine which eye is more affected by amblyopia. Then make small adjustments to the eye's shape, position, size and more until you're satisfied.
Step 5. Regularly preview your changes and make adjustments as needed to achieve a natural-looking result.
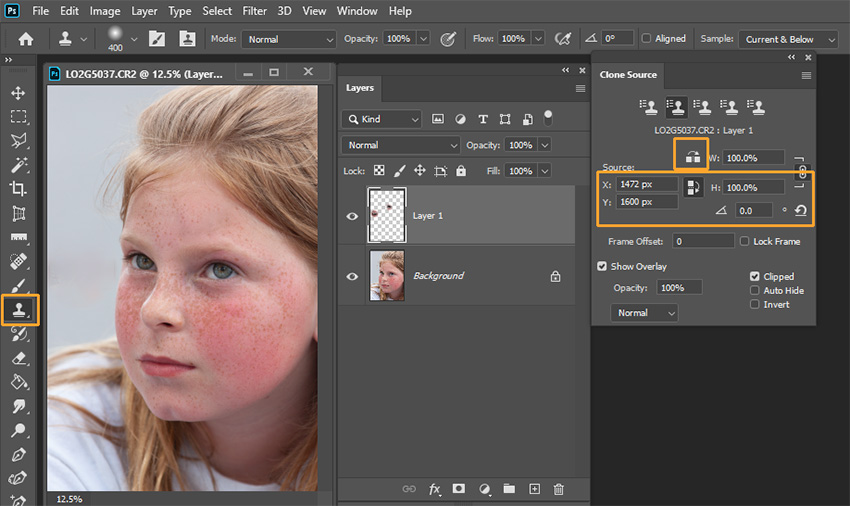
2. Use the Clone Stamp Tool
Step 1. Open your image with lazy eye issue in PhotoShop.
Step 2. Select "Clone Source" from the Window on the toolbar.
Step 3. Click on the "Horizontal flip" next to Width.
Step 4. Choose the "Clone Stamp Tool" on the side toolbar. Adjust the stamp size, then sucking out the eye you're trying to clone while holding on the Alt on the keyboard.
Step 5. Adjust the source position, and angle to correct the lazy eye in picture.
3. Use the Lasso Tool
Step 1. Open your image in Adobe Photoshop.
Step 2. Select the area around the subject's eye using the Lasso tool. Duplicate this selected area onto a new layer by pressing Ctrl+J (Windows) or Command+J (Mac).
Step 3. Use the Move tool to adjust the position of the selected eye. Make sure the distance between the pupil and the edge of the eye is consistent in both eyes.
Step 4. Create a mask for the selected eye layer. Use the Brush tool to blend the edges of the mask to match the background. Make sure black is the foreground color when using the brush.
Step 5. To finalize the image, correct the eye color of the lazy eye. Review the final image and save it if you're satisfied with the results.

By following these techniques, you can successfully remove the visual distractions caused by lazy eyes in Photoshop, creating images that are more aesthetically pleasing and professional.
Related search: How to Remove Glare from Glasses in Photoshop >>
Part 4. How to Fix Lazy Eye in Pictures Using Fotor
Fotor is a versatile online photo editor that provides a range of tools to enhance your images. While it may not offer the same granular control as professional software like Photoshop, it's a convenient and accessible option for many users, especially those who don't require the most advanced editing features.
When it comes to fixing lazy eyes in photos, Fotor can be a valuable tool. Its user-friendly interface and intuitive tools make it easy to manipulate and adjust the eye area. Features like the Blemish Fix tool, Clone tool, and adjustment on eye shadow, eyeliner, eye pop etc. can be used to address various eye imperfections and create a more visually appealing result.
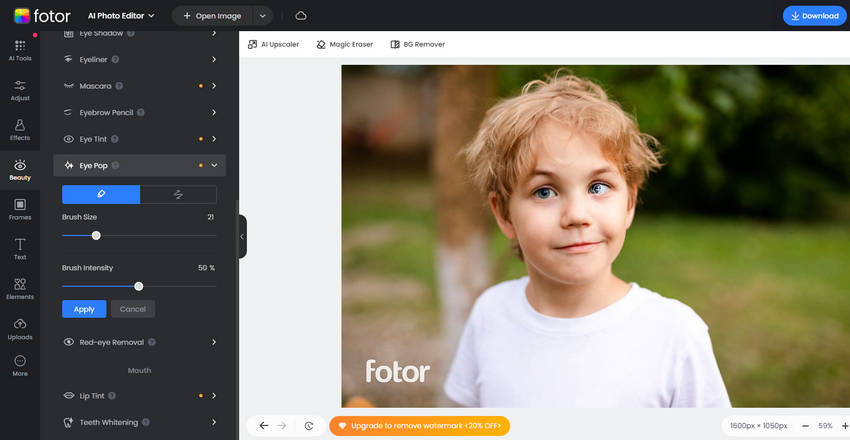
Step 1. Navigate to Fotor editing page and upload your photo which has lazy eye.
Step 2. Click on the "Beauty" on the side toolbar.
Step 3. Apply the Blemish Fix feature for removing blemishes, but it can also be helpful for making subtle adjustments to the eyes.
Step 4. Use the "Clone" tool to clone areas of the image to correct imperfections, such as misaligned eyes.
Step 5. Carefully adjust the eye area for better matched eye shadow, eyeliner, eye pop and tint etc. until you're satisfied.
Step 6. Tap the "Download" button to save the lazy eye fixed photo after you've done.
While Fotor may not have the same level of precision as dedicated photo editing software, it can be a great starting point, especially for those who are new to photo editing or simply need a quick and easy solution. For more complex adjustments or advanced features, you might consider transitioning to more specialized software.
Part 5. Tips for Fixing Lazy Eyes in Photos
Lazy eyes can be a common challenge in photography, but with the right approach, they can be minimized. By understanding how to capture images in a way that reduces the visibility of lazy eyes, you'll not only save time in post-processing but also achieve more pleasing results. Let's explore some tips for both in-camera and post-production techniques.
1. Using a Wide Aperture:
A wider aperture (lower f-number) creates a shallower depth of field, meaning the background is significantly blurred. This can help to draw attention away from any imperfections, including lazy eyes. Experiment with different f-numbers to find the best balance between blurring the background and maintaining image sharpness. A typical range for portrait photography is f/1.8 to f/3.5.
2. Focusing on the Unaffected Eye:
By focusing on the eye that is less affected by lazy eyes, you can create a more balanced and visually pleasing image. Use manual focus or spot metering to ensure precise focus on the desired eye. If the subject is wearing glasses, consider removing them to improve focusing accuracy.
3. Using a Shallow Depth of Field:
A shallow depth of field isolates the subject, making them stand out from the background. This can help to mask imperfections like lazy eyes. Adjust your aperture and distance from the subject to achieve the desired depth of field. Remember that a closer distance and a wider aperture will result in a shallower depth of field.
4. Considering Black and White:
Converting an image to black and white can reduce the visibility of color variations and imperfections. This can be particularly effective for masking lazy eyes. Experiment with different black and white conversion techniques and toning to find the best look for your image.
5. Using Photo Editing Software:
Photo editing software can provide precise control over adjustments, allowing you to refine the appearance of the eyes. Explore tools like the Liquify tool in Photoshop to make adjustments to the eyes' shape, size, and position. Be cautious not to overdo it, as excessive adjustments can look unnatural.
6. Using AI Photo Enhancer:
AI image enhancement software like Aiarty Image Enhancer offers a promising solution for individuals seeking to correct minor instances of strabismus in their photos. By automatically identifying and rectifying eye-related imperfections, these tools can significantly improve the overall appearance of images. However, for more complex cases of strabismus, professional photo editing software offers a wider range of tools and greater control over the editing process.
Free download Aiarty Image Enhaner to fix lazy eye and enhance photos now!
Conclusion
Fixing lazy eyes in photos can dramatically improve their visual appeal. By employing the strategies and tools outlined in this article, you can effectively address this common photographic challenge. Not only does correcting lazy eyes enhance the overall aesthetic of your images, but it also contributes to a more balanced and harmonious composition. By understanding and implementing these techniques, you'll be able to create photos that are more engaging, professional, and visually satisfying.
If your photo precisely has lazy eye, just fix it following this article. Can't wait to hear your success stories!
You May Also Like
Brenda Peng is a seasoned editor at Digiarty Software who loves turning ordinary photos into extraordinary works of art. With years of experience behind the lens and in front of the computer, Brenda shares her passion for photography, image enhancement, and editing through easy-to-follow tutorials.