Best Stable Diffusion Prompts for Realistic Photos (12 Tips)
Updated on
Creating realistic photos with Stable Diffusion can be fulfilling for content creators, photographers, and AI enthusiasts like me, as long as we can wield the magic wand properly.
I've been playing around with Stable Diffusion for the past two years, initially drawn to anime, fantasy, and Pony Diffusion (come on, who can resist adorable ponies?).
Recently, with the release of Midjourney v6/v7 focusing on realistic photos, my interest in AI-generated photorealism has grown. I found that generating realistic photos in Stable Diffusion requires more effort compared to Midjourney, as it involves selecting checkpoint models, LoRa, prompts, sampling methods, and various other parameters.
Based on my theoretical and practical learnings, I'll share some of the best tips I've gathered. Additionally, I've compiled a list of Stable Diffusion realistic photo prompts at the end of this article.
Before we get started, here is my secret recipe to get clear and sharp realistic images from Stable Diffusion (and achieve 4K/8K resolution from 512px).
Step 1. Choose a realistic checkpoint model and test your prompt.
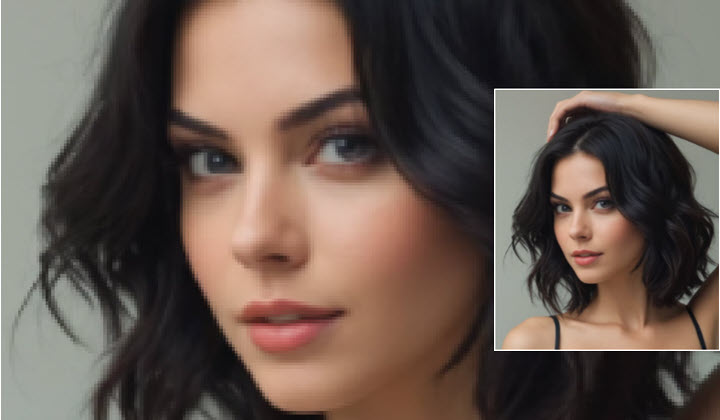
💬Prompt: 1 beautiful woman with shoulder length hair, dark brown eyes and black medium wavy bob cut hairstyle, soft glam makeup, hair in hand pose, close shot, (catalogue photo shoot)
The output is 512px, and it becomes blurry when zoomed in.
Step 2. Enhance with AI image upscaler/detailer.
Now if you don't want to go through complex steps to upscale in Stable Diffusion, we can use a dedicated AI image upscaler that are faster, easier, with even better results.
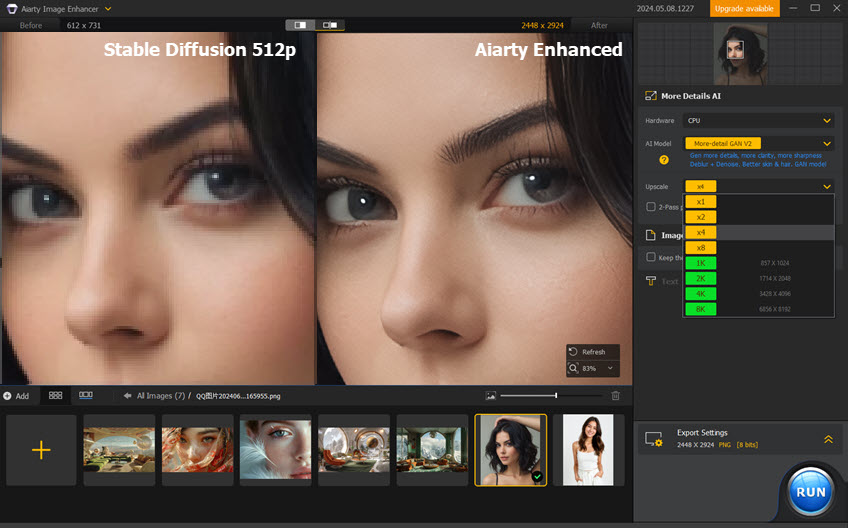
Above is a preview of upscaling Stable Diffusion images in Aiarty Image Enhancer. It can add details and keep the realistic skin texture, brighten up blurry eyes, and make everything so real and natural.
Aiarty Image Enhancer is the flagship AI tool from Digiarty Software. It can upscale and enhance any image from low-res to 4K/8K/16K+ with realistic details kept. Trained on a 6.78million dataset, it has auto AI inference to denoise and deblur images, and fix pixelation artifacts.
12 Tips to Create Realistic Photos in Stable Diffusion
Before we jumping into the details, here is a trend in the community since the release of Google's Nano Banana. Now you can use Nano Banana to restore and enhance Stable Diffusion images for realistic details.
Image blending and compositions are supported also. For instance, Reddit User (@Race88) challenged the r/StableDiffusion community to recreate a realistic blend of images in Nano Banana, based on the Stable Diffusion ComfyUI use case below.

For the Stable Diffusion workflow, you need to provide 2 source images, 1 pose reference, and 1 depth map, while using Nano Banana, you can omit either the depth map or the pose reference.
Pro Tips: To bypass censor limitations, use Nano Banana on Google AI Studio (https://aistudio.google.com/ ), instead of in Gemini Flash Image or LLM Arena. Sometimes, Nano Banana will mistakenly detect the Mario image as "image of Children" and thus refusing editing the image.
#1. Use Photo Realistic Models for Stable Diffusion
To create realistic photos, start with models designed specifically for photorealism. These models are trained on high-quality images and can generate more life-like results compared to general models. Look for models labeled as "realistic" or "analog photo" as they are tailored to produce images with finer details and natural lighting.

Below are my favorite Stable Diffusion models that can generate realistic photos.
1. CyberRealistic Pony: https://civitai.com/models/443821/cyberrealistic-pony
The author recommends using "female/male" as opposed to "woman/man" for better tagging.
It supports Danbooru tags (learn how to use it with Dynamic Prompts).
2. Pony Realism: https://civitai.com/models/372465/pony-realism
You can find detailed parameter settings, recommended prompts and negative prompts on that Model pages hosted in Civitai.
3. Flux: https://civitai.com/models/618692/flux
This model is controversial, with some users saying there's no big difference from its predecessors, while others find it worked nicely.
4. EpicRealism: https://civitai.com/models/277058/epicrealism-xl
For the updated model, the author noted that avoiding negatives can enhance the result if you are basing on SDXL.
5. Juggernaut XL: You can download it from Civitai, Fooocus, and RunDiffusion
On Civitai: https://civitai.com/models/133005/juggernaut-xl
6. Realistic Vision 6.0 https://civitai.com/models/4201/realistic-vision-v60-b1
Legacy model but I get accustomed to it, together with Adetailer for face restoration.
7. DreamShaper XL: https://civitai.com/models/112902/dreamshaper-xl
#2. Structure Your Prompts
Crafting structured prompts is crucial for achieving realistic photos. You can go with the basic structure and adjust the tokens based on the output.
Structure: Subject, description of the subject {hairstyle, skin, cloth, props, poses}, environment, {other important features}, composition, lighting, camera {angles, camera properties}, by [photographer], quality keywords.

Note: Read the descriptions of each model when you are downloading them from Civitai, Huggingface, and other communities. The author of the model usually gives tips to generate nice images. For instance, for some models, the author may suggest you use short descriptions, and sometimes there is no need to add quality keywords such as 8K, UHD, etc.
Incorporate keywords like "RAW photo," "analog style," or "DSLR photo" to guide the model. Including specific camera brands such as "Fujifilm" or "Sony" can also influence the aesthetic, especially if you're aiming for a Japanese photography style.
Additionally, specifying the year of the photo can help models that perform well with temporal details. For instance, phrases like "2008 photo" or "2009 photo" can add a nostalgic touch. Adjusting the weight of each token in your prompt allows you to fine-tune the emphasis on certain aspects, ensuring a balanced and realistic output.
#3. Use Effective Negative Prompts
Negative prompts are essential for eliminating unwanted elements in your photos. Including terms like "doll," "anime," "animation," "cartoon," "render," "artwork," "semi-realistic," "CGI," "3d," "sketch," and "drawing" can help steer the model away from generating unrealistic or stylized images.
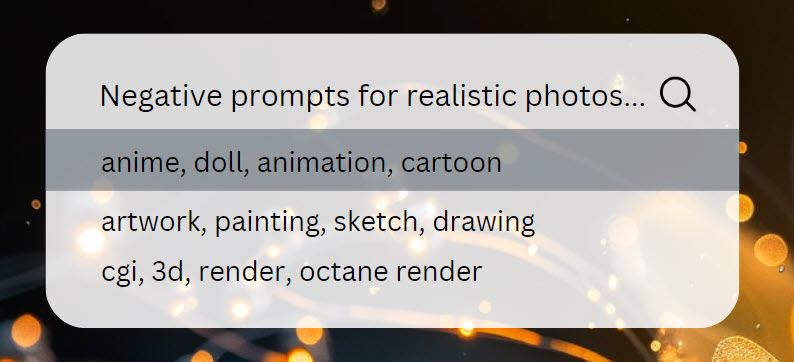
The goal is to eliminate any traits that could make the image look artificial or illustrative, focusing solely on achieving a natural appearance. This ensures that the final output maintains a photorealistic quality.
#4. Define the Lighting in Your Realistic Photo Prompts
Lighting is a critical element in photography that can dramatically affect the realism of your photos. Be specific about the lighting conditions in your prompts. Terms like "dramatic lighting," "soft sunlight," "golden hour," or "bokeh" can guide the model to create images with the desired ambiance.
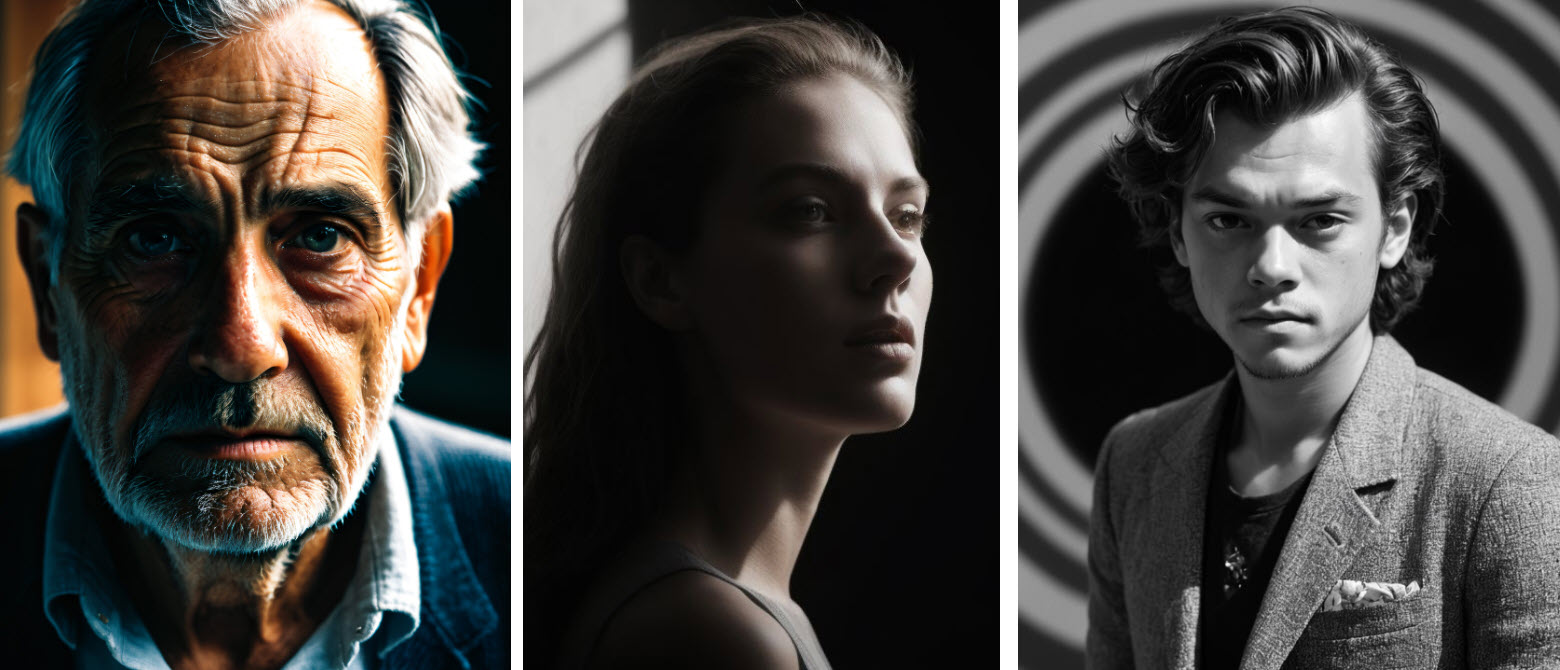
Experiment with different lighting scenarios to see how they impact the photo’s realism. Natural light often yields the most believable results, but artificial lighting can also be used effectively if described accurately. The key is to match the lighting to the context of your photo to enhance its authenticity.
Read the complete guide of Stable Diffusion lighting prompts with image examples.
#5. Use AI Upscaler and Detailer for Realistic Portrait
AI image upscaling and detailing tools can enhance the resolution and detail of your portraits, making them appear more realistic. These tools refine skin texture, hair details, and other facial features, adding depth and clarity to your photos.
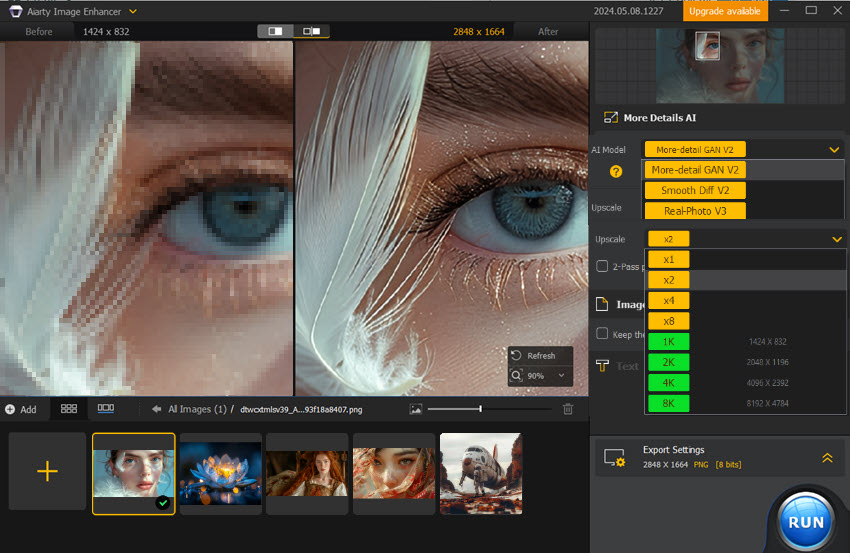
Aiarty Image Enhancer - Best for Stable Diffusion and More AI-Gen Images
- Upscale and enhance Stable Diffusion images with realistic details
- AI-enhance texture for skin, fabric, fur, hair, wood, rocks, and more
- Auto AI inference to denoise, deblur, restore and fix pictures (It's one of the best AI Image Enhancers!)
- Optimized for Nvidia/AMD/Intel/CPU, faster than SD upscaling workflow
#6. Use Img2Imge Feature
The Img2Img feature in Stable Diffusion allows you to take a realistic photo from another AI image generator and enhance it further in Stable Diffusion. This method is particularly useful for refining details, improving resolution, and adding final touches to make the photo more lifelike.
Start with a high-quality base image and use Img2Img to adjust aspects like lighting, texture, and color balance. This iterative process can help you achieve a higher degree of realism than generating from scratch, as you can build upon an already realistic foundation.
#7. Add Photographer In Your Prompts for Realistic Photo
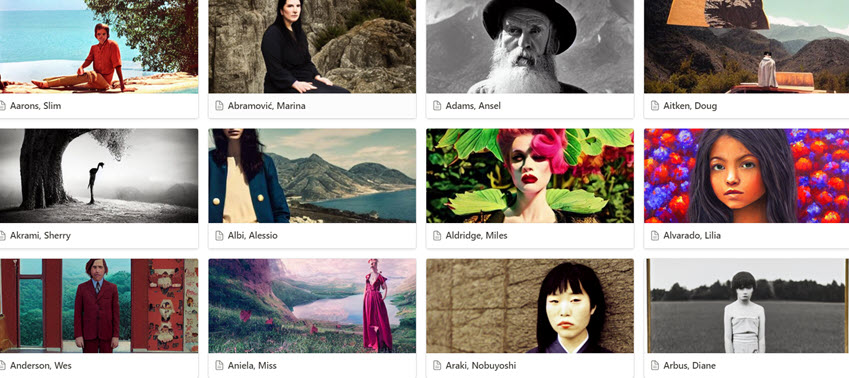
Including the name of a photographer in your prompts can significantly influence the style and realism of your generated photos. Mentioning renowned photographers known for their realistic work can guide the model to emulate their techniques, resulting in more credible outputs.
Here is a list of photographer names that work in Stable Diffusion.
#8. Use LoRa to Make Photo Realistic
LoRa (Low-Rank Adaptation) can be used to enhance the photorealism of your images by focusing on specific features like HDR, skin textures, or intricate details in clothing and decorations.
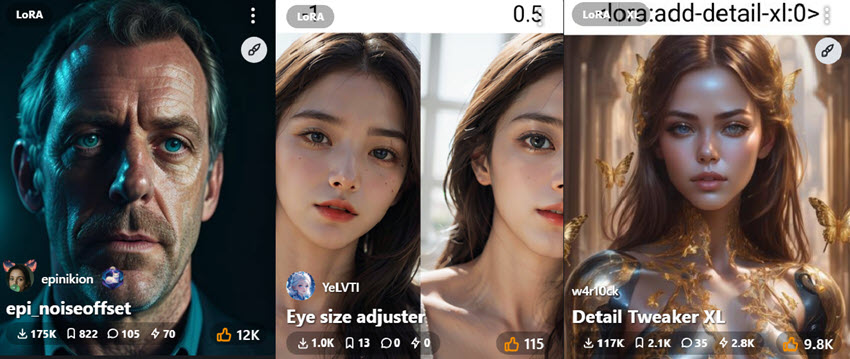
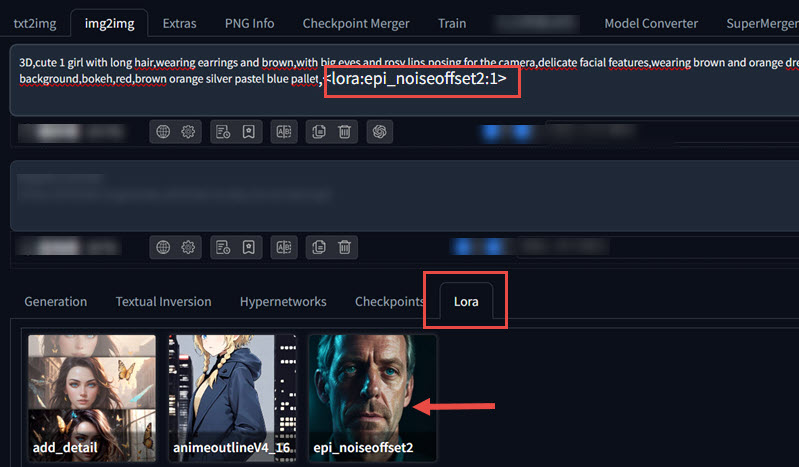
You can use celebrity LoRa for realistic images (please adhere to copyright). There are plenty of skin, cloth, and decoration LoRa on Civitai. You can even find wet hair loRa, eye Lora, ponytail loRa, etc. For low key, high key and HDR photos, go with epi_noiseoffset LoRa.
#9. Use ControlNet for Natural Poses
ControlNet is a powerful tool within Stable Diffusion that helps achieve natural poses. You can guide the model to generate images with more natural and lifelike poses, avoiding the stiffness or awkwardness that sometimes plagues AI-generated photos.
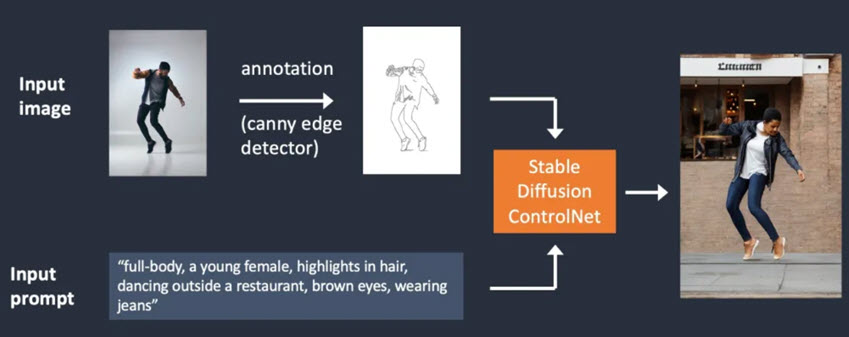
Natural poses contribute significantly to the realism of a photo. They make the subjects appear more relaxed and authentic. When using ControlNet, provide clear guidelines on the pose you want, and make adjustments to perfect the final output.
#10. Select Appropriate Sampling Methods for Realism
Beyond your prompt and the choice of model, the technical settings play a significant role in the final output, such as the sampling methods.
Detail Preservation vs. Smoothness: Samplers like Euler are often described as producing softer images, which can be beneficial for a "retouched" look. Conversely, many variants of DPM++ (such as DPM++ SDE or DPM++ 2M SDE) are frequently cited for their sharpness and ability to capture intricate details.
The DPM++ Family: Samplers like DPM++ 2M, DPM++ SDE, and DPM++ 3M SDE remain very popular.
These are often paired with schedulers like Karras (a long-standing favorite for good detail, particularly for skin, with many general models), Exponential, or Heun Exponential.
Euler and Euler a
Euler a is appreciated for its speed and, as mentioned, can produce a softer, more "retouched" aesthetic suitable for certain styles of portraiture or when aiming to reduce "AI grain."
Euler (non-ancestral) is also used, sometimes noted for rendering fine skin imperfections well, though like Euler a, it can be softer than DPM++ variants.
#11. Crafting Prompts for Pony Diffusion Realism
The original Pony models were trained using Danbooru tags, a system common for categorizing anime and illustrative art. While fine-tuned versions aim for photorealism, this underlying "language" can still influence output.
This means that certain tags or combinations might be more effective—or counterproductive—than with general photorealistic models.
Based on my test and research in related communities, here are several effective tags to guide Pony models towards a photographic style:
- Photo (medium): This Danbooru tag explicitly signals that the desired output is a photograph rather than an illustration.
- Sometimes, photo alone might pull in images of photographed art or cosplay. To counteract this, it's often beneficial to pair it with the term realistic, photo realistic in your prompts.
- Source_photo: While there's some discussion on whether base Pony was explicitly trained on this tag, using source_photo in the positive prompt.
- Commonly used negative tags include: source_pony, source_anime, drawing, cartoon, 3D, render, illustration, mannequin.
#12. Use ChatGPT to Create Realistic Prompts
Leveraging ChatGPT to craft your prompts can help you generate more effective and detailed instructions for Stable Diffusion. It can also assist in brainstorming and refining your ideas, ensuring that your prompts are clear and detailed.
Part 2. Best Stable Diffusion Prompts for Realistic Photos
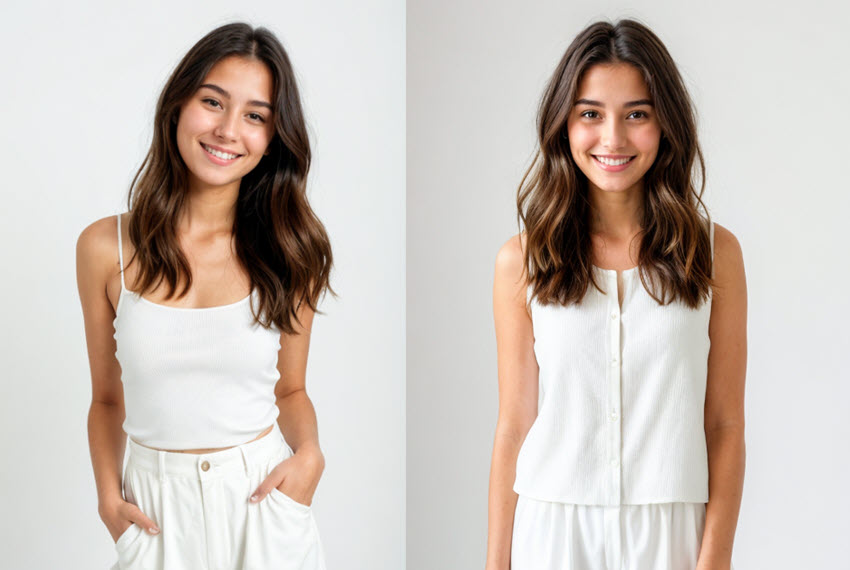
💬Prompt: 1 young woman, gentle smile, close shot, ((standing before the white background)), (catalogue photo shoot)
Catalogue photo shoot token works so nice to create professional looking images, featuring neat color and gorgeous poses. I also tried changing the pose from standing to sitting.
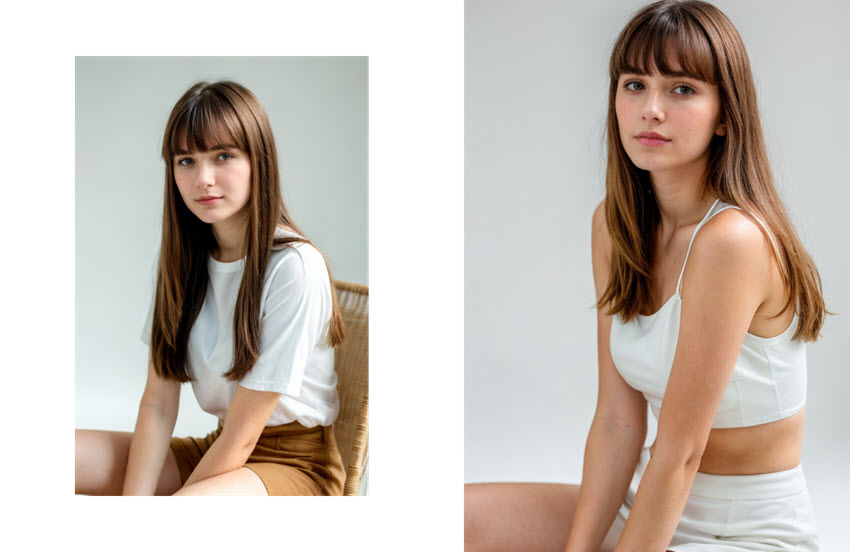
💬Prompt: 1 young woman, faint smile, hair bangs, close shot, (catalogue photo shoot), (sitting before the white background)
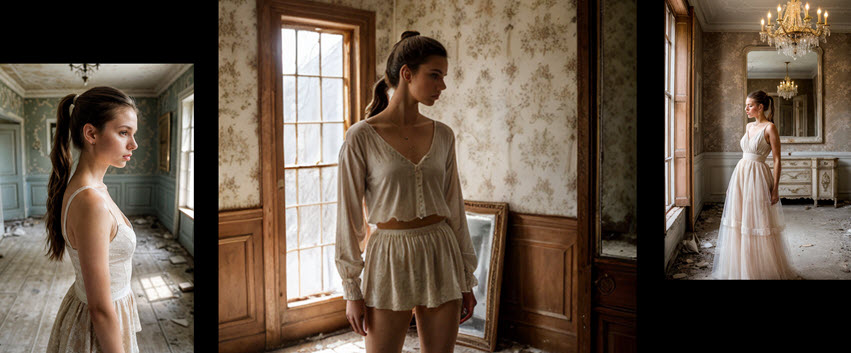
💬Prompt: Fashion photo of a graceful young woman, brown hair in a ponytail, standing in an abandoned manor in somber demeanor, faded wallpaper behind her. Medium shot, cracked mirrors and tarnished chandeliers. Soft lighting, diffused lighting, melancholic ambiance. Shot on Sony Alpha a7 III.
To make the output more realistic, and avoid those semi-realistic results, we can add several keywords to the negative prompts, such as anime, cartoon, octane render and anything that's related to 3D CGI.
💬Negative: (cgi, painting, drawing, anime, octane render:1.2), bad photo, text, bad photography, (worst quality, low quality, blurry:1.2), (bad anatomy, bad proportions:1.1), (bad teeth, deformed teeth, deformed lips), (deformed eyes, bad eyes), (deformed iris, deformed pupils), (deformed face, ugly face, bad face), (deformed hands, bad hands, fused fingers, text), morbid, mutilated, mutation, disfigured.
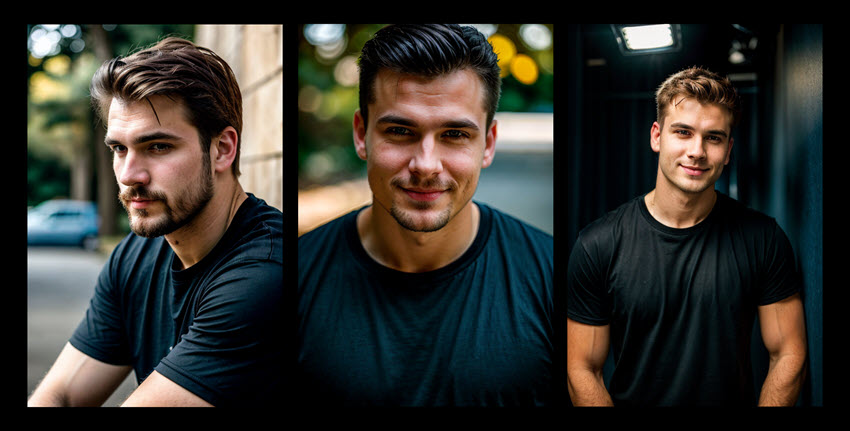
💬Prompt: professional photo, closeup portrait photo of caucasian man, wearing black t-shirt and blue jeans, warm smile, dramatic lighting, nature, bokeh, <lora:epi_noiseoffset2:1>.
Since that lora:epi_noiseoffset recommends using words such as Studio light and dim lit in the prompts, I added it. The result is, the output image ignores the keyword "nature", and put the subject under a studio light indoor. If we are not aiming for low key photography, we can remove that LoRa, and experiment with other lighting keywords in the prompt.
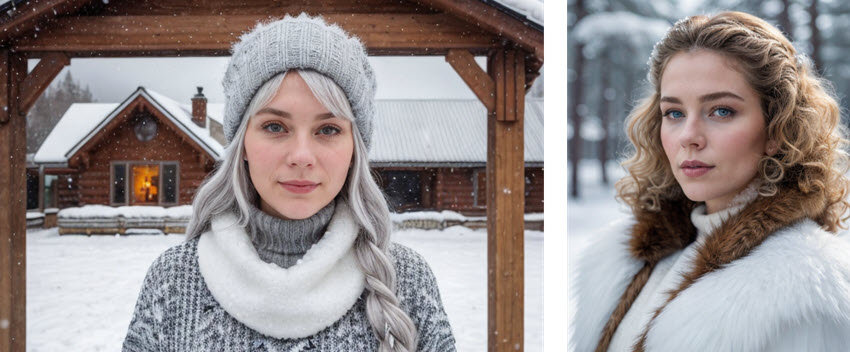
💬Prompt: Portrait of a 28 years old Nordic woman, silver hair, dressed in woolen sweater in traditional patterns, snowflakes dusting her shoulders. Close-up framing, the snow-covered landscape stretches behind her. Snow capped wooden house behind her. Caustic lighting.
In that prompts above, "dressed in fur and leather" triggered NSFW content. My guess is that "leather" is associate with NSFW content during the data training process, so I adjust it into "dressed in woolen sweater in traditional patterns".
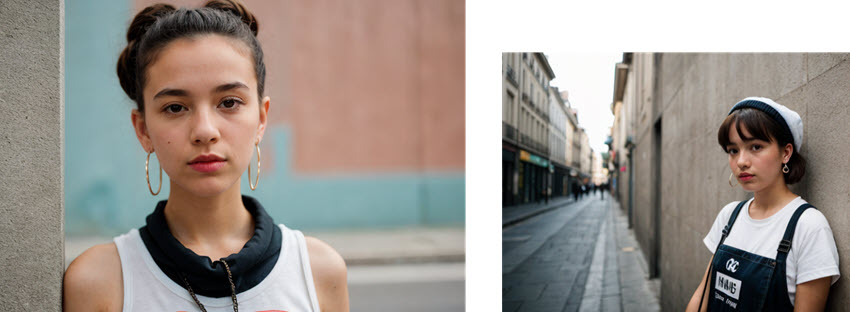
💬Prompt: 1girl, (cute French street artist wearing hoop earing), hyperrealistic art analog film photo (Photorealistic:1.2),(Urban backdrop, wearing eclectic streetwear),Faded film,desaturated,35mm photo, grainy, vignette, vintage, Kodachrome, Lomography, flash with softbox, 4k, Canon EOS R3, hdr, award winning photo, 80mm,f2.8, bokeh,
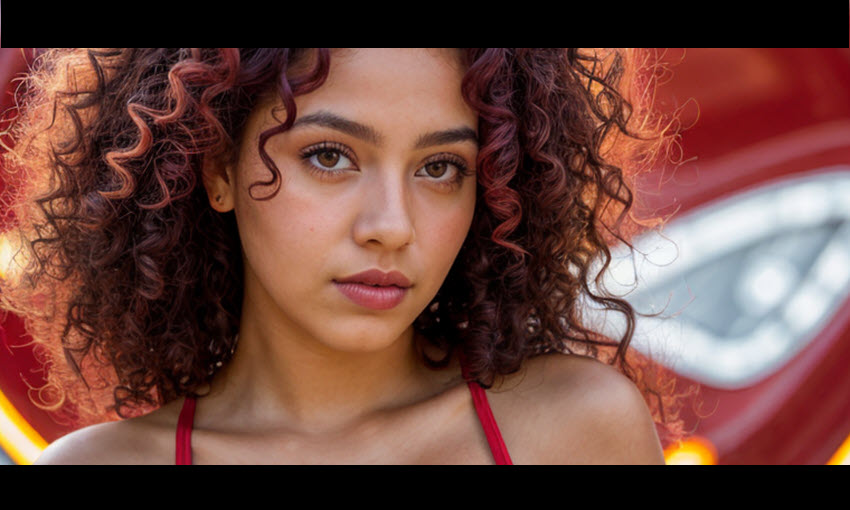
💬Prompt: 1girl, (Mexican artist with vibrant crimson curls and expressive dark eyes), healthy tanned skin, (Colorful studio backdrop), flash with softbox, 4k, Canon EOS R3, hdr, smooth, sharp focus, 80mm, f2.8, bokeh
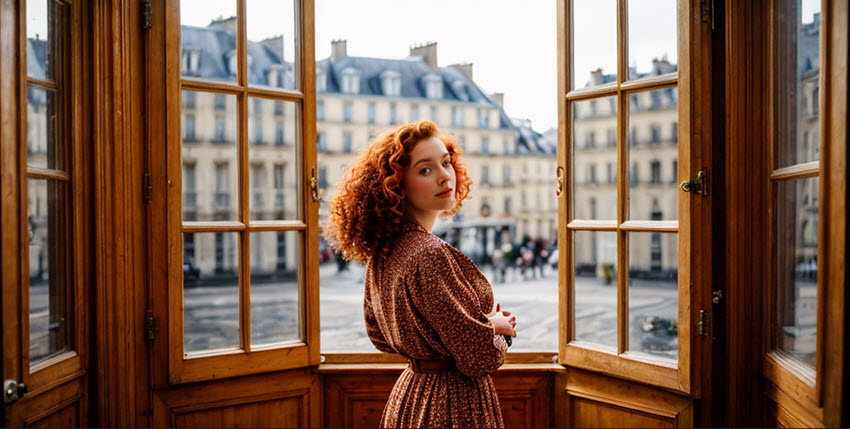
💬Prompt: cinematic and super realistic analog photo still of a graceful french girl with red curly hair,half body shot,wearing vibrant vintage clothing,standing in front of a vintage wood open window in paris,light from behind,35mm,portra 800,detailed face,style raw.
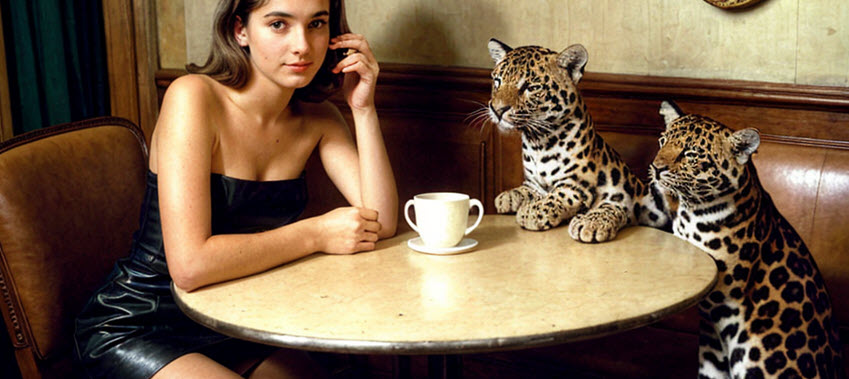
💬Prompt: Sepia grainy photo by Robert Doisneau, beautiful French girl and her jaguar pet in a cafe, Paris, 1963, 60-s vibe, playful and romantic, coffee, jaguar tries to drink from a cup, girl is stroking jaguar, waiter is shocked, funny setting.