How to Fix Grainy Photos [Detailed Tutorial]
Updated on
Summary: We've put together a comprehensive guide on how to fix grainy photos using the most effective methods. For the best results, give Aiarty Image Enhancer a try.
Struggling with grainy photos ruining your perfect shots? You're not alone! Whether you're capturing memories on your smartphone or with a DSLR camera, noise can creep into your images and leave you frustrated. But don't worry, as there are practical solutions to help you fix grainy photos and achieve crystal-clear results. Below we have compiled a detailed tutorial explaining how to fix grainy photos using the best ways. Read on!
Hot Search: How to Fix Grainy Wildlife Photos >>
What Causes Grain in Pictures/Photos
Grain in pictures, also known as "noise," typically results from several factors:
- ISO Sensitivity: Higher ISO settings amplify the signal from the camera sensor, which can introduce noise, particularly in low-light conditions. The higher the ISO, the more pronounced the grain becomes.
- Sensor Size and Type: Smaller sensors, common in smartphones and compact cameras, tend to produce more noise compared to larger sensors found in DSLRs and mirrorless cameras. Additionally, the sensor technology itself can influence noise levels.
- Low Exposure: When there isn't enough light to properly illuminate the scene, the camera's sensor has to work harder to capture the image. This increased sensor activity can result in more noise or grain in the photo.
- Low Light Conditions: The amount of light plays a crucial role in impacting grain in photos. In low-light conditions, the camera sensor struggles to capture enough light, leading to a weaker signal. To compensate, the camera increases the ISO setting, amplifying both the signal and the random noise, which results in a grainier image.
- Image Compression: JPEG compression, especially at high levels, can introduce artifacts that appear as grain in the final image.
Best Way to Fix Grainy Photos
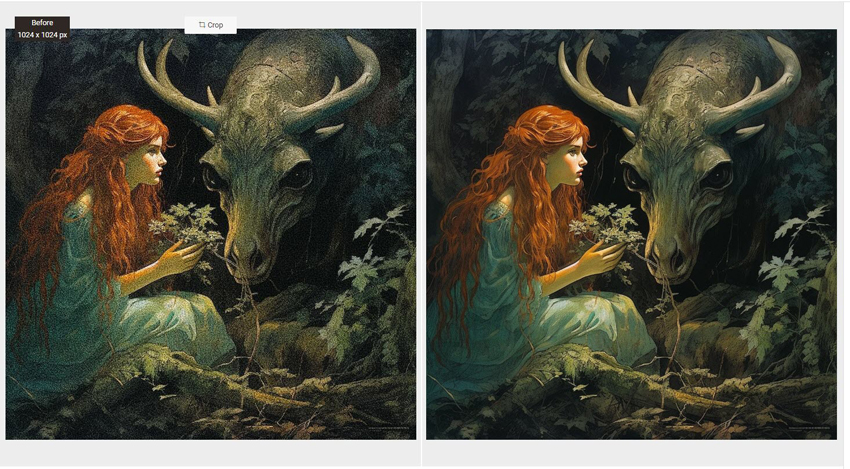
Aiarty Image Enhancer is a cutting-edge image enhancement and upscaling software powered by deep learning technology. Designed to effortlessly denoise, deblur, dejpeg, and upscale images in one go, this software can effectively reduce graininess and noise in simple clicks, producing sharper and cleaner images with enhanced detail.
Aiarty offers three AI denoise models, and respectively, they are More-detail GAN V2 (for more details, clarity, and sharpness, particularly for skin, hair, and textures), Smooth Diff V2 (for producing a smoother, more flawless version of the original image), and Real-Photo V3 (tailored for photo restoration) to remove grains from photos, and user can select the model that best matches their denoising requirements to ensure the optimal denoising results.
How to Fix Grain Photos using Aiarty Image Enhancer
Step 1. Free download the software on your computer, install, and launch it.
Step 2. Import the photo or photo folder by dragging or clicking the +/Add Media icon you wish to fix grain from.

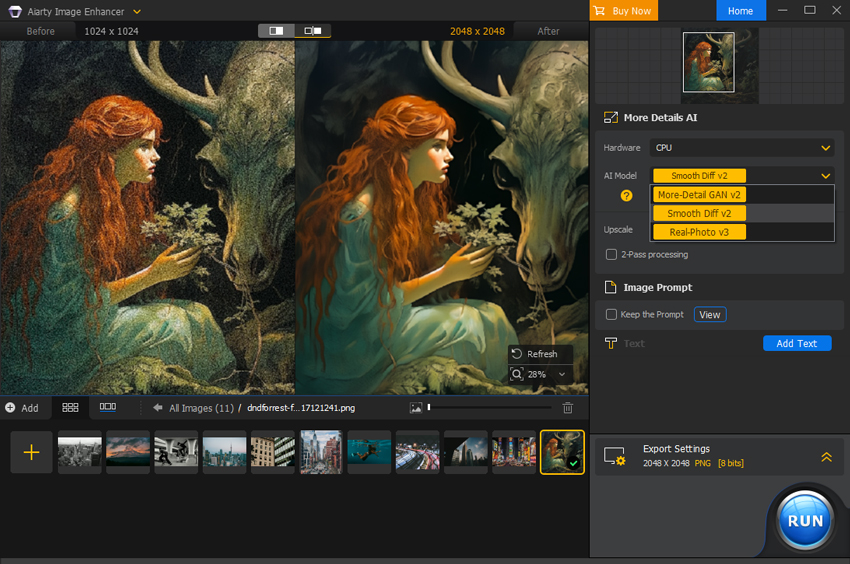
Step 3. Once the grainy photo is loaded, we come to the right, and choose the desired AI denoising model to remove the grains from your photos.
- More-detail GAN V2: this AI model will help denoise and deblur your photos, and at the same time, generate mode details clarity, and sharpness.
- Smooth Diff V2: this AI model is perfect for restoring the original image while ungraining your photos, and generating smooth and flawless results.
- Real-Photo V3: this AI model is especially for photo restoration; deblur, denoise, and generate more clarity and details for your photography.
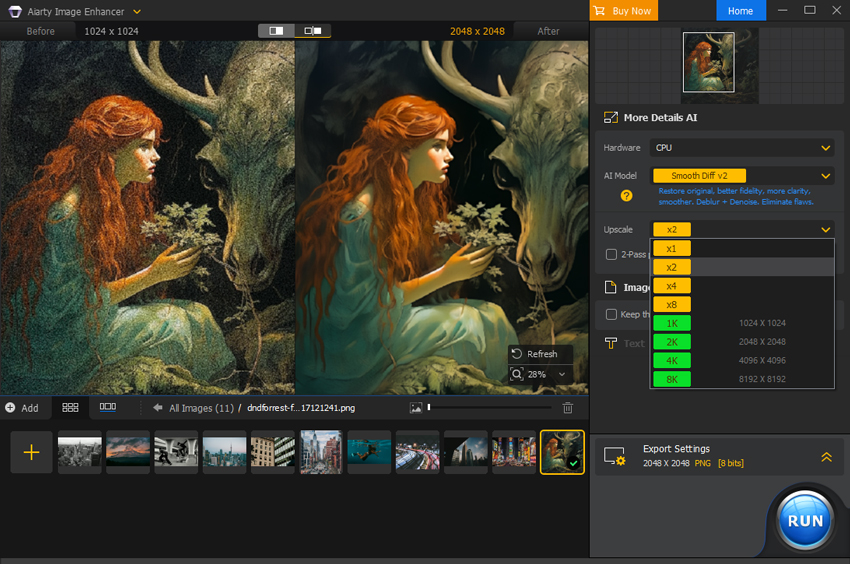
After choosing the desired AI model, we find the Upscale section where you can choose from x1, x2, x4, or x8 to enhance your images, or double, quadruple, or octuple your image resolution. Or you can choose from 1K, 2K, 4K, or 8K to convert your images to specific resolution, like 1K (1408 x 1408), 2K (2408 x 2408), 4K (4096 x 4096), or 8K (8192 x 8192).
Step 4. Choose your desired format, and output quality, and specify the output folder. Then Click on Run to fix the grainy photos using Aiarty Image Enhancer.
How to Fix Grainy Photos in Lightroom
Equipped with sophisticated noise reduction capabilities, Adobe Lightroom allows you to smooth out unwanted grain while preserving the essential details that make your photos sharp and vibrant. The software offers an intuitive interface and precise controls that you can leverage to minimize graininess and achieve a cleaner, more polished look. Follow the steps below to fix grainy photos in Lightroom:
Step 1. Launch Lightroom on your computer, and import the grainy photos you wish to fix.
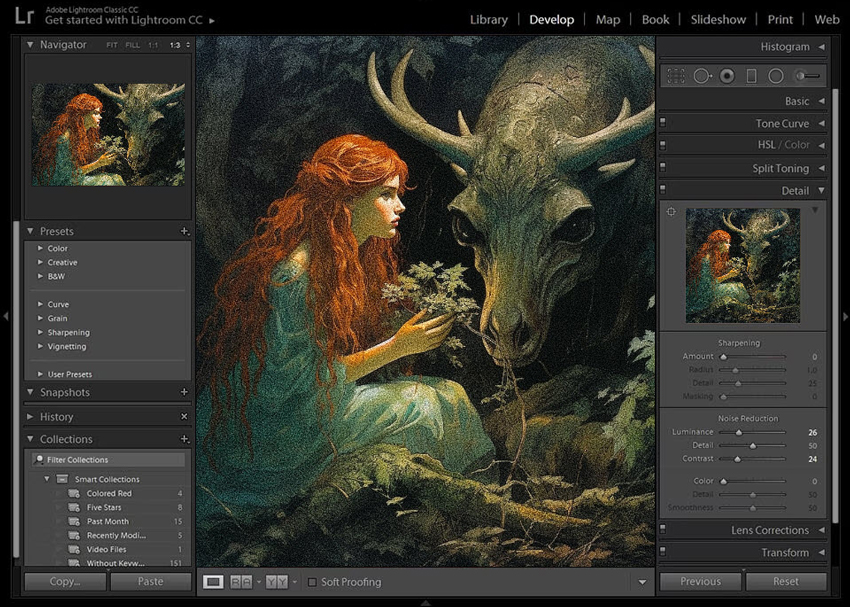
Step 2. Click on the Develop mode at the top of the screen to open the photo editing workspace. On the right hand, find the Detail panel, and click to expand.
Step 3. Adjust the Noise Reduction settings to remove grain from your photo:
- Luminance Noise Reduction:
- Amount: Move this slider to the right to reduce luminance noise. It is suggested to start with a value around 25-30 and adjust gradually.
- Detail: Higher values retain more detail but may leave some grain, while lower values smooth the image but may sacrifice some fine details.
- Contrast: Increase to restore contrast lost during noise reduction.
- Color Noise Reduction:
- Amount: Move this slider to the right to reduce color noise. It is suggested to start with a value around 25 and adjust gradually.
- Detail: Higher values retain more color detail but may leave some color noise, while lower values smooth color noise but may lose fine color details.
- Smoothness: This can adjust the smoothness of color transitions; higher values create smoother color transitions.
Step 4. Preview the result, and make further adjustments if needed. Once you are satisfied, export your photo.
How to Fix Grainy Photos in Photoshop
Adobe Photoshop is the industry-standard software when it comes to photo editing and manipulation, offering a plethora of powerful tools that cater to professionals and enthusiasts alike. With a range of advanced tools and techniques, Photoshop can easily remove grain and noise from your photos, revealing a smooth, detailed, and professional-looking image. See below how to fix grainy photos in Photoshop:
Step 1. Launch Adobe Photoshop, and import the grainy photo you wish to fix.
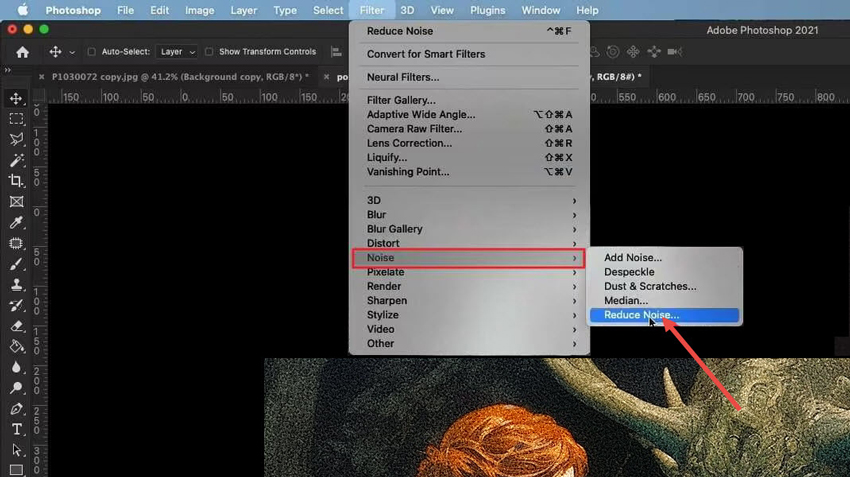
Step 2. Click on the Filter menu at the top bar, and select Noise > Reduce Noise. And in the Reduce Noise window, you will see three sliders:
- Strength: This slider controls the amount of noise reduction. Move the slider to the right to increase the strength of the noise reduction, but be careful not to overdo it, as this can soften the image.
- Preserve Details: This slider determines how much of the image's details are preserved during the noise reduction process. Move the slider to the right to preserve more details, but this may also preserve some of the noise.
- Reduce Color Noise: This slider specifically targets color noise, which can give your image a grainy or speckled appearance. Move the slider to the right to reduce color noise.
Tweak each of these sliders to find the optimal balance between noise reduction and image detail. You can also click on the Preview checkbox to see the effects of your adjustments in real time.
Step 3. On top of the Reduce Noise filter, you can also use the Shake Reduction from Filter > Sharpen to remove blur caused by the camera shake. In the Shake Reduction window, you'll see a preview of your image with a grid overlay. Use the Blur Trace and Blur Estimation tools to detect the blur caused by camera shake. Then, click OK to apply the shake reduction.
Step 4. Once the grains are removed, go to File > Save as to export your photo.
How to Fix Grainy Photos Online
For those who are seeking an easy solution to fix their grainy photos without installing any third-party software, the online image denoiser is your optimal choice.
VanceAI Image Denoiser is a web-based grain remover. It can effortlessly remove grain and reduce unwanted background noise to enhance your photos. In just a click, you can transform your grainy, blurred, or low-light photos into stunning, clear images. Follow the steps below to fix your grainy photos online using VanceAI Image Denoiser:
Step 1. Go to the VanceAI Image Denoiser.
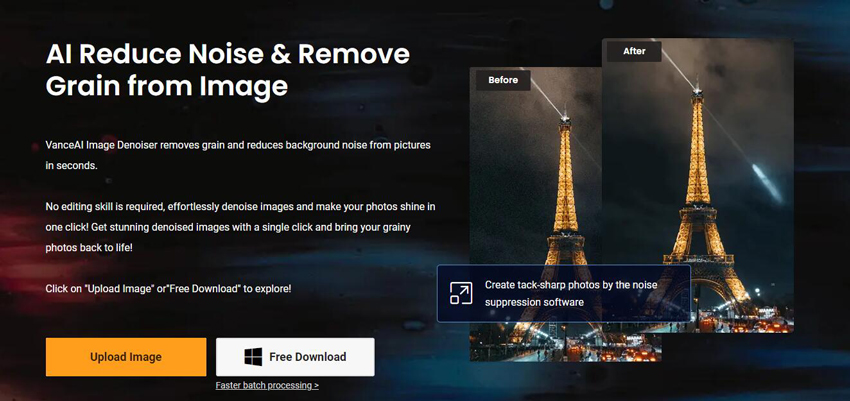
Step 2. Click the Upload Image button to upload your grainy photo. Once uploaded, the program will automatically remove grain from the photo.
Step 3. Once finished, click Download to download the ungrainy photo.
How to Fix Grainy Photos on iPhone/Android
For mobile users who are looking for a way to fix and enhance grainy photos, you can use the grainy reduction app.
Fotor is a versatile all-in-one photo editor app for both Android and iOS, featuring a comprehensive suite of tools including photo editing and enhancing, design creation, and collage making. Harnessing the power of Artificial Intelligence, the app offers a wide array of quick and efficient editing solutions, including grain removal. Free download the app on Google Play or App Store and follow the steps below to fix grainy photos on iPhone/Android.
Step 1. Launch the app on your mobile. Click on the Plus icon to import the photos you wish to remove grains from.
Step 2. In the tools section, click Adjust > Denoise. Use the sliders for Luminance Noise and Color Noise to remove unwanted grains from your photo.
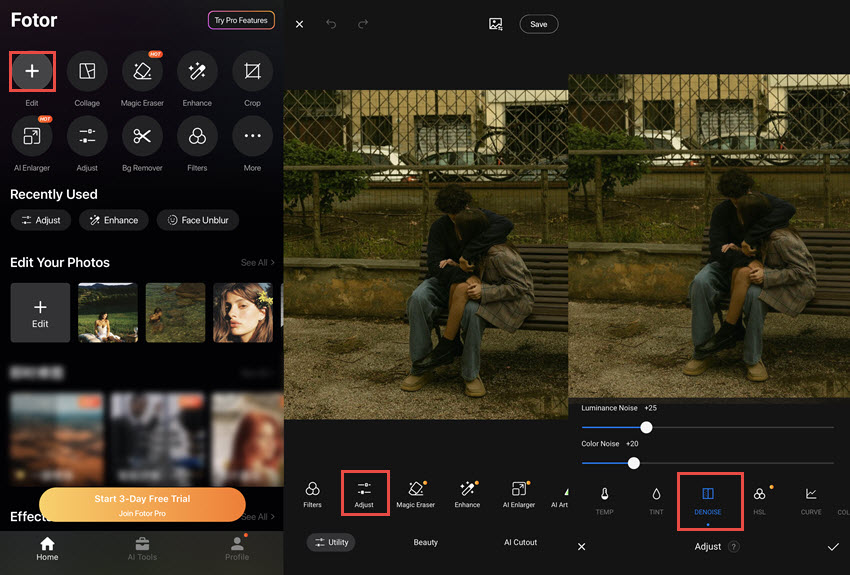
Step 3. Once satisfied, click the Confirm button > Save to export the ungrainy photos.
How to Avoid Grainy Photos
For those reluctant to use post-processing tools to fix the grainy photos, here are some tips to avoid grainy or noisy photos during the photo shoot:
- Use a Lower ISO: The ISO setting controls the camera's sensitivity to light. Higher ISO values (e.g. 1600, 3200) will result in more image noise and graininess. Lowering the ISO when shooting can help reduce grains in your photos.
- Use Proper Lighting: The most effective way to avoid grainy, noisy photos is to maximize the available light. The more light your camera's sensor can capture, the less it will need to boost the ISO sensitivity, which is a primary contributor to image noise. Shooting in bright natural lighting conditions is the ideal scenario. When you have ample ambient light, you can use a lower ISO setting, which will result in cleaner, less grainy images. Outdoor daytime shoots or well-lit indoor scenes are perfect for this approach. If the lighting is limited, you can supplement it with artificial lighting sources, such as studio strobes, continuous LED lights, or even a simple on-camera flash. Adding more light to the scene allows you to keep the ISO low and minimize noise.
- Shoot in RAW Format: The RAW image format is a far more versatile option for capturing high-quality, low-noise photographs. Unlike JPEG, which applies in-camera processing and compression, RAW files preserve the original, unprocessed data from the camera's sensor. While RAW files will result in larger file sizes compared to JPEG, the trade-off is superior image quality and greater flexibility in post-processing. Because RAW files contain more detailed information, you'll have more control to reduce noise and grain during editing.
- Clean Sensor: A dirty camera sensor can contribute to artifacts that may resemble graininess. Regularly clean your camera sensor or have it professionally cleaned.
You May Also Like
Brenda Peng is a seasoned editor at Digiarty Software who loves turning ordinary photos into extraordinary works of art. With years of experience behind the lens and in front of the computer, Brenda shares her passion for photography, image enhancement, and editing through easy-to-follow tutorials.