Wildlife Photography Guide: More Than Just Snapping Shots
Updated on
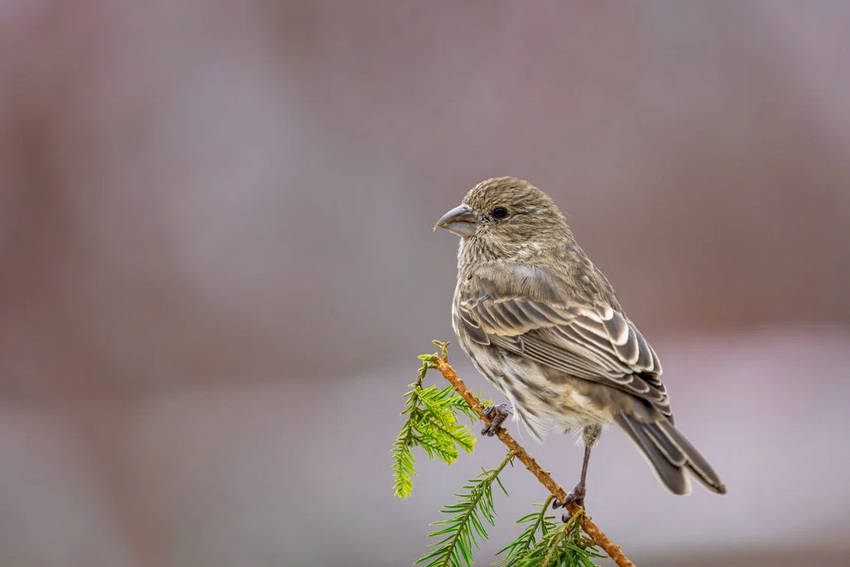
Wildlife photography is a versatile field that takes you on a journey around the world. Whether you're tracking cheetahs in Africa or photographing robins in your garden, this discipline offers endless opportunities for exploration. From land to air and sea, you can capture the wonders of nature in various settings, but it also requires skill, patience, and a passion for nature.
Without the right techniques, it's difficult to capture wildlife photos that truly stand out. Unlike professional wildlife photographers, amateurs often struggle with blurry subjects, excessive noise, and cluttered backgrounds. Their images may lack the impact and storytelling ability of a truly great wildlife photo. In this article, we'll show you how to overcome these challenges and capture stunning wild animal photography.
Blurry and Noisy Wildlife Photos?
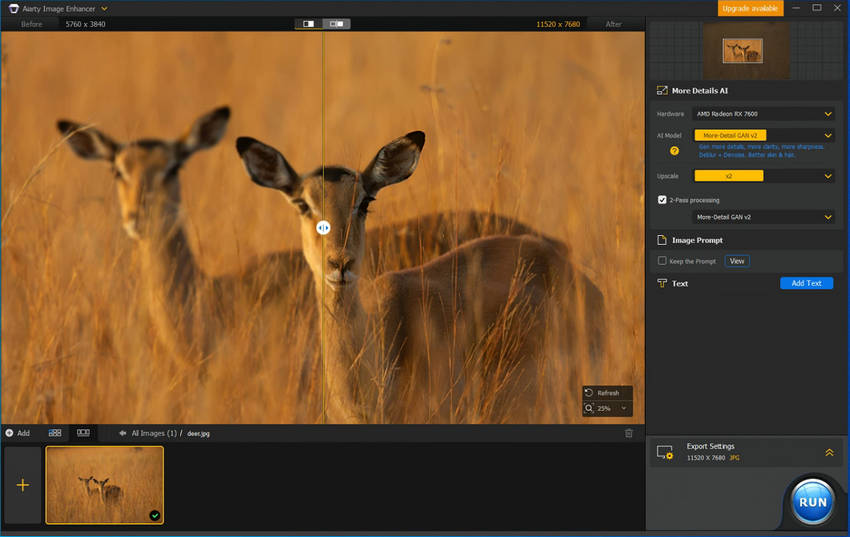
As you know, wildlife photography is a rewarding yet challenging endeavor. One of the most common issues photographers face is blurry or noisy images. These imperfections can significantly detract from the overall quality of a photo. Fortunately, with advancements in AI technology, tools like Aiarty Image Enhancer can now instantly enhance wildelife photos quality to fix these problems.
Denoise & Deblur Wildlife Photos Using Aiarty Image Enhancer
Aiarty's powerful algorithms are designed to enhance image clarity and reduce noise, even in the most challenging lighting conditions. By simply uploading your blurry or noisy wildlife photo, Aiarty can quickly restore its original detail and vibrancy. Still, you can also upscale your nature wildlife photography upto 32K with clarity and impressive details.
It's absolutely a game-changer for wildlife photographers, allowing them to focus on capturing stunning shots without worrying about post-processing hassles.
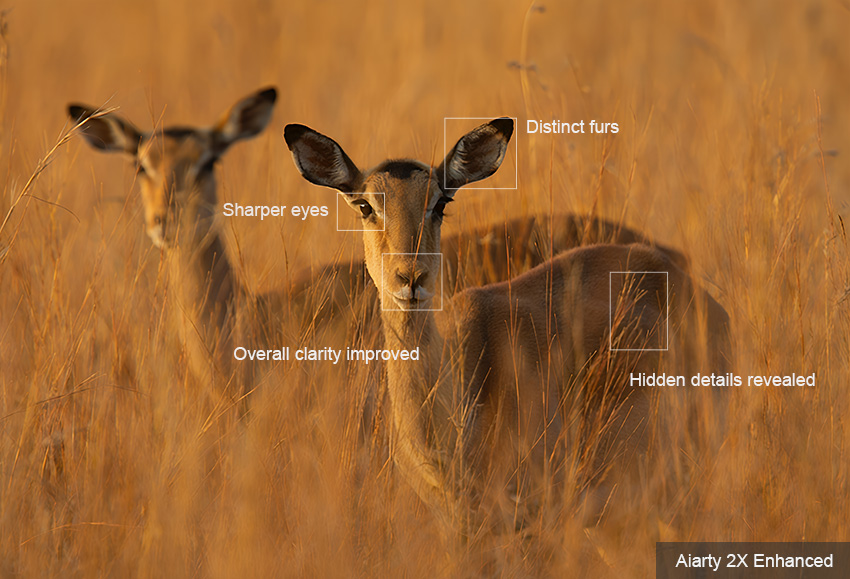
Before & After Comparison:
Let's take a look at the incredible results between the original image and the 2x upscaled one by Aiarty Image Enhancer:
- The overall clarity of the image has been significantly improved, removing the noise in the original photo.
- The deer, as the main subject, is now much clearer, with bright and sharp eyes and distinct individual furs.
- Aiarty has not over-processed the deer in the background, preserving the original sense of depth.
- The surrounding elements, such as the dry grass, have been enhanced, revealing a level of detail that was previously hidden.

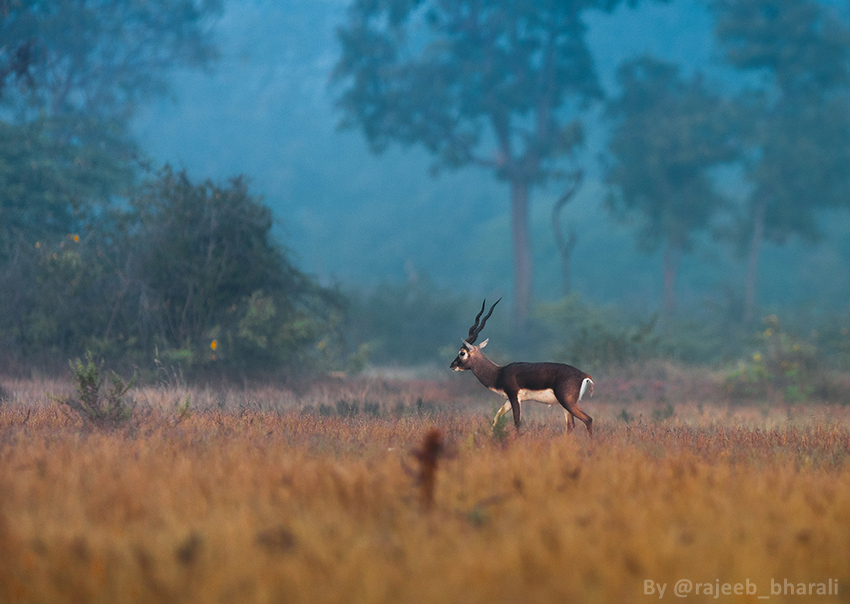
How to Shoot Stunning Wildlife Photos
Of course, compared to fix the imperfection of already captured wildlife photography, it's better to prevent image defects while shooting the wild animal photography. Let's explore some key points to help you capture more perfect wildlife photos.
1. A Wealth of Wildlife Knowledge
Before you head out with your camera, one of the first and most overlooked things you can do is research your location and the species you want to photograph. First, decide which wildlife you want to capture and learn about their habitats, hunting grounds, migration patterns, breeding seasons, and more. You can do this by watching wildlife documentaries, searching for information about the species on Google, and discussing with other photographers on social media who have experience in this area.
Then, decide on a rough departure time and pay attention to the weather forecast. You don't want to be caught unprepared with inappropriate clothing or camera protection equipment. Additionally, make sure you have your logistics in place. Consider your mode of transportation, companions, accommodation, and any potential safety concerns.
2. Use the Right Camera
A high-quality camera is an essential tool for any wildlife photographer. To capture stunning images of animals in their natural habitat, you'll need a camera that is fast, reliable, and capable of producing excellent results in various lighting conditions. Both DSLR and mirrorless cameras are popular choices among wildlife photographers.
DLSR Cameras or Mirrorless Cameras?
DSLRs, or Digital Single-Lens Reflex cameras, have been the go-to choice for award winning wildlife photography for nearly two decades. Their mirror and pentaprism design offer an optical viewfinder, providing a real-time, unhindered view of your subject. While they may be larger and heavier than other options, DSLRs deliver exceptional image quality thanks to their large image sensors and fast shooting speeds. The ability to swap lenses gives you unparalleled flexibility to capture a wide range of wildlife subjects.
Mirrorless cameras are a newer type of camera that's becoming increasingly popular for wildlife photography. They're smaller and lighter than DSLRs because they don't have a mirror. This means you can take better photos without having to carry around a heavy camera. Mirrorless cameras also allow for more advanced features like in-body image stabilization and electronic viewfinders that can provide real-time preview of your image with various settings applied.
Key Features for Wildlife Photography Cameras
Once you've decided on a camera type, let's delve into the essential features that a wildlife photography camera should possess. These include sensor size, continuous shooting speed, autofocus, in-body image stabilization (IBIS), and weather sealing.
- Sensor: Generally, you'll have the choice between full-frame and crop sensors. Full-frame sensors have a larger surface area (36mm x 24mm), resulting in higher image quality. APS-C or crop sensors have a smaller surface area (22mm x 16mm), introducing a crop factor that effectively lengthens the focal length of all lenses.
- Continuous shooting speed: This refers to the number of images, or "frames per second," a camera can capture. The higher this number, the better your chances of capturing decisive moments during fast-paced action or animal behavior.
- Autofocus: The more autofocus points a camera offers, the lower the risk of losing focus lock while tracking fast-moving wildlife.
- In-body image stabilization (IBIS): A relatively new camera feature, IBIS reduces blur caused by camera shake during exposure. Since nature wildlife photography often involves using long lenses, which are particularly susceptible to camera shake, IBIS is a valuable asset.
- Weather sealing: This feature protects your camera from harsh weather conditions, especially light rain, humidity, and dust.
Top Picks: Best Cameras for Wildlife Photography
- Nikon Coolpix P950: Incredible zoom range, perfect for capturing distant subjects.
- Canon EOS R10: Great value, professional specs, and a versatile sensor.
- Canon EOS R5: Best overall camera, amazing image quality and performance.
- Sony A9 III: Ultra-fast shooting for capturing fleeting moments.
- Nikon Z9: High-speed shooting and excellent image quality.
- Canon EOS 90D: Great DSLR option for detail, speed, and video.
3. Configure to the Best Camera Settings
To achieve the best camera settings for wildlife photography, you need to understand the exposure triangle: shutter speed, aperture, and ISO, and the relationship among them.
Shutter Speed
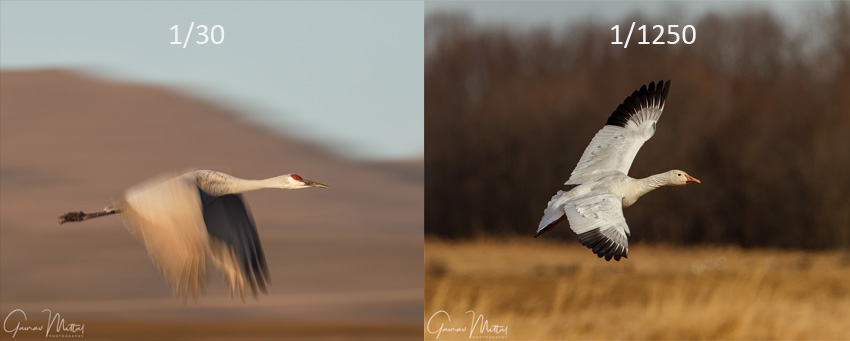
Shutter speed determines the duration for which the camera sensor is exposed to light. It can range from extremely fast (e.g., 1/4000 second) to very slow (e.g., 30 seconds). Faster shutter speeds freeze motion, preventing blur caused by subject movement or camera shake. However, they also reduce the amount of light entering the camera, potentially resulting in underexposed images.
Wild life photography, especially when using telephoto lenses, often demands fast shutter speeds to counteract the effects of camera shake and capture sharp images of moving subjects. For me, when I’m out shooting wildlife, I try to stick to a shutter speed of at least 1/250 of a second to freeze the action. If I’m shooting something really fast, like a bird in flight, I’ll bump it up to 1/1000 or even 1/2000 of a second.
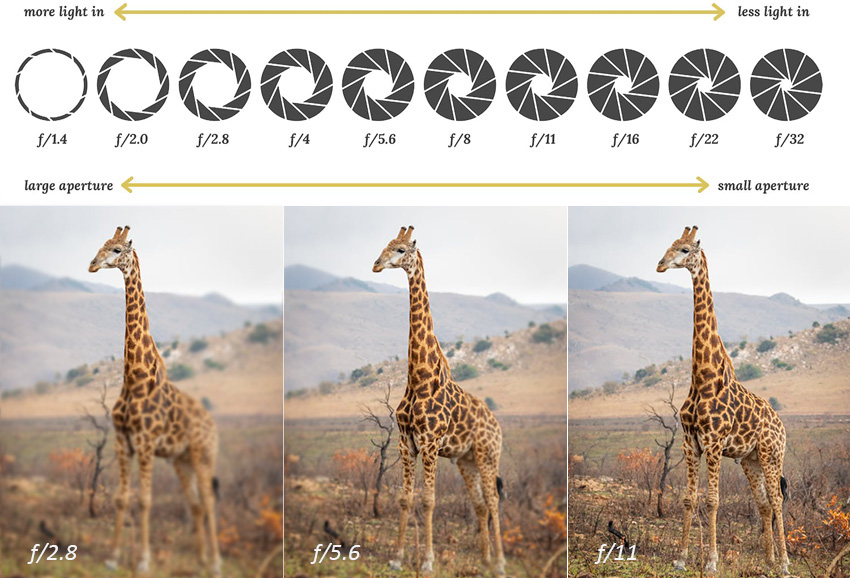
Aperture
Aperture, measured in f-stops, controls the amount of light that enters the camera lens and directly influences depth of field. A larger aperture (e.g., f/2.8) allows more light in, creating a shallow depth of field and blurring the background. Conversely, a smaller aperture (e.g., f/11) reduces the amount of light, resulting in a greater depth of field and sharper foreground to background. Think of your eye's pupil: it dilates in low light to let in more light and constricts in bright light to reduce it. Aperture works similarly in a camera.
ISO
ISO controls the camera's sensitivity to light, affecting the brightness and noise of your image. It's often used to compensate for less-than-ideal natural light conditions—whether it's too bright or too dark. Wildlife photography is often affected by weather and light conditions, often requiring you to adjust the ISO for better results. For example, if you're photographing birds in a nature reserve on an overcast day, a slightly higher ISO (400) can make your photo lighter. If the wildlife is more active at dusk, increasing the ISO to 800 or higher can improve sensitivity for low-light conditions.
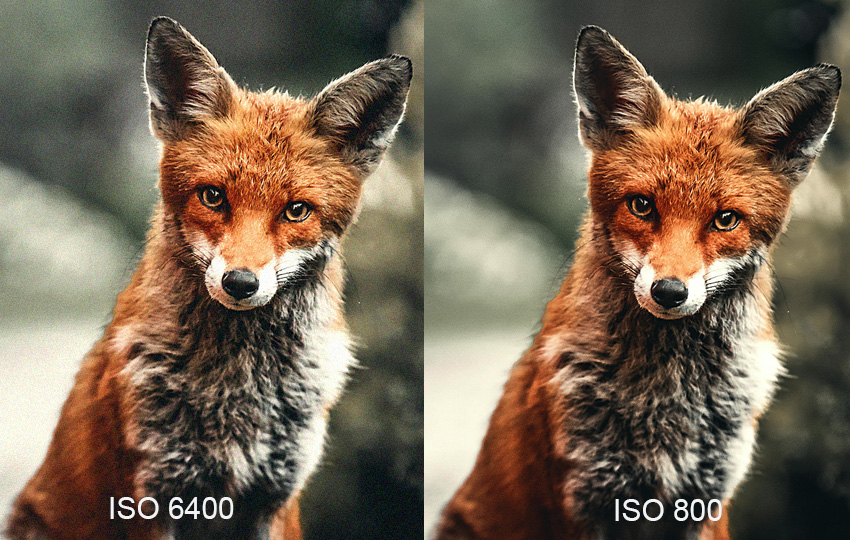
It's worth noting that a high ISO can introduce noise into your image, reducing image quality. However, don't worry too much, as Aiarty Image Enhancer can help reduce noise and grain, giving your photos a cleaner look while preserving details and avoiding artifacts.
Short on Time? Jump to the AI Image Denoising Guide to Remove Any Noise in Photos!
By flexibly utilizing the exposure triangle, we can achieve ideal wildlife photos based on different shooting scenarios and requirements. Shutter speed determines the dynamic effect of the image, aperture controls the depth of field, and ISO affects the brightness and noise of the image. In actual shooting, constant trial and error is necessary to find the optimal exposure settings.
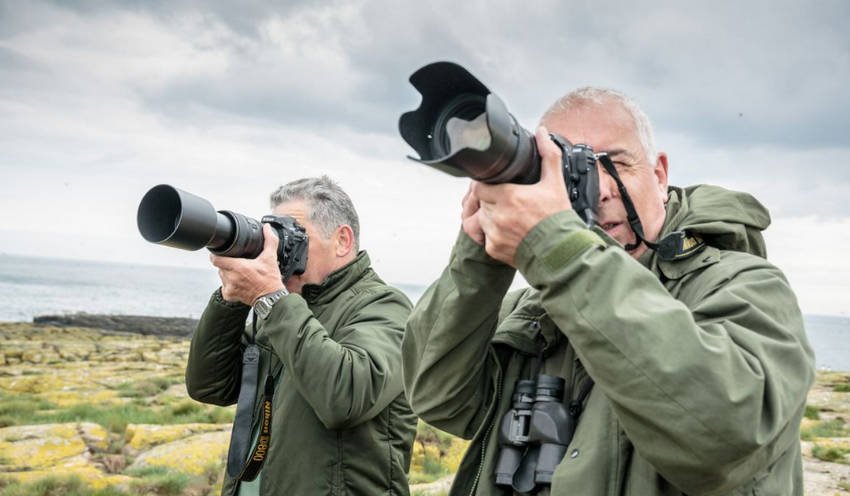
4. Choose the Right Lens
Wildlife photography can utilize any lens — from standard zooms to telephotos, macros to super telephotos, or wide-angles — depending on the situation and what you want to convey in your image.
1. Zoom Lens
A standard zoom lens, with a moderate focal length range and a zoom capability, is a versatile choice for capturing animals at a closer distance, such as lions, tigers, and bears in zoos or wildlife preserves.
2. Telephoto Lens
Telephoto lenses are essential for wildlife photography because animals tend to keep their distance. They allow you to zoom in and magnify your subject, letting you count the whiskers on a lion’s face. The narrow angle of view is ideal for animal portraits as it isolates the subject from the background, making it easier to control what’s included in the frame.
A super-telephoto lens, with extremely long focal lengths, is perfect for capturing distant subjects like birds in flight or animals high in the mountains. They allow you to photograph wary animals without disturbing them.
3. Wide-angle Lens
Wide-angle lenses, with their shorter focal lengths, capture a wider field of view, allowing you to showcase the animal's environment, like forests or grasslands, or underwater wildlife photography. For close-up shots of small animals, wide-angles can create a dramatic perspective and emphasize the subject.
4. Macro Lens
Macro lenses, with their extreme magnification capabilities, are ideal for capturing tiny subjects like insects, allowing you to reveal intricate details. They're also useful for capturing the delicate details of plants.
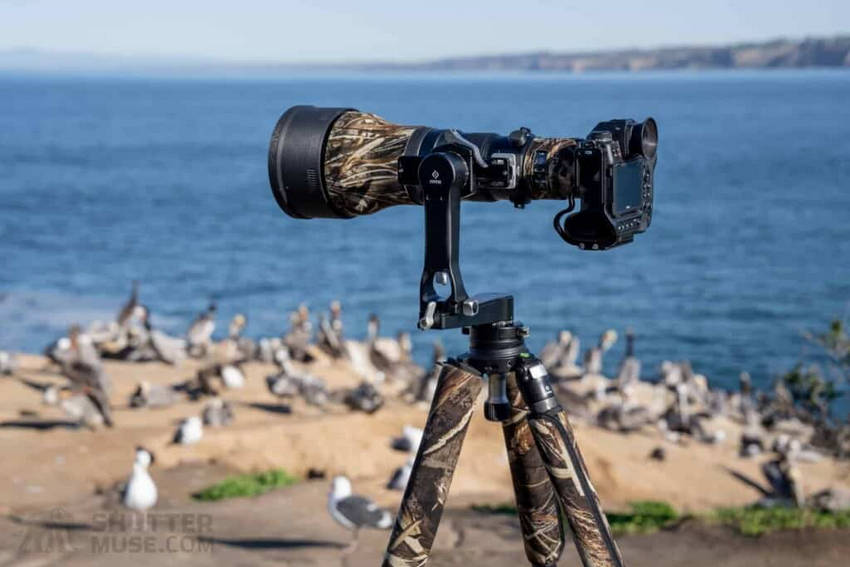
5. Try Other Helpful Equipment
While a high-quality camera and lens are essential, accessories like tripod, extension tube, remote shutter release, lens hood, ball head, flash etc. play a crucial role in achieving professional-looking results.
- Tripod: A tripod is a fundamental tool for the best wildlife photography, providing the necessary stability to prevent camera shake, especially when using telephoto lenses or long exposures.
- Flash: A flash unit offers supplementary illumination, enabling photographers to capture sharp images in challenging lighting conditions, such as low-light environments or shaded areas.
- Ball head: A ball head provides unparalleled flexibility, allowing for quick and precise adjustments to your camera's orientation.
- Extension tube: Extension tubes are specialized accessories used in macro photography to increase the magnification of a lens, facilitating the capture of minute details.
- Lens hood: A lens hood serves to protect the front element of a lens from impact and stray light, reducing flare and improving image quality.
- Remote shutter release: It captures images without touching the camera, reducing the risk of camera shake and ensuring sharper results.
6. Apply the Appropriate Composition
Composition is a crucial element in wildlife photography as it helps to highlight the subject, tell a story, and create a visually appealing image. Here are some common composition techniques used in award winning wildlife photography:
1. Rule of Thirds
Rule of Thirds divides the frame into thirds both horizontally and vertically and places the subject on the intersections of these lines or along the lines themselves. This creates a more balanced and dynamic composition.
2. Negative Space
Negative space is the "breathing room" around your subject in a wildlife photo. It determines whether the image feels balanced and pleasing to the eye. Negative space helps to emphasize the main subject of the photo, naturally drawing the viewer's eye. If there's not enough negative space around the animal, it can feel crowded. If you leave too much space, it can feel unbalanced.
3. Perspective
Different perspectives can reveal unique aspects of animals and their environments. Shooting wildlife at eye level can make viewers feel like they're right there with you. Looking down can emphasize the animal's size or vulnerability, while looking up can make them appear more majestic or imposing. A side view can highlight their shape, form, and movement.
Conclusion
Overall, wildlife photography is a rewarding but challenging pursuit that requires patience, skill, and a deep appreciation for nature. To capture stunning images of animals in their natural habitat, it's essential to have a solid understanding of various techniques and best practices. Always keep these tips in mind:
- Be Patient: Wildlife photography often requires patience. Animals can be unpredictable, and it may take time to capture the perfect shot.
- Don't Get Too Close: While it's tempting to get as close as possible, it's important to respect the animals' space and avoid disturbing them. Getting too close can stress animals and may even be illegal in some areas.
- Let Them Come to You: Sometimes, the best approach is to remain still and let the animals come to you. This can allow you to capture more natural and candid shots.
- Show Respect: Always respect wildlife and their habitats. Avoid making loud noises or sudden movements that could scare animals away.
Now you're ready to grab your camera, head out, and put all this knowledge into practice. With Aiarty Image Enhancer, you can achieve crystal-clear image details with minimal noise and grain.
Brenda Peng is a seasoned editor at Digiarty Software who loves turning ordinary photos into extraordinary works of art. With years of experience behind the lens and in front of the computer, Brenda shares her passion for photography, image enhancement, and editing through easy-to-follow tutorials.