How to Unblur an Image: 6 Best Apps to Fix Blurry Photos
Updated on
Ever snapped a photo capturing the perfect moment, only to discover later it's blurry? Don't rush to delete it. You can actually unblur the image. There are many tools on the market with features to remove blur from images, ranging from dedicated image enhancers to versatile photo editing software. Whether you want to perform this task on your desktop, mobile device, or on a website, you'll find a good option.
Now, let's take a look at some of the great options available.
How to Unblur an Image on Windows/Mac
Here we'll introduce two programs to make blurry images clear, namely Aiarty Image Enhancer and Adobe Photoshop. But before we dive in, let’s see which option is a better choice for you.
| Recommended for | Pros | Cons | |
|---|---|---|---|
| Aiarty Image Enhancer | Beginners with limited budget. |
|
|
| Adobe Photoshop | Professionals and users with enough budget. |
|
|
Further Reading: How to Unblur Wildlife Photos >>
Method 1. Fix Blurry Images with Aiarty Image Enhancer
Aiarty Image Enhancer is a dedicated image enhancement tool for Windows and Mac. It can deblur, denoise, dejpeg, and upscale images that you download online or you take with your photos or camera.
Aiarty Image Enhancer currently offers five AI models to help you unblur and enhance images and photos, including More-Detail GAN v3, More-Detail GAN v2, AIGCsmooth v3, Smooth Diff v2, and Real-Photo v3.
The development team at Aiarty has created these models to meet different image enhancement needs.
- More-Detail GAN v3/v2 can create more details, making the image sharper and clearer. These models are ideal for photos with textures like skin, hair, fur, feature, fabric, etc.
- AIGCsmooth v3 is tailored for AI-generated images, providing enhanced clarity, smoother textures, and overall better quality. This model works best with AI art, anime, line art, and images with smooth textures or glass surfaces.
- Smooth Diff v2 prioritizes smoothness while restoring clarity. It is suitable for images with less detail like cartoons, glass surfaces, or line drawings.
- Real-Photo v3 is specially used for photo restoration, giving your photos better fidelity and more clarity. With these three AI models, almost all your images can be effectively enhanced.
Unblurring an image is simple with Aiarty Image Enhancer. Just select the blurry image, choose the appropriate AI model, and let the magic unfold. Below are the detailed steps.
Step 1. Download and install Aiarty Image Enhancer on your computer.
Step 2. Select the AI model that best suits your image's characteristics.

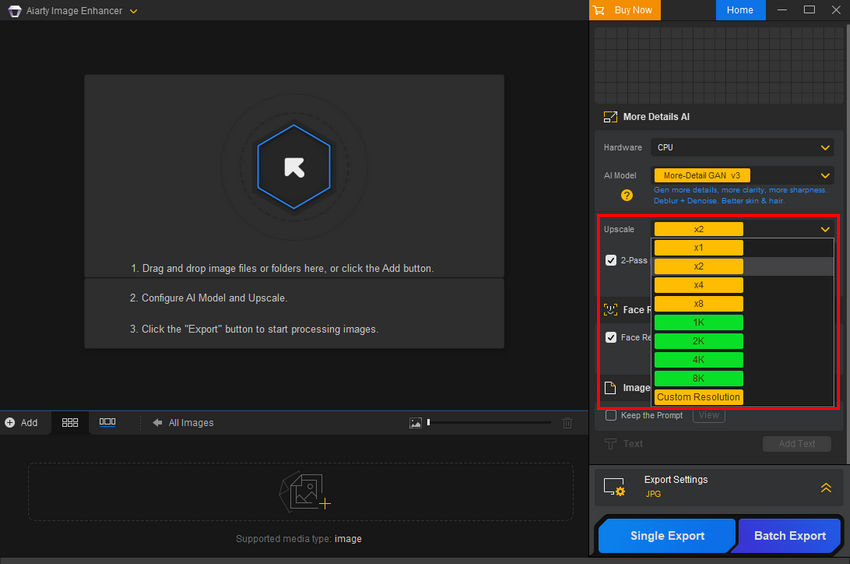
Step 3. Click the Upscale dropdown menu and choose the magnification level (1x, 2x, 4x, or 8x) or the resolution you want to upscale to (1k, 2k, 4k, 8k, or a custom resolution). If you don't want to change the image size, simply select 1x.
Step 4. Open Aiarty Image Enhancer and drag and drop the blurry image you want to fix into the file window of Aiarty. Once the image is loaded, Aiarty will automatically begin processing it with the selected AI models. No manual action is required to remove the blur; the software handles the unblurring process automatically.
Tips:
- You can import multiple images or add a file folder for batch processing.
- The supported image formats include.jpg, .jpeg, .jp2, .j2k, .jpf, .jpm, .jpg2, .j2c, .jpc, .jpx, .mj2, .png, png (16bit), .tif, .tiff, webp, bmp, heic, and various raw formats.
Step 5. Preview the result. If you're not satisfied with the result, you can try another model.
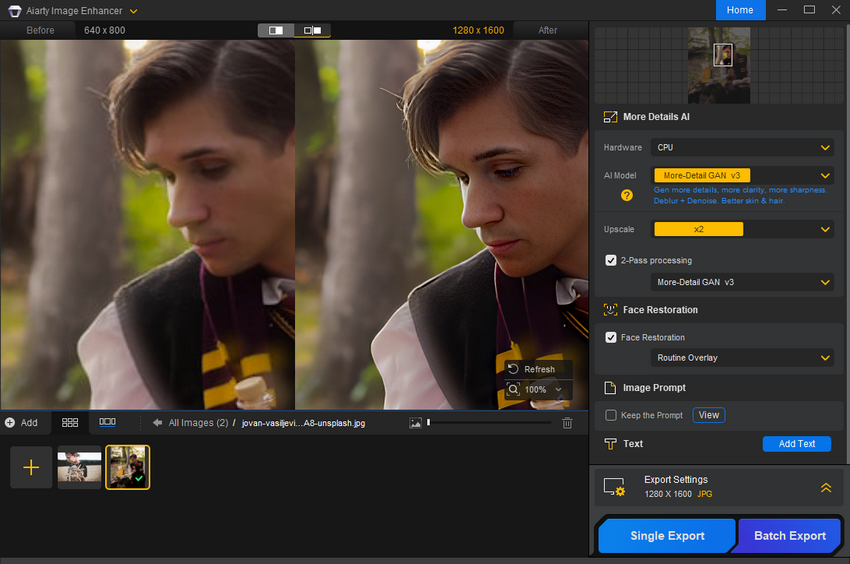
I've tried a blurry image. As you can see from the screenshot below, the blur is gone.
Step 6. Expand the Export Settings and specify output format and quality.
Step 7. Click Single Export or Batch Export to save your unblurred image(s).
That's it. It's really easy to remove blur and noise from images with Aiarty Image Enhancer.
Method 2. Remove Blur from Images with Adobe Photoshop
Adobe Photoshop is a very popular image editing software. It covers a wide range of tools to fix blurry images, such as the High Pass Filter and Unsharp Mask. No matter you want to remove all blur on your image or just want to remove blur from specific parts of the image, such as the text on the image, Photoshop can help you.
Now let's check how to make use of High Pass and Unsharp Mask to unblur an image.
Sharpen blurry images with High Pass Filter
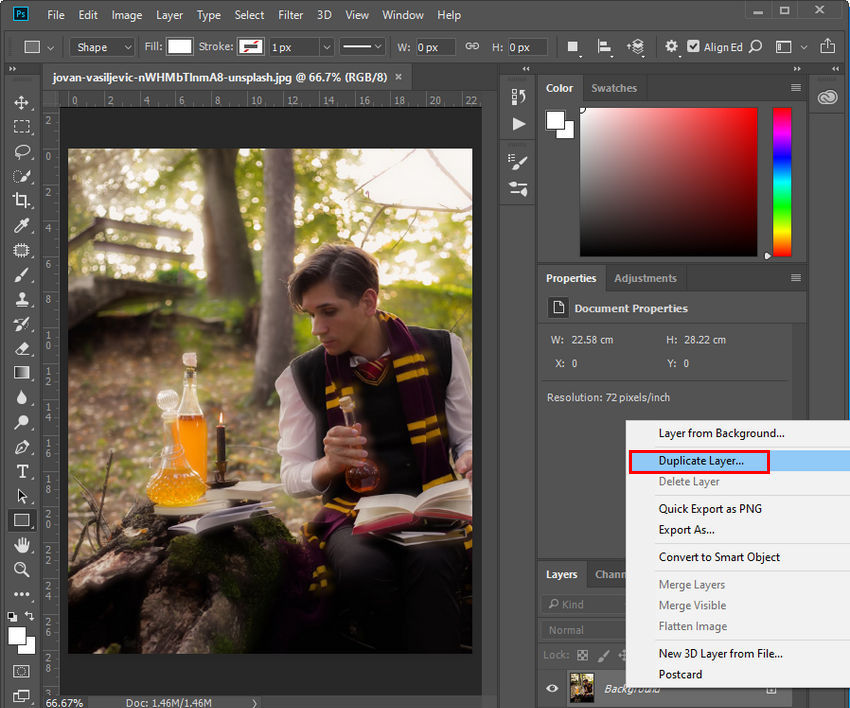
Step 1. Right-click on the "Background" layer in the Layers panel and choose "Duplicate Layer." This creates a copy to work on without affecting the original image.
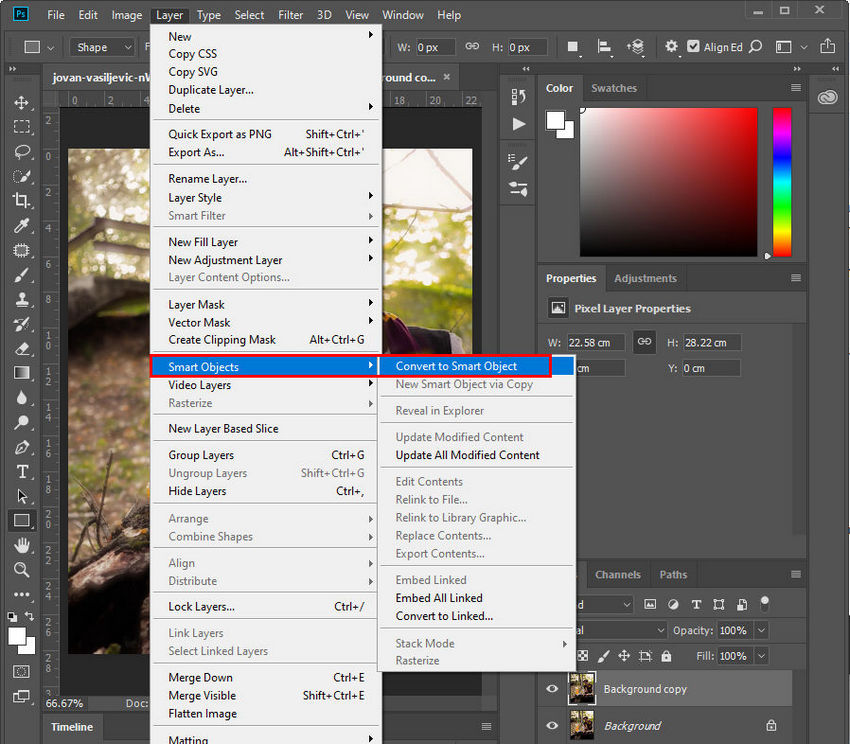
Step 2. Go to Layer > Smart Objects > Convert to Smart Object. This allows for non-destructive editing, meaning you can adjust the filter later.
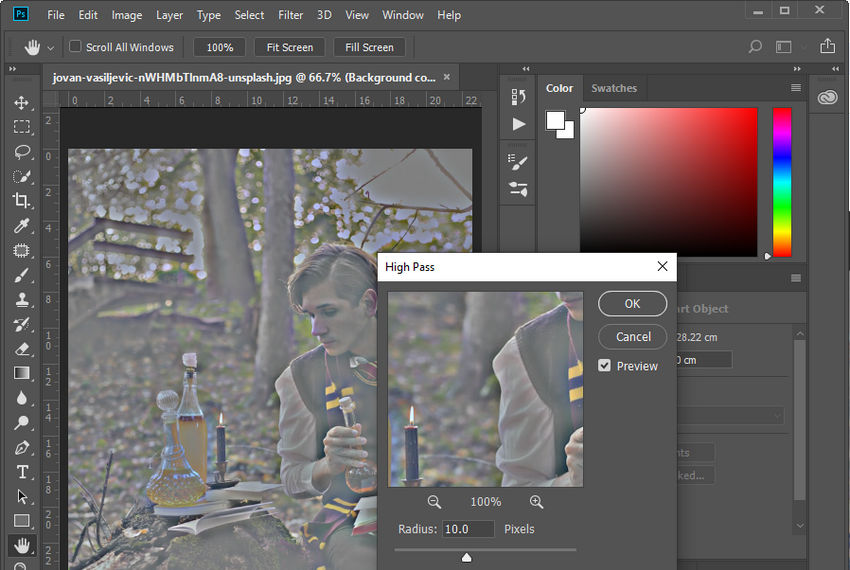
Step 3. Go to Filter > Other > High Pass.

Step 4. Drag the "Radius" slider to see a black and white preview. The higher the radius, the more prominent the edges will be (appearing as white lines). Aim for a good definition of your subject's edges without creating unwanted halos (bright edges).
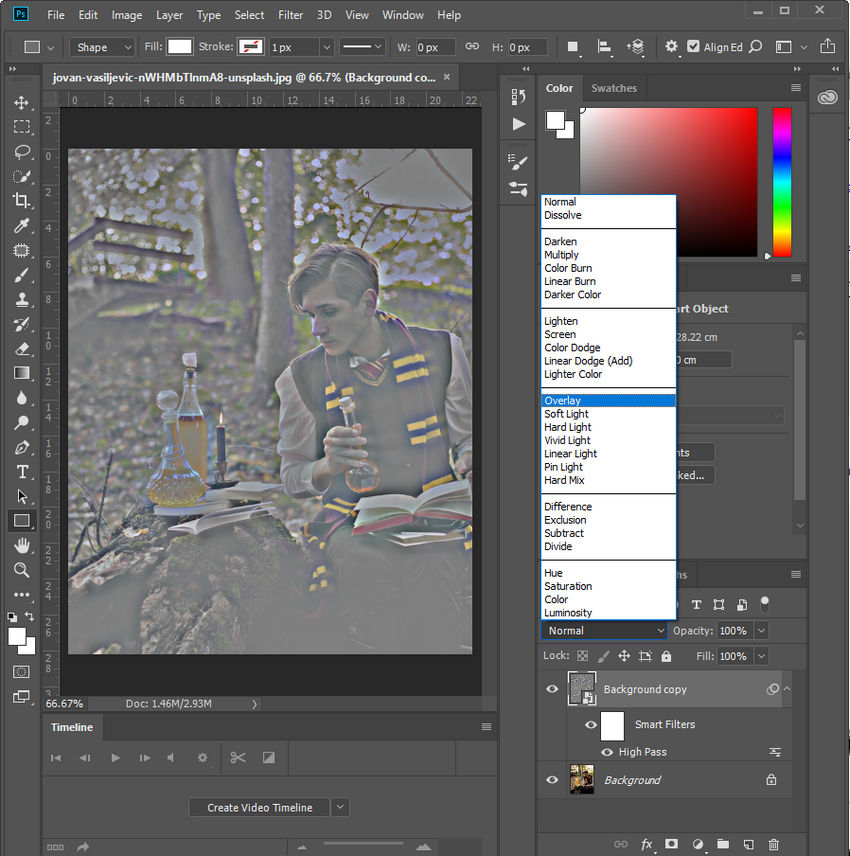
Step 5. Click the dropdown menu next to "Normal" in the Layers panel and choose "Overlay." This blends the sharpened details back into the image, removing the grayness.
Step 6. Double-click the "High Pass" filter in the Layers panel to re-edit the radius if needed.
Step 7. Lower the layer's "Opacity" value (0-100%) to reduce the sharpening effect's intensity.
Sharpen blurry images with Unsharp Mask
Step 1. Right-click on your image layer and choose "Duplicate Layer."
Step 2. Similar to the High Pass method, you can convert the layer to a Smart Object for non-destructive editing.
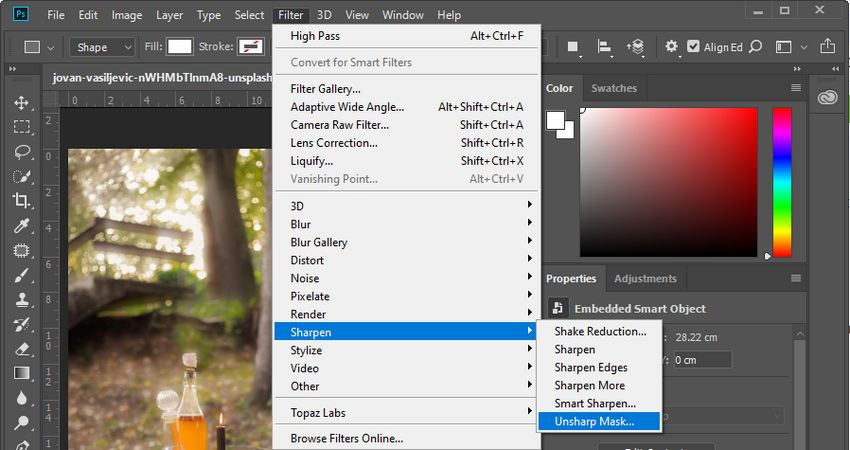
Step 3. Go to Filter > Sharpen > Unsharp Mask.
Step 4. Adjust sharpening settings:
- Amount: Controls the strength of the sharpening effect. Higher values increase sharpening but can introduce noise.
- Radius: Defines how many pixels around the edges will be affected by the sharpening.
- Threshold: Sets the sensitivity for detecting edges. Lower values sharpen even subtle details, while higher values focus on more prominent edges.
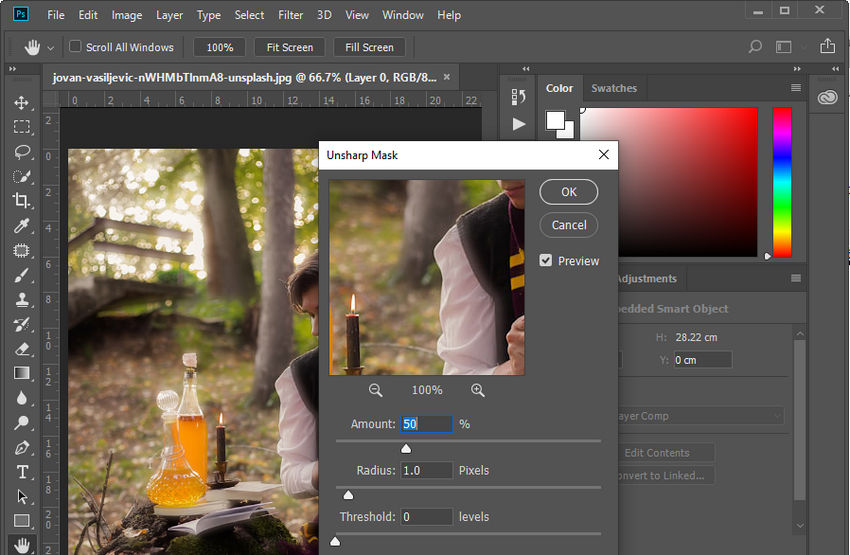
Play with these sliders to find the optimal balance between sharpening your image and introducing artifacts (noise or halos).
By following these steps and experimenting with the settings, you can effectively unblur your images.
How to Unblur an Image on iPhone/Android
While Aiarty Image Enhancer and Photoshop offer powerful tools for unblurring photos, there are some people looking for excellent options available for mobiles as well. Here, we'll explore two popular apps that can help you sharpen blurry photos on your iPhone or Android device: Adobe Lightroom Mobile and Snapseed.
Method 1. Unblur Images with Adobe lightroom
In addition to Windows and Mac, Adobe Lightroom can also work on iOS and Android. This is a versatile photo editing App capable of sharpening blurry images and reducing noise. And surprisingly, Lightroom's sharpening tools are available for free. So you can make use of this tool to unblur images for free.
How to unblur an image on iPhone with Adobe Lightroom?
Step 1. Download and install Lightroom app on your iPhone or Android device.
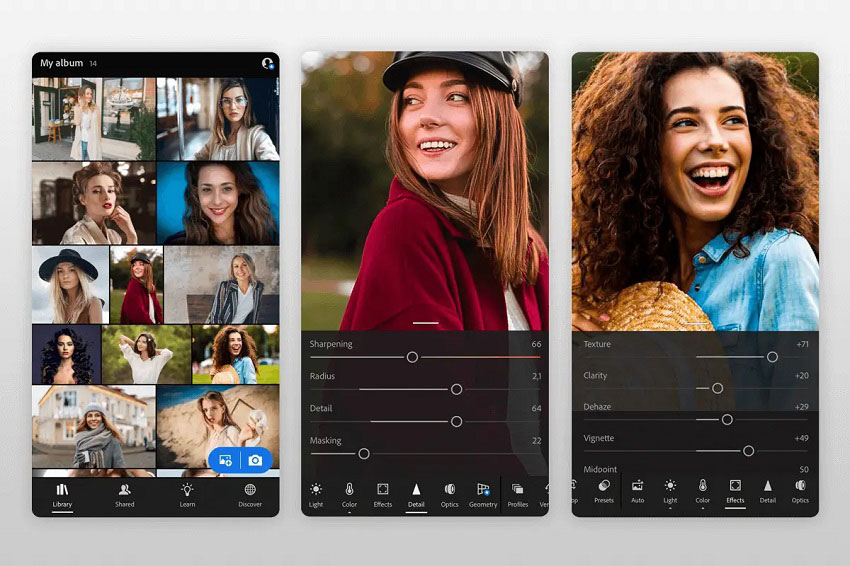
Step 2. Open the Lightroom Mobile app and tap the gallery icon (usually looks like a stack of photos). Find the blurry photo you want to fix and tap it to import it into Lightroom.
Step 3. wipe right on the editing toolbar at the bottom of your screen. You'll see several editing options appear. Tap on Details. Then you'll see sliders for Sharpening, Radius, Detail, and Masking. Here's a quick breakdown of what each does:
- Sharpening: This controls the overall intensity of the sharpening effect. Drag the slider to the right to increase the sharpening.
- Radius: This adjusts how wide the sharpening effect is applied around the edges. A lower radius focuses on sharper details, while a higher radius sharpens a broader area.
- Detail: This helps control how much noise is introduced with sharpening. Drag the slider to the right to reduce noise, but be careful not to lose too much detail.
- Masking: (Optional) This lets you target specific areas for sharpening. You can use it to focus on sharpening edges while protecting smoother areas like skin tones.
Just play around with these sliders to find the best settings for your photo. Remember, the goal is to sharpen your image without introducing unwanted artifacts like noise or halos.
Step 4. Once you're happy with the results, tap the checkmark in the top right corner. You'll see various options for saving or exporting your edited image. Choose the option that works best for you.
Method 2. Unblur Images with Snapseed
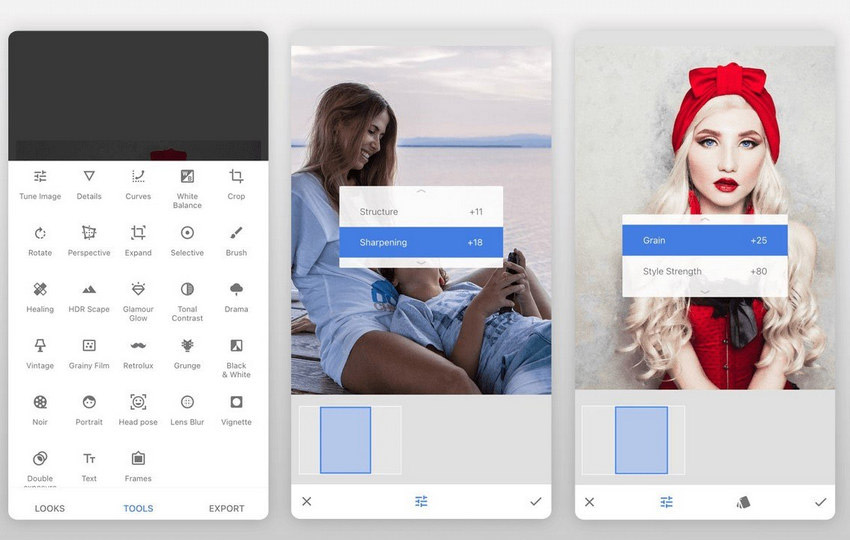
Another app you can use to unblur images on iPhone or Android is Snapseed. It is a versatile image editor that comes with a lot tools, such as Details, Tune Image, Curves, Brush, White Balance, etc.
To fix blurry images, you should make use of the Details tool. Within this tool, you can adjust the amount of Sharpening and Structure.
Sharpening focuses on enhancing edges in your photo. Increasing the values of Sharpening can increase contrast along these edges, making them appear crisper. Structure uses a special algorithm to selectively bring out the texture within objects throughout your photo without affecting their edges.
How to unblur an image on iPhone/Android with Snapseed
Step 1. Download and install the Snapseed app on the store of your Android or iPhone.
Step 2. Open Snapseed and then open the blurry image you want to fix.
Step 3. Click Tools and select the Details.
Step 4. Adjust Sharpening and Structure to the level you want. Once satisfied, save your edits and download your modified image.
How to Unblur an Image Online
While powerful desktop software and mobile apps exist for unblurring images, sometimes you need a quick and easy solution. Thankfully, several online tools can help you sharpen blurry photos directly from your web browser. Here, we'll explore two popular options: Canva and Picsart.
Method 1. Remove Blur from Photo Online Free with Canva
This graphic design tool offers a lot of image editing features, including the ability to unblur images. To make your images sharper and clearer, you can utilize the Sharpen and Clarity slider in Canva.
In addition to adjust the sharpness and clarity, you can also adjust the brightness, contrast, saturation, and more to further enhance your images. And there’re many fun filters and effects for you to play with.
How to unblur an image with Canva
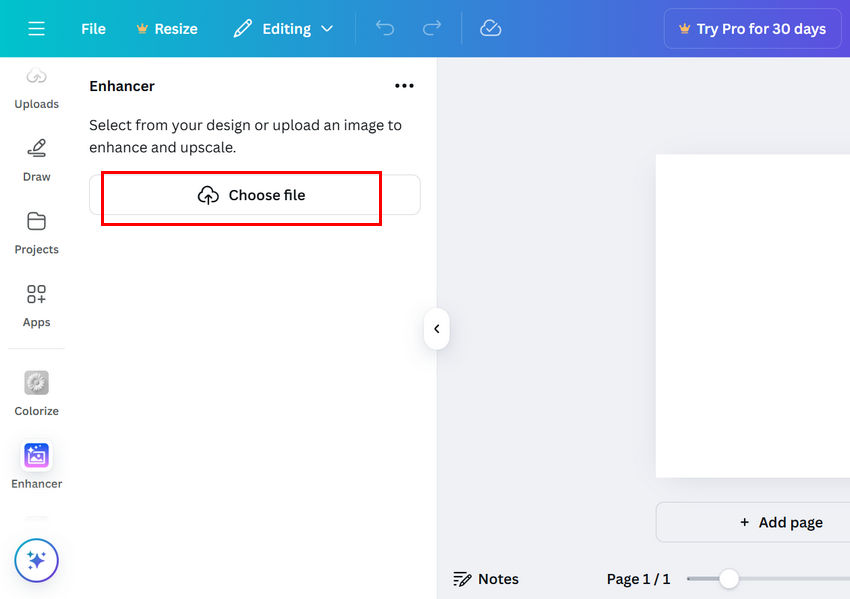
Step 1. Open a browser and then open Canva enhancer within the browser.
Step 2. Sign in Canva.
Step 3. Choose to create a new design or open an existing one.
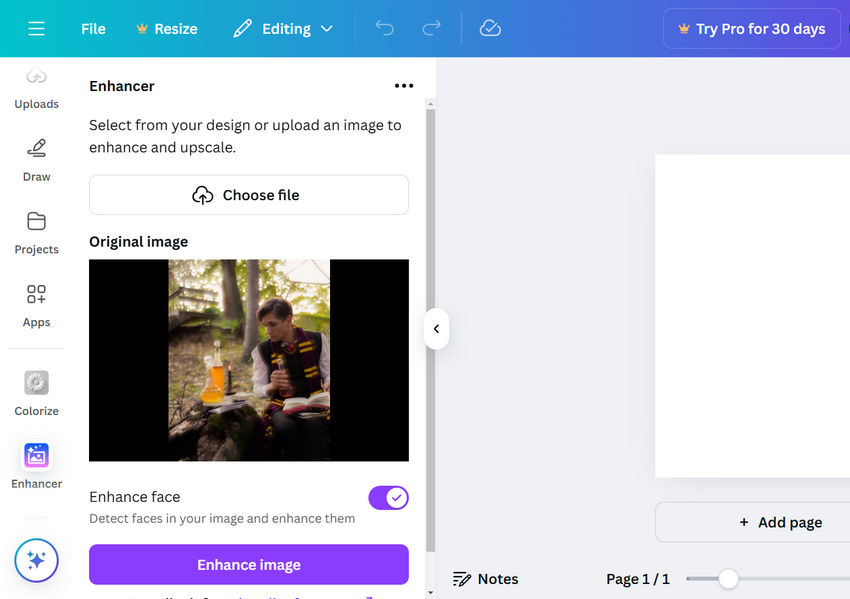
Step 4. Click the Choose file button to upload the blurry image you need to fix.
Step 5. Toggle on Enhance face if you need to enhance the face in your photo.
Step 6. Click Enhance image. Then, Canva will start enhancing your image. Once done, click Add to design.
Step 7. If you still need to further remove the blurriness, click the Adjust tab, scroll down to find Sharpen and Clarity, and then move the sliders. You can preview the result in the right window in real-time.
Step 8. Click the Share button on the top-right corner to download or share your image.
Method 2. Unblur Pictures Online Free with Picsart
Picsart is a powerful online image editor that provides an automatic enhancement tool to unblur images. If the result isn’t satisfactory, you can refine it using either the Sharpen effect or the Clarity adjustment.
How to unblur an image with Picsart
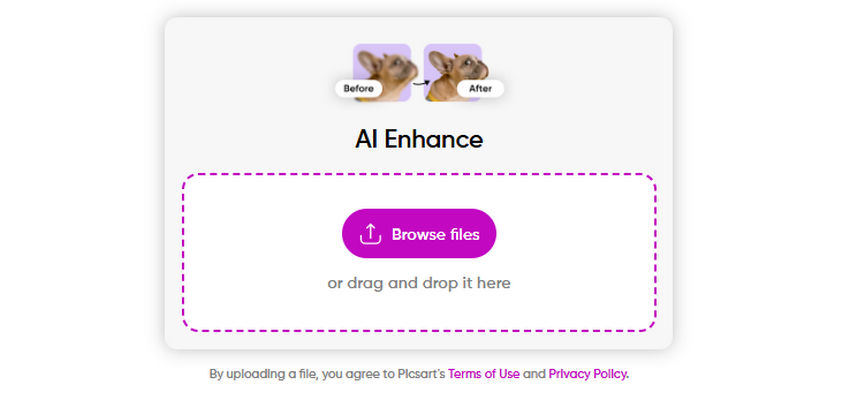
Step 1. Open Picsart in your preferred browser.
Step 2. Click the Browse files button to import your blurry image.
Step 3. Picsart will automatically process the image. Once done, preview and compare it with the original.

Step 4.
- If you're satisfied with the result, click the Download button.
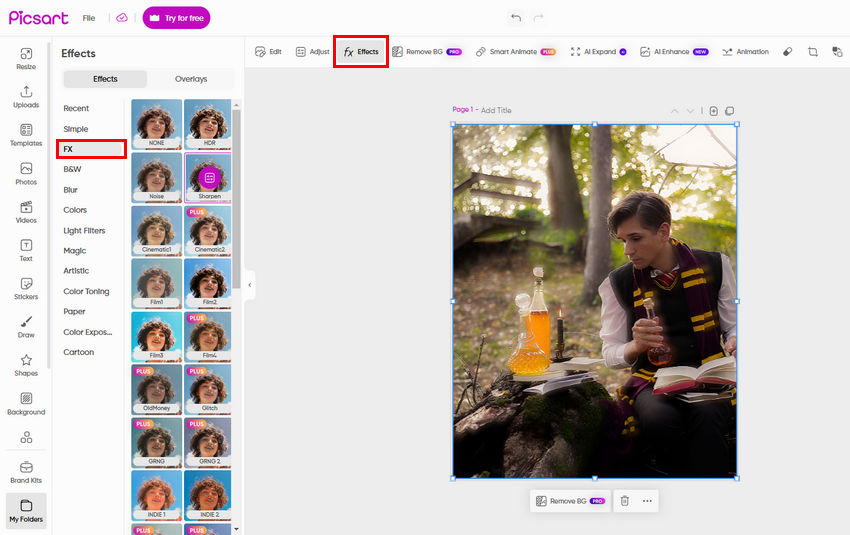
- If further enhancement is needed, click Edit image to access the Picsart Editor.
To sharpen the image, go to Effects > FX > Sharpen and adjust the Fade and Blend Modes if necessary.
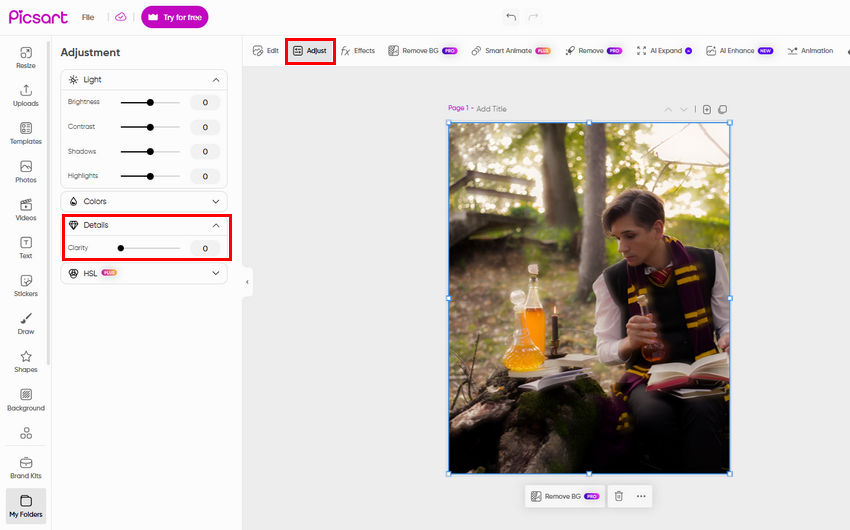
Alternatively, go to the Adjust tab, expand Details, and tweak the Clarity slider.
Step 5. Once satisfied, click the Export button to download the final image.
By following these steps, you can easily unblur images using Picsart's automatic enhancement and manual editing tools.
Step 5. Click the Export button to export the edited image.
Why Pictures Get Blurry? How to Avoid It?
There are numerous factors that can contribute to blurry images, including camera shake, moving subjects, inappropriate camera settings (such as slow shutter speeds, incorrect aperture settings, or high ISO values), excessive zooming, compression during image transfer, and using outdated camera equipment. Understanding these causes can help us take appropriate measures to get rid of blurry images.
Camera shake
If you accidentally move the camera, even a tiny bit, while taking the photo, you will get a blurry image. To avoid this, steady your hands by using two hands, plant your elbows, or brace against a solid object. Or, you can use a tripod.
Moving subject
If your photo subject is wiggling around, you might end up with blurry results. This is called "motion blur." To freeze the action and get a sharper picture, try using a faster shutter speed on your camera.
When capturing fast-moving subjects, such as sports or kids playing, set your shutter speed to a high value, like 1/1000 of a second. If you're taking pictures of things that aren't moving much, or you want a special blurry effect, use a slower shutter speed. Try something around 1/30 or 1/60 of a second. Here's a special trick for slower shutter speeds: panning. Imagine you're tracking a race car with your camera. You can pre-focus on the spot where the car will be and then smoothly move your camera along with the car as you press the shutter button. This will keep your subject sharp while blurring the background, creating a sense of movement. But panning takes practice, so don't worry if you don't get it perfect right away!
Some cameras also have a "burst mode" that takes several pictures really quickly, increasing your chances of getting a clear shot when your subject is moving.
Wrong camera settings
There are different settings on your camera, kind of like controls. If you're taking pictures in low light, you might need to use a setting that keeps the camera open for a longer time to capture enough light. But the problem is, if you don't hold the camera super still with this setting, your photo might get blurry. It's a good idea to play around with the settings on your camera to see what works best in different situations.
Zooming in too much
When you zoom in really close on your camera, it can sometimes make it harder to focus properly. This is because the area that's in focus gets smaller the more you zoom. If you're having trouble getting a clear photo, try zooming out a bit and see if that helps.
App-caused blur
Some apps you use to edit or share photos might actually lower the quality of the picture to make the file size smaller. This can make your photos look blurry. To avoid this, try transferring your photos using email or apps that don't compress images, so your pictures stay nice and sharp.
Old photos
Photos taken with older cameras might naturally look a bit less crisp compared to pictures from newer ones. Technology has come a long way, and modern cameras capture way more detail. There is no way to avoid it, but now there are photo restoration software and services that can help sharpen them up and bring those memories back to life.
Final Words
So there you have it! With the tools we introduced above, you should be able to unblur your photos and salvage those precious moments.
Although there are numerous dedicated software, mobile apps, and online solutions you can use to transform blurry pictures into sharp ones, prevention is always better than cure. Understand the common causes of blurry photos and take steps to prevent them from happening in the first place.
You May Also Like
Brenda Peng is a seasoned editor at Digiarty Software who loves turning ordinary photos into extraordinary works of art. With years of experience behind the lens and in front of the computer, Brenda shares her passion for photography, image enhancement, and editing through easy-to-follow tutorials.