Best Stable Diffusion Lighting Prompts and Controls
Updated on
Lighting is the backbone of photography and illustration, especially in portrait photography and product shooting. It has the power to make or break a shot or a design. When generating images in Stable Diffusion, you may have encountered various challenges to control the lighting for realistic results .
Below are some of the best lighting prompts in Stable Diffusion, followed by tutorials to use denoise offset Lora for high dynamic range images.
Part 1. How to Write Stable Diffusion Lighting Prompts
Step 1. Use the basic structure: Subject, attire details and props, scene, style, composition, lighting, and quality.
However, you don't necessarily need to follow the structure and include every aspect. Please note that the order of the tokens will also influence the outcome. Also, the best practice is to read the instructions of the author of a specific model. For instance, some models don't require you to include "quality keywords" to generate good results.
Prompt example: 1girl, ((pink ancient outfit)), golden jewelry, shine necklace, long red hair, high-class, palace window in backgrounground, cinematic ambient lighting, masterpiece, extreme realistic.
Model: DreamShaper; CFG: 7; Sampler: DPM++2M Karras.
Resolution: 512x768.
512px low resolution is not enough for a 4K display or 300DPI print. When zoomed in, the image will look fuzzy and pixelated. The best solution is to use a Standalone Stable Diffusion Upscaler - Aiarty Image Enhancer.
Step 2. Upscale 512px image to a higher resolution in Aiarty Image Enhancer.
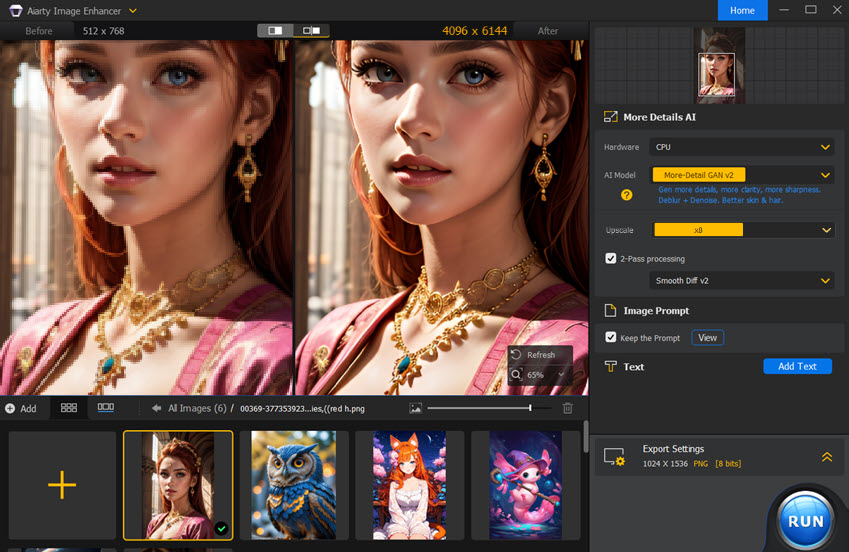
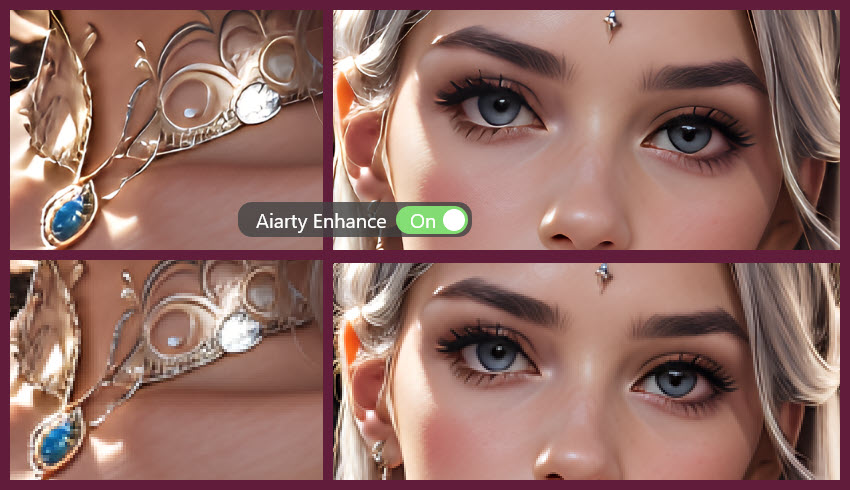
Click the button below to use Aiarty Image Enhancer, achieving 8X upscale with details.
Watch Aiarty Image Enhancer in action:
🎬 Timestamp
00:35 Part 1. Why use Aiarty to enhance your workflow
01:10 Part 2. Image upscaling case #More-Detail Model
02:30 Part 3. Image upscaling case #Smooth Diff Model
Part 2. Popular Lighting Prompts (Tokens) in Stable Diffusion
Using lighting prompts in Stable Diffusion is one way to control the light effects and visuals in your AI art styles. If you are familiar with photography lighting techniques, it will be much easier.
Note that not every technique in photography is transferrable to Stable Diffusion AI image generation. Below are some tokens that work.
My Favorite Lighting Keywords:
- -Rim lighting, backlight, crepuscular rays, golden hour, blue hour
- -For faces: Loop lighting, broad lighting, Rembrandt lighting, butterfly lighting for faces
- -For contrast: chiaroscuro, noir, dimly lit
Broad lighting
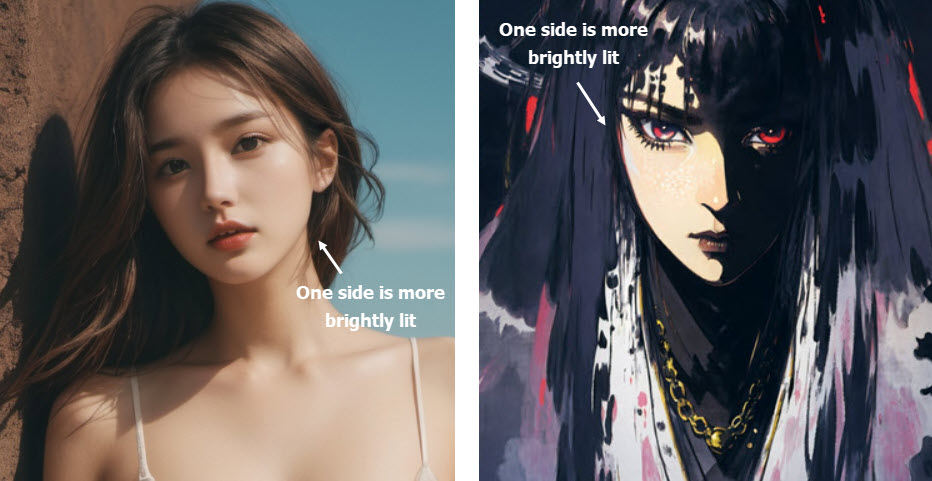
Broad lighting is a photography technique where the side of the subject's face facing the camera is more brightly lit than the side facing away.
Since the subjects being photographed have their faces turned sideways, neither of the following two AI images can be considered broad lighting because they are both facing the camera head-on. Still, they represent the essence where half of the face is lit up than the other side.
You can add broad lighting into your Stable Diffusion prompts and adjust its weight (Broad lighting: 1.5) until you are satisfied with the results.
Rim Lighting
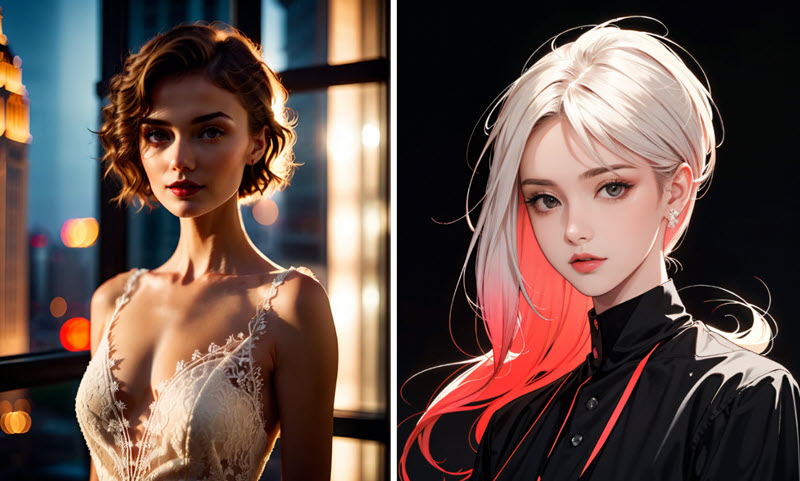
Rim lighting adds a bright outline along the edges of the character. In photography, it is achieved by placing a strong light source – either natural or artificial – behind the subject.
Backlight
Backlight, as its name suggests, comes from the back of the subject. If the subject has a certain degree of transparency, the backlight may appear as a rim light to some extent.
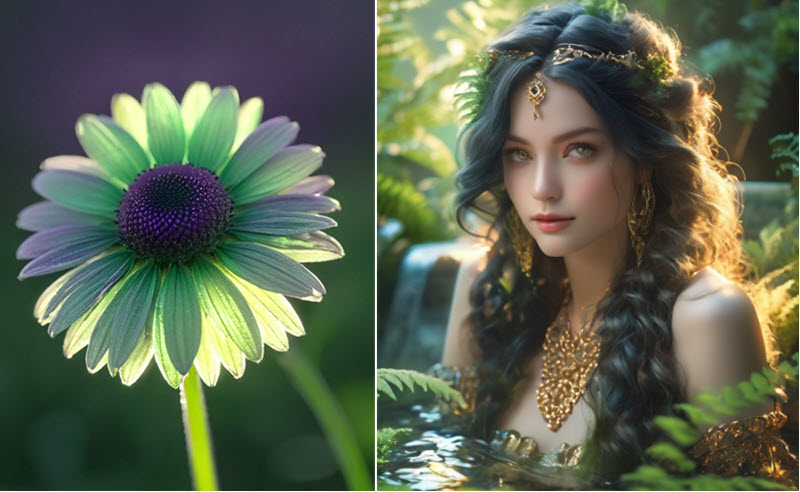
Rembrandt Lighting
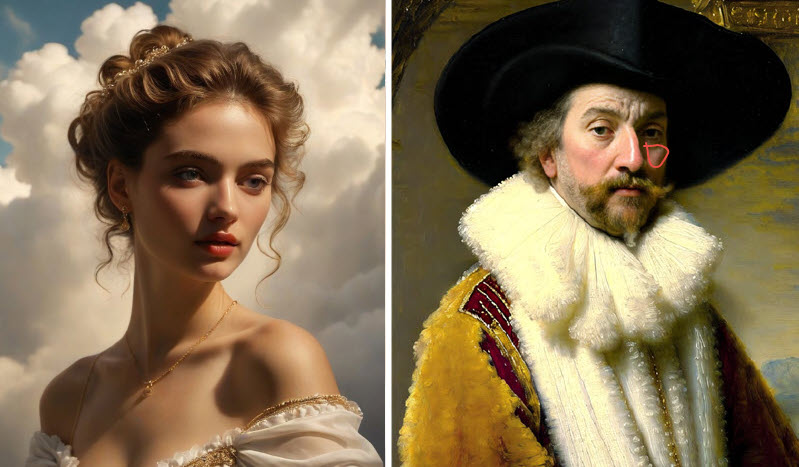
Rembrandt lighting is popular in portrait photography. It can create compelling visuals characterized by a triangle light patch under the subject's eye on the dim side of the face (see screenshot below). The technique is named after the Dutch painter Rembrandt, known for its use in his artworks.
To use this technique in Stable Diffusion, simply incorporate Rembrandt lighting into the prompts.
Loop Lighting
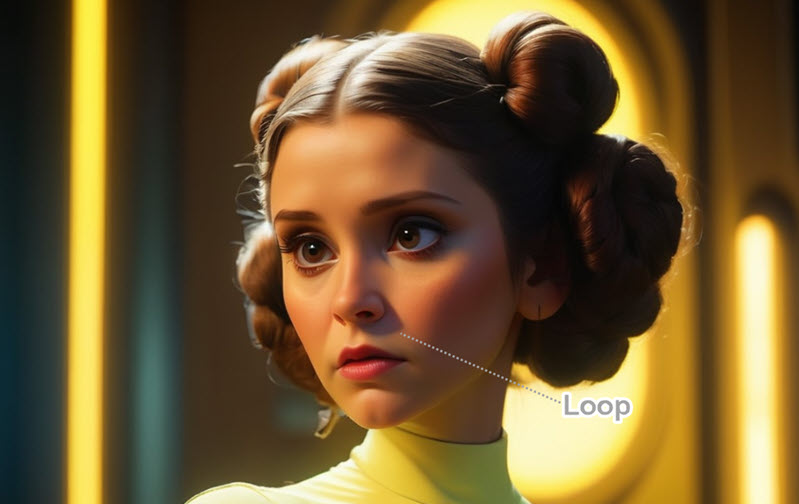
Loop lighting creates a small shadow of the subject's nose on their cheek, forming a loop-like shape. This technique adds depth and dimension to the subject's face without creating harsh shadows, and are quite popular in portrait photography.
You can recreate the loop lighting effects in Stable Diffusion. It may not succeed every time, but you can adjust the weight of (Loop Lighting:1.5) and arrange its position in the prompt.
Crepuscular Rays
Crepuscular rays, also known as god rays, are dramatic shafts of sunlight that appear to radiate from a single point in the sky. It can add depth and atmosphere to images, often creating a sense of awe or mystery.
In Stable Diffision, you can combine crepuscular rays with semantically related words such as dreamlike, otherworldly, ethereal, hazy background, mystic, eerie fog, and fantasy for different atmospheres.
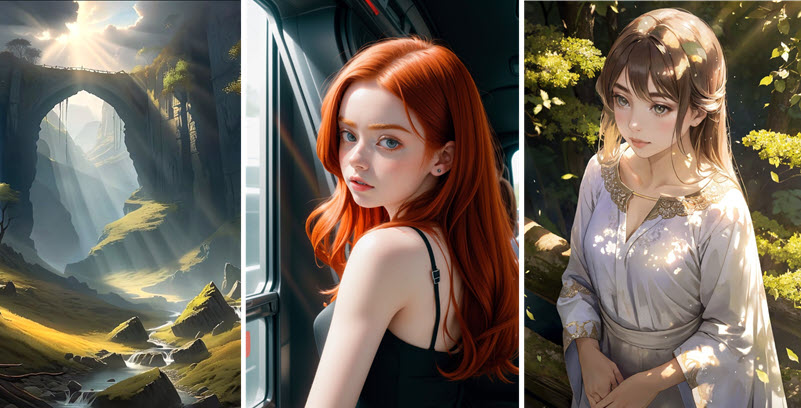
In digital graphics, crepuscular rays can be referred to as volumetric lighting. It is the computer graphics replication to add depth and realism to scenes. In your Stable Diffusion lighting prompts, you can experiment with crepuscular rays and volumetric lighting and go with whatever works.
Light Shimmering
Light shimmering, sparkling, or glimmering is often observed on bodies of water, where sunlight bounces off ripples or waves, creating a mesmerizing shimmer.
To capture the flickering and twinkling appearance in Stable Diffusion, we can try to add "light particles, water drops, shimmering light, dreamy glow" whenever needed.
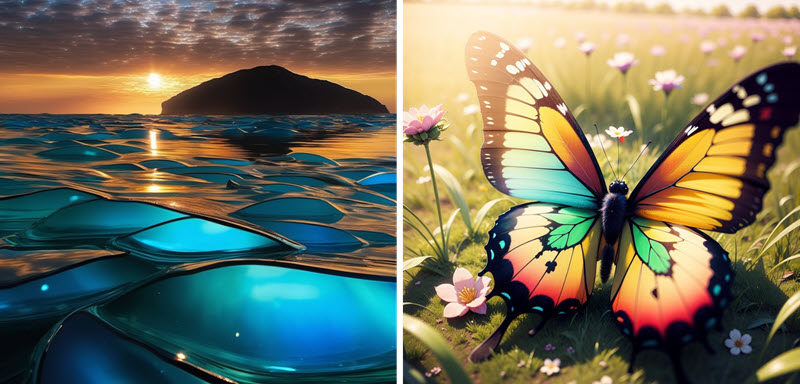
Iridescent Lighting
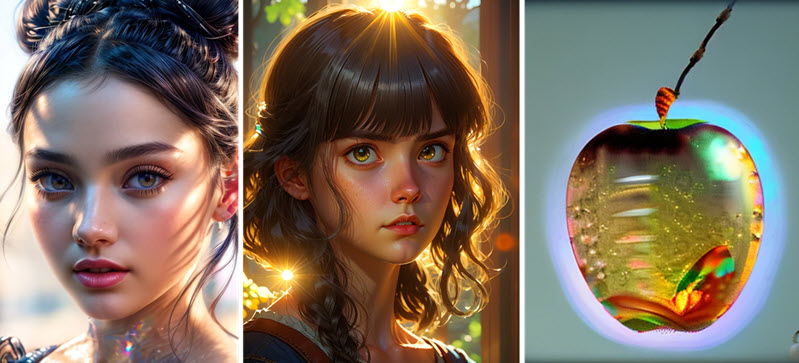
Iridescent lighting creates a spectrum of colors like what you see on soap bubbles, oil slicks, or the wings of certain butterflies. If you love the vibrancy and shifting of colors, you can add iridescent in Stable Diffusion prompts, together with phrases such as:
- -iridescent lighting reflection, glistening mesmerizing color, glowing
- -global illumination, intricate iridescent details
- -divine iridescent glowing
Luminescent Effects
Luminescent effects are light emitted from substances without heating, such as bioluminescence, phosphorescence, and fluorescence. Using it in Stable Diffusion lighting prompts can create striking visuals, such as the soft illumination of glow-in-the-dark materials, or the natural glow of fireflies and deep-sea creatures.
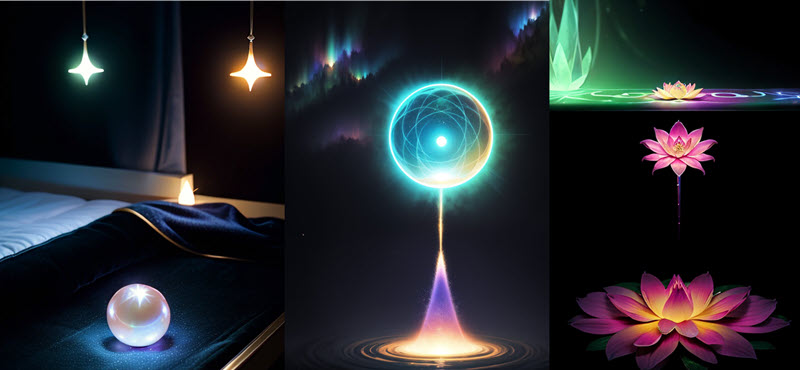
These effects are often used to add a surreal, magical, or otherworldly quality to images. For instance, some of my favorite recipes are:
- -luminescent crystal
- -small luminescent creature
- -luminescent pearl that shimmers with starlight
-luminescent, crystalline flower - -luminescent geometric patterns, ethereal light
- -bioluminescent creature
Caustics
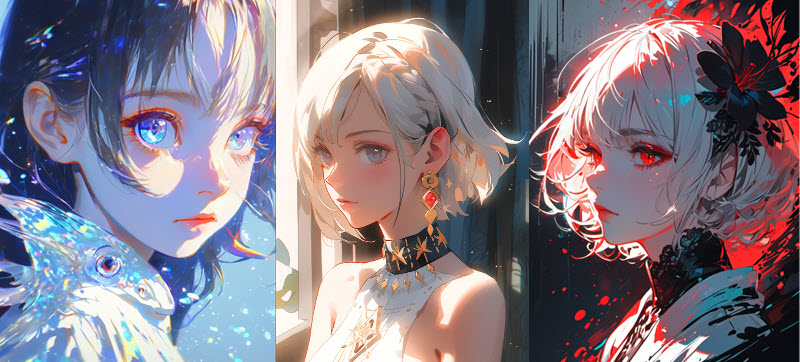
Caustics in lighting are the intricate light patterns formed when light rays interact with curved surfaces like water, glass, or shiny metal. These patterns, seen as bright shapes and lines, can add drama and visual interest to images.
In Stable Diffusion txt2img and img2img, you can combine it with other lighting effects and descriptions for coherence:
- -caustics, glass-like sparkling fish, glass-like sparkling eyes
- -caustics, shade, dappled sunlight, sunlight coming from the window
Blue Hour
Blue hour photography captures the mesmerizing blue that fills the sky, shooting in a short period of time before sunrise or after sunset. This is one of my favorite Stable Diffusion lighting prompts as the result feels soothing and calming.
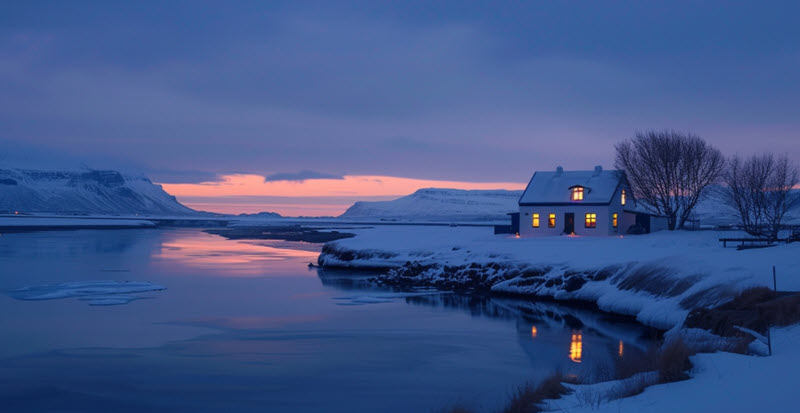
I love adding keywords such as movie still, deep blues, moody and ethereal atmosphere in Stable Diffusion. Still, it is not necessary to use it only for landscape AI art. For instance, when combining blue hour photography tokens with food photography or other themes, there can be surprisingly great results too.
Golden Hour
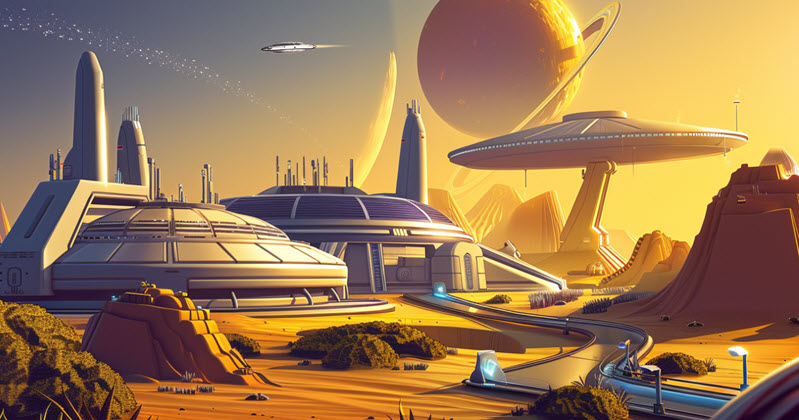
Golden hour photography is what I call the amazing twin of the blue hour. In photography, it refers to the short period after sunrise or before sunset, when the sky is lit with warm colors.
Stable Diffusion readily presents the style when you add Golden Hour in the prompts. You can also incorporate keywords such as photorealistic, vivid colors, and sharp focus if those are in line with your imagination.
Lighting Tokens for Stable Diffusion
Below is a wrap up of lighting keywords you can use in Stable Diffusion. Do you have more suggestions? Leave me a message and I will be happily updating the list.
1. Directional Lighting Techniques:
- Backlight
- Broad Lighting
- Loop Lighting
- Rembrandt Lighting
- Rim Lighting
- Butterfly lighting
2. Mood, Atmosphere and Specific Effects
- Cinematic Lighting
- Crepuscular Rays
- Dimly Lit
- Dynamic Lighting
- Halo Lighting
- Radiant Light Rays
- Shimmering Light
- Soft Shadows
- Iridescent Lighting
- Luminescent Lighting
- Neon Light
3. Contrast and Shadow Manipulation:
- Chiaroscuro Lighting
- High Key Lighting
- Low Key Lighting
- Noir Lighting
4. Light Quality and Texture Enhancement:
- Caustics
- Diffused Lighting
- Hard Light
- Harsh Shadows
- Soft Light
- Translucent Lighting
- Subsurface Scattering
- Volumetric Lighting
Part 3. Use Lora: Epi_Noiseoffset to Control Light
Low-key and high-key photography are distinctive styles that can evoke specific moods with clean aesthetics. However, it is widely known that Stable Diffusion cannot properly handle these kind of images.
One possible reason is that Stable Diffusion cannot go for images that are all dim or all bright. It tries to balance the tone somehow. For instance, if you prefer to generate a snow mountain with white roof, Stable Diffusion might give you a black roof since a snow mountain is already bright and white.
How to better control the lighting in Stable Diffusion for low-key and high-key photography? Luckily, now we have Epi_Noiseoffset Lora.
This Stable Diffusion Lora offers you much more flexibility in terms of dynamic range, enhancing the quality and visual of your image generations.
How to Use Epi_Noiseoffset Lora
Step 1. Download epi_noiseoffset Lora.
You can download it from Civitai.com or other resources.
Step 2. Add the downloaded file to the Lora folder.
The folder path is: [Stable Diffusion folder]\models\Lora

Step 3. Use Lora in your prompts, and adjust its weight.
Under the txt2img or img2img tab, input <lora:epi_noiseoffset2:1> in your prompts.
You can adjust its weight to influence the outcome.
Besides pasting <lora:epi_noiseoffset2:1> into the prompts, you can simply click the Lora tab and find epi_noseoffset together with other Lora models. Click on the epi_noiseoffset thumbnail and <lora:epi_noiseoffset2:1> will be added automatically into your prompts.
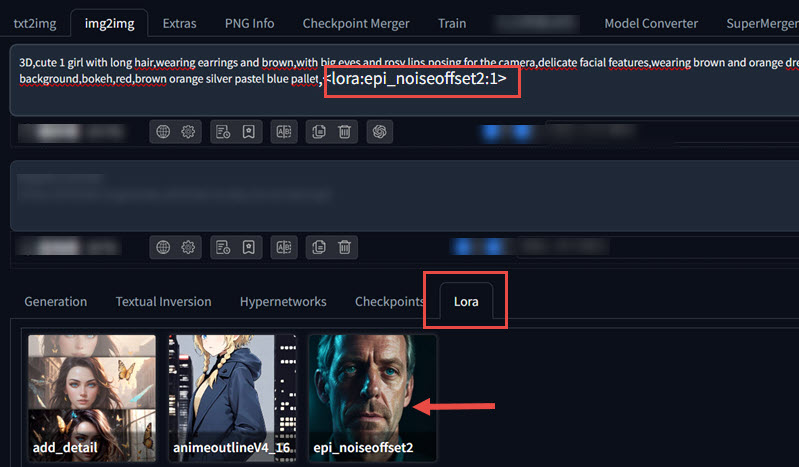
Hovering over the thumbnail and click on the wrench icon to edit metadata. There you can add preferred weight, description, trigger words, etc.
Tips: according to the author of this Lora, it works better when using keywords like: dark studio, rim lighting, two tone lighting, dimly lit, low key in the prompts.
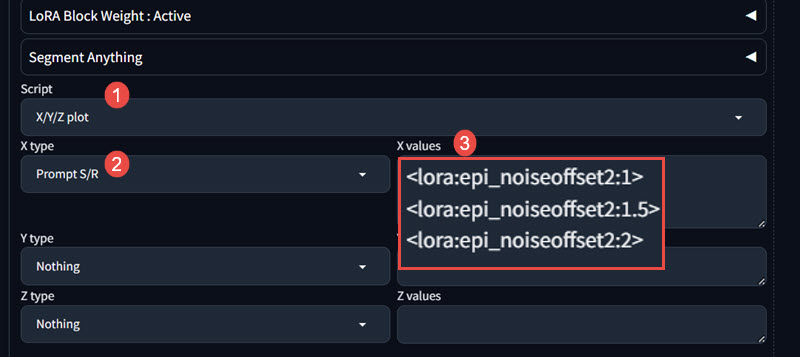
You can also experiment with Prompt S/R to compare different weight.
Go to Script (X/Y/Z plot) > X type: Prompt S/R > input X values.
Note: the starting value (the first value) should be in line with what you put in the prompts. For instance, if you use
- <lora:epi_noiseoffset2:0>
- <lora:epi_noiseoffset2:1>
- <lora:epi_noiseoffset2:1.5>
- <lora:epi_noiseoffset2:2>
Stable Diffusion will throw at you an error saying: Prompt S/R did not find <lora:epi_noiseoffset2:0> in prompt or negative prompt.

Now you can have dark scenes, high dynamic range photos or very light photos.
Why does Stable Diffusion struggle with making very dark or light images?
The massive datasets used to train Stable Diffusion are scraped from the internet. Most photographs online aim for good exposure, meaning they avoid being overly dark or blown out.
If you love low-key photography, the widely recommended solution is to use specific LoRAs or embeddings, as listed above. These LoRAs or embeddings trained on dark/light images to improve results. Alternatively, parameters like denoising strength, CFG scale, and sampling methods can impact the output and can be tweaked to improve results.