Summary: The importance of product images cannot be overstated. However, ordinary product images will not improve purchase decisions and conversion rates. Don't worry! This article explores the essential steps and strategies to optimize product images, including the most efficient way of removing and changing the image backgrounds to enhance appeal and drive more sales.
Have you ever thought about why other ecommerce stores are selling well but your store is struggling to retain customers? The visual elements of a product listing—primarily the images—play a critical role in shaping consumer decisions. According to a study by BusinessDasher, 75% of online shoppers rely on product photos to make purchasing decision, and high-quality product photos had 94% higher conversion rate than low-quality product photos.
Humans process visuals faster than text. This means that an eye-catching, well-presented image can immediately build trust and increase a customer's likelihood of completing a purchase. A remarkable and high-quality product photo helps reduce uncertainty about the product, increase consumer confidence, and lower return rates, which are crucial for long-term business success. That's why we're here to discuss how to optimize product images.
![]() The Best Answer: Change Product Image Background with Aiarty Image Matting
The Best Answer: Change Product Image Background with Aiarty Image Matting
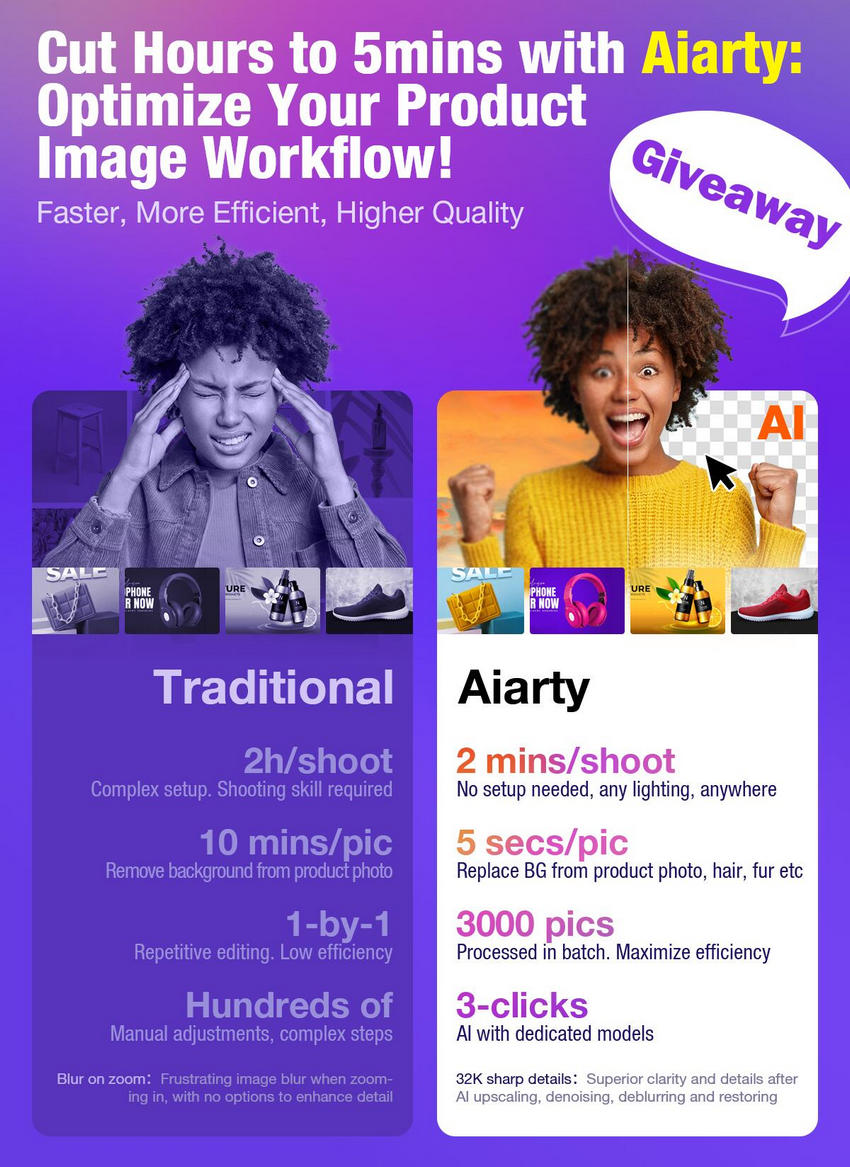
Aiarty Image Matting precisely removes and replaces e-commerce image backgrounds (Amazon, eBay, Shopify, Etsy), batch processing up to 3000 images to save you hours.
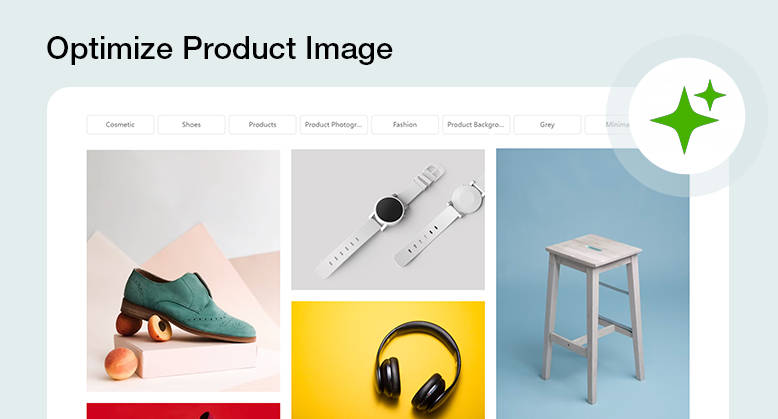
Secrets to Optimize Product Photos for Higher Conversion Rate
Before we delve into the specifics of product photo optimization, let's identify the key areas where we can make improvements to boost your product photo's conversion rate. Then, we can tailor our ecommerce photo retouching strategy accordingly.
1. Change Product Photo Backgrounds for Diverse Showcases
Product image requirements vary by platform. Amazon likes white backgrounds, Etsy favors real-life shots. Neutral backgrounds isolate products, but contextual ones boost engagement.
Fortunately, Aiarty Image Matting makes it easy to remove and change the product image background. It can:
- Accurately isolate subjects, even complex AIGC images (translucency, lace, hair), and replace backgrounds with solid colors or lifestyle scenes for Amazon, eBay, Shopify, Etsy, etc.
- Batch process up to 3000 product images simultaneously, saving significant time and effort.
- Upscale product images by 2x, enhancing fine details, textures, and edges for standout product visuals.
- Process images locally to protect your privacy, eliminating the risks of online uploads and sharing.
Download Aiarty Image Matting now and start removing or replacing product backgrounds!
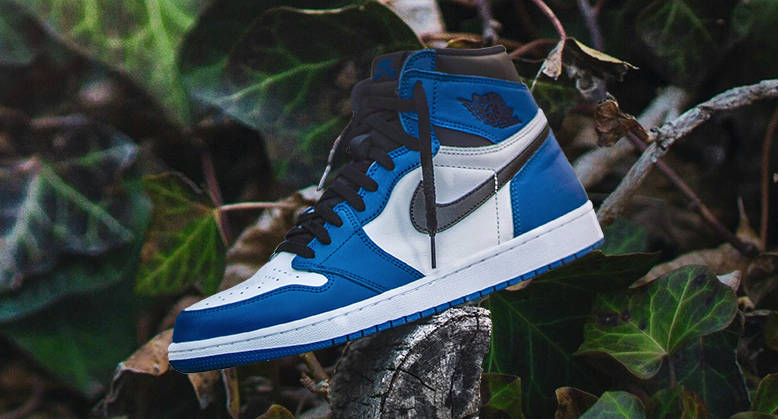
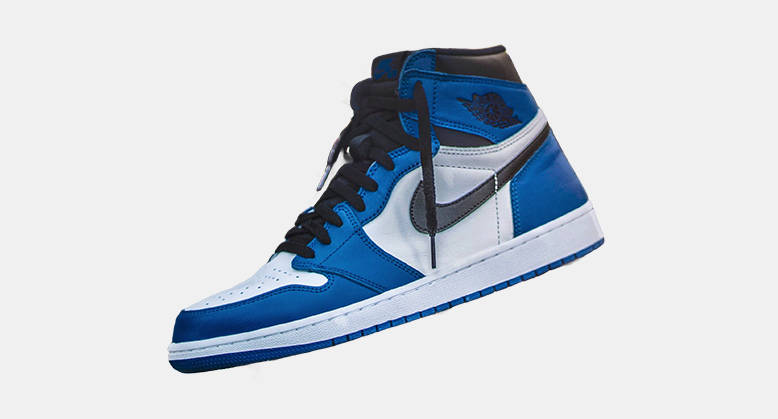
How to Remove & Change Backgrounds Using Aiarty Image Matting [Step-by-Step Guide]
Step 1. Download/install Aiarty Image Matting. Drag and drop product images, up to 3000+ images simultaneously.
Step 2. Choose from various AI models, including AlphaStandard V2, AlphaEdge V2, EdgeClear V2, and SolidMat V2, to best suit your image.
- AlphaStandard V2: Ideal for semi-transparent objects (dresses, glass, hair, pets). Preserves translucency and provides smooth edges.
- AlphaEdge V2: Best for sharp edges and silhouettes (portraits, anime, cartoons, tattoos).
- EdgeClear V2: Enhances detail preservation for objects like birds, bicycles, cars, and furniture.
- SolidMat V2: Optimizes edge sharpness for solid objects (bags, shoes, cars, buildings). Ideal for architecture, industrial products, and macro photography.
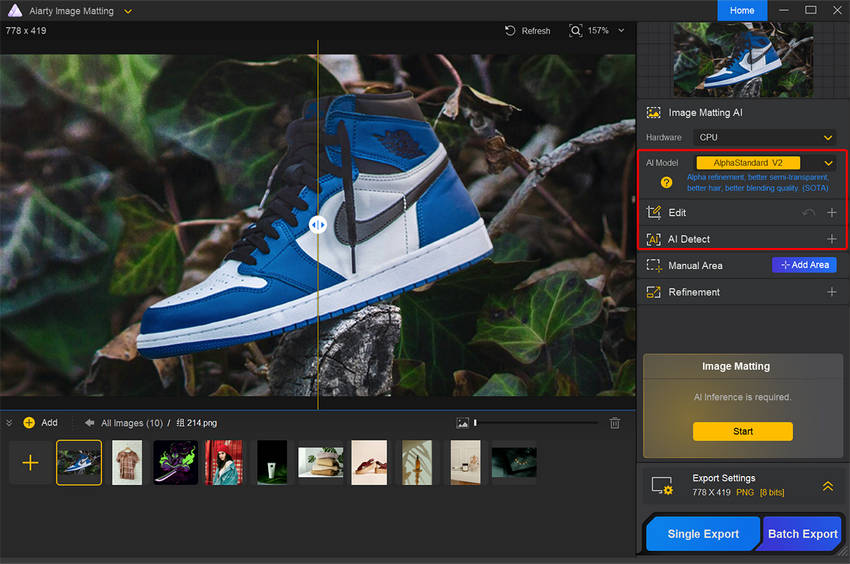
Step 3. Click "+Add area" to select the main subject (if needed), then click "Start" in the Image Matting panel. After then, you can review and refine the result using tools like Eraser, Brush, Dodge, and Burn if necessary.
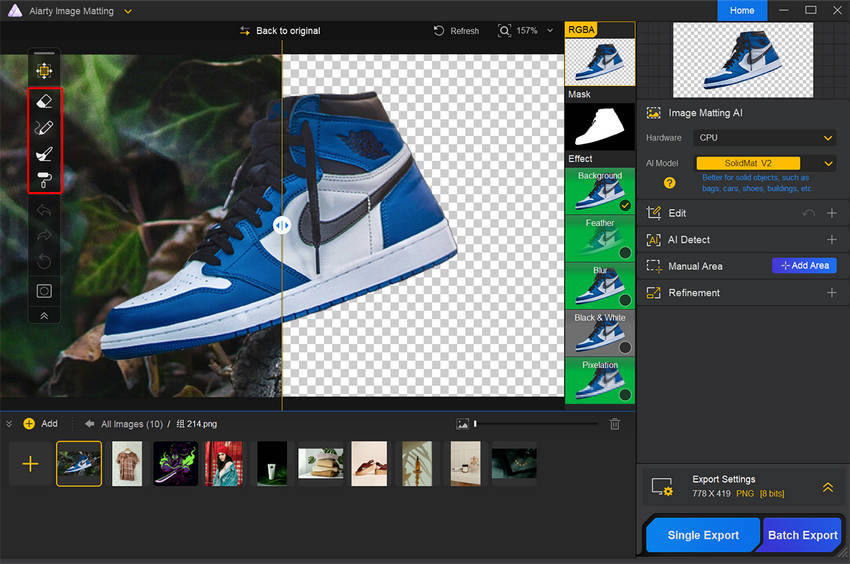
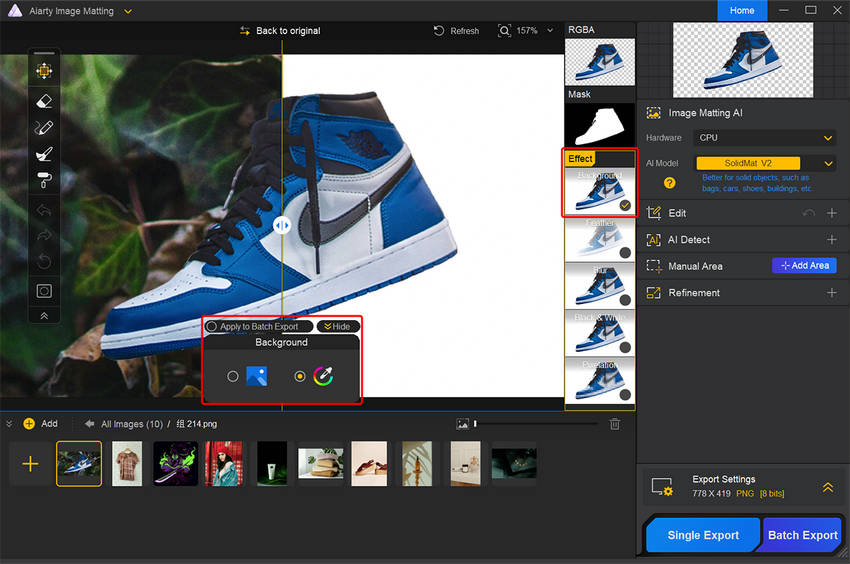
Step 4. Tick on the “Background” under the Effects. You have the option to select a solid color, create a gradient, or import a custom background image from your local device to seamlessly integrate with your product image.
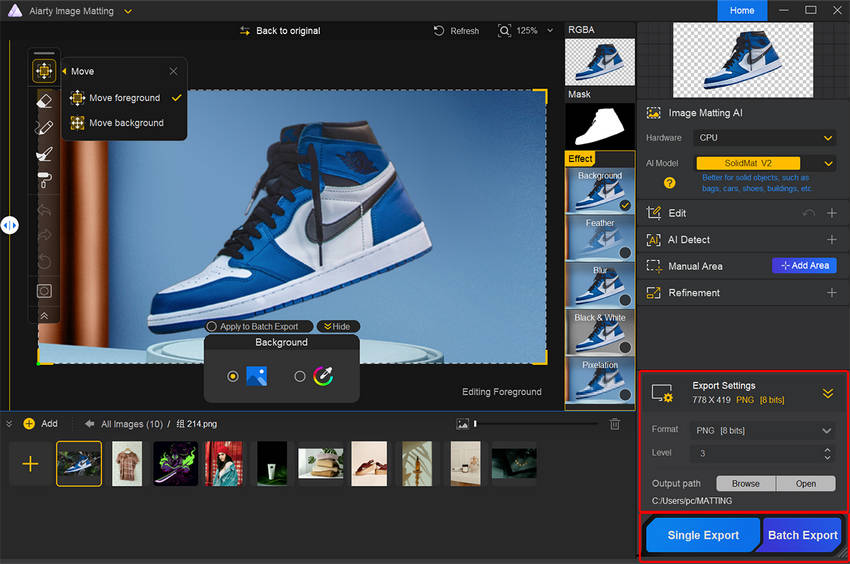
Step 5. Once you're satisfied with the results, export the "Export Settings" section to choose the output format and quality level. Then you can select to export your images individually or in bulk using the "Single Export" or "Batch Export" options.
1. For products with larger subjects, such as clothing, furniture, and automobiles, where extreme magnification is not necessary, Aiarty Image Matting offers image enhancement capabilities of up to 2x.
2. The Edit panel allows you to crop images to precise dimensions as required by different platforms.
2. Ensure High Image Quality of Your Product Photos
High-resolution, clear images are essential for product image optimization. They let customers zoom in on textures and materials details. Blurry images suggest low quality and deter buyers. While image size matters for loading speed, over-compression sacrifices clarity and hurts user experience.
AI image enhancers like Aiarty Image Enhancer are invaluable for boosting quality. It can upscale image resolution to an impressive 8K/16K, restoring lost details and eliminating blur or pixelation. This ensures your product images are crystal-clear and showcase every intricate detail, presenting your products in the most professional and visually appealing way.
Free download Aiarty Image Enhancer to improve your product image quality now!
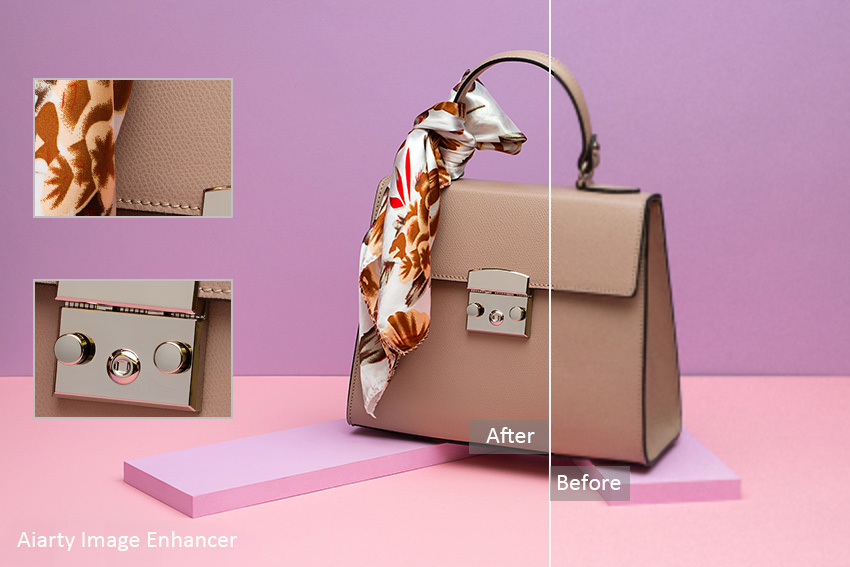
Check the easy steps to upscale the resolution of product photos with intricate details using Aiarty Image Enhancer.
Step 1. Free download Aiarty Image Enhancer and launch it on your computer. Drag and drop your product photography into the program.
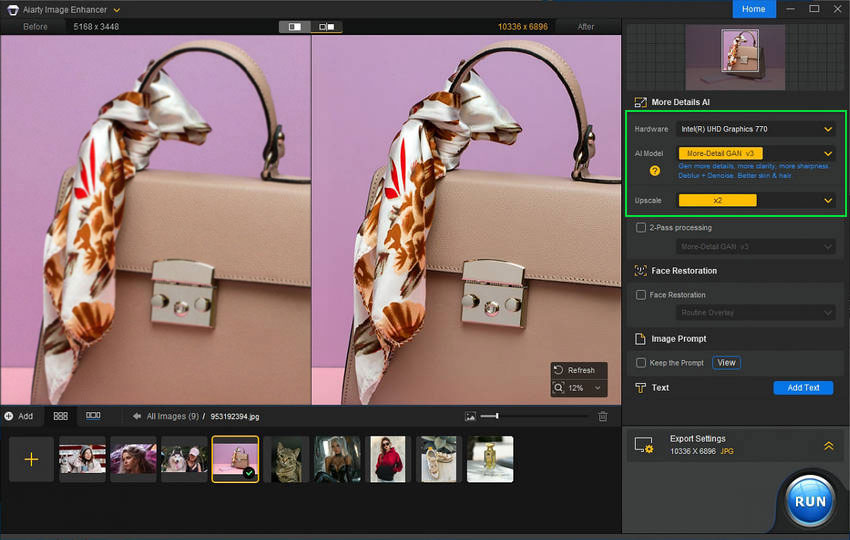
Step 2. Head over to the right side of the interface where you can choose the hardware, AI model, and upscaling scale for enhancing your product images.
- Hardware: GPU would be highly suggested compared with CPU.
- AI Model: More-Detail GAN v3 excels in detail enhancement and magnification for e-commerce product images, especially those with fine textures. You can also experiment with other models for optimal results.
- Upscaling Scale: Select a resolution or upscale scale (2x, 4x, 8x, 1K, 2K, 4K, 8K, or custom) for your product image as needed.
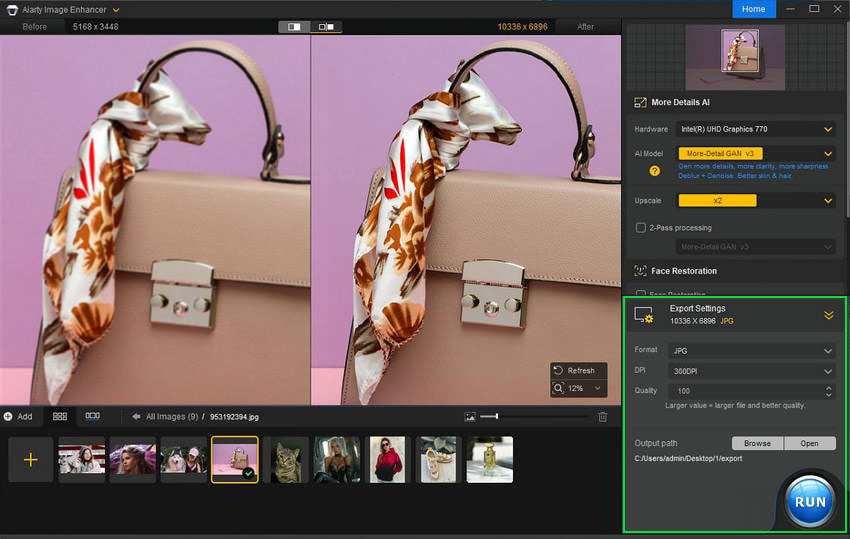
Step 3. Expand the Export settings section. Choose an output format and quality level. Then click on the "Browse" button to choose a folder to save the upscaled images. When you’ve done, click on the “RUN” button to start improving your product image quality.
Explore more AI tools for eCommerce to optimize product photos, videos, marketing, and more >>
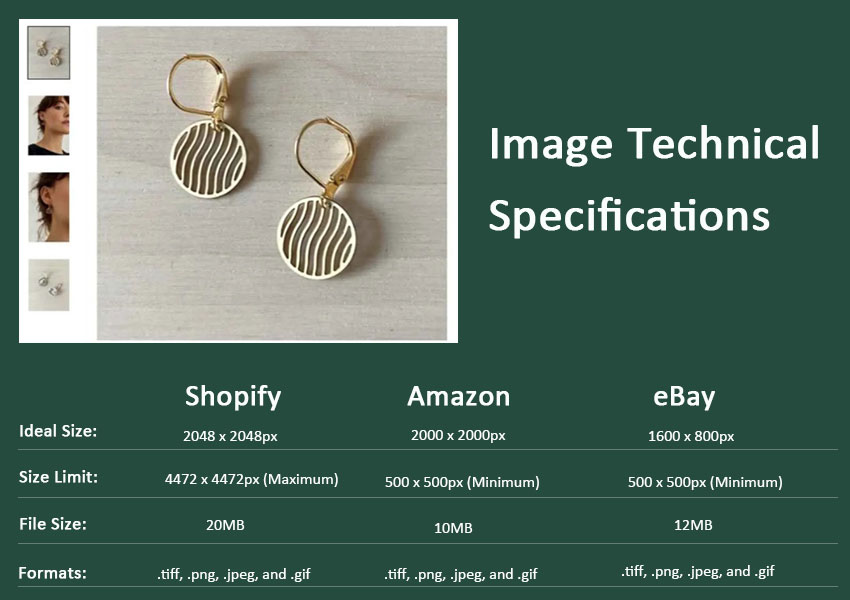
3. Resize Product Image Dimensions for Shopify, eBay, Amazon etc.
High-quality images are crucial, but they can also hinder website speed. This can lead to frustrated customers abandoning their carts. Given that 50% of consumers won't wait more than three seconds, optimizing image size is key. The dimensions of your product images play a crucial role. To ensure optimal display across different platforms, utilize tools like Pixlr and Canva to adjust image dimensions or crop specific details according to platform-specific guidelines.
For example, Amazon has relatively flexible size requirements, but recommends high-resolution images with a main image size of 1000x1000 pixels. eBay allows a wider range of sizes, from a minimum of 500x500 pixels to a maximum of 9000x9000 pixels, with a recommended range of 800-1600 pixels. Shopify supports a maximum image size of 5000x5000 pixels and recommends using 2048x2048 pixels.
Learn: how to optimize photos for different websites
4. Use Multi-angle Product Images or Add a 360-degree View
Multiple product views (front, side, back) give customers a comprehensive understanding of design and features, especially for detail-oriented products like electronics or clothing. 360-degree views further enhance this by allowing interactive rotation, boosting engagement and potentially increasing conversions.
Shoot Product Photos in Multiple Angles
For effective product photography, capture images from a variety of angles so consumers can fully understand the product. Showcase the overall appearance with a front view, highlight the outline with a side view, emphasize the three-dimensionality with a 45-degree angle, and reveal the details and materials with close-ups.

Add 360 Degree Views for Product Photos
To further enhance your product presentation, creating a 360-degree product view is invaluable. This allows consumers to observe the product from all angles, providing a more comprehensive understanding of its appearance, dimensions, materials, and other details. 360-degree view makes the product display more attractive and helps consumers make better purchasing decisions.
Here's how to create 360-degree views for your products:
- Use a turntable to capture a series of images of your product from various angles.
- Ensure consistent lighting and camera settings throughout the image capture process.
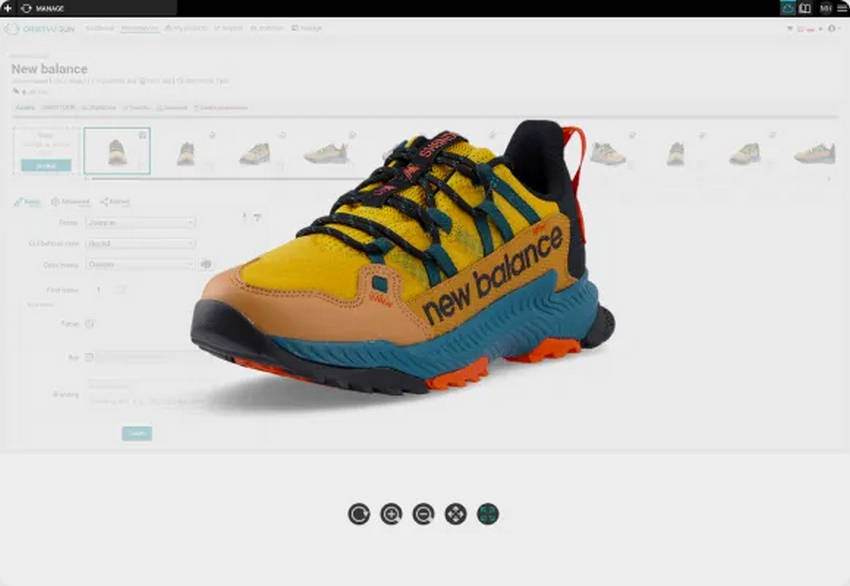
- Use specialized software, such as Orbitvu, Magic360, or Sirv, to seamlessly stitch the captured images together.
- This process creates a 360-degree product view, which fully displays details and significantly boosts product appeal.
Best Practices to Optimize Product Images for Maximum Visibility on Web
Product images are not just visual aids—they’re critical tools for enhancing your e-commerce store's search engine visibility. Properly optimizing product images for SEO can improve your website's ranking, attract more organic traffic, and ultimately increase sales. Here’s how to make your product images work harder for your business.
1. Rename Your Image Files
Keyword-rich image file names (e.g., "Dyson-Supersonic-Hairdryer.jpg" instead of "IMG12345.jpg") improve search engine rankings and visibility, especially on Google Image Search. To identify the most effective keywords, review your website analytics to understand what terms your customers use when searching for products. Incorporate these insights into your image file names to align with customer behavior.
2. Use Descriptive ALT Text
ALT text is a key element for both SEO and accessibility. Search engines use it to understand image content, while visually impaired users rely on it for context. Descriptive, concise, and keyword-rich ALT text improves your image's relevance and visibility in search engine results. Keep ALT text under 125 characters and avoid generic descriptions like “Image of…” Instead, describe the product with meaningful context, such as “Dyson Supersonic Hairdryer in matte silver finish.” This enhances both user experience and search engine indexing.
3. Choose the Correct Image File Type
The choice of file format affects both image quality and performance. JPEG is ideal for high-quality photographs with minimal file size, making it a popular choice for e-commerce. PNG files are better suited for images requiring transparency or sharp edges, while GIFs are suitable for simple animations. Each format impacts file size differently, with PNG files generally being larger than JPEGs. Additionally, optimizing image formats ensures better load times and user experience.
4. Compress Image Size for the Web
Appropriate image dimensions and file sizes are critical for balancing quality and performance. Large, high-resolution images can slow down website loading times, negatively impacting user experience and SEO rankings. If your product image is too large, consider using TinyPNG and JPEG-Optimizer to reduce file size while maintaining their resolution and clarity. These tools help balance quality and speed, ensuring that product images load quickly without compromising the shopping experience.
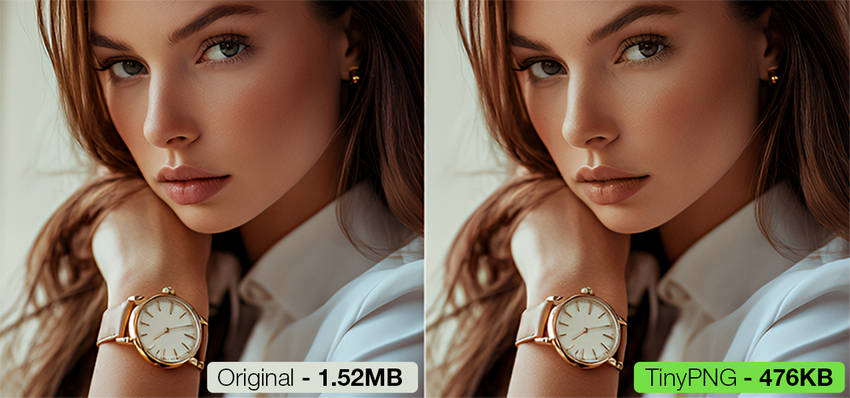
As mentioned, adhere to platform-specific size requirements; for example, Amazon typically recommends 1,000 pixels on the longest side for optimal zoom functionality. Using consistent aspect ratios and proper dimensions ensures your images display seamlessly across all devices and platforms.
5. Ensure Responsive Design for Mobile Users
With the growth of mobile shopping, responsive image design is more important than ever. Images should automatically adjust to different screen sizes and devices without losing clarity or quality. Responsive design improves the user experience and aligns with Google’s mobile-first indexing approach, which prioritizes mobile-friendly websites in search rankings.
6. Provide an Image Sitemap
Including an image sitemap helps search engines discover and index all your site’s images efficiently. This is especially beneficial for large e-commerce websites with extensive catalogs, isolated pages, or rich media content. A sitemap ensures that search engines can find your images, boosting their visibility and potentially driving more traffic to your site. An image sitemap is particularly useful for showcasing high-quality product visuals in search results, helping to attract more engaged visitors.
By implementing these strategies, you can ensure that your product images are optimized for SEO, delivering improved visibility, better user experiences, and higher conversion rates.
Final Thought
Optimizing product images is a key factor in driving traffic, enhancing user experience, and improving your e-commerce store’s search engine rankings. From creating high-resolution, clear images to replacing the different background of products, utilizing descriptive filenames, ALT text, and ensuring mobile responsiveness, each step in the product photo optimization process helps to create a more effective and engaging online shopping experience. Optimized images, formats, sizes, and a sitemap ensure fast load times and enhance customer trust, leading to increased conversions and sales.
 FAQs about Product Images Optimization
Clean, consistent backgrounds (often white) make products stand out, create a professional look, and make it easier to place products on different backgrounds for marketing materials.
AVIF offers better image compression (lossy/lossless) than JPEG, WebP, and JPEG 2000, while maintaining quality. PNG is ideal for transparency/graphics. However, platform compatibility is essential.
It depends on your platform and the level of zoom you want to offer. Balance high resolution (for detail) with reasonable file sizes (for fast loading). Check your e-commerce platform's recommendations. Larger images are generally better, but always optimize them for web use.
Use responsive images (using the <picture> element or srcset attribute in <img> tags) so different image sizes are served depending on the device. Compress images aggressively for mobile without sacrificing too much quality.
External source:
- 9 Importance of Product Photography Statistics in Ecommerce By Yaqub M. (CBC), April 11, 2024
- It’s All About the Images [Infographic]
- How to Boost Your Conversion Rate with the Right Hero Image? Pepper Square, Aug 8, 2024
- How to Add 360 Product Photography to Your Shopify Website 09.07.2024
- Website Image Size Guidelines for 2025, by Michael Keenan, Nov 30, 2024