How to Optimize Photos for Website: A Step-By-Step Guide in 2025
Updated on
First impressions matter, especially online. When visitors land on your website, the quality of your images can make or break their experience. Poorly optimized images on a website can give a unprofessional and outdated look, driving visitors away. By taking the time to optimize your photos for web—from ensuring clean backgrounds to choosing the appropriate file format and size—you can create a visually stunning website that leaves a lasting impression on your audience.
In this guide, we will show you how to optimize photos for websites like an e-commerce store on Amazon, Shopify, Etsy, Instagram, a blog, or a portfolio site, ensuring that your images will look sharp, load fast, and don’t hinder the performance of your website.
What is Image Optimization for Web?
Image optimization for websites is the process of adjusting and fine-tuning images to ensure they show the products clearly, load quickly, display correctly, and contribute to a smooth browsing experience without negatively impacting website performance. There are several key steps to optimize photos for websites, including opitmize them to the best visual quality, resolution, format, image size for websites.
Below is a workflow on how to optimize photos for website.
- Remove cluttered backgrounds to highlight product features
- Enhance image quality to showcase product details
- Optimize Image size and resolution for web
- Compress photos for websites to load faster
- Choose appropriate file formats for optimal performance
- Optimize Photos for Websites with SEO Elements
1. Remove Cluttered Backgrounds to Highlight Product Features
When selling online, the choice of background for your product images can significantly impact your sales. Platforms like Amazon and eBay typically require a simple white background to ensure clarity and professionalism. On more customizable platforms like Shopify, Etsy, and WooCommerce, you have more flexibility to use lifestyle or minimalist backgrounds that reflect your brand's personality. However, always prioritize clarity and avoid distracting backgrounds that might take the focus away from your product.
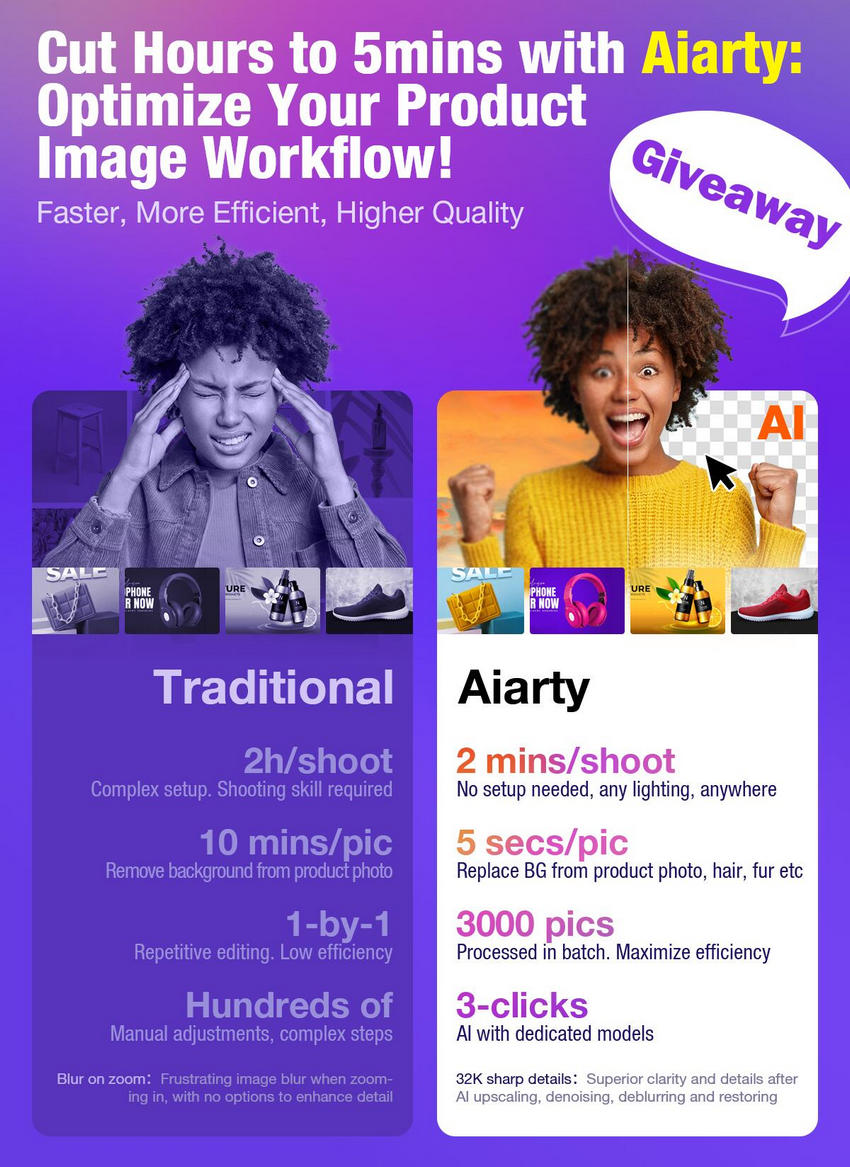
If you need to optimize photos for websites with the proper background, try Aiarty Image Matting. It’s an AI-powered tool designed to streamline background removal and optimization for e-commerce product images. It can accurately remove backgrounds, even from complex products like jewelry or apparel, ensuring clean, professional images. Users can replace backgrounds with solid colors, transparent options, or custom lifestyle images, ideal for platforms like Shopify, Amazon, and Etsy.
How to Optimize Image Background for Website
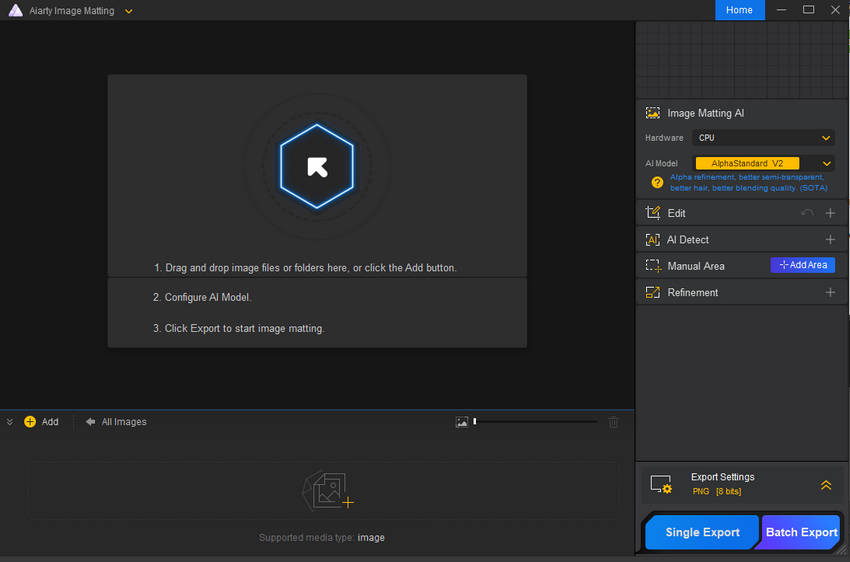
Step 1. Download and install the software on your computer. Run it and from the main interface, drag and drop the images directly into it. You can add as many photos as you need to optimize for the web in bulk.
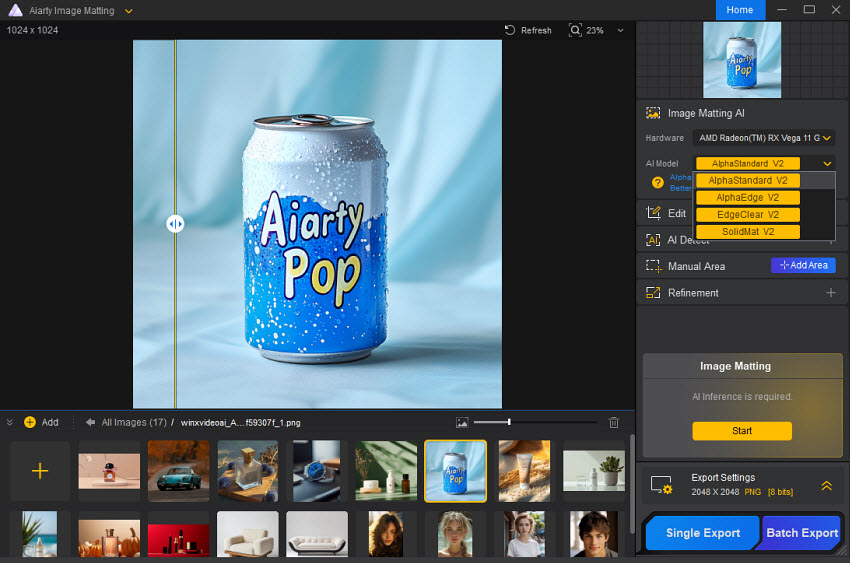
Step 2. Once the images are all imported, you need to adjust the settings. On the right-hand panel, there are four AI models, AlphaStandard V2, AlphaEdge V2, EdgeClear V2, and SolidMat V2, each excels in handling different types of photos, such as hair, glass, portrait, cars, bags, etc. Choose an AI model based on the images that you want to optimize.
Step 3. If the source images are not in the best quality or contains artifacts like blur or noise, you can also optimize the photos quality for websites using the enhance feature in the Edit section. Besides, there are also tools to crop, manual select the subject, rotate, etc.
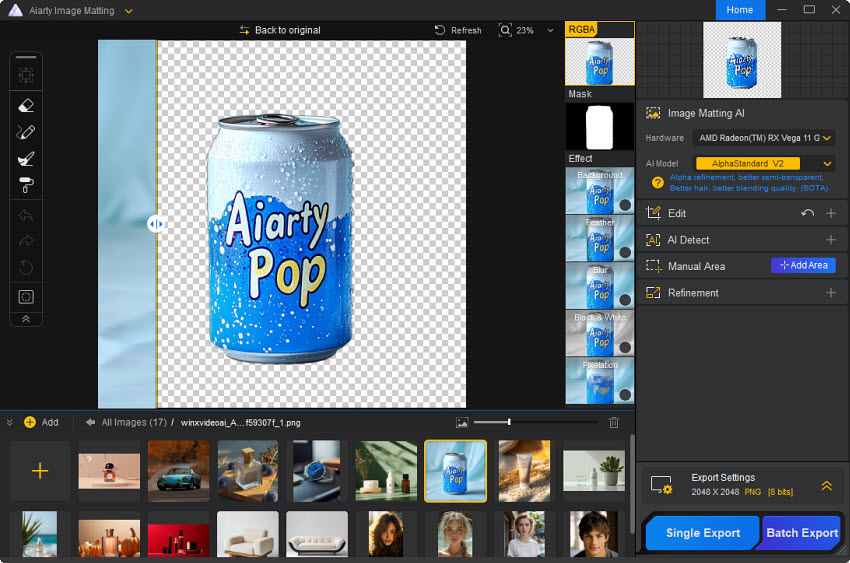
Step 4. Next, click the Start button in the small "Image Matting" dialog on the right sidebar. It will then start to remove the background.
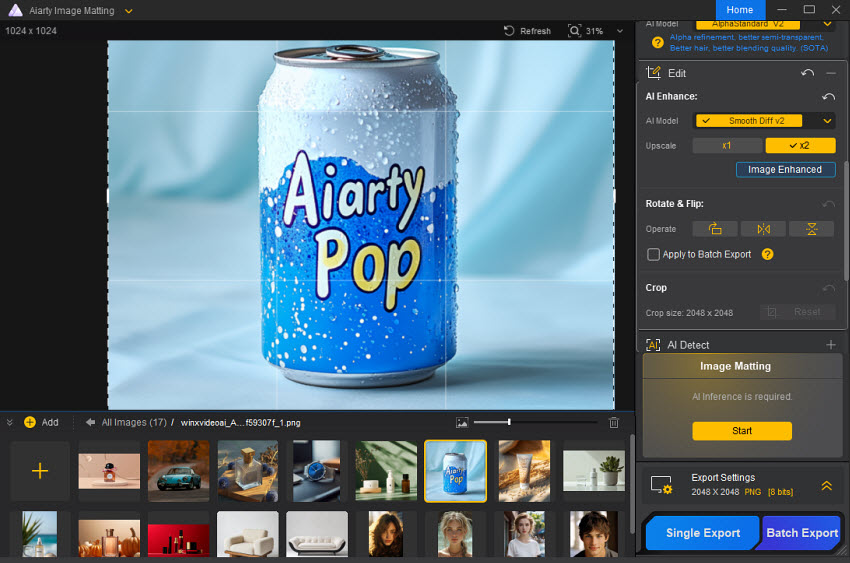
Step 5. After the background is removed, you can fine-tune the edges using the tools on the left panel if necessary. Then you can tick on the “Background” under the Effects to add new background to the image. Based on the websites that you’re optimizing the images for, you can add a local image as the background.
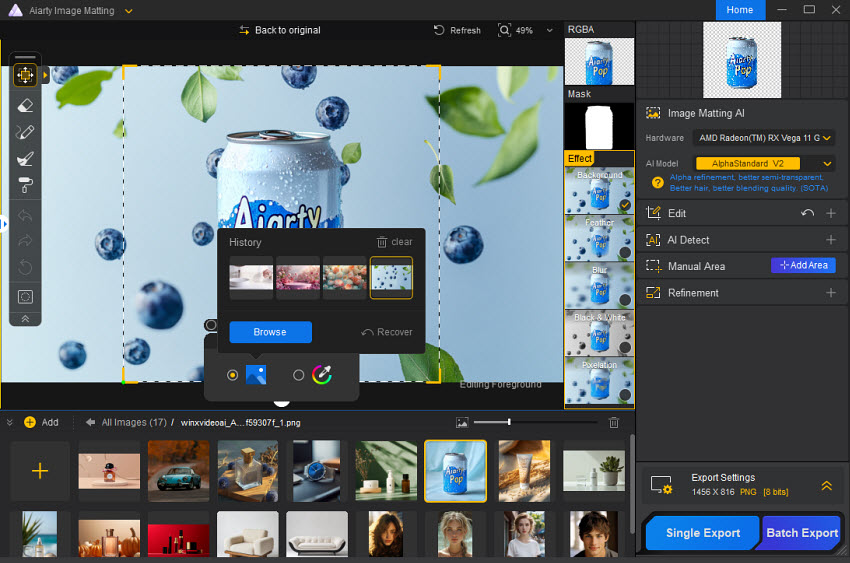
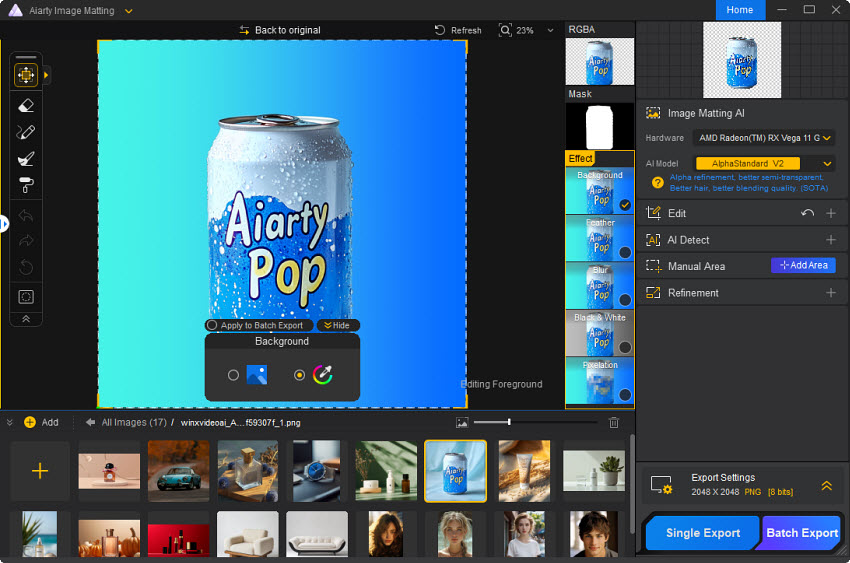
Or, you can add solid color or gradient effect as the background.
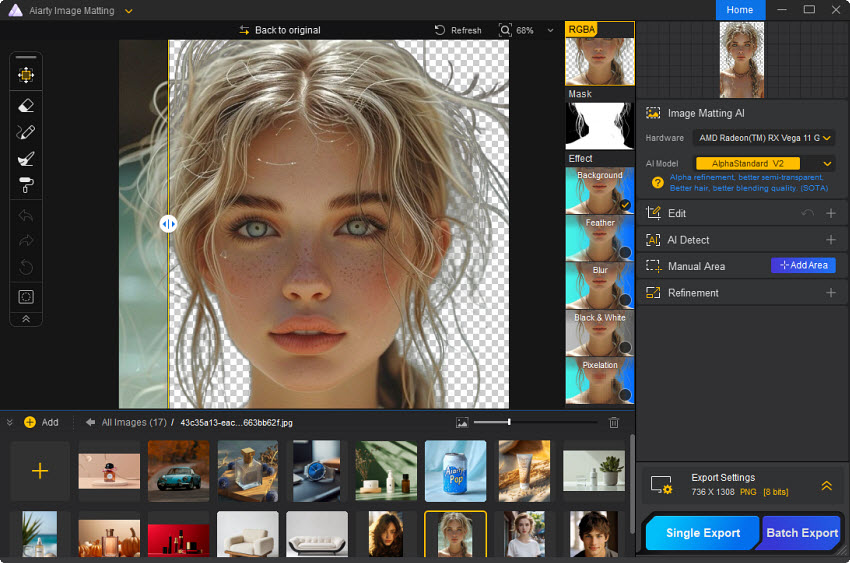
Step 6. Once you’re satisfied with the results, you can export your images individually or in bulk. Choose your desired output format and quality settings, then click the "Export" button. No matter you need to optimize a portrait photo for Instram, or product image for commerce sites, just follow the same way.
2. Enhance Image Quality to Showcase Product Details
High-quality product images can increase the likelihood of making a sale. Nielsen Norman Group found that the more professional and clear the images are, the more likely a customer is to feel confident in their purchase. Clear and appealing images directly correlate with higher sales conversions, especially when compared to competitors with poor visuals. If your photos are blurry, improperly lit, or low resolution, optimize pics for web before you upload them.
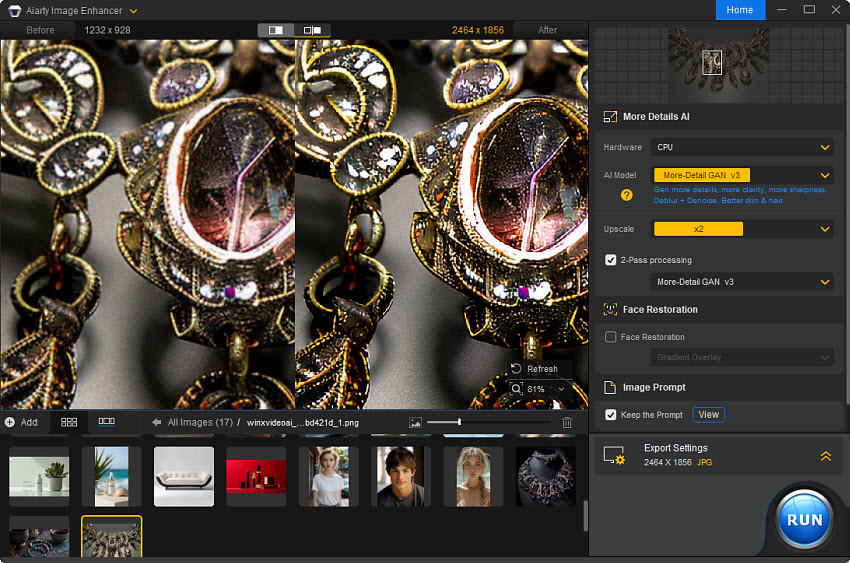
Aiarty Image Enhancer comes to help. It uses advanced AI to optimize photos to the best resolution for websites, from 1080P and 4K to up to 32K. It effectively fixes image artifacts such as blur, noise, and pixelation, ensuring your images are sharp, clear, and professional. Ideal for websites and e-commerce platforms, Aiarty enables users to zoom in and view detailed product features like texture, material, and design patterns, providing a seamless and high-quality browsing experience.
How to Optimize Photos Quality for Website
Step 1. Download and install the software on your computer. Run it and from the main interface, drag and drop the images directly into it. You can add as many photos as you need to optimize for the web in bulk.
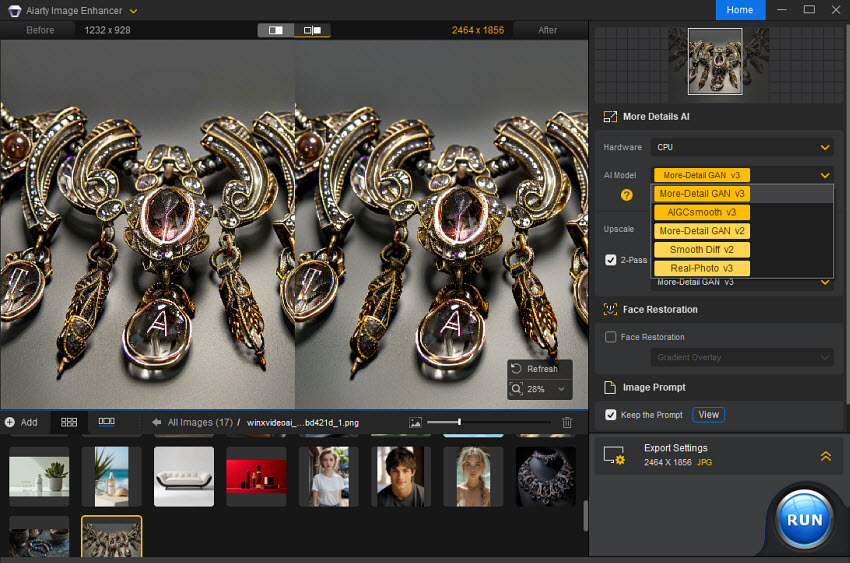
Step 2. Once the images are all imported, you need to adjust the settings. On the right-hand panel, there are three AI models, More-detail GAN, Smooth Diff, and Real-Photo, each excels in handling different types of photos, such fur, hair, cartoons, logos, realistic photos, etc. Choose an AI model based on the images that you want to optimize.
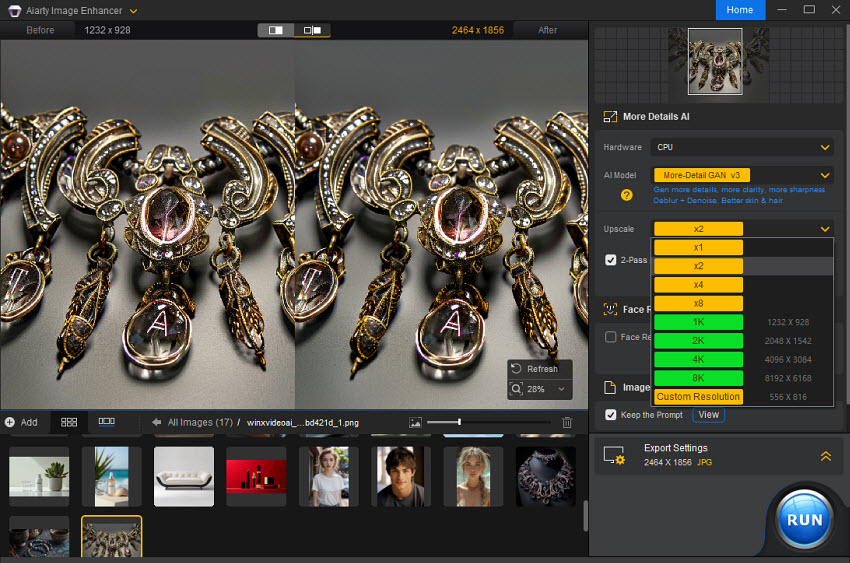
Step 3. Next, select a resolution to optimize your photos for websites, such as 2x, 4x, 8x to 1K, 2K, 4K, or 8K. You can also type the best image resolution for website.
Step 4. Expand the Export settings section. You can choose to save the optimized website images in JPG or PNG. Then click on the "Browse" button to choose a folder to save the images. Once ready, click "RUN" to start processing.
Explore more AI tools for eCommerce to optimize product photos, videos, marketing, and more >>
3. Optimize Image Size and Dimension for Web
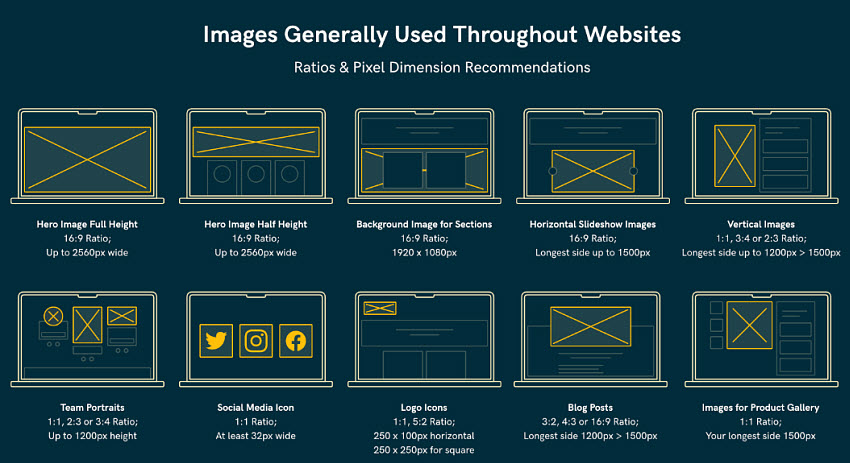
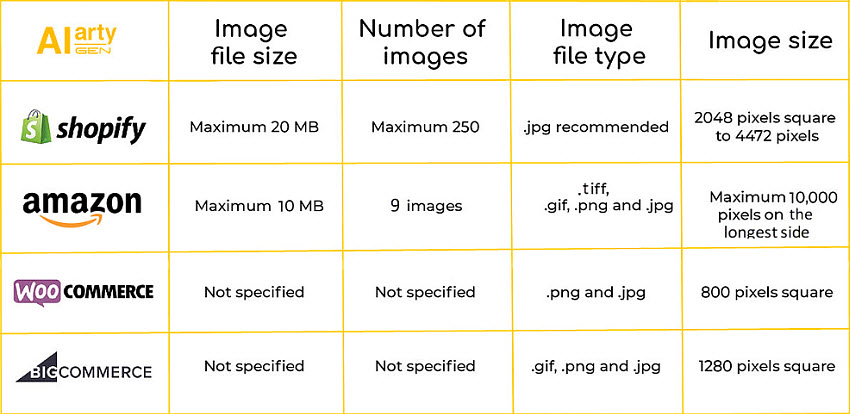
Another key step in website photos optimization is to make sure your images are in the best sizes and dimensions for the web. The optimal image size and dimension for different websites, such as Amazon, Etsy, Shopify, eBay, etc., depend on various factors, including the specific use case and the overall design of your website. However, here are some general guidelines to help you choose the right sizes for websites:
For example, below are the recommended best image sizes for websites. However, different sites and platforms have specific requirements, so it's always best to check their guidelines.
- Background images: Around 1920 x 1080 pixels.
- Hero images: Around 1280 x 720 pixels.
- Product images: Between 1024x1024 pixels and 2000 x 2000 pixels.
- Thumbnails: Generally 150 x 150 pixels to 300 x 300 pixels.
- Logo images: Around 100 x 400 pixels, with heights typically between 50 - 100 pixels.
Related: best Etsy listing image sizes
To optimize the website image dimensions and resolution to 300DPI or HD or higher pixels for large-format print or desktop publishing, you can use Aiarty Image Enhancer to adjust the resolution of the image for websites. If you also need to crop the image size and adjust the aspect ratio, you may need an image editor like Photoshop, Canva, and Pixlr.
4. Compress Photos for Websites to Load Faster
According to a study by Amazon, every 100ms delay in page load time can result in a 1% decrease in sales, and Shopify also found that slow images directly impact a website’s performance, leading to abandoned carts and lost revenue. Optimizing website images for faster loading is critical for success.
Large image files significantly impact website loading speed, particularly on slower connections or mobile devices. Several factors contribute to large image file sizes, including high resolution, unoptimized file formats, and excessive dimensions. Images captured with high-resolution cameras often have larger files than necessary for web use. Furthermore, uncompressed or improperly formatted images can significantly increase file size.
Therefore, it’s essential to optimize images for the websites by reducing their file size while preserving quality. Some common techniques include:
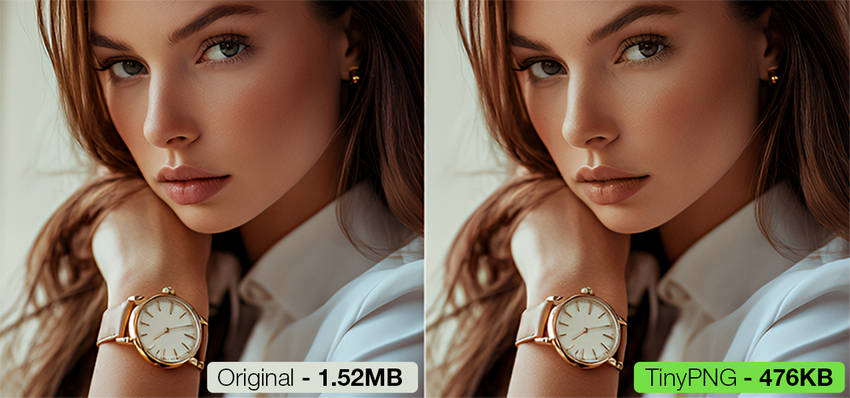
- Image Compression: Compressing website images reduces their file size by eliminating unnecessary data, either with lossless or lossy methods. Lossless compression retains all image details, while lossy compression may sacrifice some quality for a more significant reduction in size.
To compress photo size for websites, you can use tools like Photoshop, TinyPNG, JPEG optimizer, or other online website image file size compressors. - Choosing the Right File Format: Uncompressed or minimally compressed formats like TIFF or BMP result in significantly larger file sizes compared to compressed formats like JPEG. For example, a RAW file can be 2-6 times larger than a JPEG of the same resolution.
- Resizing Images: Resizing image dimensions to the best image size for website ensures that they’re not larger than necessary. For example, an image displayed at 800x600 pixels should not be uploaded as a 4000x3000 pixel file.
- Lazy Loading: This technique involves loading images only when they enter the user’s viewport, reducing initial page load time and improving performance, particularly on image-heavy websites.
- Image Caching: Storing images in the browser cache allows them to load faster for return visitors, improving overall user experience and reducing the load on your server.
5. Choose Appropriate File Formats for Optimal Performance
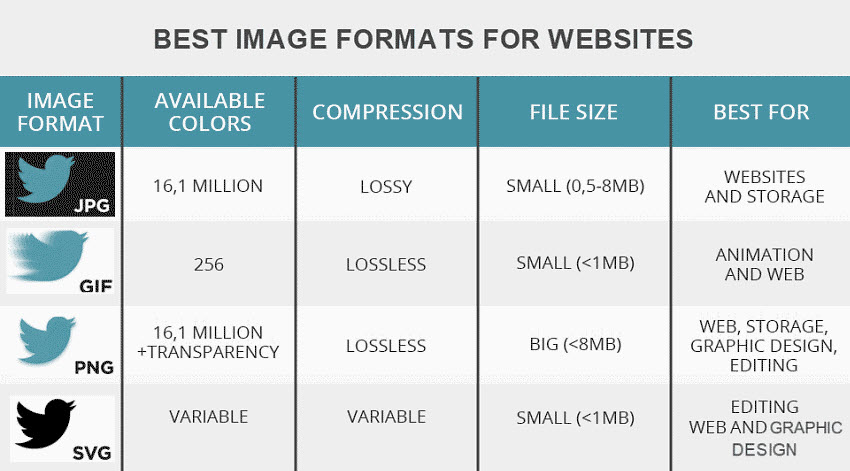
Different image formats are suited for different uses. The best image format for a website depends on several factors, including the type of image and the desired balance between quality and file size. You can optimize photos to a website format in advance:
- JPEG is widely used for photographs and images with complex color gradients. It offers efficient lossy compression, reducing file size while maintaining decent quality. JPEG is ideal for product photos or blog images but does not support transparency.
- PNG is a lossless format, preserving image quality and supporting transparency, making it perfect for logos, icons, and graphics with sharp edges. However, PNG files tend to be larger, which can impact loading times, so it’s best for smaller, detailed images rather than large photos.
- WebP is a modern format that offers both lossy and lossless compression, often resulting in smaller file sizes compared to JPEG and PNG while retaining high quality. It supports transparency and animation, making it versatile, but not all browsers support it yet.
- SVG is a vector-based format, ideal for logos, icons, and simple illustrations. It scales to any resolution without losing quality and has small file sizes. SVG is editable via CSS or JavaScript but is unsuitable for photographs or complex images.
- GIF is popular for simple animations and small graphics, supporting lossless compression but limited to 256 colors. While it’s widely used for web animations, its file size can become large for more complex animations, and it’s less efficient than WebP for modern uses.
Conclusion: Which is the Best Image Format for Websites?
- For photographs and detailed images: JPEG or WebP is typically the best choice. WebP offers better compression and quality if browser support is sufficient.
- For images requiring transparency: PNG or WebP (if supported).
- For simple graphics, icons, and logos: SVG is the best choice, providing scalability and very small file sizes.
- For animations: GIF is traditional, but WebP and AVIF are more efficient alternatives with better quality and smaller file sizes.
- For cutting-edge performance: AVIF is emerging as a strong contender due to its superior quality-to-size ratio, though its browser support is still catching up.
6. Optimize Photos for Websites with SEO Elements
Optimizing photos for websites with SEO elements is crucial for better search engine visibility, faster load times, and enhanced user experience. Here’s a streamlined approach:
1. Use Concise and Descriptive Image Names
Rename images from generic names (e.g., product_123.jpg) to descriptive, keyword-rich names that reflect customer search patterns, such as red_cotton_t-shirt_large.jpg. This helps search engines crawl your images more effectively and improves SEO.
2. Optimize Alt Text
In addition to opitmizing images for web, also add Alt text to the images. Be descriptive and use relevant keywords, but avoid keyword stuffing. For example, instead of "alt='Image of a red shirt,'" use "alt='Red cotton t-shirt for men, size large.'" Regularly check that alt text remains relevant.
3. Use Image Sitemaps
For dynamic content like JavaScript galleries or pop-up images, include them in an image sitemap. This ensures that search engines can find and index images that aren't embedded in the page HTML.
4. Minimize Server Storage
Large image files can slow down your website. Compress images without compromising quality using tools like TinyPNG and also store less images on your server. This ensures faster load times and better SEO rankings.
5. Use Responsive Design
Responsive design in website photos optimization is crucial for ensuring that images look good on any device, from smartphones to desktops. When implementing responsive design, it's essential to use images that adapt to different screen sizes and resolutions, without compromising loading speed or image quality.

Final Thought
Optimizing your website images is an essential step in creating a successful online presence. By following this workflow, you can ensure your images are not only visually appealing but also optimized for search engines and user experience. Start implementing these techniques today and see the positive impact on your website's performance.
 FAQ about Photo Optimization for Web
To optimize image size for a website, you can consider to choose the right format, such as JPEG for smaller file size. Next, optimize the images to the exact size for your website. Then use tools like TinyPNG, Squoosh, or ImageOptim to compress photos/pictures for websites.
To optimize website images for the best quality, start with high-quality images if possible. If the source images are not in the best quality, you can upscale and enhance the image quality using AI image enhancers like Aiarty Image Enhancer. They can enhance images from low to higher quality with details reserved. Also maintain a consistent style throughout your images. Whether it's color tones, backgrounds, or angles, consistency helps create a cohesive look across your website.
Smaller files = faster loading times. To optimize image size to improve website speed and user experience, you need to avoid large file size. To achieve that, choose the format that best suits the image type, compress photos for websites, and implement lazy loading to improve initial page load speed by delaying the loading of images.
Here’s a breakdown of recommended optimal image settings for a website:
- Resolution: For web use, 72-150 DPI is sufficient; product images should be 1500-2500px wide.
- File Format: Use JPEG for photos, PNG for transparency or sharp edges, WebP for better compression, and SVG for scalable graphics.
- Compression: Lossy compression (JPEG, WebP) reduces size by discarding data; lossless (PNG, SVG) maintains quality with slight size reduction. Use tools like TinyPNG and Squoosh.
- Dimensions: Resize images to fit your site’s display size (e.g., 1200px max width).
- Aspect Ratio: Maintain consistent width-to-height ratios to avoid layout shifts.
- Color Profile: Save images in sRGB color space for consistent display across devices.
- Others: Include descriptive alt text, file names, use lazy loading, and responsive images for performance and SEO.

