How to Create Transparent Background Images with Midjourney
Updated on
Midjourney is a powerful AI tool that allows you to generate stunning images simply by describing them in text prompts. While the results can be incredibly realistic and detailed, one limitation is that Midjourney does not natively support creating images with transparent backgrounds.
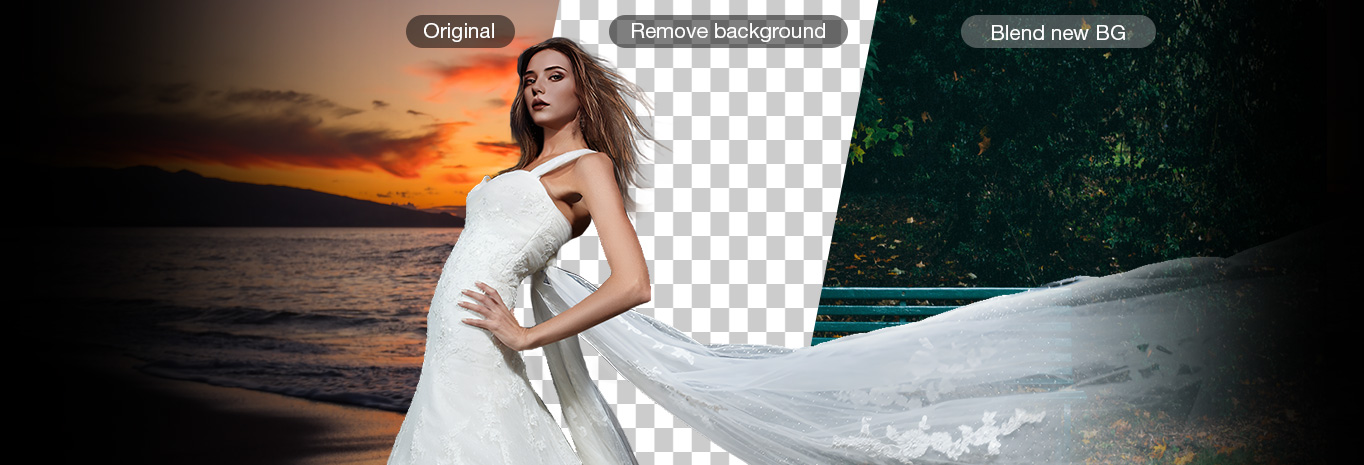
Having images with transparent backgrounds can be extremely useful for a variety of purposes - from graphic design and photo editing to creating custom stickers, logos, and overlays. A transparent background allows you to seamlessly composite your Midjourney image over any other background or layer it with other visuals.
In this Midjourney guide, we'll walk through a simple multi-step process to leverage Midjourney's impressive image generation capabilities while still obtaining PNG images with fully transparent backgrounds. This allows you to create unique, customized visuals that can easily integrate into your creative projects and workflows.
The process simply include using specific prompt techniques to set up your Midjourney image for easy background removal first, and then using some tool to automatically strip away the background. You'll be left with a high-quality transparent PNG render of your Midjourney creation, ready to be utilized however you need.
Whether you're a graphic designer, digital artist, content creator or just looking to expand your image editing skills, being able to generate AI images with transparent backgrounds can open up new creative possibilities. Let's get started!
Step 1. Create An Image with Simple and Solid Color Background in Midjourney
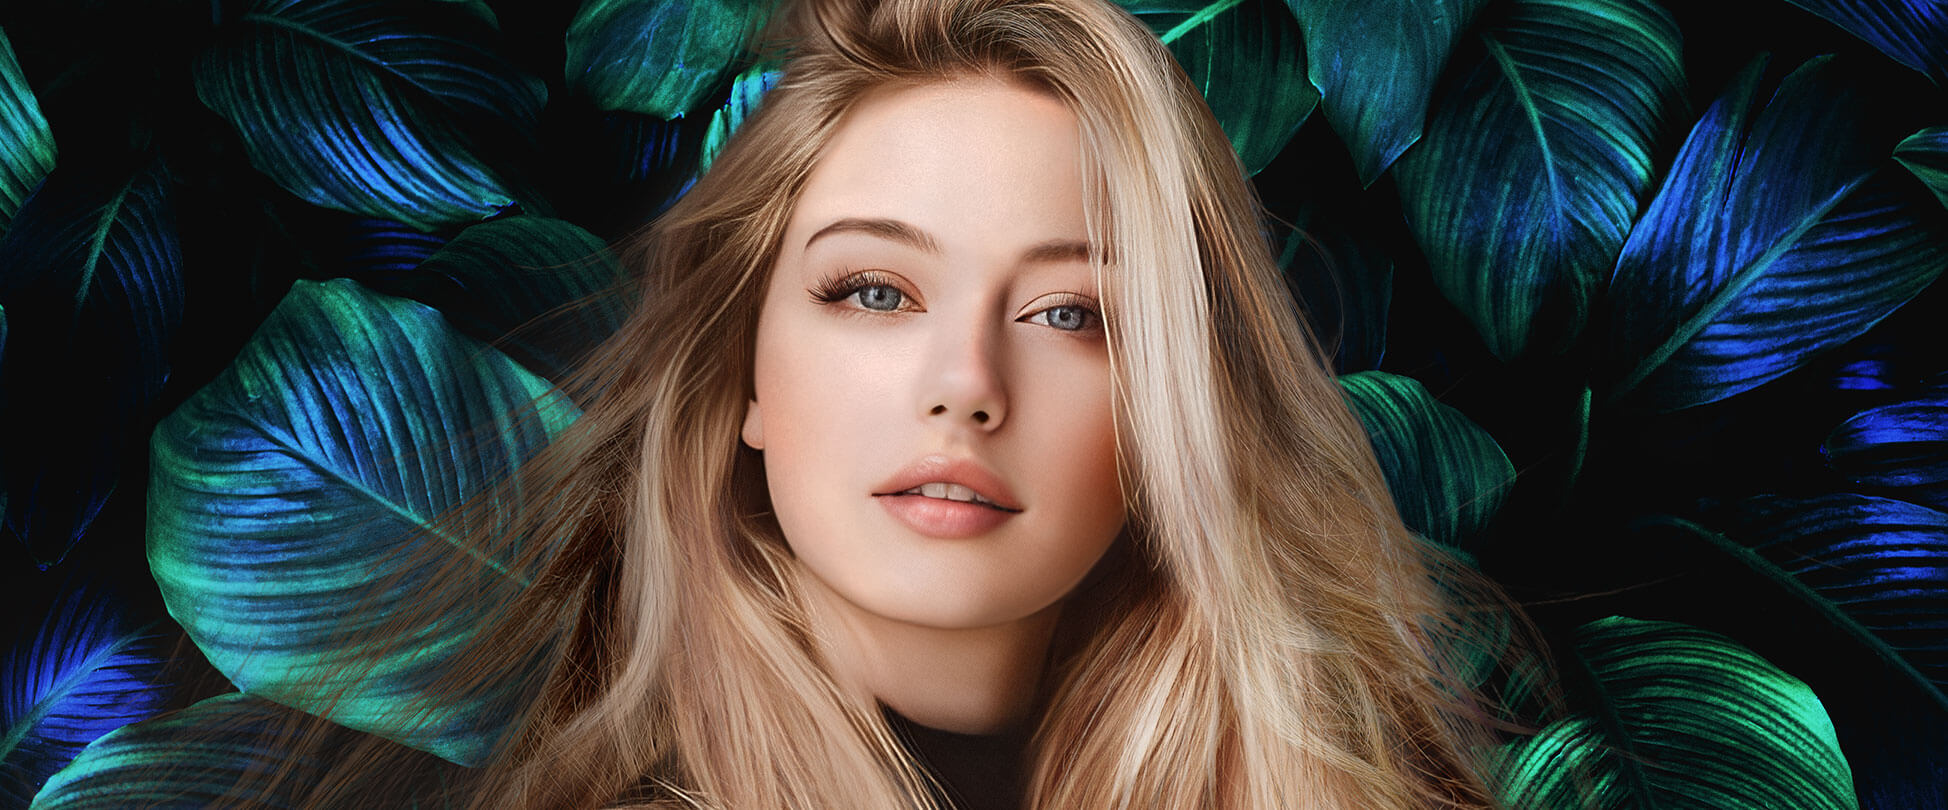
The first step is to create your desired image on Midjourney, but with a simple, solid color background, which we highly recommend. With simple and solid color background, it will be so easy to remove later and with great result. This can be done by including specific keywords in your text prompt.
When using the Midjourney bot, you'll want to append phrases like:
- plain background
- white background
- solid [color] background
For example, a prompt like:
A realistic Tyrannosaurus Rex roaring, plain white background
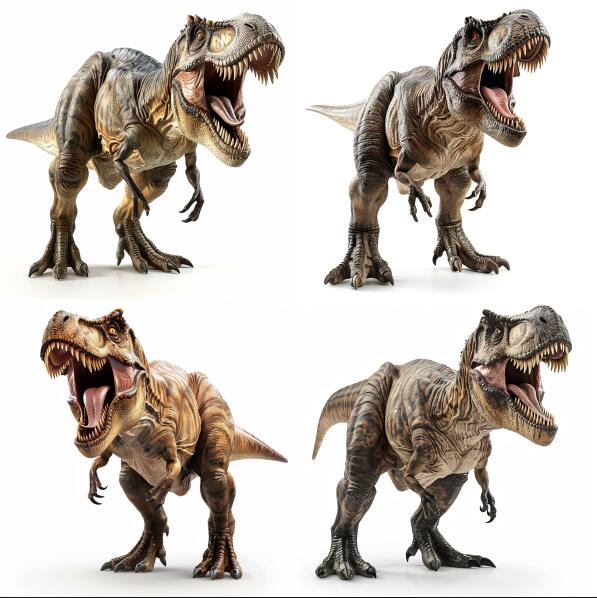
This will instruct Midjourney to generate the T-Rex image, but with a clean white background behind it instead of a more complex scene.
You can also use negative prompts to prevent certain background elements from appearing. Adding --no shadows or --no reflections can help ensure smoother, cleaner edges around your subject.
Additionally, choosing art styles that naturally lend themselves to flat backgrounds with defined edges can make the next background removal step easier. Some styles to consider are:
- Vector art
- Flat shaded
- Minimal illustration
For example:
A vector illustration of a butterfly, solid blue background, --no shadows
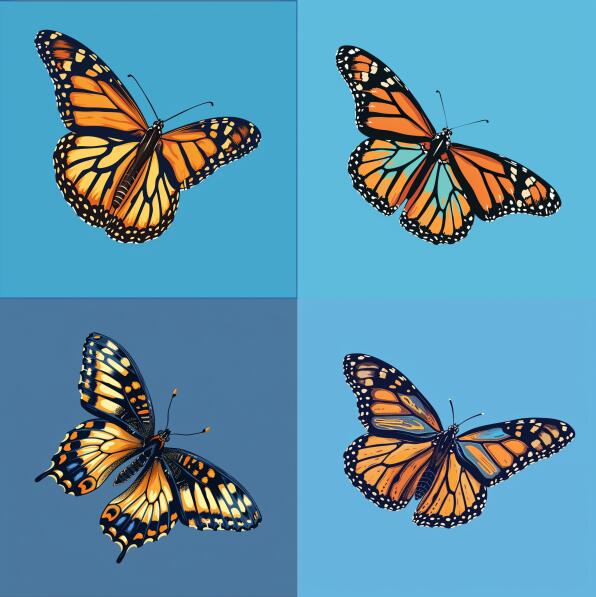
This prompt is likely to render a stylized butterfly image with sharp lines perfectly separated from the solid yellow backdrop.
Take some time to experiment with different prompts and styles to get an image you're happy with. The cleaner and simpler the background, the better for transitioning to the background removal process.
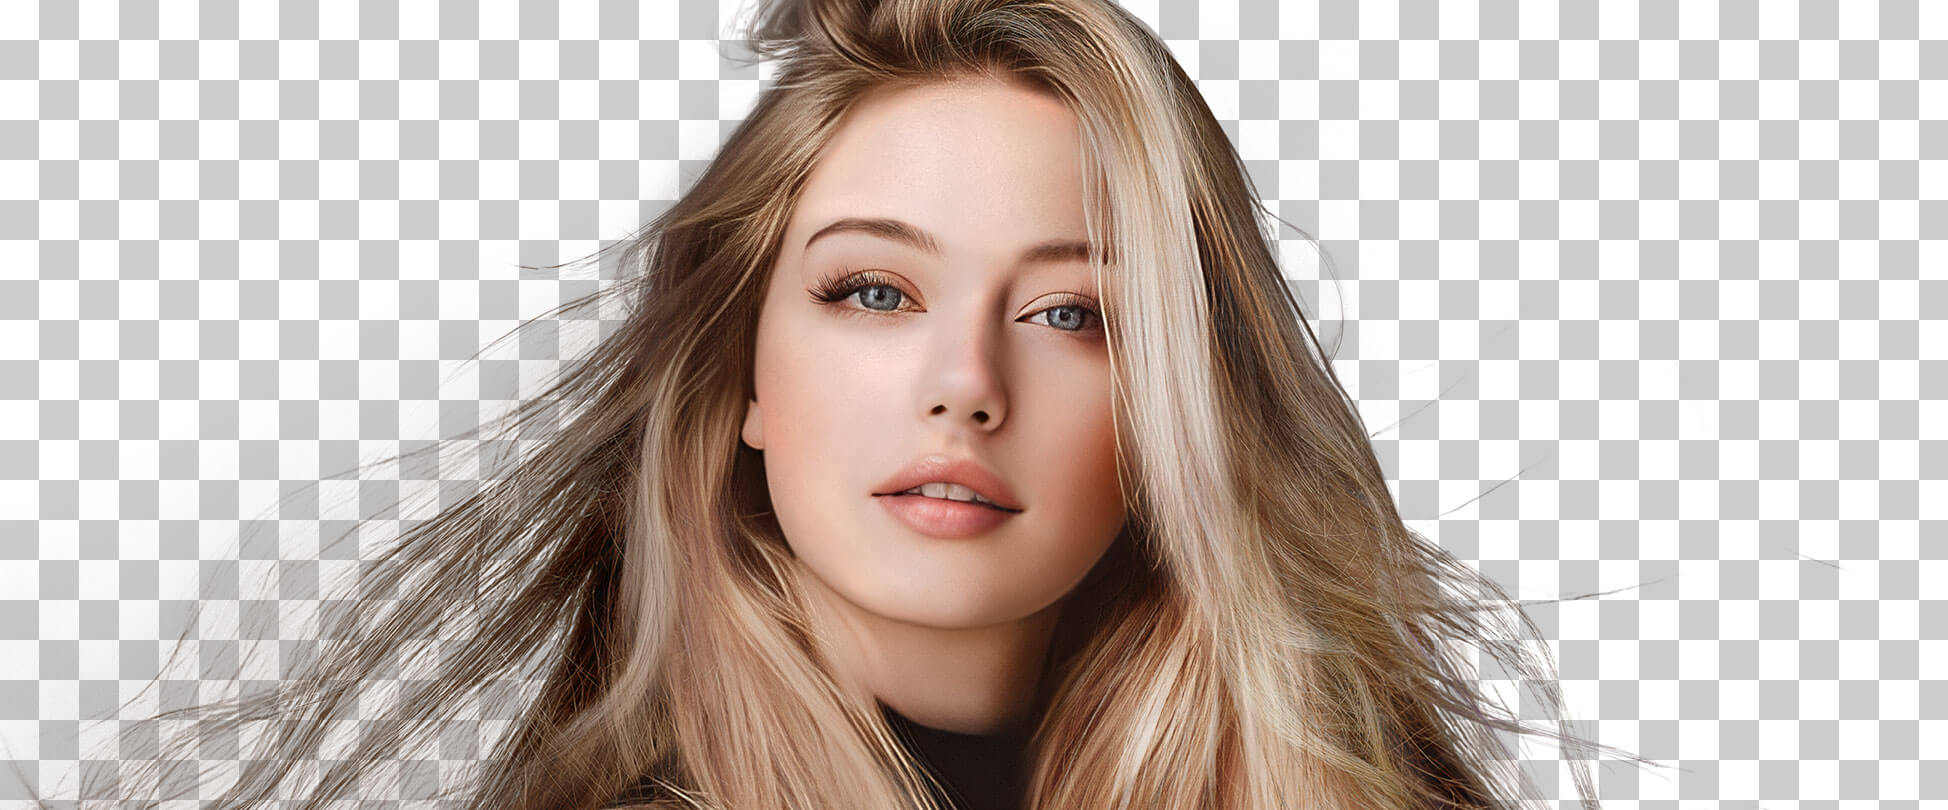
Once you have your Midjourney image ready, it's time to move on to automatically stripping away that background color to make it transparent.
Note: Before you decide to change the image background into transparent, do not forget to download it from your Archive folder on the Midjourney website first.
Step 2. Turn the Background into Transparent
In this step, we will use Aiarty Image Matting to remove the Midjourney generated image's background. Why?
Aiarty Image Matting uses advanced AI models to accurately remove complex backgrounds, preserving fine details like hair, fur, and lace. This ensures that subjects are naturally isolated from their backgrounds, making it ideal for a variety of applications.
One of the key benefits of Aiarty Image Matting is that users can refine the Alpha value for precise control over edge transparency, ensuring seamless integration with new backgrounds. This level of control is crucial for achieving natural-looking results.
Aiarty also supports batch processing of up to 3,000 images at once, significantly improving productivity for large projects. This feature makes it particularly useful for e-commerce businesses and photographers who need to process multiple images quickly.
Overall, Aiarty simplifies the process of creating images with transparent backgrounds, ensuring professional results that blend naturally with any background while maintaining high-quality details and transparency. So why not download it now?
And, here is how to do it.
Step 1. Drag and drop your images into the working panel.
Step 2. Hit the Start button in Image Matting to remove the image background.
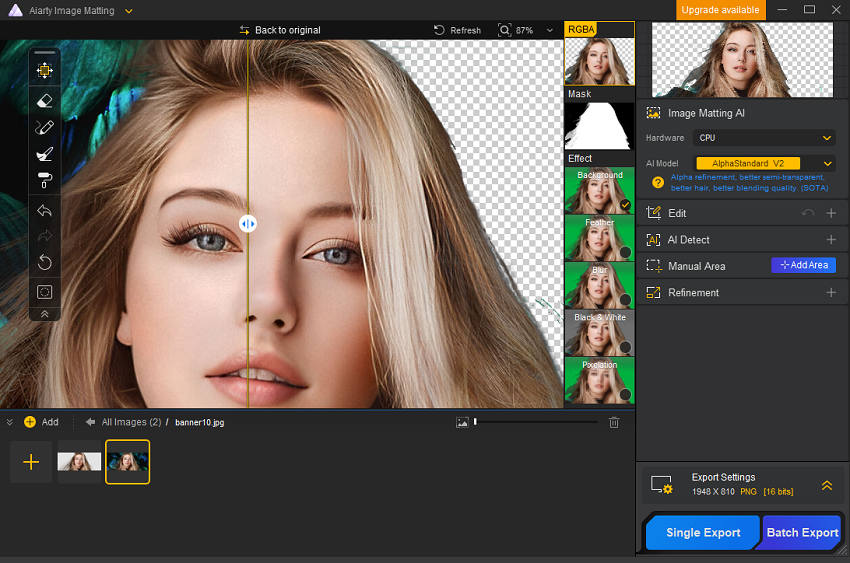
Aiarty's AI models will automatically matte the image, providing a clean, transparent background with natural edges.
Shortcut:
- You can use mouse scroll to zoom in on a specific part.
- Press Space and drag your mouse to move the image.
- Hold down Control or command plus mouse scroll to adjust the brush size.
Step 3. Export the image with a transparent background.
Aiarty also supports batch processing, so you can export up to 3000 images at once for efficiency.
Watch video tutorial to remove background using Aiarty Image Matting:
Step 3: Using the Transparent Image
Now that you have a high-quality PNG image from Midjourney with a fully transparent background, the creative possibilities are endless! Transparent images can be incredibly valuable assets for all kinds of design projects and workflows.
Some common use cases for transparent PNGs include:
Graphic Design: Overlay your Midjourney creation over other graphics, backgrounds, or product mockups. This allows you to easily integrate AI-generated elements into branding materials, social media graphics, presentations, and more.
Photo Editing: Composite your transparent Midjourney image on top of photographs to create surreal or conceptual imagery. You can blend AI-generated subjects seamlessly into real-world scenes.
Web & App Design: Use transparent PNGs as icons, illustrations, stickers, and other assets for websites, mobile apps, and digital products. They can add unique flair compared to generic stock imagery.
Video Editing & Motion Graphics: Animate your Midjourney image over video footage as an overlay, or use it as a motion graphics element with different background layers. Perfect for intros, titles, and visual effects.
Print & Merchandise: Print transparent images on products like t-shirts, mugs, bags, and more. Or use them as stickers, decals, or vinyl prints applied to any surface.
The key is that with a transparent background, your Midjourney image is a versatile layer that can be incorporated into any other visual project or composition.
To use your transparent PNG, simply open it in your preferred graphic design software like Photoshop, Illustrator, After Effects, etc. You can then place it on top of any background layer or footage. Most image and video editing apps have blending modes and tools to customize the transparency and integration further.
Summary
By following the steps outlined in this guide, you now have the ability to create stunning, high-quality images with fully transparent backgrounds using the powerful AI image generator Midjourney.
Having this capability opens up a world of new creative possibilities. You can now seamlessly integrate your unique AI-generated visuals into any other image, graphic, or video simply by layering the transparent PNG on top.
No longer are you limited to the backgrounds and scenes generated by Midjourney. With a transparent background, your imagination is the only limit for how these AI artworks can be composed and applied.
So have fun experimenting with different Midjourney prompts and styles, and enjoy the freedom of being able to extract those creations as transparent elements ready to elevate your designs and projects.