Midjourney Remix Mode User Guide
Updated on
Midjourney Remix mode is a powerful tool to modify and refine the generated images based on the initial prompts. Once the Remix mode is activated, Midjourney will let you edit and reimagine the first creations while preserving the overall structure and arrangement of the original.
To fully understand Midjourney Remix mode and get the most out of it, here is an overall guide.
What is Midjourney Remix Mode?
When the Remix mode is turned on, Midjourney will utilize the original structure and layout of the initial image as a foundation for creating new variations, guaranteeing that the resulting images bear a resemblance to the original with slight alterations. Additionally, the Remix mode grants users greater authority over the variations by enabling them to input precise instructions and preferences, resulting in a more deliberate and purposeful collection of image variations.
- Modify the original image: You can tweak the prompt text, image reference, model version, image weights, and parameters like aspect ratio to modify the image.
- Refine details: You can change the settings, evolve an object, or achieve a tricky composition in an image.
- Make precise edits: Combine Remix mode with the "Vary Region" feature, and you can select a specific part of an image and write a new prompt to modify just the area.
How to Use Midjourney Remix Mode?
Remix mode in Midjourney V6/7 has greatly improved in comparison to V5, so here we will use Midjourney V6 to show you the process of using Remix mode to unleash your creativity.
In Midjourney V7, Remix mode allows you to modify a prompt and its parameters after generating an image, while still maintaining the overall composition of the original image.
Variations + Remix Mode
Step 1. Turn on Midjourney Remix mode by using one of the following ways.
- Use the /prefer remix command to toggle Remix mode.
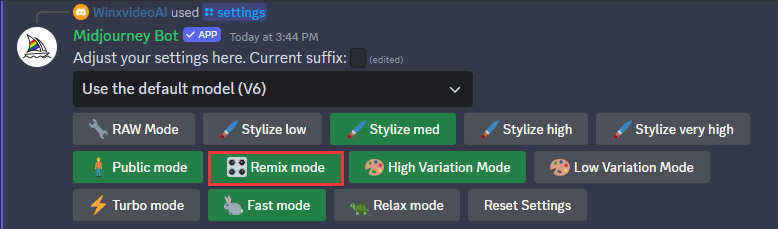
- Type /settings and activate the "Remix Mode" button.
Click on "Remix mode", and then it will appear in green.
Step 2. Generate an image with Midjourney. For example, use preferred Midjourney prompts like:
/imagine a model wearing a necklace strolling down a street in New York City
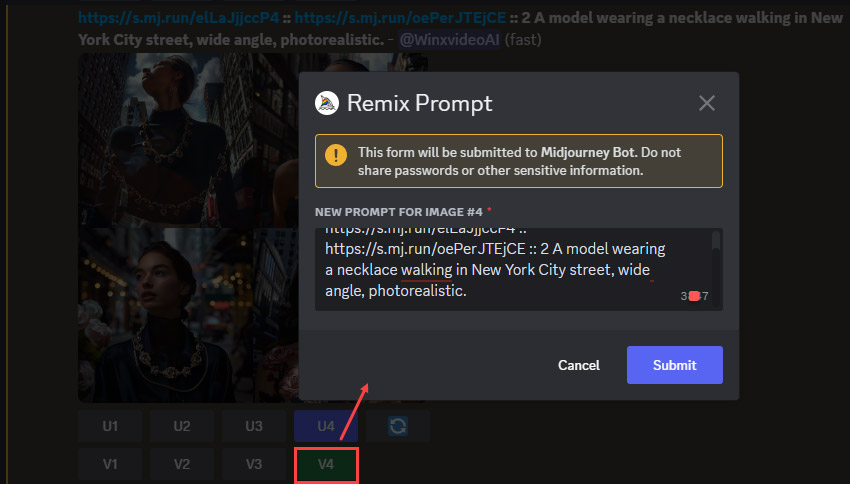
Step 3. Once the image is generated, click the "V" button (V1, V2, V3, V4) under image grids.
- V1, V2, V3, and V4 stands for creating variations for image 1, image 2, image 3, and image 4 respectively, from left to right, top to bottom.
- When Remix mode is enabled, V buttons turn green instead of blue when clicked.
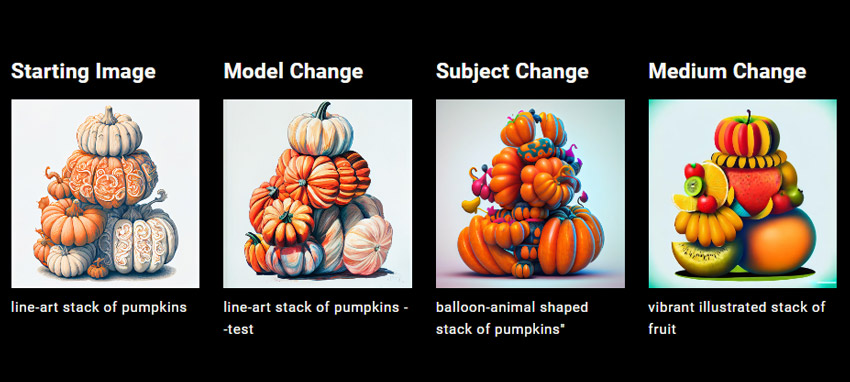
Step 4. When the Remix prompt window launches, you can change your prompt, such as changing model, subject, or medium, or even remix with an image URL. Then, the Midjourney Bot will generate an image by incorporating elements from the original image into the new prompt.
For desired result, you can modify the prompt many times. The concept involves commencing with the reference shape and gradually approximating its characteristics to achieve the desired outcome. By separating the prompts parts into multiple steps, the Remix mode enables us to construct highly intricate prompts to generate the final image. Rather than generating ABCD all at once, it is suggested to generate A first, then incorporate B, followed by C, and finally conclude with D.
Tips:
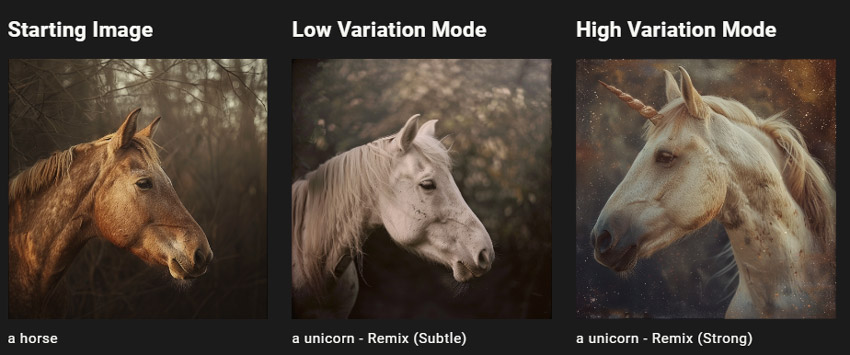
1. When using V buttons, High Variation Mode is the default.
2. You can change the variation mode from High to Low by using /settings, or using /prefer variability command to toggle between High and Low Variation Modes.
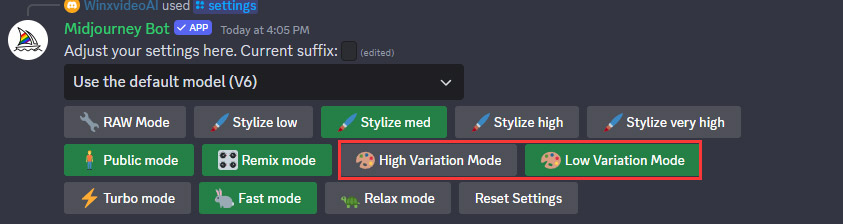
3. High Variation Mode means stronger changers. Low Variation Mode means subtler changes.
FYI:
If you want to change parameters when utilizing Variations + Remix, only the parameters that typically impact variations will be effective, including:
- --as
- --no
- --stop
- --tile
- --video
Vary Region + Remix Mode
You can choose a specific image to modify from the generated image grids. After clicking the U buttons (U1, U2, U3, U4) to upscale a Midjourney image, you can select and regenerate specific parts of the upscaled image with the help of Vary Region.
- The Vary (Region) button appears after a Midjourney image has been upscaled.
- Vary (Region) is compatible with Midjourney Model Version V6, V5, niji 5, and niji 6.
Step 1. Use the /settings command and click Remix mode to turn it on.
Step 2. Generate an image using the /imagine command.
Step 3. Click one of the U buttons (U1, U2, U3, U4) to upscale your selected image.
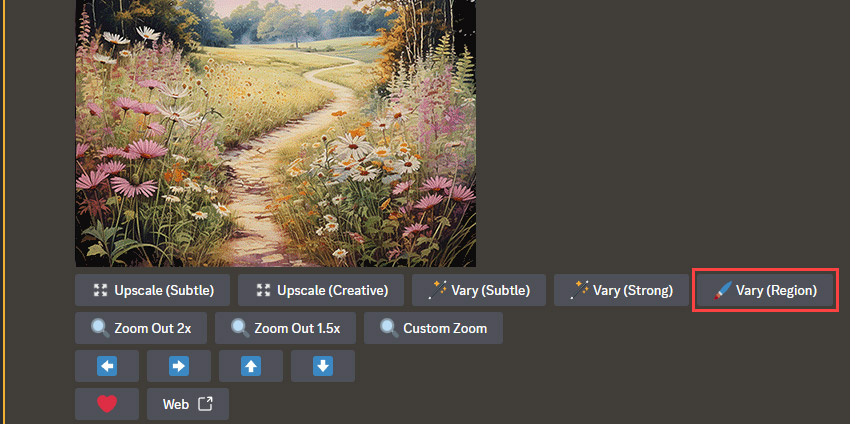
Step 4. Once upscaled, the Vary (Region) button will appear. Click on it to open the editing interface.
- Tip: You can also see Vary (Strong) and Vary (Subtle) buttons under the image. Their functions equal to High Variation Mode and Low Variation Mode respectively.
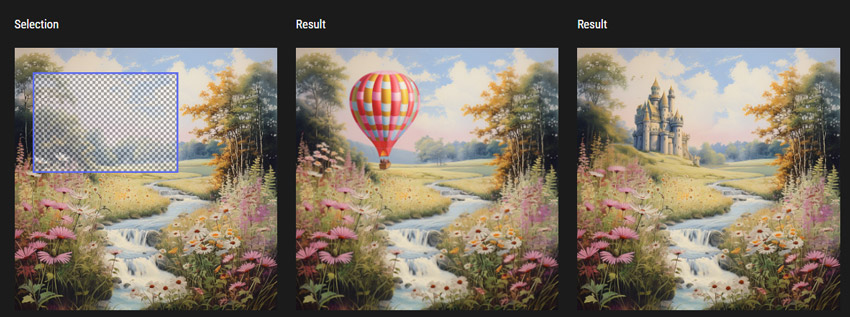
Step 5. Select areas you want to regenerate after choosing the freehand or rectangular selection tools in the lower left of the Editor.
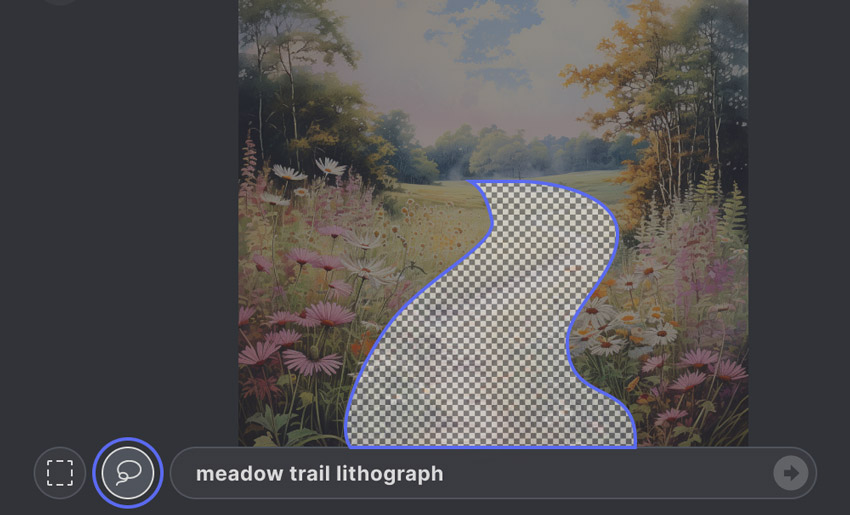
- Tip: The outcome is influenced by the size of your selection. Bigger selections offer the Midjourney Bot a greater amount of contextual information, enhancing the scaling and context of new elements. However, choosing excessively may result in the newly generated elements blending in or replacing sections of the original image you intended to keep intact.
Step 6. After that, input the new prompt you need to reimagine in the selected areas. Then, click the Submit button and close the Vary Region editor.
- Shorter focused prompts are more effective, and the prompts should not be conversational.
- You can use the editor button multiple times to modify different selections and prompts.
Step 7. View the results.
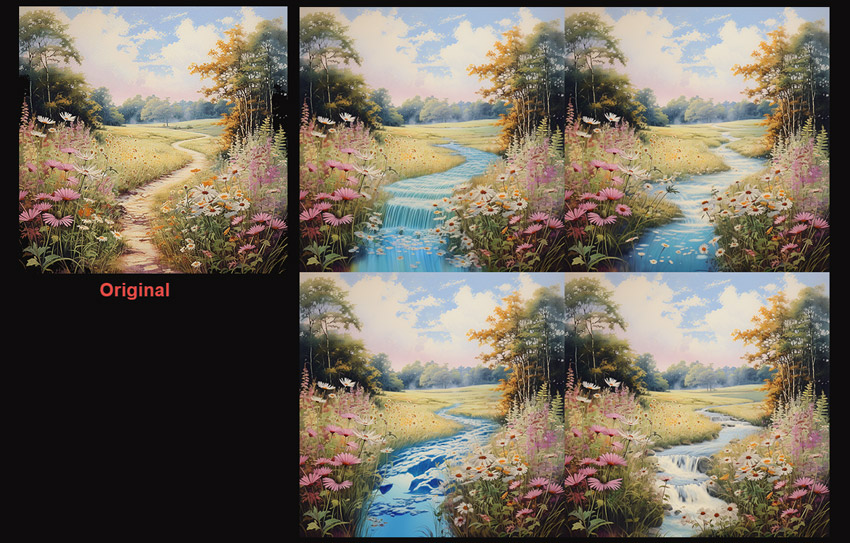
Step 8. Select a different area to modify by just repeating the above steps.
Tip: To change many parts of an image to get desired effects, you are suggested to work on one part at a time.
FYI:
When combining Vary (Region) + Remix, you can use the following parameters to modify your images.
- --chaos
- --fast
- --iw
- --no
- --stylize
- --relax
- --style
- --version
- --video
- --weird
Over to you…
Once the Remix mode in Midjourney is enabled, you will be able to modify your prompt before generating new images whenever you utilize functions such as "Variations" and "Vary Region". This will allow you to adopt an iterative approach and attain the precise outcomes you desire.
 FAQs about Midjourney Remix Mode
Midjourney Remix mode is a tool allowing users to modify and refine the generated images based on prompts by editing the prompts, adjusting parameters, selecting areas to modify, and so on.
After turning on Remix mode in Midjourney, you can click on the V buttons (V1, V2, V3, V4) to make variations of an image after it is generated.
Type /settings and turn off the Remix mode button. When turned off, the button will turn from green to grey.
You can use Variations and Vary (Region) to tweak the Midjourney results. Variations will modify your image automatically based on the new prompts. Vary (Region) lets you choose specific parts of an image to modify.
The Vary (Region) button will appear after an image is upscaled. After generating images with initial prompts, you should first click on the U buttons (U1, U2, U3, U4) to upscale your image, and then you can see the Vary (Region) button.
You May Also Like
Abby Poole is a seasoned AI enthusiast, with years of experience in the generative AI field. She has become a proficient user of AI tools like Midjourney. Abby’s expertise in crafting intricate prompts has led to the creation of countless stunning visuals. Her in-depth knowledge of AI and her passion for sharing it make her a valuable asset to the Aiarty team.