How to Zoom in and Pan Images in Midjourney? [Midjourney AI Tutorial]
Updated on
"Zoom in" is a phrasal verb that means to adjust the lens of a camera to make the image appear larger or closer. It can also mean to concentrate on a small detail or point. If you're meant to focus on the target object of an image and enlarge it, Midjourney actually doesn't have such feature. Well, providing you mean enlarging the whole image, the Upscale feature in Midjourney can be your lifesaver.
One feature to be supplemented is Midjourney Pan function, which allows you to expand the canvas of an image in a chosen direction (left, right, up or down) without changing the content of the original image. In some degree, it also refers to zooming in images.
This post here will show you how to zoom in and pan images in AI Midjourney. Additionally, it covers the real "zoom in" guide for you to magnify your target object of a picture.
Part 1. How to Zoom in Images in AI Midjourney?
Step 1. Log into your Midjourney account via Discord community.
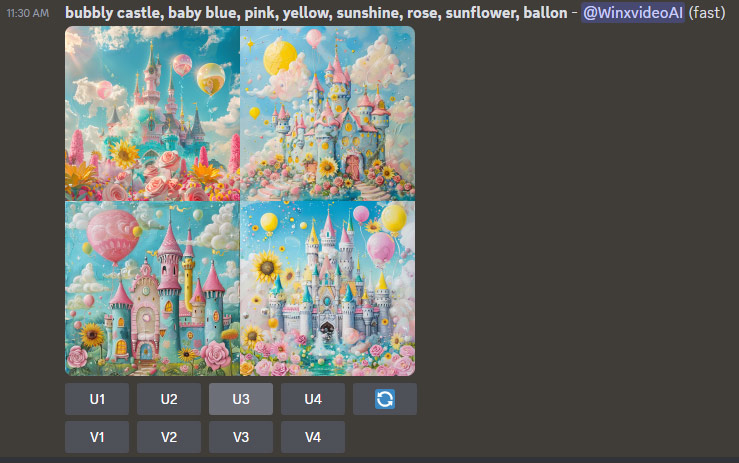
Step 2. Create an image using the /imagine command in AI Midjourney. Prompt like: /imagine prompt "bubbly castle, baby blue, pink, yellow, sunshine, rose, sunflower, ballon".
Step 3. Choose one from the generated 4 image options. Use a U button to separate your selected image from the grid. Here we pick up the U3 one.
Step 4. Click on the Upscale (Subtle) or Upscale (Creative) button to upscale and zoom in your image. It will increase your image resolution from 1024 x 1024 pixels to 2048 x 2048 pixels.
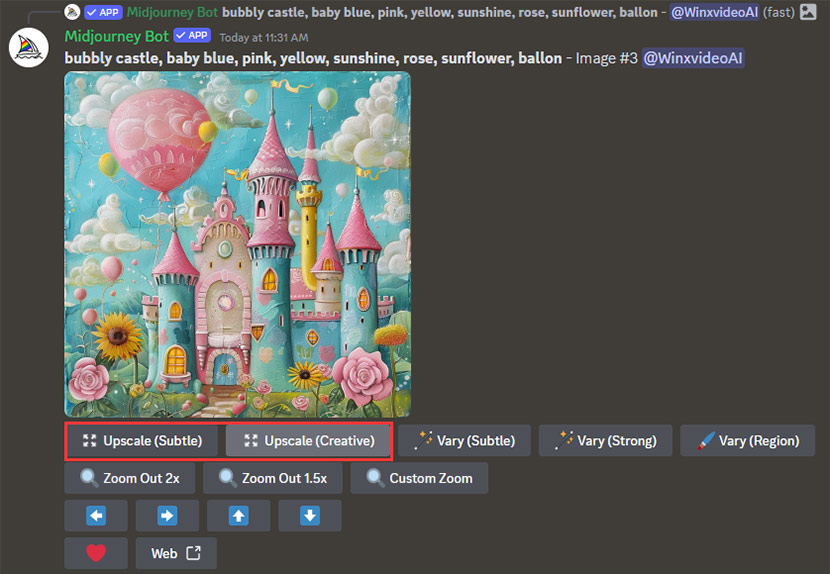
Midjourney offers two upscaling options to double your image's size.
- Upscale (Subtle): This option prioritizes maintaining the original details and style, giving you a clean, high-resolution version of your image.
- Upscale (Creative): In addition to doubling the size, this option injects new details, potentially adding a fresh twist to your image.
Both of them are worth a try. You can use them to generate AI images and check if there is any difference. Both upscalers upscale Midjourney by 2x. If you want 4x upscaling, learn how to upscale Midjourney images by 4x here.
Upscale comparison among original image, upscale subtle and upscale creative.
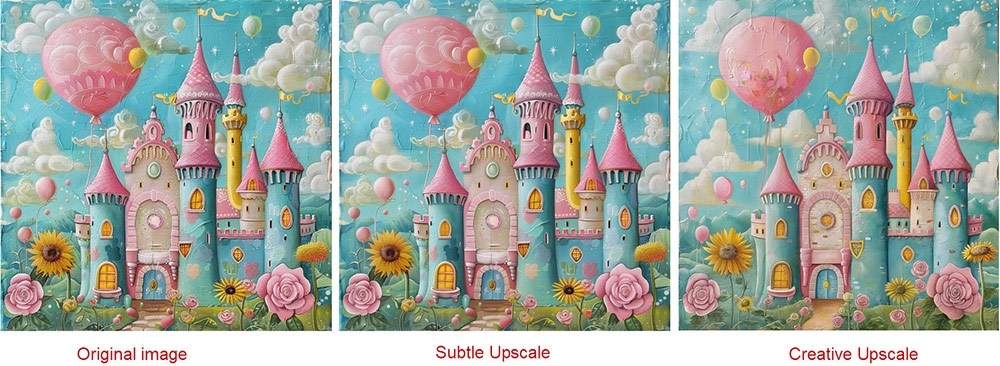
The above panoramic pictures couldn't clearly show the difference at the first glance. When you focus on some details of the image, you can find the distinct difference especially between subtle upscale and creative upscale (shown in the below comparison picture).
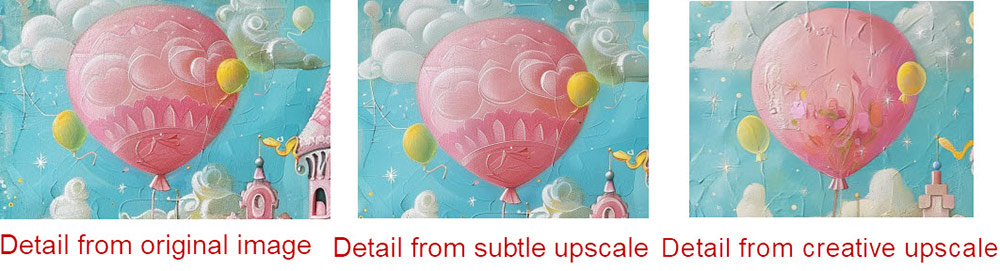
After you upscale the image from 1024p to 2048p in Midjourney, the output image will become blurry or even pixelated after zooming in. In such case, you need a more professional AI-powered image upscaler & enhancer like Aiarty Image Enhancer to AI improve your Midjourney image quality via its auto enhancing process - denoise + deblur + generate more details + upscale. Thus, you can upscale your MJ image 8X times, up to 32K and meanwhile keep Hollywood-level high quality!
If the "zoom in" you want is to expand the canvas of your image to your desired direction (up, down, left, right), the "Pan" feature in Midjourney cuts the buck. Check the detailed guide to pan your image in AI Midjourney below if you have no acquaintance with this function.
Part 2. How to Pan Images in Midjourney?
Step 1. The Pan buttons ⬅️ ➡️ ⬆️ ⬇️ will show up only after you upscale an image.
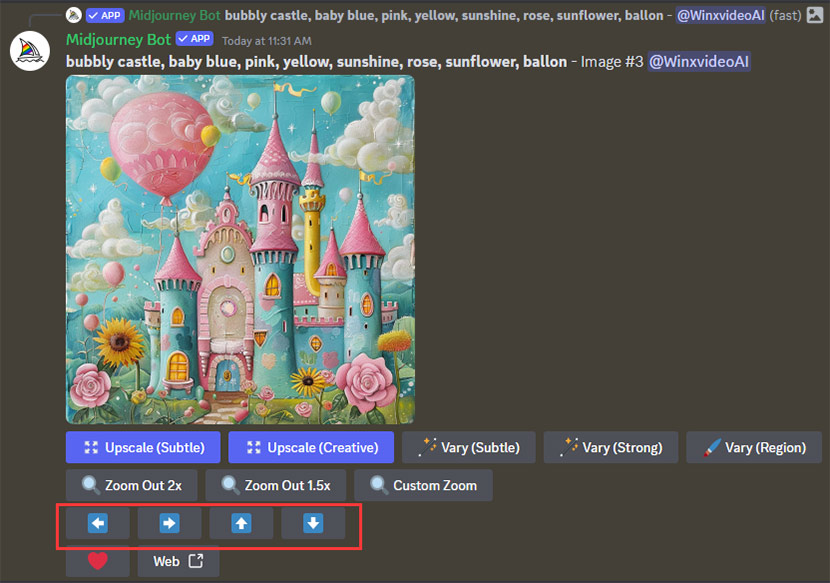
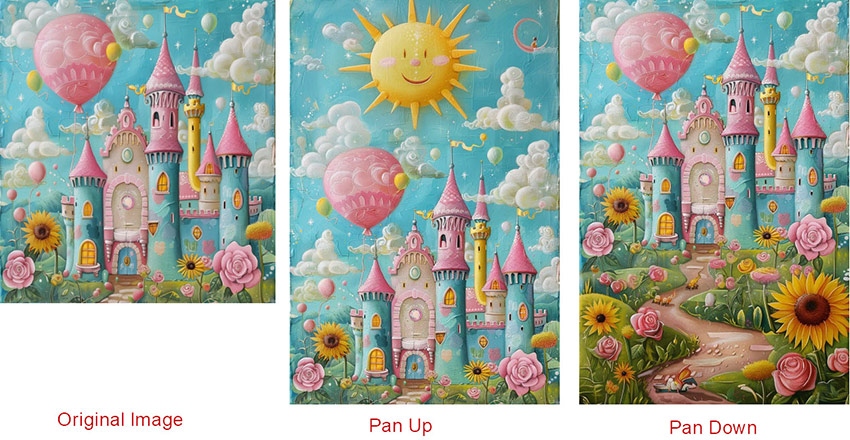
Step 2. Select the direction you want and tap the direction icon.
Once you pan an image, you can only pan it again in the same direction (either horizontally or vertically). You can keep panning in that direction as many times as you want. However, after multiple pans, the image might become too large to send on Discord. If this occurs, you'll receive a link to access the image instead.
Part 3. How to Really Zoom in Image to Highlight Object?
Midjourney Upscale and Pan features, as we mentioned before, don't zoom in your images, strictly speaking. The zooming in, in most cases, refers to highlighting the target object of an image, not to increase the resolution of the whole image.
To zoom in your target object of an image, you need to resort to the professional image enhancer and processing toolkit like Aiarty Image Enhancer, which helps you focus on your target object like face, flower, eyes, product logo, etc. and then AI upscale your object to 2K, 4K, 8K, 16K, or even 32K resolution without losing quality. Its advanced More-detail GAN model, Smooth and Real-Photo models are well-designed to fix noisy, blurry, grainy and pixelated Midjourney images (& any other types of photos), and to generate more details for your images to deliver more clarity and sharpness.
Step 1. Upload your Midjourney generated AI arts. Tap the "Add" icon located at the bottom left corner of the interface to import your AI-generated text-to-image picture. You can also upscale multiple images at once, with no restrictions on picture quality or quantity.
Step 2. Choose a mode. Currently, there are three main AI models available: More-detail, Smooth, and Real-Photo. The More-detail mode is ideal for enhancing resolution in images of skin, hair, fur, and textures, adding more details to improve clarity and sharpness.
The Smooth model is designed to enhance the quality of 2D cartoons, anime images, self-portraits, and similar images, making them clearer and brighter. The Real-Photo model focuses on processing realistic photos, restoring them, and reducing noise. Choose the mode that best suits your specific photo style.
Step 3. Use the marquee to choose the target object you want to zoom in (like the below example). The preview window of before vs after image will show you the difference after you upscale and zoom in your object of your Midjourney image.
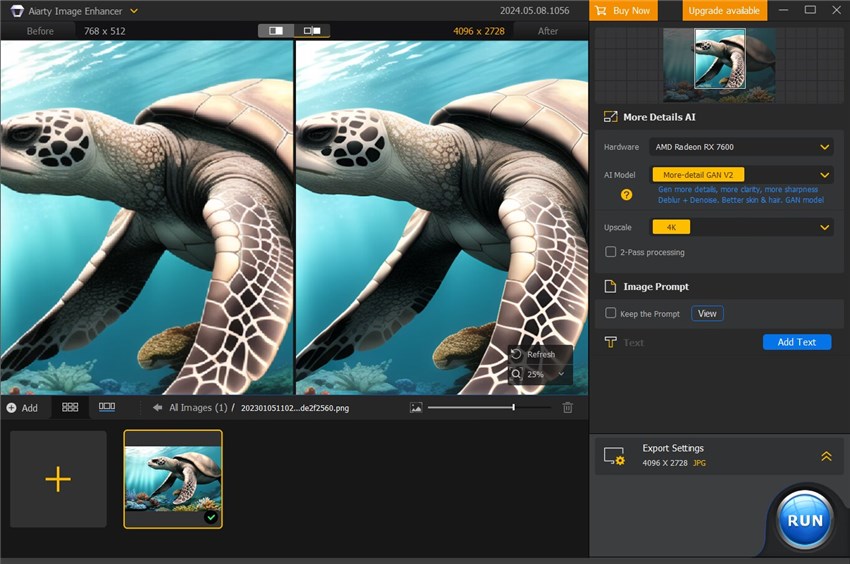
Step 4. Select the Upscale value. This image enhancer software allows you to increase the resolution of your Midjourney text-to-image art up to 8X, reaching a resolution of 32K, ensuring a well-balanced trade-off between image size and quality.
Step 5. Click on "Run" to start upscaling and zooming in your Midjourney generated AI image after selecting the desired output image format (PNG or JPG).
In conclusion, while Midjourney's current inpainting and outpainting features are impressive, the ability to seamlessly zoom and enhance specific areas within an image truly sets it apart. This functionality opens a world of creative possibilities for artists of all skill levels. From adding intricate details to existing creations to repairing or reconstructing damaged photographs, Midjourney's zooming prowess empowers users to refine their visions with remarkable precision. With this level of control, the line between creation and manipulation starts to blur, raising exciting questions about the future of AI-assisted art and its potential impact on artistic expression.
You May Also Like
Abby Poole is a seasoned AI enthusiast, with years of experience in the generative AI field. She has become a proficient user of AI tools like Midjourney. Abby’s expertise in crafting intricate prompts has led to the creation of countless stunning visuals. Her in-depth knowledge of AI and her passion for sharing it make her a valuable asset to the Aiarty team.