Resizing an image without sacrificing quality is a common challenge. Whether you want to enlarge a low-resolution picture or reduce the dimensions of an image for web use, the biggest concern is avoiding pixelation and blurriness. Many traditional resizing methods, such as built-in system tools or online resizers, often result in a loss of detail. However, AI-powered solutions now offer a way to resize images while preserving sharpness and clarity.
In this guide, we’ll explore different methods to resize images, compare their effectiveness, and show you the best tools for achieving high-quality results. If you want the most advanced solution, AI-powered tools like Aiarty Image Enhancer can upscale or downscale images with minimal quality loss. Let’s dive in!
Many users have experienced this firsthand—resizing images often results in a frustrating loss of clarity, causing photos to appear blurry or pixelated. This occurs because traditional resizing methods struggle to maintain sharpness, especially when enlarging images for prints or high-resolution displays.
![]() The Best Solution: Resize Image with AI-powered Aiarty Image Enhancer
The Best Solution: Resize Image with AI-powered Aiarty Image Enhancer
Aiarty Image Enhancer solves this issue by using advanced AI technology to upscale images while preserving fine details. Whether you need to enhance old photos or prepare visuals for professional use, Aiarty delivers crisp, high-quality results effortlessly.

How to Resize Images Without Losing Quality
Method 1: Using Aiarty Image Enhancer
When it comes to resizing images while maintaining high quality, AI-powered tools are the most effective solution. Unlike traditional resizing methods that simply stretch or compress pixels, AI tools analyze image details and intelligently enhance them, ensuring clarity and sharpness.
Aiarty Image Enhancer is designed specifically for this purpose. It offers advanced AI models that can both upscale and downscale images without quality loss. Whether you want to enlarge a low-resolution image or shrink an image while keeping details intact, Aiarty provides a seamless and efficient solution.
Key Features of Aiarty Image Enhancer
- Uses five AI models to improve clarity, sharpness, and detail.
- Resize images to 1K, 2K, 4K, 8K, or even up to 32K, or set a custom resolution.
- Supports 1x, 2x, 4x, and 8x upscaling without blurring or pixelation.
- Resize multiple images at once, saving time and effort.
- Built-in face enhancement feature with two modes: Routine Overlay and Gradient Overlay.
- Supports GPU acceleration for faster processing speed.
How to Resize an Image Using Aiarty Image Enhancer
Step 1: Download and Install Aiarty Image Enhancer
Install the software on your PC or Mac.
Step 2: Import Your Image
Drag and drop your image into Aiarty's interface.
Step 3: Select the AI Model
Choose the most suitable AI model based on your image type.
Step 4: Set the Desired Resolution
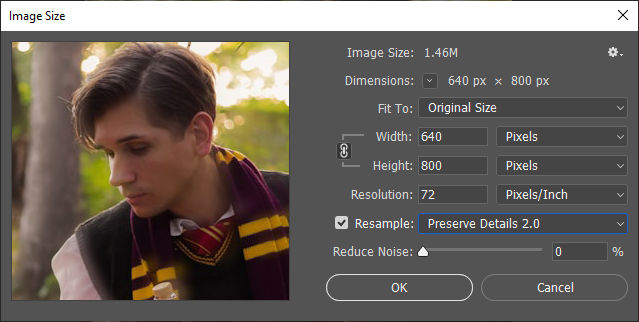
Pick a preset (1K, 2K, 4K, 8K, 1x, 2x, 4x, 8x) or enter a custom size. For example, let's take a 640×800 image and upscale it by 2x.
Once selected, Aiarty will begin resizing your image. The process completes quickly, and you can then preview the results.
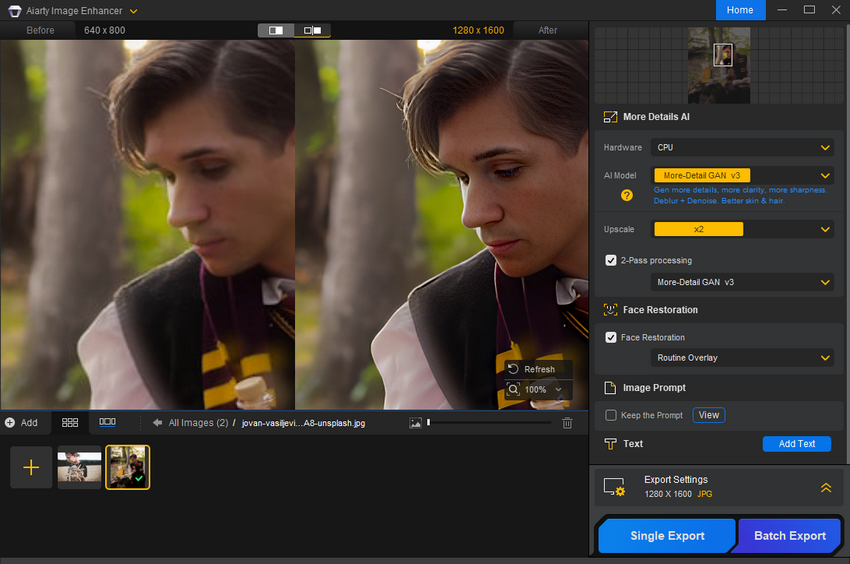
As shown in the screenshot above, the resized version (on the right) not only maintains its quality but also appears sharper, clearer, and more detailed—demonstrating Aiarty’s ability to enhance image quality while resizing.
Step 5: Export the Resized Image
Click Single Export or Batch Export to save the resized image in high quality.
With Aiarty Image Enhancer, resizing images no longer means sacrificing quality. Whether you're preparing visuals for social media, printing, or design projects, Aiarty ensures that every resized image remains sharp and professional.
Method 2: Using Built-in System Tools
If you prefer a quick and simple way to resize images without installing third-party software, built-in tools on Windows and macOS can get the job done. These tools allow you to adjust image dimensions easily, but they come with some limitations—especially when it comes to preserving quality.
How to Resize an Image in Paint on Windows
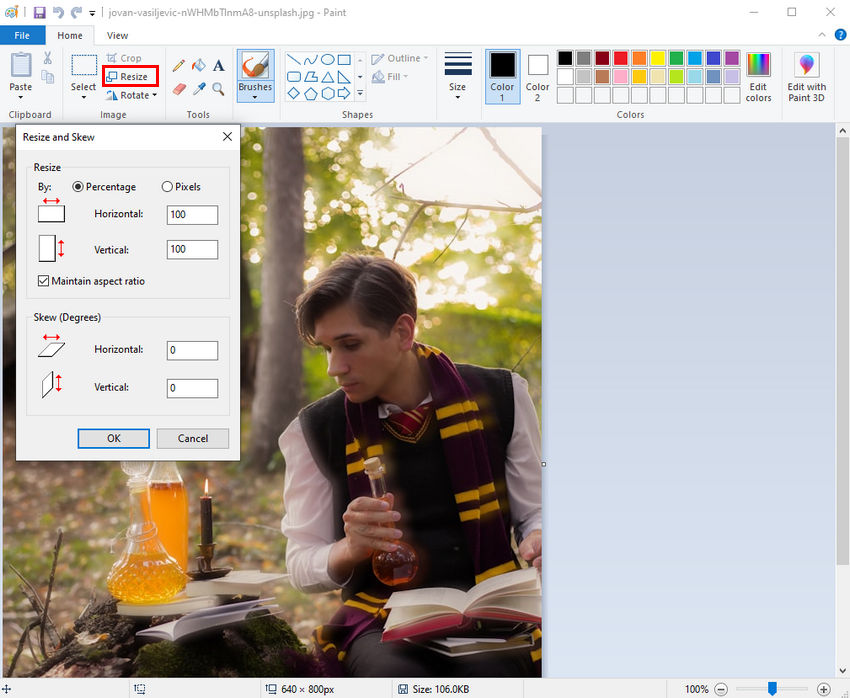
Step 1: Right-click the image you want to resize and select Open With > Paint.
Step 2: Click on the Resize button in the toolbar.
Step 3: Choose whether to resize by percentage or pixels, then enter the new dimensions.
Step 4: Make sure the Maintain aspect ratio box is checked to prevent distortion.
Step 5: Click OK, then go to File > Save As to save the resized image.
How to Resize an Image in Preview on macOS
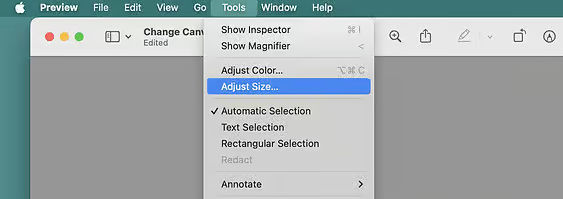
Step 1: Open the image in Preview (default image viewer on macOS).
Step 2: Click Tools > Adjust Size in the menu bar.
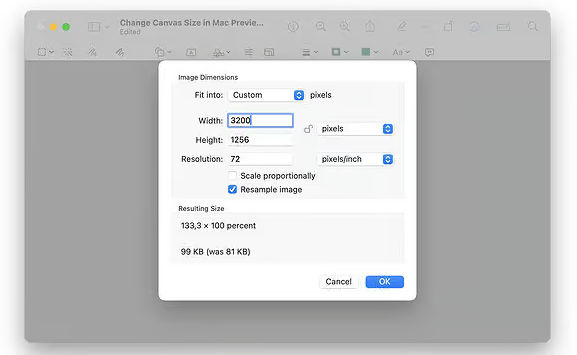
Step 3: Enter the desired width and height or scale the image by percentage.
Step 4: Ensure Resample Image is checked to enable resizing.
Step 5: Click OK, then go to File > Save to save the changes.
Limitations of Built-in Tools (Paint & Preview):
- No AI-based enhancement, meaning image quality may degrade when resizing.
- Reducing image size can result in a loss of sharpness and clarity.
- Limited format support and lack of advanced editing options.
Method 3: Using Online Image Resizers
For those who prefer a quick and convenient solution without installing software, online image resizers offer an easy way to adjust image dimensions. Many of these tools allow users to upload an image, set a new size, and download the resized version within seconds. Below are three popular free online image resizers:
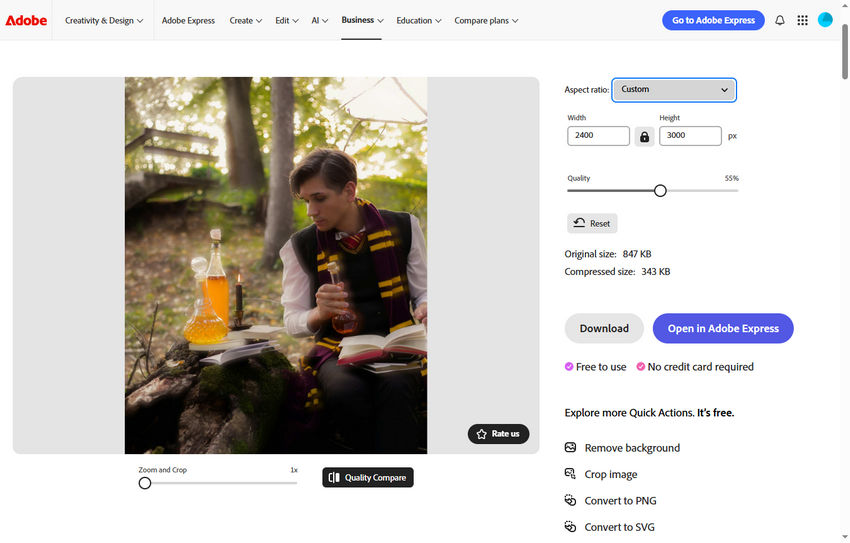
1. Adobe Express
Adobe Express supports JPEG, JPG, PNG, and WEBP formats with a maximum file size of 40MB. After uploading an image, users can choose an aspect ratio from the aspect ratio dropdown menu, which includes presets for Instagram, Facebook, X, YouTube, Pinterest, LinkedIn, and Snapchat.
If a specific dimension is needed, selecting the "Custom" option allows manual entry of width and height in pixels. Users can also adjust image quality using a slider, and Adobe Express will estimate the compressed file size before downloading. Once satisfied, they can click the Download button to save the resized image.
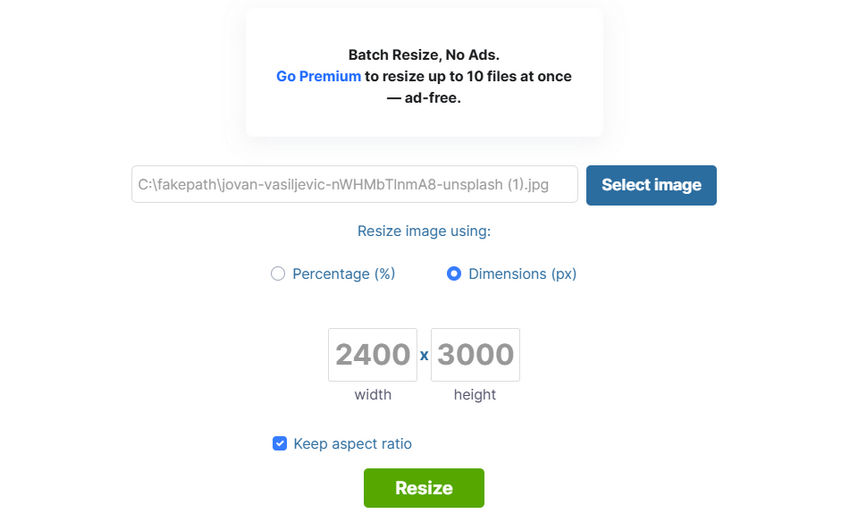
2. Simple Image Resizer
Simple Image Resizer provides two resizing methods: by percentage or by dimensions. If resizing by percentage, users simply drag the slider to shrink the image by a certain amount before clicking "Resize."
Alternatively, if resizing by dimensions, they can manually enter the desired width and height and apply the changes with a single click.
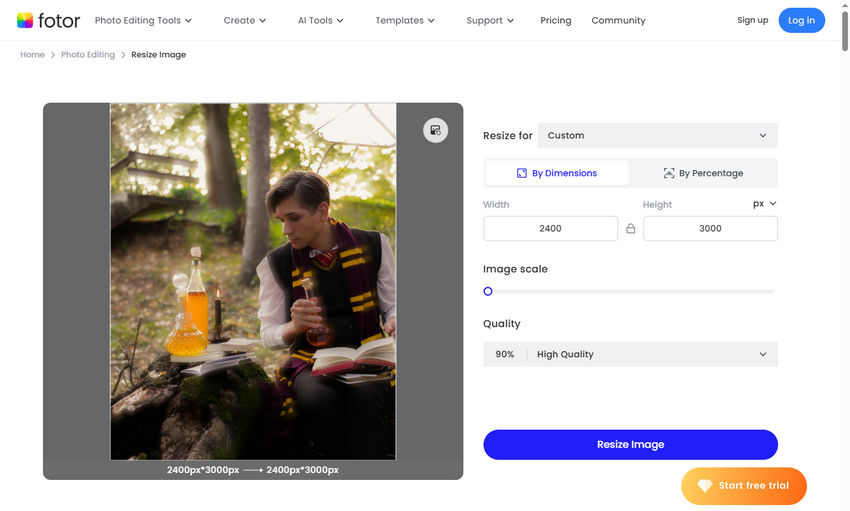
3. Fotor
Fotor offers more flexibility by allowing users to resize images based on both aspect ratio and custom dimensions. The "Resize for" dropdown menu includes popular social media presets, similar to Adobe Express.
If choosing the Custom option, users can resize images by dimensions, selecting units such as pixels, inches, centimeters, or millimeters, or resize by percentage. Additionally, Fotor provides options to adjust image scale and quality, with settings for original, high, medium, or poor quality output.
Limitations of Online Image Resizers:
- Quality Loss: Most online tools lack AI-powered enhancement, resulting in pixelation or blurring when resizing.
- File Size Limits: Many platforms impose restrictions on file size and resolution.
- No Batch Processing: Most free versions only allow resizing one image at a time.
- Internet Dependency: Uploading and processing images online can be slow, especially for large files.
- Privacy Concerns: Some platforms store or process images on their servers, which may pose security risks.
While online resizers are useful for quick adjustments, they may not be the best option for those who need high-quality resizing without losing detail. For better results, AI-powered tools like Aiarty Image Enhancer provide a superior alternative.
Method 4: Using Photoshop
For users who want more control over image resizing while minimizing quality loss, Adobe Photoshop offers a powerful solution through its Preserve Details 2.0 resampling method. Unlike basic resizing, this feature uses AI-based algorithms to retain sharpness and reduce artifacts, making it an excellent option for enlarging images without excessive blurring.
How to Resize an Image in Photoshop Without Losing Quality
Step 1: Open Your Image in Photoshop
Launch Photoshop and open the image you want to resize by dragging it into the workspace or using File > Open.
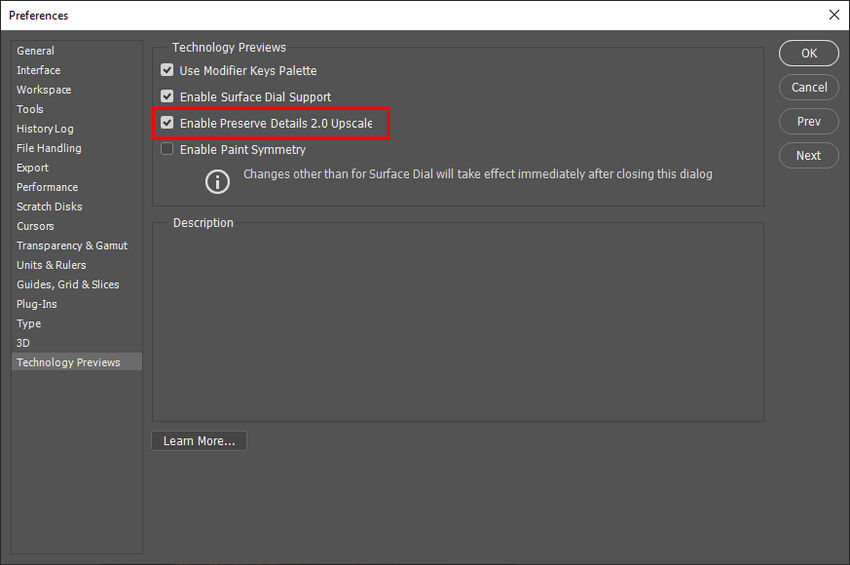
Step 2: Enable Preserve Details 2.0
Before resizing, ensure that Preserve Details 2.0 Upscale is enabled. Go to Edit > Preferences > Technology Previews and check the box for Enable Preserve Details 2.0 Upscale. Restart Photoshop to apply the changes.
Step 3: Resize the Image
Navigate to Image > Image Size, which opens the resizing window. In the Resample dropdown menu, select Preserve Details 2.0. Enter the desired width and height in pixels, or adjust the Resolution field if necessary. Photoshop will automatically upscale the image while preserving detail.
Step 4: Adjust Noise Reduction
When enlarging an image, some noise may appear. Use the Reduce Noise slider to fine-tune the balance between sharpness and smoothness, preventing excessive graininess.
Step 5: Apply and Save
Once satisfied with the resized image, click OK to apply the changes. Save the image using File > Save As, selecting an appropriate format such as PNG or JPEG based on your needs.
Limitations of Photoshop’s Resizing Method
While Photoshop provides excellent image enlargement capabilities, it does come with some drawbacks. First, it requires a paid subscription, making it less accessible for casual users. Additionally, resizing effectiveness depends on the original image quality—low-quality images may still show artifacts after enlargement. The process is also more manual, requiring user adjustments for optimal results.
Image Resizer's Output Quality Comparison
The difference in image quality after scaling image up is quite noticeable. Below is a set of close-up comparison images, showing how a 640×800 image looks after being resized to 1280×1600 using different image resizers.
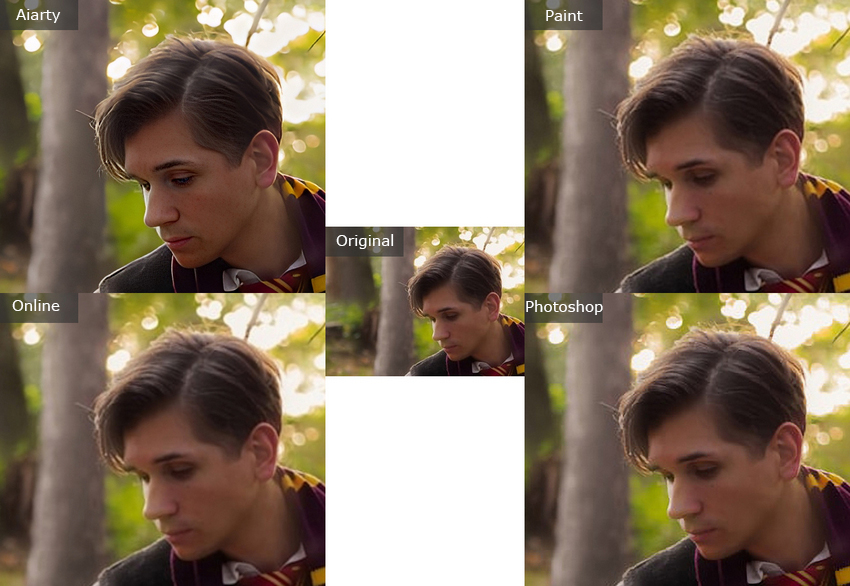
Aiarty delivers the best results, preserving fine details such as individual hair strands and facial contours. The overall sharpness is even better than the original, showcasing its AI-powered enhancement capabilities. In contrast, Photoshop’s upscaling performance is decent—it retains a fair amount of detail but introduces slight blurring around the edges, requiring manual adjustments for optimal results.
Online tools and Paint, however, show a noticeable drop in quality. Compared to the original, these methods result in some detail loss, making facial features and hair appear softer and somewhat blurry, lacking the clarity seen in Aiarty and Photoshop. This makes them less suitable for tasks requiring high-quality image enlargement.
Tips for Resizing Images for Different Use Cases
When resizing images, it's essential to consider the specific requirements of different platforms and purposes. Whether you're optimizing images for social media, printing, websites, or e-commerce, selecting the correct dimensions, aspect ratio, and file size ensures the best quality and performance. Below, we break down key recommendations for common scenarios.
Resizing Images for Social Media
Each social media platform has its own guidelines for image dimensions, which, if not followed, can result in unwanted cropping or compression. For example, Instagram favors a 1080×1350 px size for posts in the feed, while stories require a full-screen 1080×1920 px. On the other hand, Twitter (X) supports a 1600×900 px landscape format for posts but uses a much narrower 1500×500 px space for headers.
| Platform | Recommended Post Size | Profile Picture | Others |
| 1080×1080 px (1:1) / 1080×1350 px (4:5) | 320×320 px | Stories & Reels: 1080×1920 px (9:16) | |
| 1200×630 px (1.91:1) | 170×170 px | Cover Photo: 851×315 px | |
| Twitter (X) | 1600×900 px (16:9) | 400×400 px | Header Image: 1500×500 px |
| YouTube | 1280×720 px (16:9) | N/A | Channel Art: 2560×1440 px |
| 1000×1500 px (2:3) | N/A | Vertical images perform best | |
| 1200×627 px | 400×400 px | Banner: 1584×396 px |
To prevent quality loss, it's best to upload images at the exact recommended sizes. Tools like Aiarty and Photoshop allow easy resizing while maintaining clarity.
Resizing for Printing
Printing requires higher resolution images than digital displays. A photo that looks sharp on a screen may appear pixelated in print if the resolution is too low. The standard recommendation is to use 300 DPI (dots per inch) for high-quality prints.
| Print Size | Minimum Resolution (300 DPI) |
| 4×6 in | 1200×1800 px |
| 8×10 in | 2400×3000 px |
| 16×20 in | 4800×6000 px |
For large-format printing, Aiarty’s AI upscaling can improve sharpness without introducing excessive noise. It's also advisable to save the images in TIFF or PNG format to avoid compression artifacts.
Resizing Images for Websites and Blogs
For web use, it's crucial to balance quality and file size. Oversized images can slow down a website, affecting user experience and SEO rankings.
| Image Type | Recommended Size | Notes |
| Full-width header | 1920×1080 px | Ensures high-quality display across devices |
| Blog post images | 1200×800 px | Balanced for clarity and loading speed |
| Thumbnails | 150×150 px | Small but clear for previews |
To maintain speed, keep images under 200 KB where possible. Using WebP format instead of JPEG or PNG can significantly reduce file size without sacrificing quality.
Resizing Images for Presentations and PDFs
When inserting images into PowerPoint presentations or PDF documents, clarity is important, but excessive file sizes should be avoided.
- For PowerPoint slides, a resolution of 1280×720 px (HD) or 1920×1080 px (Full HD) is typically sufficient.
- For PDFs, maintaining 300 DPI ensures the best quality for printing or zooming in on details.
To avoid bloating file sizes, use moderate JPEG compression, or convert images to WebP where applicable.
Resizing Images for E-commerce and Product Listings
Online marketplaces require product images to be clear, zoomable, and well-formatted. A blurry or poorly cropped product image can deter potential buyers.
| Platform | Minimum Image Size | Recommended Size |
| Amazon | 1000×1000 px | 2000×2000 px for zoom feature |
| eBay | 500×500 px | 1600×1600 px |
| Etsy | 2000×2000 px | Square format preferred |
| Shopify | 2048×2048 px | Optimal for product clarity |
For product listings, Aiarty's AI upscaling helps retain sharpness, while Photoshop offers fine-tuned adjustments to brightness and contrast to make images more appealing.
Final Thoughts
Choosing the right image size depends on the intended use. Social media platforms, print, websites, and e-commerce all have different requirements that affect quality and usability. While Photoshop provides manual control, Aiarty’s AI-powered upscaling is a great choice for enhancing images automatically. Understanding these best practices will help ensure your resized images look crisp, clear, and professional.
 FAQs about Image Resizing
To scale down an image without quality loss, use tools that employ high-quality resampling methods such as bicubic or AI-powered resizing. Avoid simple pixel reduction, as it may cause blurriness.
To upscale an image while maintaining quality, use AI-based tools like Aiarty Image Enhancer or Photoshop's Super Resolution feature. Traditional resizing methods can introduce pixelation and artifacts.
Maintain the aspect ratio when resizing by locking the width-to-height proportion. Most editing tools have an option to constrain proportions automatically.
To resize without cropping, adjust the canvas size instead of the image itself, or add padding to maintain the full image while achieving the desired dimensions.
Disable the aspect ratio lock in your editing tool and manually adjust width and height. Be cautious, as this may cause distortion unless used for specific design purposes.
You May Also Like
This post was written by Brenda Peng who is a seasoned editor at Digiarty Software who loves turning ordinary photos into extraordinary works of art. With AI assistance for brainstorming and drafting, the post is reviewed for accuracy by our expert Abby Poole for her expertise in this field.