Summary:This guide covers mastering product photo editing in Adobe Lightroom, from workflow organization to advanced techniques like batch editing and presets. For specialized refinement—fixing blur, reducing noise, or restoring intricate details — Aiarty Image Enhancer complements Lightroom by upscaling images and enhancing clarity, ensuring crisp, vibrant results that captivate your audience.
When it comes to product photography, consistency and professionalism are essential—whether you’re running an e-commerce store, selling handmade crafts, or showcasing designs. Adobe Lightroom is your ultimate ally in achieving this, offering powerful tools for batch editing, color accuracy, and non-destructive workflows. This means you can tweak and refine your images without altering the originals, ensuring your product photos always look polished and ready to impress.
For instance, a jewelry brand saw a 25% boost in conversion rates after streamlining its product photo edits with Lightroom. By leveraging its precision tools, the brand achieved a cohesive look across its catalog, making its products more appealing to customers. If you’re ready to elevate your product photography game, let’s dive into the details of mastering Lightroom for product photo editing.
Even after manual edits in Lightroom, certain images - particularly low-resolution shots or those with intricate details like fabric or jewelry—often require additional refinement. Aiarty Image Enhancer steps in to upscale and recover lost details, avoiding unnatural sharpness or artifacts for a polished, professional finish.
![]() The Best Solution: Enhance Your Product Photos with AI
The Best Solution: Enhance Your Product Photos with AI
After perfecting your edits in Lightroom, take your product photos to the next level with Aiarty Image Enhancer. Using advanced AI technology, it upscales image resolution, fixes blur and noise, and restores intricate details, ensuring your visuals are crisp, vibrant, and ready to captivate your audience. Whether you’re preparing images for an online store, social media, or print, Aiarty guarantees professional-quality results every time. Download for free today and transform your product photos into high-impact visuals!
How To Edit Product Photos in Lightroom in 10 Steps
Before you start adjusting sliders and applying presets, it’s crucial to set up your workflow for maximum efficiency. A well-organized process not only saves time but also ensures consistency across your product catalog.
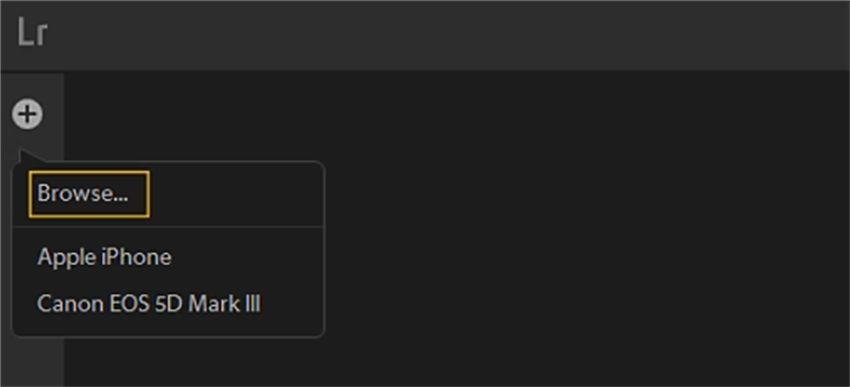
Step 1: Import and Organize Efficiently
Start by creating a dedicated catalog in Lightroom. Name it something straightforward, like “Product_Edits,” to keep your work focused and clutter-free. Use keywords such as “_final” or “_needs_review” to streamline sorting and make it easier to track your progress.
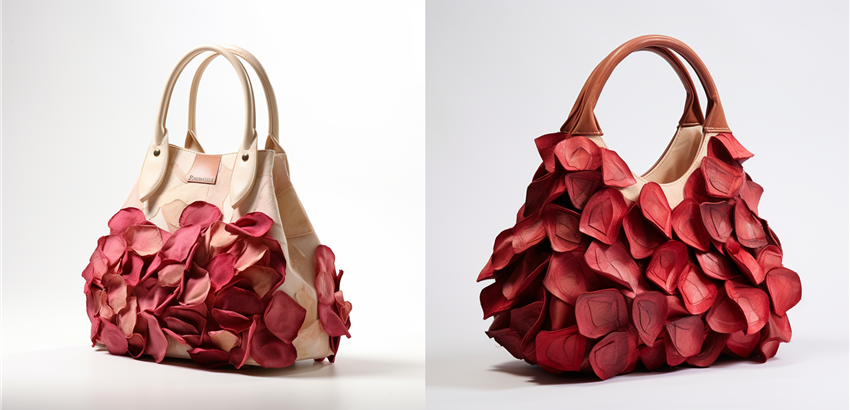
For instance, if you’re editing a collection of handbags, you might tag them as “Handbags_FallCollection_Final” once edits are complete. This simple step can save you hours of searching later.
Prioritize RAW Files
If your camera supports it, always shoot in RAW format. RAW files retain significantly more detail, especially in shadows and highlights, giving you greater flexibility during editing. By starting with RAW, you’ll have a stronger
foundation for your edits, ensuring your product photos look their best.
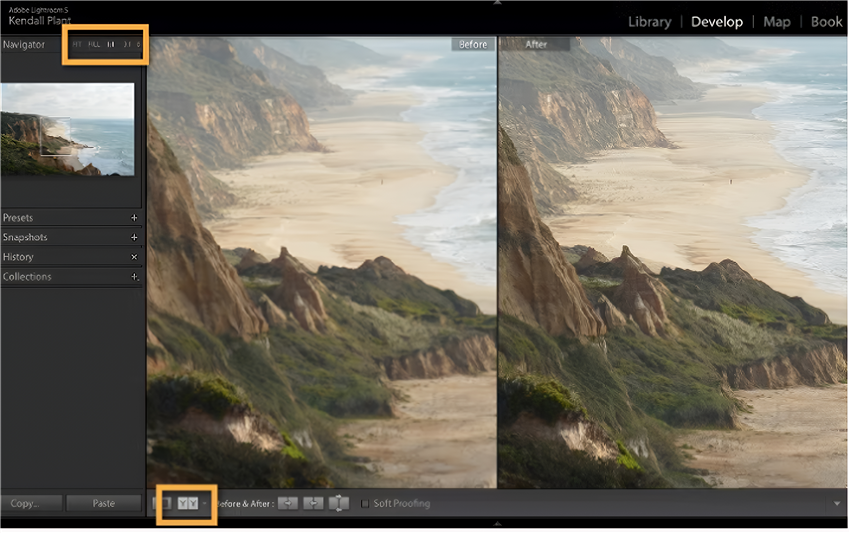
To illustrate the difference, consider this comparison:
- RAW: Recovers intricate details in both dark and bright areas, preserving texture and depth.
- JPEG: Struggles with overexposed highlights and lost shadows, often resulting in a flat, less dynamic image.
With your photos organized, it’s time to refine them. Here are the essential techniques every product photographer should master to create stunning, professional-quality images.
Step 2: Perfect Exposure and White Balance
Exposure and white balance are the cornerstones of any great product photo. Use the histogram in Lightroom to avoid clipped highlights or shadows. A well-balanced histogram ensures your product is neither too dark nor too bright.

For white balance, start with the Auto setting, then manually tweak it to suit your product. For example:
- Fabric: Slightly warmer tones can enhance texture and make the material look more inviting.
- Glass or Metal: Cooler tones emphasize clarity and give a sleek, modern feel.
Step 3: Master Color Accuracy
Accurate colors are critical for product photos, especially when customers rely on images to make purchasing decisions. Use the Color Picker tool to sample neutral areas like whites or greys, ensuring your colors are true to life.

A Shopify store, for instance, reduced returns by 15% after fine-tuning their product colors using HSL (Hue, Saturation, Luminance) adjustments. By tweaking the saturation of specific colors, they ensured their products looked exactly as they did in real life.
Step 4: Enhance Sharpness Without Noise
Sharpness is key to making your product details pop, but overdoing it can introduce unwanted noise. Use the Masking slider to sharpen edges—like product logos or intricate patterns—while avoiding noise in smooth areas.
Pair this with Noise Reduction and Luminance smoothing for clean, professional results. This is particularly useful for photos with dark backgrounds, where noise tends to be more noticeable.
Editing product photos can be time-consuming, especially when you’re dealing with large catalogs. Fortunately, Lightroom offers several tools to speed up the process without sacrificing quality.
Step 5: Create Custom Presets
Presets are a lifesaver for maintaining brand consistency. For example, if you’re editing a collection of luxury jewelry, create a “Luxury Jewelry Preset” to apply the same look across all your photos. This ensures your product catalog has a cohesive aesthetic, which is crucial for building brand identity.
Step 6: Batch-Edit Large Catalogs
Need to edit 50+ product shots? Lightroom’s batch editing feature lets you sync settings across similar photos, saving you hours of work. With this method, you can edit an entire catalog in under an hour. Simply apply your edits to one photo, sync the settings, and fine-tune as needed.

- Edit one photo to perfection.
- Select the edited photo and the photos you want to apply the same settings to.
- Click “Sync Settings” to apply the edits across all selected photos.
With this method, you can edit an entire catalog in under an hour.
Step 7: Use Masking for Precision
Radial filters and adjustment brushes allow you to highlight specific product details, adding depth and dimension to your images. For example, a leather goods brand used these tools to enhance texture and depth, making their products look more tactile and appealing. This small tweak can make a big difference in how your products are perceived.
Step 8: Exporting for Web and Print
Once your edits are complete, it’s time to export your photos. Proper export settings ensure your images look great, whether they’re displayed on a website or printed in a catalog.
Step 1: Optimize Export Settings
For web use, choose the sRGB color profile and resize images to fit platform guidelines. For instance, Amazon recommends images be at least 1000 pixels on the longest side for optimal zoom functionality.
Step 2: Organize Exported Files
Use SEO-friendly filenames like “black-dress-product-shot.jpg” to improve search visibility. This small step can make a big difference in driving traffic to your product pages.How to Troubleshooting Common Issues
Even the best photographers encounter challenges. Here’s how to tackle some of the most common issues in product photography.
Eliminate Glare on Reflective Surfaces
Glare can be a major distraction, especially on glass or metal surfaces. Use Radial Filters to reduce exposure in problematic areas, minimizing glare without compromising the overall image.
Remove Dust and Scratches
The Spot Removal Tool, combined with the “Visualize Spots” feature, makes it easy to clean up imperfections. This is particularly useful for product photos, where even the smallest flaw can stand out.
Ensure Uniform Backgrounds
A clean, uniform background is essential for professional product photos. Use Gradient Filters and adjust the white slider to create a seamless, studio-style backdrop.
Enhance Product Photos Instantly with Aiarty Image Enhancer
Even after meticulously editing your photos in Lightroom, some images may still struggle with noise, blurriness, or a lack of detail—particularly those shot in low-light conditions. This is where Aiarty Image Enhancer steps in. Leveraging advanced AI upscaling and noise reduction, Aiarty enhances every pixel to bring back sharpness and clarity, ensuring your photos truly stand out with professional-quality results.
How to Integrate Aiarty with Lightroom:
Export your photos from Lightroom, enhance them with Aiarty, and re-import them for final touches. One Shopify store improved its image quality by 50% using this workflow, resulting in higher engagement and sales.
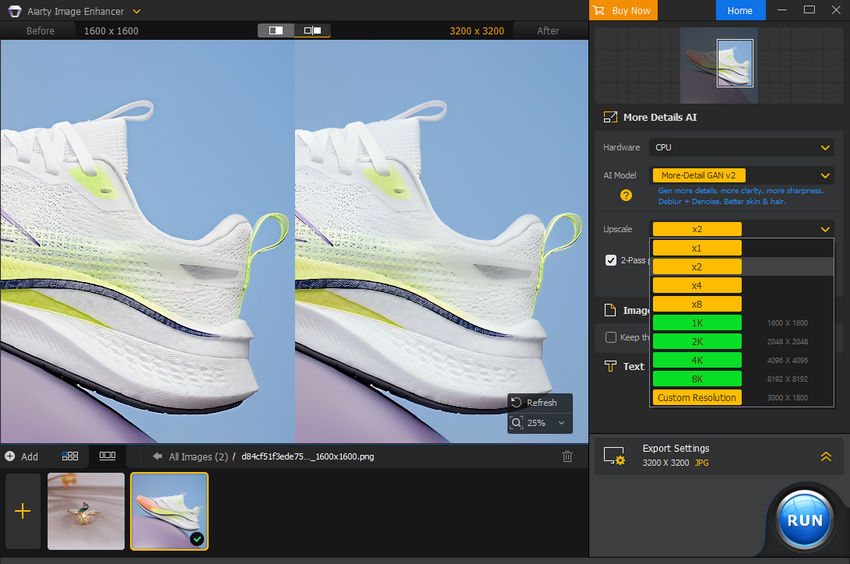
Steps to Enhance Your Product Photos with Aiarty:
1. Download Aiarty Image Enhancer from the official website.
2. Launch the software and upload the product photos you want to enhance or upscale.
3. Choose your desired settings for upscaling, sharpening, or noise reduction, then save the enhanced images.
For a detailed walkthrough, check out our Aiarty Image Enhancer guide or watch the embedded video below:
Conclusion
By mastering these techniques and tools, you’ll be well on your way to creating stunning, professional-quality product photos that captivate your audience and drive sales. Whether you’re a beginner or a seasoned pro, Lightroom - and a little help from Aiarty Image Enhancer, which can take your product photography to the next level.
You May Also Like
This post was written by Brenda Peng who is a seasoned editor at Digiarty Software who loves turning ordinary photos into extraordinary works of art. With AI assistance for brainstorming and drafting, the post is reviewed for accuracy by our expert Abby Poole for her expertise in this field.