Summary: Learn how to capture high-quality product photos with your iPhone. If you need to achieve flawless background removal and refine image details, the best AI background remover is the perfect tool for creators looking to create professional-grade product images with ease.
In today's visually driven marketplace, stunning product photos aren't just a luxury—they're a necessity. Whether you're a small business owner, a budding entrepreneur, or a side hustler selling handmade crafts, your iPhone holds the power to create jaw-dropping product imagery that rivals professional setups. This guide unlocks the secrets to mastering iPhone product photography, from optimizing your camera settings to harnessing natural light like a pro. Ready to turn your iPhone into a powerhouse tool that boosts your brand's credibility—and sales? Let's dive into the step-by-step strategies that make professional-grade product photos surprisingly simple.
Many people struggle with distracting backgrounds and capturing fine details in their product photos. Research shows that compelling product visuals are essential for building consumer trust and driving purchasing decisions. In fact, 87.6% of shoppers consider product images a critical factor in their buying process.
![]() The Best Solution: Achieve Flawless Product Photos with Aiarty Image Matting
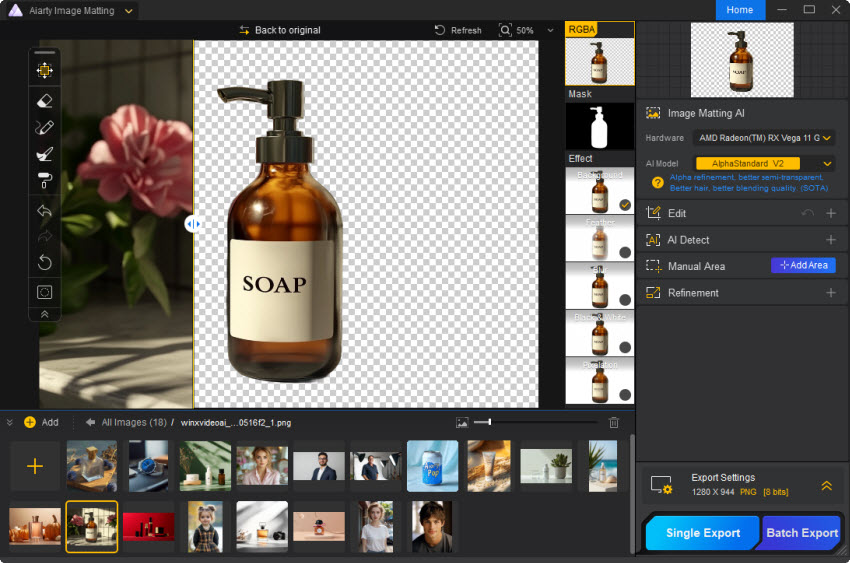
The Best Solution: Achieve Flawless Product Photos with Aiarty Image Matting
Aiarty Image Matting utilizes advanced AI models and gradient alpha matte technology to facilitate precise background removal and seamless blending. This tool adeptly handles intricate details, including hair and edges, ensuring your product images meet professional standards. By eliminating unwanted backgrounds and enhancing image clarity, Aiarty helps you create compelling visuals that resonate with customers.
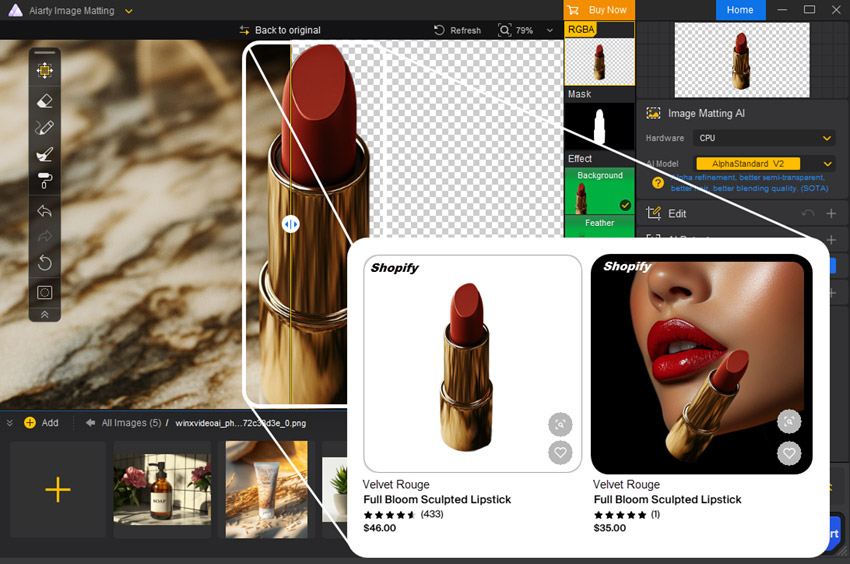
- Effortlessly remove and replace backgrounds from your product photo
- Upscale images up to 10K resolution for stunning clarity and zoom-in detail.
- Achieve professional results with just 3 clicks – no time-consuming manual adjustments.
- Process up to 3000 images in a single batch for maximum efficiency.
Why Use an iPhone for Product Photography
When it comes to product photography, your iPhone is more powerful than you might think. With advancements in camera technology, it offers a cost-effective, convenient, and accessible solution for capturing professional-looking images.
- Cost-Effectiveness: Investing in a high-end camera setup can be expensive, but an iPhone provides exceptional image quality without additional costs. With built-in features like Smart HDR and Night Mode, you can achieve sharp, well-lit photos without the need for pricey equipment.
- Convenience and Speed: Unlike bulky DSLR cameras, an iPhone is lightweight, easy to use, and always within reach. You can quickly set up, shoot, and edit on the go, making product photography more efficient—perfect for e-commerce sellers who need fast turnaround times.
- Accessibility: Anyone can take great product photos with an iPhone, regardless of photography experience. With intuitive controls, automatic adjustments, and a wide range of editing apps, achieving high-quality images has never been easier.
- Seamless Integration with Editing Apps: The App Store offers powerful editing tools like Snapseed, Lightroom Mobile, and VSCO, allowing you to enhance product images effortlessly right after capturing them.
Essential Tools for iPhone Product Photography
While an iPhone alone can capture high-quality product photos, the right tools can take your images to the next level. Investing in these essentials will help you achieve professional results with minimal effort
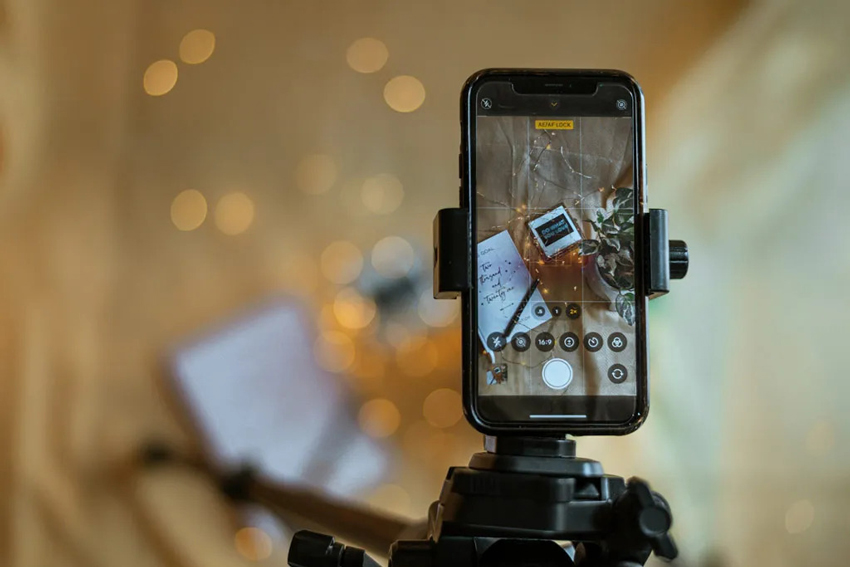
1. Tripod or Phone Stand
A steady shot is key to capturing sharp and professional-looking product images. A tripod eliminates camera shake, ensuring consistency across multiple shots. Look for one with an adjustable height and a smartphone mount to help you frame your products perfectly. Some tripods also come with a Bluetooth remote shutter, allowing you to take photos without touching your iPhone.
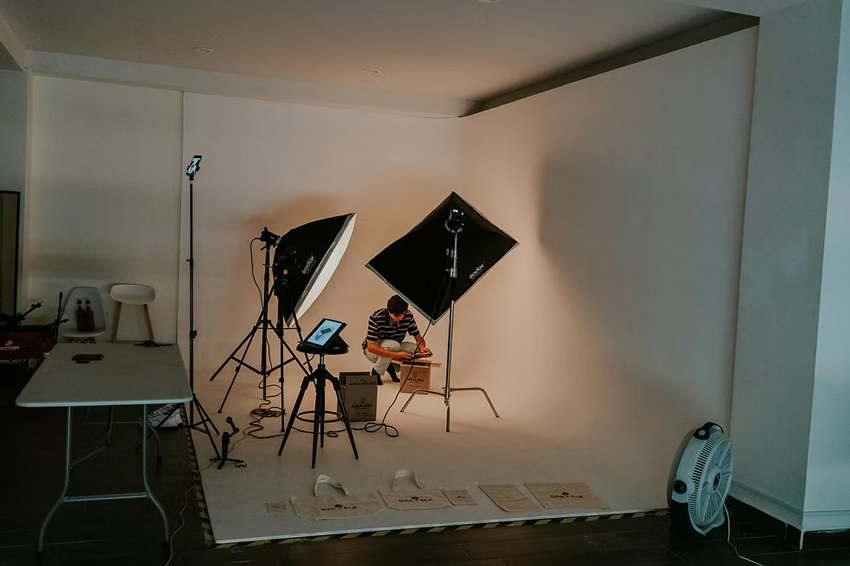
2. Lighting Equipment
Lighting is one of the most critical aspects of product photography, as it directly affects how colors, textures, and details appear in your images. Choosing the right lighting setup can make a significant difference in the quality of your product photos.
2.1 Natural Light: Best for Soft, Realistic Tones
Natural light is an excellent option for product photography, especially when shooting lifestyle images or organic products like food, clothing, or handmade crafts. It provides a soft, even glow that enhances colors and textures without making the image look overly processed.
- Best Time to Use: Shoot near a large window or outdoors on a cloudy day for diffused light. Morning and late afternoon provide the most flattering natural light.
- Limitations: Natural light can be inconsistent, changing throughout the day and depending on weather conditions.
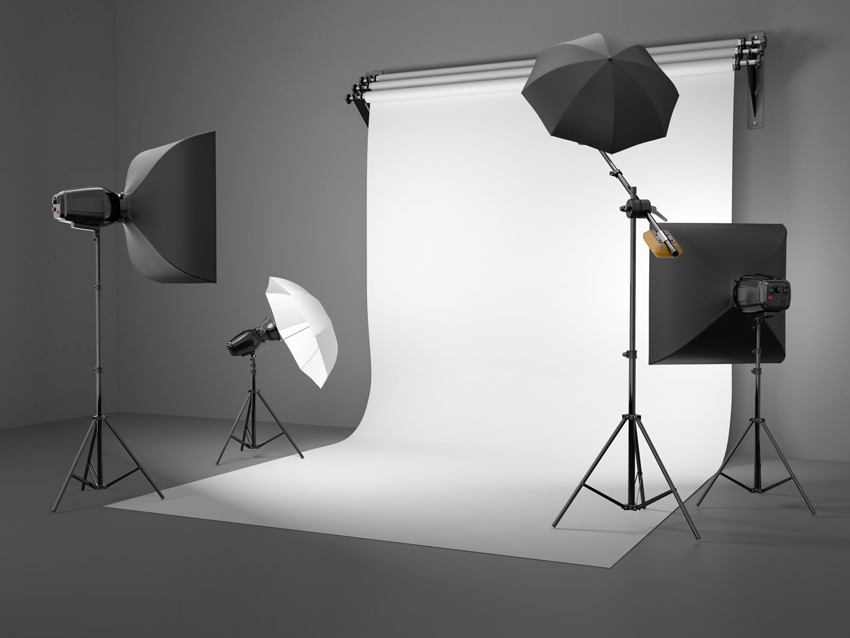
2.2 Artificial Light: Consistent and Adjustable
Artificial lighting, such as LED panels, ring lights, or softboxes, provides a controlled and consistent environment for product photography. It's especially useful for indoor shoots or when natural light is unavailable.
- Benefits: Adjustable intensity, direction, and temperature allow for greater control over shadows and highlights.
- Ideal Use: Works well for e-commerce product photography, jewelry, electronics, and items requiring precise lighting.
2.3 Reflectors and Diffusers: Enhancing Light for a Professional Look
Reflectors and diffusers help modify both natural and artificial light to create balanced, professional-looking product photos.
- Reflectors: Bounce light back onto the product to fill in shadows, making the image look brighter and more even. White foam boards, silver reflectors, or even household materials like aluminum foil can work as cost-effective reflectors.
- Diffusers: Soften harsh light from direct sources, preventing strong shadows and glare. A sheer white curtain, professional diffusion panels, or softboxes can help achieve a more natural and polished look.
2.4 Choosing the Right Lighting Setup
- For a bright, airy look: Use natural light with a reflector.
- For a professional studio feel: Use artificial lights with softboxes or diffusers.
- For small products: Consider a lightbox for even lighting from all angles.
By understanding how to use different lighting sources effectively, you can create high-quality product photos that highlight the best features of your items.
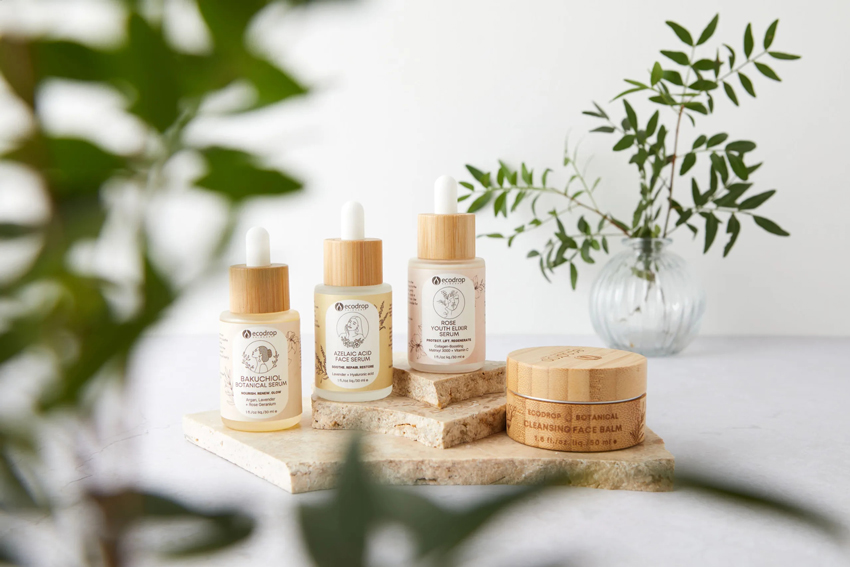
3. Backdrops and Surfaces for a Clean, Professional Look
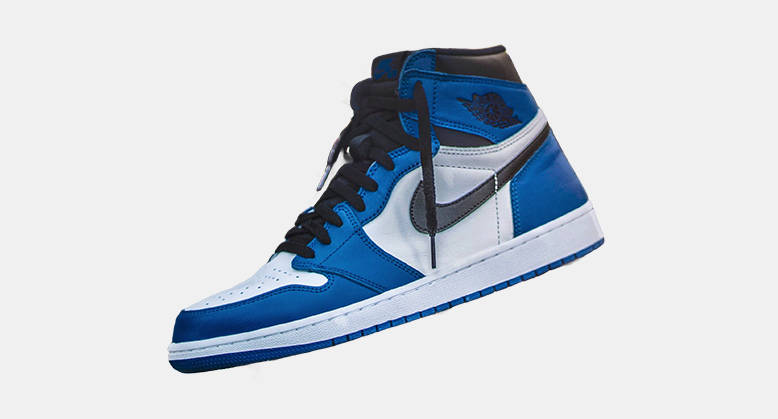
A cluttered or distracting background can take attention away from your product. Using a clean, neutral backdrop—such as a white, black, or solid-colored background—keeps the focus on your product and gives your photos a polished, high-end feel. For lifestyle shots, textured surfaces like wooden tables, marble slabs, or fabric can add depth and character to your images.
If you want to make your product stand out even more and achieve a flawless, professional look, Aiarty Image Matting is a powerful tool to consider. It allows you to seamlessly remove unwanted backgrounds and fine-tune your product's image by isolating it from any distractions. This AI-powered tool makes it simple to create clean, high-quality photos in just a few clicks, elevating the visual appeal of your product and giving it a more polished, studio-like finish.
4. iPhone Accessories
Using the right accessories can elevate your iPhone product photography, helping you capture sharper, more detailed, and professional-looking images. Here are some essential add-ons that can enhance your shots:
4.1 External Lenses for Advanced Camera Capabilities
Clip-on lenses expand your iPhone's photographic abilities, allowing you to capture product details with precision. A macro lens is ideal for small items like jewelry, while a wide-angle lens helps photograph larger products or flat lays. If you want to eliminate distortion, a telephoto lens can enhance zoom without losing image quality.
4.2 Light Cones and LED Attachments for Better Illumination
If you need more control over lighting, external LED lights or light cones can provide consistent illumination. Ring lights help evenly distribute light, reducing harsh shadows, while portable LED panels allow for adjustable brightness and color temperature. For small objects, a light cone diffuses light, reducing glare and reflections, which is especially useful for photographing shiny surfaces like glass or metal.
4.3 Remote Shutter or Timer for Stability
To minimize camera shake, a Bluetooth remote shutter lets you snap photos without touching your iPhone. Alternatively, using the built-in timer function ensures a hands-free shooting experience, helping you maintain sharpness and consistency across product images.
4.4 Editing Apps for Professional Touch-Ups
Even with perfect lighting and composition, some post-processing can enhance your product photos. Apps like Adobe Lightroom Mobile, Snapseed, and VSCO allow you to adjust brightness, contrast, and sharpness, correct color tones, and remove unwanted distractions. A well-edited photo can make your products look more polished and appealing to potential buyers.
By integrating these accessories into your workflow, you can transform your iPhone into a powerful product photography tool, ensuring that your images look as professional as those taken with high-end cameras.
How to Take Product Photos with iPhone (Step-by-Step Guide)
Taking professional product photos with your iPhone is easier than you might think. Follow this step-by-step guide to ensure your photos are sharp, well-lit, and showcase your product in the best light.
1. Setting Up Your Product
Start by selecting a clean, clutter-free space to photograph your product. Ensure the background is neutral to avoid distractions—white, black, or soft pastel backdrops are often ideal for most products. For lifestyle shots, choose an environment that complements your product, such as a kitchen for food items or a well-organized workspace for office supplies. Position your product with attention to detail, making sure it's clean and free of dust.
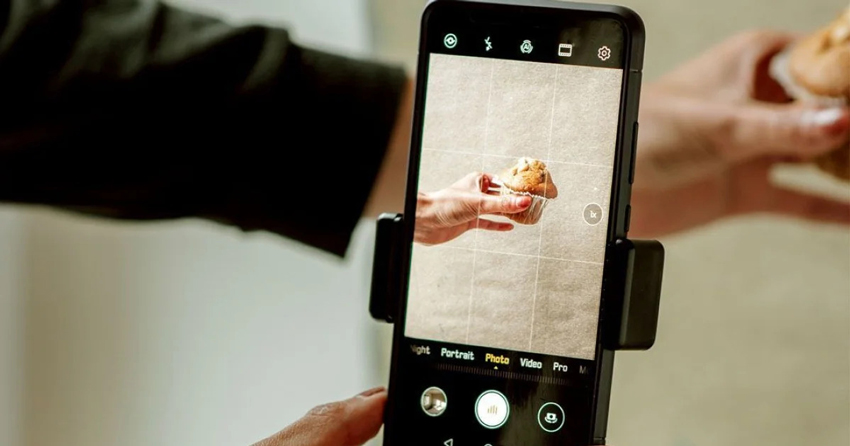
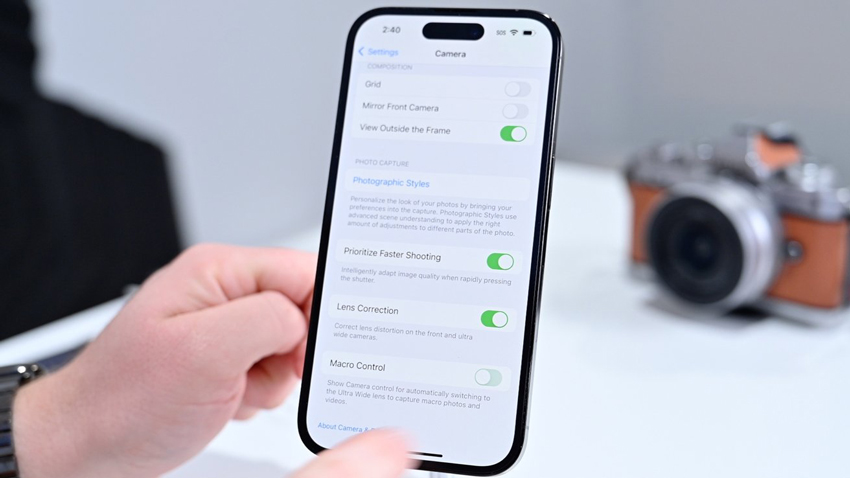
2. iPhone Camera Settings
Optimizing your iPhone camera settings ensures you get the best possible image quality.
- Using Gridlines: Turn on gridlines to improve the composition of your shots. The rule of thirds is a simple guideline to frame your product neatly within the grid, helping you avoid awkwardly placed subjects or empty spaces in your frame.
- Turning Off the Flash: Always turn off the iPhone's flash. Flash can create harsh, unflattering lighting and deep shadows. Instead, rely on natural light or artificial light sources to illuminate your product, giving it a softer, more even look.
- Using the Timer or a Remote Shutter: To prevent camera shake and ensure steady shots, use the timer or a Bluetooth remote shutter. This allows you to focus on framing the shot and avoids any blurriness caused by touching the phone. Set the timer to 3 or 10 seconds, or use a remote shutter to take photos hands-free.
- Focus and Exposure: Tap on the screen to focus on your product, ensuring it appears sharp and clear. For exposure, slide the sun icon on the screen up or down to adjust the brightness. This helps control how light or dark the image appears, ensuring the product's details are visible.
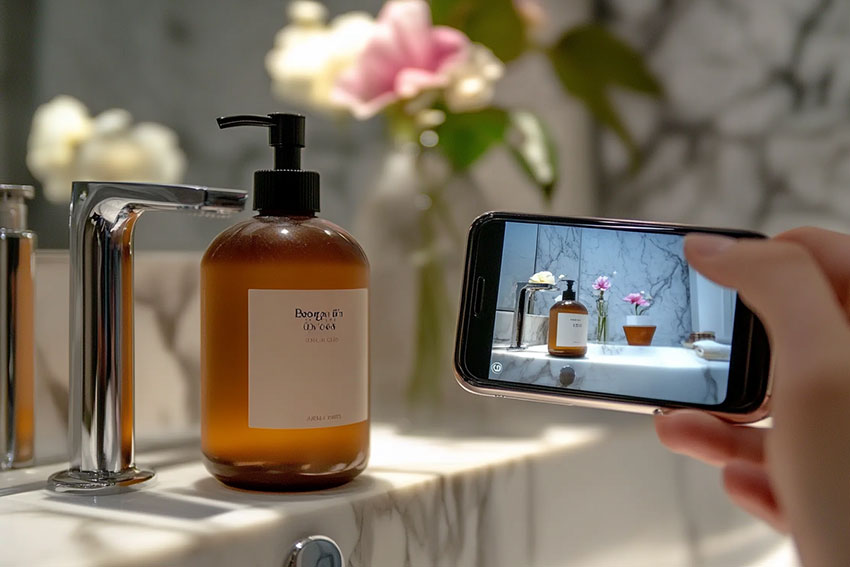
3. Taking the Photos
With everything set up, it's time to capture your product in the best way possible.
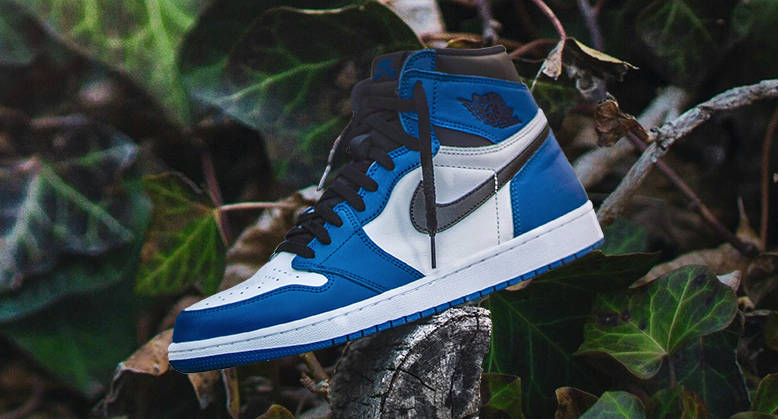
- Shoot from Multiple Angles: Provide a comprehensive view of your product by shooting from different angles. Take shots from the front, sides, and top to showcase its dimensions and features. Don't be afraid to experiment with different perspectives to create variety and highlight the product's best qualities.
- Capture Details: Close-up shots are essential for highlighting important features such as textures, logos, or unique design elements. Make sure to capture these details clearly, ensuring that the lighting and focus bring out the best in your product.
- Consider Lifestyle Shots: Lifestyle shots can help customers visualize how the product fits into their lives. If you're photographing a coffee mug, for example, show it being used in a cozy kitchen setting. This adds a personal touch and can make the product more relatable, potentially boosting sales.
By following these simple steps and utilizing the iPhone's features to your advantage, you can create high-quality product photos that will grab the attention of potential buyers.
Editing Your Product Photos on Your iPhone
Editing plays a vital role in enhancing the quality of your product photos, helping you showcase your items in the best light. Fortunately, the iPhone offers a variety of built-in tools and third-party apps to refine your images without needing professional editing software. Here's how you can edit your product photos to achieve polished, high-quality results.
1. Crop and Straighten for a Balanced Composition
Start by cropping your image to remove any unwanted background or distractions. The iPhone's editing tools allow you to easily resize and straighten your photos. Use the gridlines as a reference to align the product perfectly within the frame, ensuring that it appears centered and balanced.
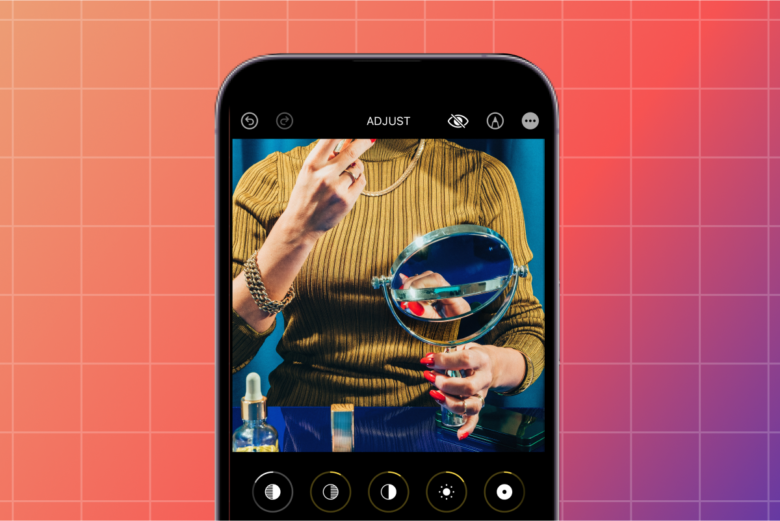
2. Adjust Brightness, Exposure, and Contrast
The iPhone offers intuitive tools to enhance the brightness, exposure, and contrast of your photos. Use the Exposure slider to adjust how light or dark the photo appears, making sure that the product is clearly visible. Adjust the Brightness to make the image appear lighter, while Contrast helps add depth to the image, making colors pop and shadows more defined.
3. Use Filters and Presets for Consistency
If you're photographing multiple products, using consistent filters or presets can help create a cohesive aesthetic across your images. The iPhone offers a range of filters that can quickly improve the look of your photos, from enhancing warmth to adding cool tones. However, avoid using overly dramatic filters, as they can alter the true colors of your product. Instead, go for subtle adjustments that enhance the image without changing its natural appearance.
4. Fine-Tune with Advanced Editing Apps
For more advanced adjustments, apps like Adobe Lightroom Mobile, Snapseed, and VSCO offer additional features, such as retouching, sharpening, and color correction. These apps provide a range of tools to fine-tune details, correct color imbalances, and improve the sharpness of your product. If you need to remove imperfections or enhance textures, these apps are your best options.
5. Perfect Your Product Photos with Aiarty
For a sleek, professional look, Aiarty Image Matting leverages advanced AI to remove backgrounds with precision, ensuring your product remains the focal point. This powerful tool eliminates distractions while preserving sharp edges and fine details, giving your images a clean, high-quality finish ideal for e-commerce, marketing, and branding. For even higher-quality visuals, Aiarty Image Enhancer offers 8X upscaling, preserving intricate details while sharpening textures for crystal-clear results.
Whether you're refining product cutouts or enhancing image resolution, Aiarty provides the ultimate AI-powered solution to elevate your store's visual appeal and boost conversions. While this tool is designed to work seamlessly on PC/Mac, it's ideal for achieving professional-level edits that are difficult to perform on mobile devices. Using a desktop setup allows for greater precision and larger editing spaces, ensuring your product photos look their best and help boost conversions.
Conclusion
Mastering product photography with your iPhone is both achievable and highly rewarding. By carefully setting up your product, optimizing camera settings, and leveraging the power of natural and artificial lighting, you can create images that not only showcase your items beautifully but also drive customer engagement. Don't forget to use essential accessories like tripods, external lenses, and advanced editing software like Aiarty Image Matting to refine your photos to a professional standard. With the right techniques and tools at your disposal, your iPhone can transform into a powerful asset for your e-commerce store, ensuring every product is presented at its best and ultimately boosting your brand's visual appeal and sales.
You May Also Like
This post was written by Brenda Peng who is a seasoned editor at Digiarty Software who loves turning ordinary photos into extraordinary works of art. With AI assistance for brainstorming and drafting, the post is reviewed for accuracy by our expert Abby Poole for her expertise in this field.