
How to Take Good Photos of Clothes to Sell Online: A Complete Guide
Updated on
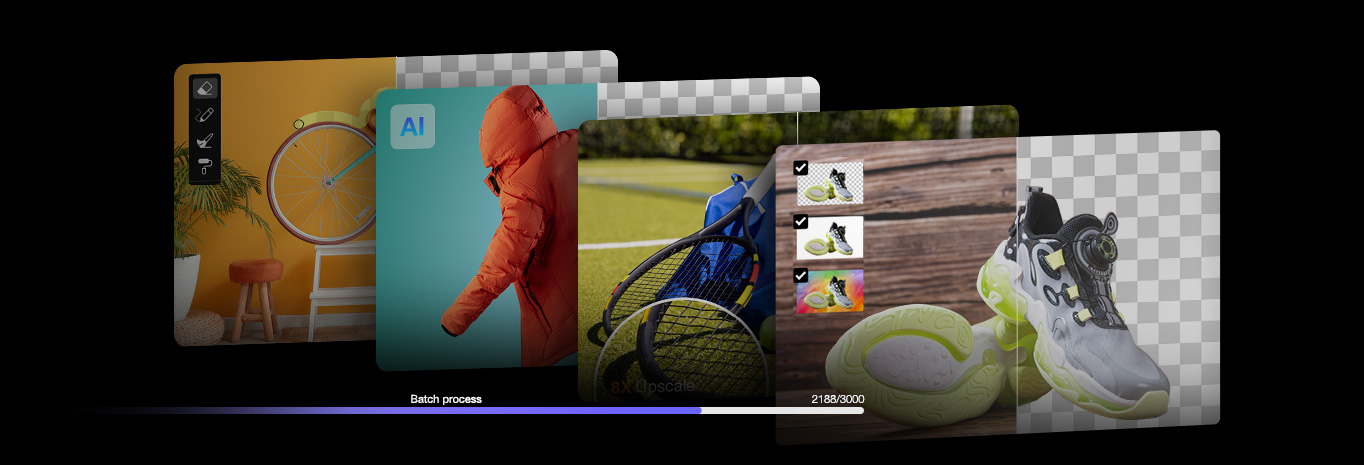
Summary: This article will show you how to take professional clothing photos for selling online, with tips on camera settings, lighting, background choices, clothing display techniques, and post-editing for stunning product images. If your background doesn't look good or doesn't meet the requirements of online stores, no worries—AI-powered Aiarty Image Matting can easily replace the background, giving your photos a clean, professional look in no time.
In the bustling world of online fashion, your photos are your first—and often only—chance to convince buyers to click "Add to Cart." Blurry snaps, cluttered backgrounds, or poorly lit images can sink even the most stylish garments, while crisp, professional-quality photos can turn casual browsers into loyal customers. Whether you’re a small boutique owner, a reseller, or a DIY fashion entrepreneur, learning how to take pictures of clothes to sell isn’t just about aesthetics—it’s about building trust, showcasing value, and boosting sales.
But here’s the good news: You don’t need a pricey studio setup or years of experience. With the right techniques, a smartphone or basic camera, and smart image editing tools, you can create stunning, scroll-stopping images that rival top e-commerce brands.
In this guide, we’ll break down exactly how to take photos of clothes to sell like a pro—from lighting hacks and styling tricks to AI-powered editing shortcuts. Get ready to transform your product listings from "meh" to must-have—and watch your sales soar.
Preparation: Getting Ready for the Clothing Photography
Before you start taking pictures of clothes to sell, proper preparation is essential to ensure high-quality, professional-looking images. From selecting the right equipment to setting up an ideal shooting environment, these steps will help you capture clear and appealing product photos.
Choose the Right Equipment
A DSLR or mirrorless camera will give you the most control over settings like aperture and shutter speed. However, you don’t need an expensive DSLR to take great clothing photos—many modern smartphones come with high-resolution cameras capable of capturing sharp details.
Additionally, using the right accessories can significantly improve image quality. A tripod helps keep the camera steady, preventing blurry shots and maintaining consistency across different angles.
Lighting is just as important: natural light works best, but if it's not available, softbox lights or a ring light can help eliminate harsh shadows and evenly illuminate the clothing.
Prepare the Clothing
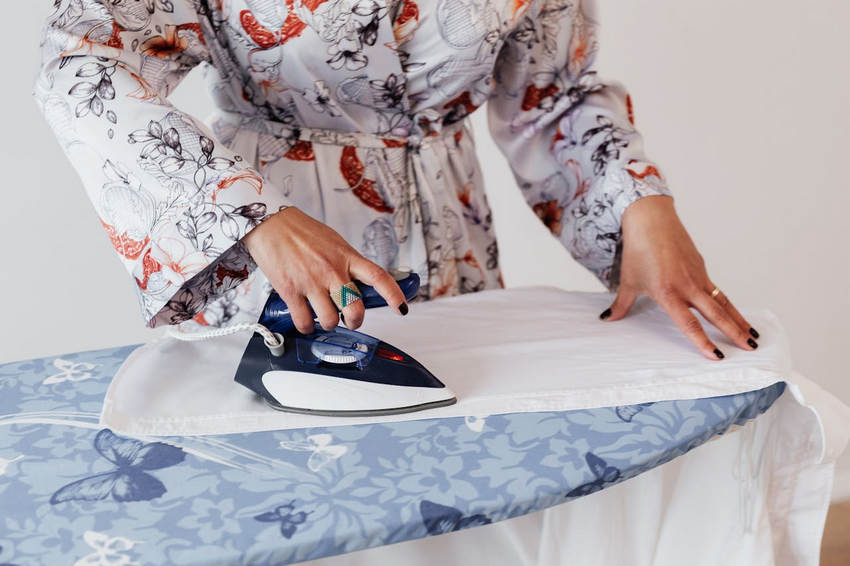
No matter how good your camera is, wrinkles, lint, or stains can ruin a product shot. Before taking photos, steam or iron the clothing to ensure a smooth, polished look. Use a lint roller to remove dust and small fibers, and inspect for any stains, loose threads, or imperfections that might stand out in high-resolution images. If you're photographing structured garments like jackets or dresses, consider using a mannequin or a live model to show their fit and shape more effectively.
Set Up the Background
The background plays a huge role in how your clothing is perceived. A simple, neutral background like white, gray, or beige helps the clothing stand out without distractions, making it easier for buyers to focus on the product.
If you want to add some creativity to your images, you can experiment with textured backgrounds, such as a wooden table, fabric backdrop, or brick wall. These can add depth and interest to your photos while keeping the focus on the clothing.
For a lifestyle-oriented look, consider shooting outdoors in a natural setting, like a park or against a clean urban backdrop. Just make sure the background remains uncluttered so that it complements rather than competes with the clothing.

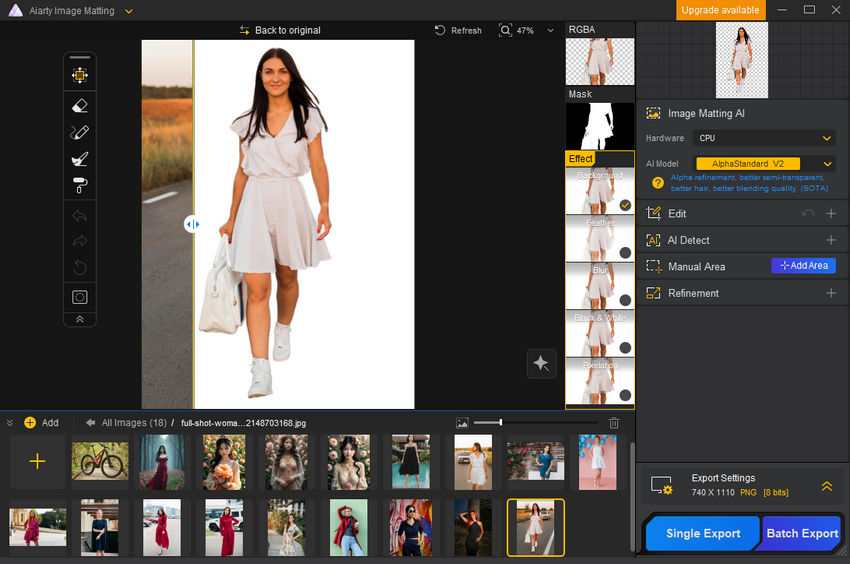
If your background isn’t perfect during the shoot, you can easily remove or replace it later using Aiarty Image Matting. This AI-powered tool automatically removes backgrounds, allowing you to replace them with a clean white backdrop or a setting that complements your brand. Simply upload your image, and Aiarty will do the work for you, with options to fine-tune the edges for a natural, professional look. This is especially useful if you want a consistent background across all your clothing photos.
I've personally used Aiarty Image Matting to change the background of a clothing photo to pure white. It removed the original background precisely, and the result looked professional in just a few seconds.
Want to give it a try? Click the "Get Free License" button below to get your own free license for Aiarty Image Matting and start editing your photos today.

By carefully selecting your background during preparation, you’ll ensure your images look professional and appealing without needing excessive editing later.
With everything set up, it’s time to start the photoshoot!
Shooting: How to Take Professional Clothing Photos
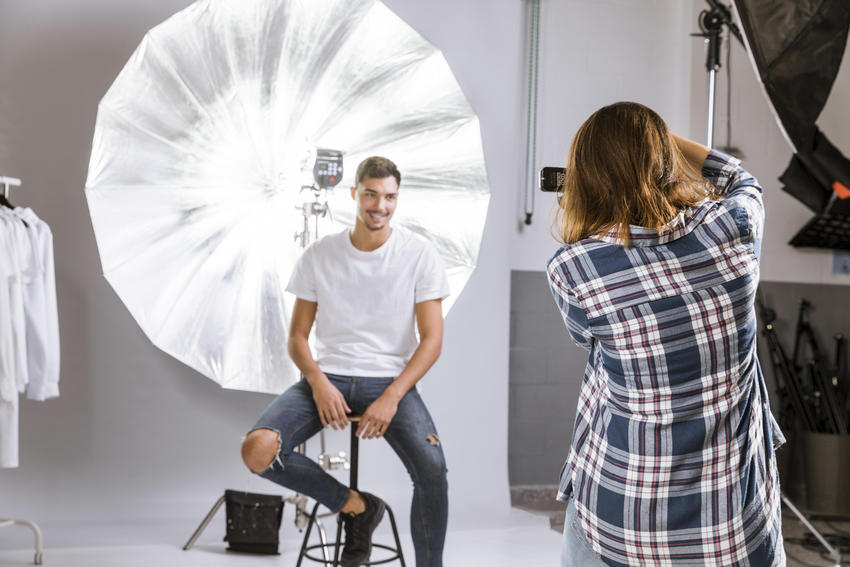
Now that everything is set up and ready, it’s time to start shooting your clothing. Capturing high-quality product images involves more than just snapping pictures; you need to consider the angle, lighting, and styling to highlight the best features of the garment. Here’s how to take professional photos that will make your clothes stand out.
Choose the Right Shooting Style
Choosing the right shooting style for your clothing product photos is essential for presenting the garment in its best light. The style of your shots should match the type of clothing you're photographing, as well as the platform’s requirements. Here's how you can determine which shooting style works best for your clothing:
Flat Lay Shots
Flat lay photography is a popular style for smaller or more casual items like T-shirts, accessories, or scarves, as well as baby clothes like onesies, socks, or hats.
To capture the best flat lay shots, lay the clothing on a clean, flat surface such as a white sheet or table, and photograph the item directly from above. This method is particularly effective for highlighting patterns, textures, and small details, such as the stitching on a shirt or the design of a belt.
Flat lay shots are perfect for items where the fit and shape are less important but where the garment's texture, color, and design need to be showcased clearly. However, avoid overlapping or cluttering the items to ensure the focus stays on the product.

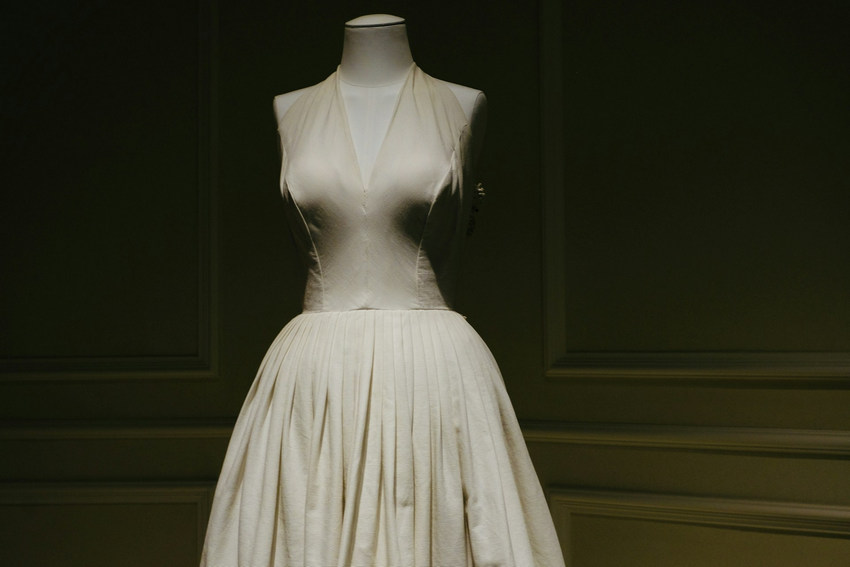
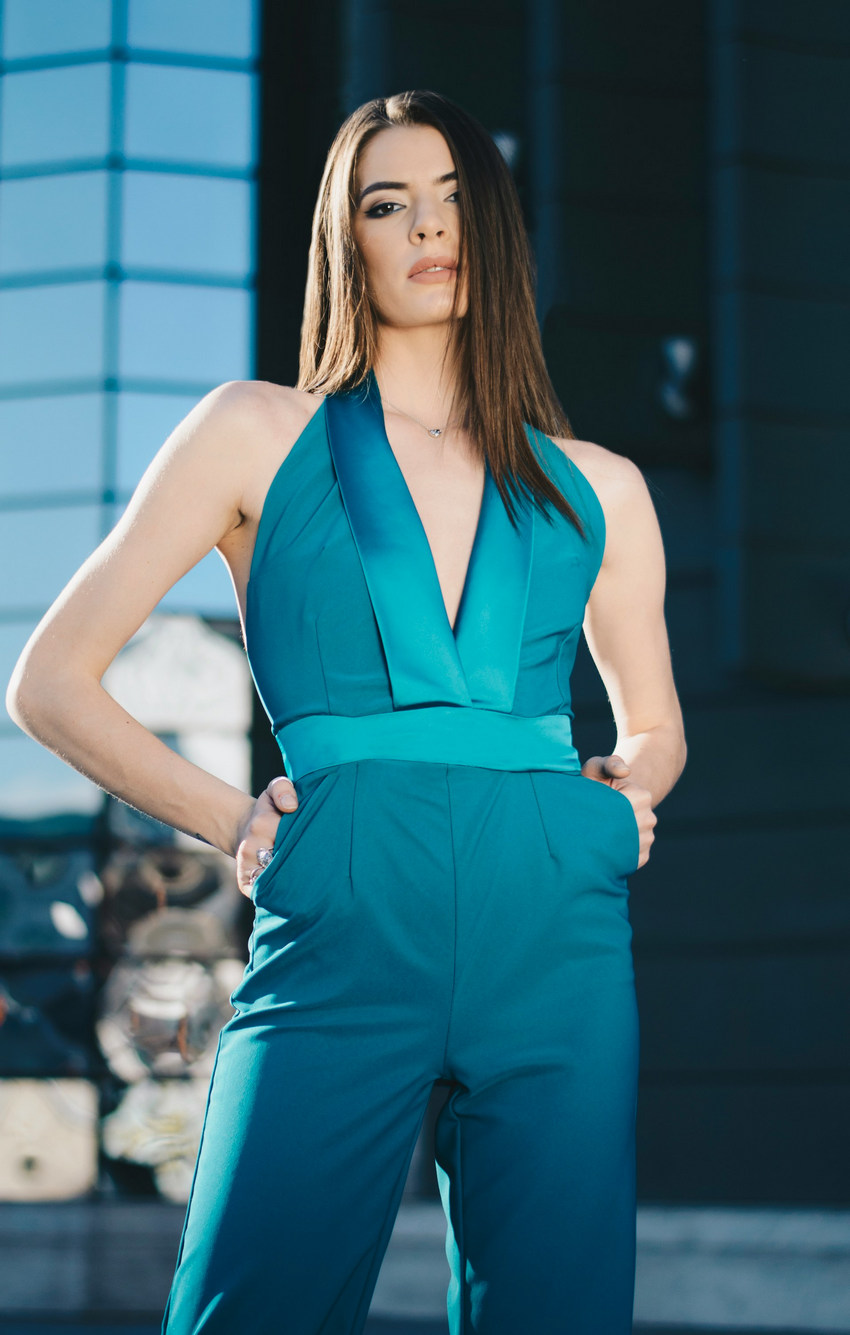
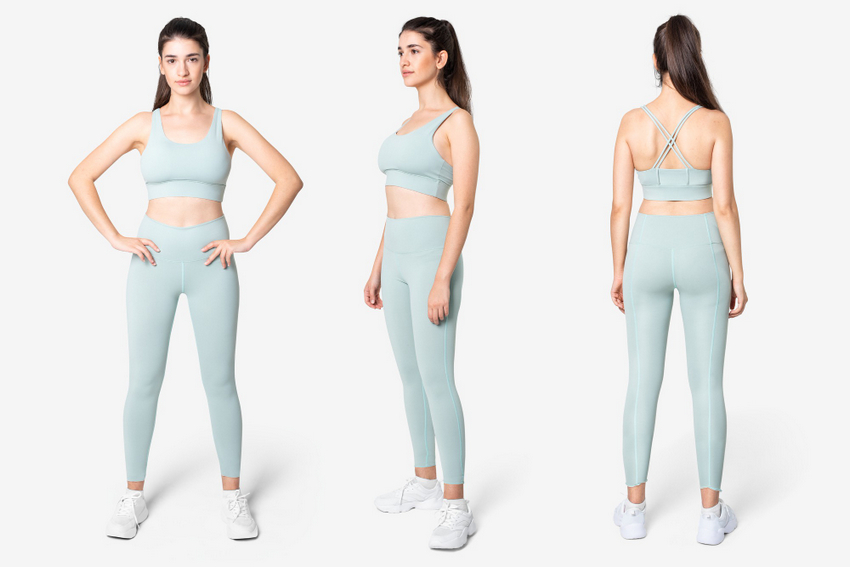
Mannequin or Model Shots
For garments like dresses, jackets, or other structured pieces, a mannequin or a live model is ideal for showing off the fit and shape of the clothing. Mannequins provide a stable, clear representation of how the garment fits, while models add a dynamic and more relatable aspect to the product photos.
When using a mannequin, ensure the garment is well fitted and neatly arranged to avoid wrinkles or stretching. Mannequins are especially useful for products like coats, blazers, and dresses, where the garment's structure and silhouette are key selling points.
If you opt for a live model, this adds a personal touch and allows buyers to visualize the garment in real life. Make sure the model is standing in a natural pose, with a neutral background to avoid distractions. For e-commerce platforms like Amazon, there are specific guidelines for model usage:
- Main images should be shot on a model, except for childrenswear, accessories, or transparent clothing.
- The model must be standing, not sitting, kneeling, leaning, or lying down.
- If the product is transparent, ensure that the model’s intimate areas are covered. Additionally, the model should wear clothes underneath the transparent item.
- For children’s clothing, avoid using models and instead show the product flat (no model).
Hanging Shots
If you don’t have access to a mannequin or model, hanging shots are an alternative for lighter garments such as scarves, silk shirts, or blouses. Hang the item neatly on a sturdy hanger and photograph against a clean background. This style works well for garments where showing the fabric's texture and drape is important but where fit is less critical.

Optimize Camera Settings
Capturing high-quality clothing photos isn’t just about the garments—it’s also about how you set up and position your camera. Adjusting the right settings ensures sharp, well-lit, and accurate images that showcase the details of your clothing.
Key Camera Settings for Clothing Photography
- Aperture (f-stop): Set your aperture between f/8 and f/11 to keep the entire garment in sharp focus. This ensures that fabric textures, stitching, and small details remain crisp.
- Shutter Speed: Use a shutter speed of 1/125s or faster to avoid motion blur, especially if photographing a model or capturing slight fabric movements.
- ISO: Keep the ISO low (100-400) to reduce noise and maintain image clarity. If shooting in lower light, increase the ISO slightly, but avoid going too high to prevent grainy images.
- White Balance: Adjust the white balance according to your light source (daylight, tungsten, or custom settings) to ensure the clothing’s colors remain true to life.
- Focus Mode: Use manual focus or single-point autofocus to emphasize key details like fabric texture, buttons, or stitching. Ensure the garment remains the sharpest element in the frame.
Additional Tips for the Best Shots
- Use a Tripod: Keeping the camera stable helps avoid blur and ensures consistent framing.
- Avoid Direct Flash: Flash can create harsh shadows and overexposed areas—opt for soft, diffused lighting instead.
- Test and Adjust: Before shooting a full batch of photos, take test shots and tweak your settings to achieve the best results.
By optimizing these camera settings, you’ll produce high-quality, professional-looking clothing photos that appeal to buyers and accurately represent your products.
Choose the Best Angles
Angles are just as important as camera settings. Experiment with front, back, and side views to present the full garment. For detailed shots, take close-ups of stitching, buttons, or unique design elements to highlight the fabric quality. For structured garments like coats or dresses, a three-quarter angle often provides the most flattering representation of the fit. If photographing flat-lay styles, ensure the clothing is arranged neatly and shot directly from above to maintain symmetry.
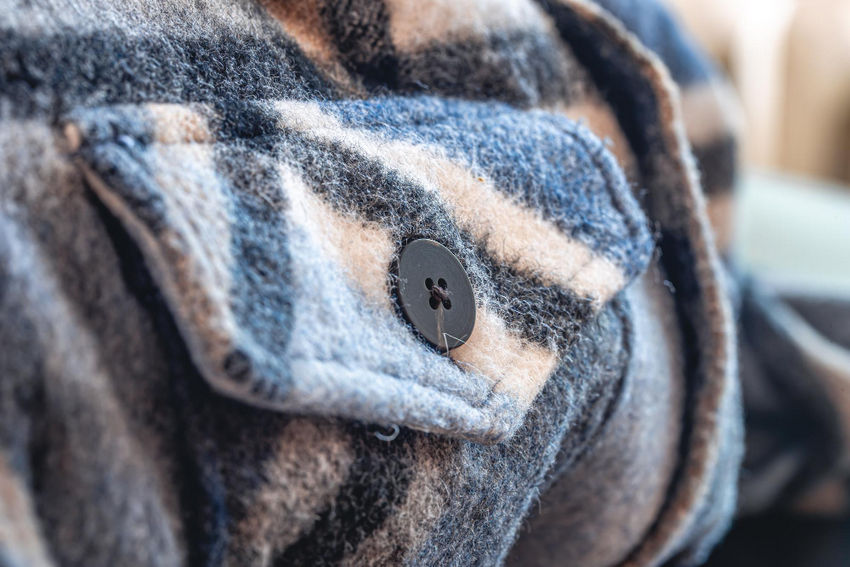
Focus on Details
The key to a professional clothing photo is capturing details that show off the quality of the garment. Close-ups of fabric textures, embroidery, buttons, or unique stitching can help buyers assess the quality of the material and craftsmanship. Pay attention to small features that make the item stand out, like the pattern on the fabric or any distinctive design elements.
Layering and accessories can also make a big difference. If you’re photographing an outfit that includes accessories like a belt or scarf, make sure to capture those items separately in close-up shots as well. This provides the buyer with a more complete view of the outfit.
Mastering Lighting for Perfect Clothing Photos
Lighting can make or break your photos. If you’re shooting indoors, natural light is your best friend. Set up your shoot near a window where the light is soft and diffused. Avoid shooting in direct sunlight, which can cause harsh shadows or overexposed areas. If you're shooting indoors and natural light isn’t enough, use a softbox light or a ring light to ensure your clothing is evenly lit.
One common mistake is overlooking the importance of shadows. Reflectors can help bounce light onto areas that might be too dark, ensuring the garment’s full details are visible. Remember, lighting should highlight the fabric and texture, not overwhelm it with glare or shadows.
Don't Forget to Photograph the Clothing Tags
In addition to capturing the garment itself, make sure to take clear, close-up shots of the clothing tags. This includes:
- Brand and Size: Ensure the brand logo and size information are clearly visible in the image. Customers often rely on this information to make purchase decisions.
- Material Composition: Highlight the fabric content (e.g., 100% cotton, polyester blend) to give potential buyers an idea of the garment’s quality and feel.
- Care Instructions: Many customers want to know how to care for their new clothes. A photo of the care instructions tag can help them understand washing and drying guidelines, which can influence their decision to buy.
For best results, photograph the tag in clear, well-lit conditions so all the text is legible. Use a macro lens or close-up shots to ensure that the small print is sharp and easily readable.
By paying attention to these key aspects, you’ll be able to take stunning clothing photos.
After the Shoot: Selecting and Editing Your Clothing Photos
After your photoshoot, it’s time to refine your images to ensure they are polished and meet e-commerce platform requirements. Proper editing not only makes your clothing product more appealing but also improves your search engine optimization (SEO) to increase visibility. Here’s how you can effectively edit your clothing photos for maximum impact.
Perform Basic Adjustments
You can adjust the brightness, contrast, and color balance to make sure the clothing’s colors appear true to life. Platforms like Amazon and eBay expect the product’s colors to be represented realistically. Additionally, you may need to correct the exposure to avoid images that are too dark or overexposed.
If the background is uneven or slightly tilted, use editing software to straighten the image and correct any distortions. A level, well-lit background ensures the product takes center stage and gives a clean, professional appearance.
For these basic adjustments, tools like Adobe Photoshop can help.
Remove Distractions
Sometimes, your clothing images may contain distractions like dust, lint, or wrinkles that are visible in the final photo. It’s crucial to remove these imperfections to maintain a clean and attractive product image. You can use Photoshop to remove any unwanted spots, dust, or small items in the background. If there are creases or folds in the clothing, tools like the healing brush in Photoshop can help smooth them out.
Moreover, make sure to remove any extra objects or accessories that don't belong in the frame, such as stray hangers, jewelry, or bags, unless they are part of the product listing. For a more polished look, you can also remove background clutter that might distract from the clothing.
Keep Platform Image Guidelines in Mind
When editing your clothing photos, it’s important to keep the specific image requirements of each platform in mind. Different e-commerce platforms have different rules regarding what can and can’t be included in your product images.
Here's a quick overview of some common guidelines:
Amazon:
- No text, pricing, or promotional material, such as "Best Seller," "Amazon’s Choice".
- Do not use Amazon logos or phrases like "Prime," "Alexa," or the Amazon Smile design.
- Swatch-only images: These are acceptable, but ensure there is no logo, pricing, or promotional text on the image.
eBay:
- No text, logos, or watermarks in product images.
- Avoid promotional elements: Make sure your images don’t include any promotional messages or distractions that could take attention away from the product.
Optimize Image for SEO
Optimizing your images for SEO is just as important as editing the visuals themselves. Proper image optimization will help your product appear in search results, driving more traffic to your listings.
- File Naming: Instead of generic filenames like “IMG1234.jpg,” rename your files to include relevant keywords. For example, use descriptive names like “red-dress-for-sale.jpg”. This helps search engines understand what the image represents and boosts visibility for relevant search terms.
- Image Dimensions: To ensure your images load quickly without sacrificing quality, resize them to 1000x1000px or larger. E-commerce platforms like Amazon and eBay recommend images that are large enough for users to zoom in but still optimized for fast loading.
Use Appropriate File Format and Compression
Finally, save your images in appropriate formats. JPEG is typically the best choice for product images due to its balance between high quality and file size. You can also use PNG for images with transparent backgrounds, though the file size can be larger. Use online tools like TinyPNG to compress your images without losing quality, which is essential for faster loading times on your listings.
 FAQs about Clothing Photography
You can capture great clothing photos without a mannequin by using a flat lay setup, hanging the clothes, or photographing a live model.
For a flat lay, simply lay the clothing on a clean surface and shoot from above to showcase patterns, textures, and details.
Hanging the clothes on a simple hanger against a neutral background is also effective, especially for items like dresses or jackets.
If you want to show how the clothing fits, you can photograph it on a live model. Ensure the model is standing to clearly show the fit and structure. Alternatively, for structured garments, using a clothing rack or rod can display the item well without a mannequin.
The best background for clothing photography is a clean, neutral backdrop that doesn’t distract from the product. A white or light gray background is ideal as it makes the clothing stand out and looks professional. If you want to add a bit of character, you can use a soft-colored backdrop or a simple textured surface, like wood or fabric, that complements the garment. Avoid busy or cluttered backgrounds, as they can take attention away from the clothing. For outdoor shoots, choose locations with soft, natural backgrounds, such as greenery or neutral-colored walls.
Taking professional-quality clothing photos with your iPhone is easy if you use the right settings and techniques. Here are some iPhone camera tips to help you capture stunning images:
1) Use Auto Focus and Auto Exposure Lock (AE/AF-L)
To get the best focus and exposure for your clothing photos, tap on the garment where you want the focus to be. Once you tap, hold the screen to lock the Auto Exposure/Auto Focus (AE/AF-L). This ensures that the iPhone camera doesn't adjust focus or exposure unexpectedly during the shoot, especially in changing lighting conditions.
2) Disable "Live" Photos, Flash, and Avoid Selfies
For clear, crisp product photos, turn off Live Photos, Flash, and avoid using selfie mode. Live Photos can introduce motion blur, while the flash can create unwanted reflections and color distortion. Selfie mode is not ideal for clothing photos as it distorts angles.
3) Turn on the Timer
Use the iPhone camera timer to prevent camera shake when taking photos. This is especially useful when shooting flat lays or when you need to step away from the camera for full-body shots. The timer ensures that your clothing photos are well-lit and detailed without any blur.
4) Avoid Using Zoom
While zooming in may seem convenient, it can reduce image quality and result in blurry photos. Instead, get closer to your clothing item to highlight details like stitching, texture, or patterns. This will give you a sharper, clearer image without sacrificing quality.
5) Experiment with Portrait Mode
Portrait Mode is perfect for clothing photography. It subtly blurs the background, making your clothing stand out by creating a beautiful depth of field effect. This mode is ideal for showcasing details like fabric texture, embroidery, or fit, as it draws attention to the garment while minimizing distractions in the background.
References:
You May Also Like
Brenda Peng is a seasoned editor at Digiarty Software who loves turning ordinary photos into extraordinary works of art. With years of experience behind the lens and in front of the computer, Brenda shares her passion for photography, image enhancement, and editing through easy-to-follow tutorials.