How to Remove Background from Images in Photoshop
Updated on
Removing a background in Photoshop is a classic skill for any photographer or designer. Whether you want to isolate a subject or swap out a backdrop, Photoshop gives you several tools to help make the process easier.
In this guide, we will guide you through detail steps to remove background using the Quick Selection tool, Select and Mask tool, Pen, Color Range, or Magic Wand.
Note that some AI-powered feature is only available on the latest version of Photoshop. Also, Photoshop doesn't support batch tasks such as removing background from 3000+ images.
That's when you need Aiarty Image Matting, it uses advanced AI technology to achieve pixel-perfect background removal, especially for tricky subjects like hair, fur, or lace. It's super accurate and fast, letting you mask out complex details without spending hours fine-tuning.
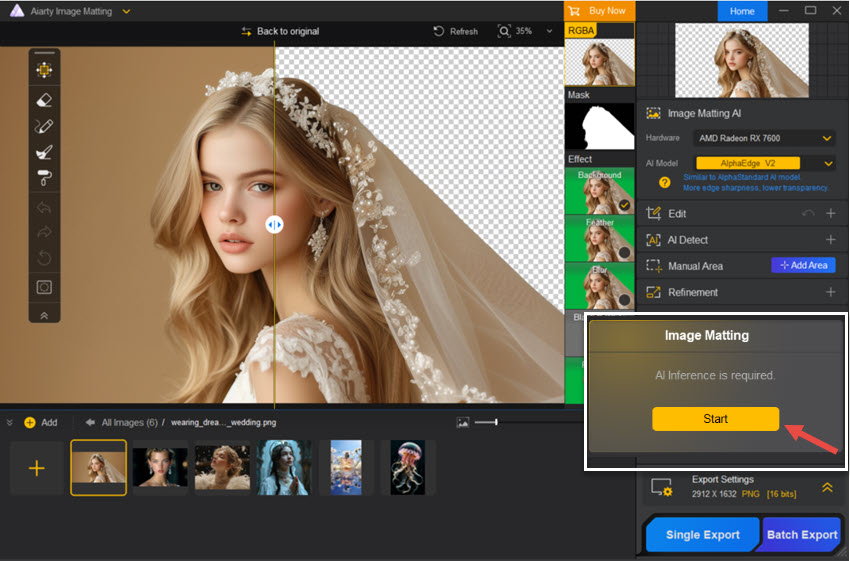
If you're facing a challenging background removal task in Photoshop, consider using Aiarty Image Matting. It’s designed to work where traditional tools fall short and provides a much smoother editing experience.
Watch video tutorial to remove background easily with AI
5 Ways to Remove Background from Photoshop
1. Using the Quick Selection Tool
The Quick Selection Tool is perfect for making selections quickly and easily. It works nicely for images with clear edges, but struggles with tricky content, such as hair strands and fuzzy edges.
Assuming you have already created a Photoshop project, and added your photo to the working area. Now follow the steps below to remove background from Photoshop.
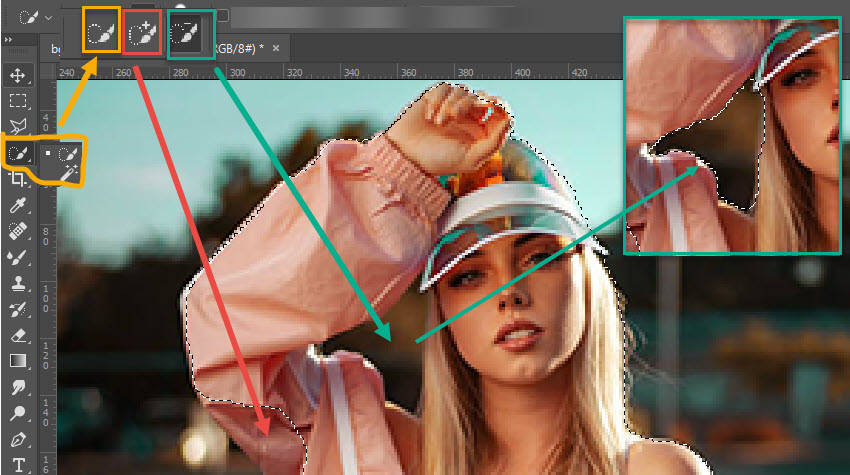
Step 1. Click on the Quick Selection Tool from the toolbar.
It is nested in the magic wand tool by default. If you don't see the Quick Selection tool, right click on the magic wand icon, and hit the Quick Selection icon instead.
Step 2. Drag the mouse over the area you want to keep.
If you accidentally select too much, hold down the Alt key (Option on Mac) to subtract from your selection, or click the Quick Selction tool with the [-] icon.
To add areas into your selection, click the Quick Selection tool with the [+] icon.
Note: You can press Ctrl+D (Cmd+D on Mac) to cancel selection.
Step 3. Use the shortcut Ctrl+J (Cmd+J on Mac) to create a new layer with the copy of the selection.
You can also right click on the selection area, and hit "Layer Via Copy" option in the context menu.
Step 4. Preview the result.
You can toggle off the eye icon for the background layer to view the newly created layer.
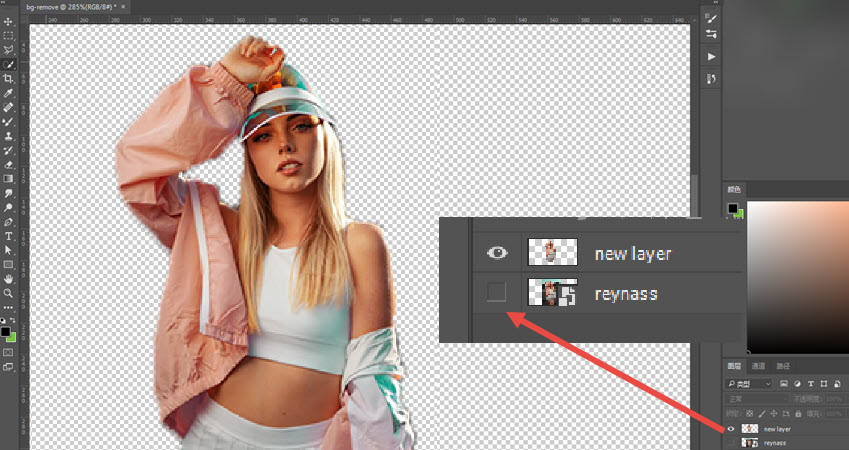
Once you are happy with the result, go to Menu > File > Export > Quick PNG or Export As…(Alt+Shift+Ctrl+W).
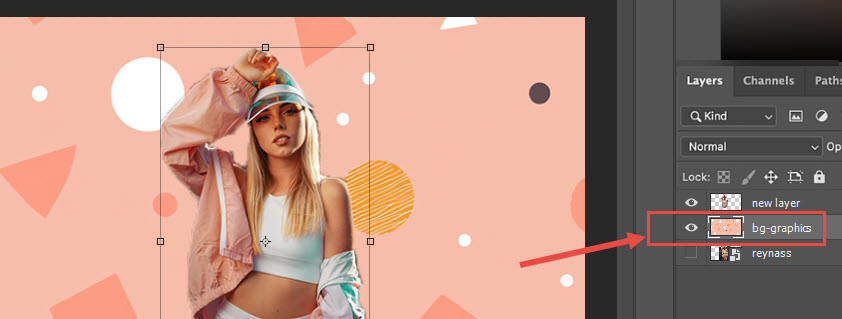
You can also add another image as its new background. Just place the desired background image below the cutout layer.
2. Using the Select and Mask Feature
The Select and Mask feature is a powerful option for more complex selections. But note that some older versions of Photoshop doesn't support some options in this feature.
Step 1. Access the Select and Mask feature.
- Navigate to the Photoshop menu: Select > Select and Mask (or use the shortcut Alt+Ctrl+R).
- Photoshop will automatically select the subject and display the image in transparency, allowing you to see the separation between the subject and background.
- Drag you mouse over the subject to make selection.
Tips:
If you're using Photoshop 2021 or newer, you can simply hit the Select Subject button. Click OK when prompted about discarding your current selection.
Step 2. Fine tune the Layer mask selection.
- To better examine the selection, you can hit the Zoom tool (the magnifier icon) to inspect areas, such as clothing edges.
- Use the Quick Selection Tool to drag over areas you want to keep. You can also use the Brush Tool to paint back any missing pixels.
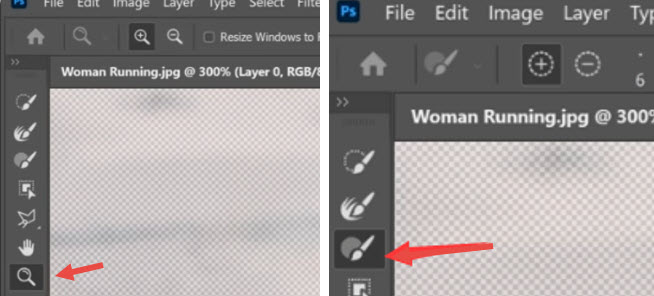
Once you've completed fine-tuning, select the Hand tool to adjust the image so it fits the screen, allowing you to see the whole picture.
Step 3. Use the Global Refinements panel to fine tune the layer mask.
Note: A layer mask is a non-destructive method for hiding pixels. You can refine the edges of the mask to create a realistic cutout, preventing a jagged or blurry appearance. The mask hides content without deleting it, so you can restore it whenever you need.
The parameters in the Global Refinements panel help you fine-tune the mask edges. Here are some commonly used parameters:
Smooth: Helps eliminate jagged edges of the mask.
Contrast: Sharpens the edges of the mask.
Shift Edge: Adjust this value to expand or contract the selection, which can help reduce any edge halos.
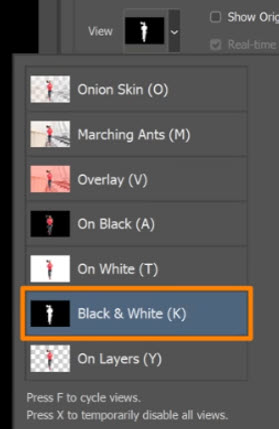
Additional Tips:
- While fine-tuning, feel free to change the view mode for a clearer look at your selection. For example, switching to "On Black" for the Shift Edge adjustment lets you easily see halo artifacts and observe the effects of the Shift Edge slider in real-time.
- Use the paint tool or the minus (-) and plus (+) buttons to paint away imperfections or restore pixels.
- Keep in mind that "white reveals and black conceals." Content in the white area will be visible in the final output, while anything covered by black will remain hidden, or visually "removed".
Step 4. Output to layer mask.
Once satisfied with your selection, choose Output to Layer Mask at the bottom of the Select and Mask panel. This will create a mask layer connected to your image.
You'll notice a mask layer linked to the image you're working on.
Note: In this scenario, the subject we're masking is a girl, focusing primarily on her body against the background. We won't focus on her hair just yet, as we'll address that separately in the following steps.
Step 5. Edit the mask layer again to fine tune hair and other tricky part.
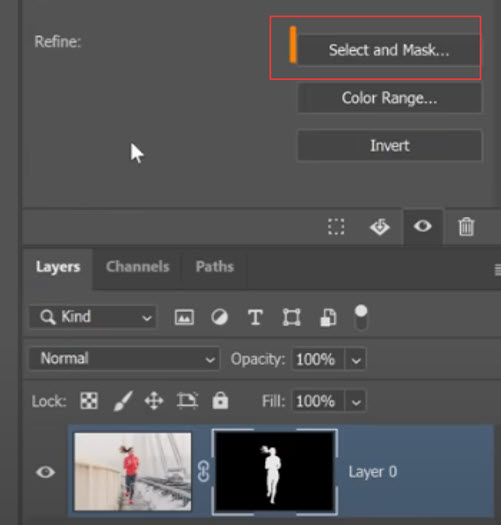
Please ensure that the mask layer is active (look for the white frame around the thumbnail), then hit the Select and Mask button again in the Refine section to refine details like hair without affecting the rest of the selection.
Why Refine Hair Selection Separately?
This approach ensures that the Global Refinement adjustments don't affect the hair in earlier steps. For example, the parameters we set for smooth, contrast, and shift edge will only influence the edges of her body.
When you return to the Select and Mask panel, you'll see that the global refinement parameters no longer impact the edges (all values are returned to 0%, 0px), while the mask layer remains as we previously edited it. Now we can work on the hair without worrying about altering the edges we've already defined.
Step 6. Use the Refine Edge tool and the Refine hair button.
Option 1. Refine Edge brush
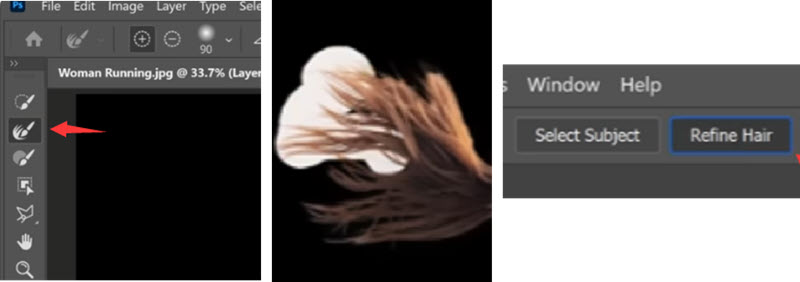
Select the Refine Edge Brush and drag it over the hair. Photoshop's algorithms will analyze and capture fine details.

To view the area you paint over using the Refine Edge Brush tool, you can tick the Show Edge box to check where Photoshop is applying this edge refining algorithms. It is under the Properties panel, next to the view Mode.
Option 2. Refine Hair Algorithms
For those using Photoshop 2021 or newer, just click the Refine Hair button for a quick fix.
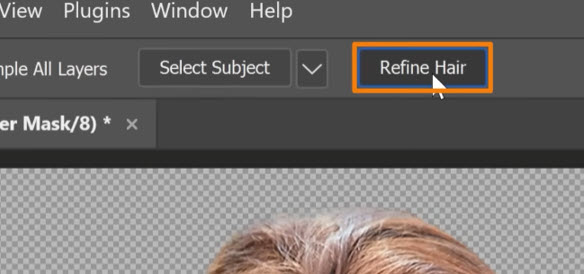
As always, you can use the + and - icons to refine the edge selection. When you're satisfied with the outcome, click OK. Photoshop will then apply the adjustments to the existing layer mask.
Step 7. Fix incomplete masking or over masking problems
For tricky subjects, you might encounter problems where some background remnants are left on the subject, or parts of the subject are unintentionally removed. Here's how to address these issues:
- Select the Brush tool from the toolbar.
- Click on the mask in the layer panel.
- Double-click the foreground color swatch to open the Color Picker.
- Choose black and click OK.
- Zoom in on the problematic area. Shortcut: Hold Alt (Option on Mac) and scroll up on the mouse wheel.
- Use the black color to paint over the areas to hide any leftover parts of the original background. To reveal any hidden content, switch the foreground color to white and paint to bring those areas back.
Recall this saying: ''White reveals and Black conceals.'' It's a handy phrase to remember how things work.
Tips: Press D to reset the foreground and background colors to their defaults (black and white), and press X to quickly swap between the foreground and background colors.
FAQs
1. What is the difference between the Brush tool and the Quick Selection tool?
The Brush Tool selects only the areas you paint over without automatic edge detection, while the Quick Selection Tool can detect edges automatically.
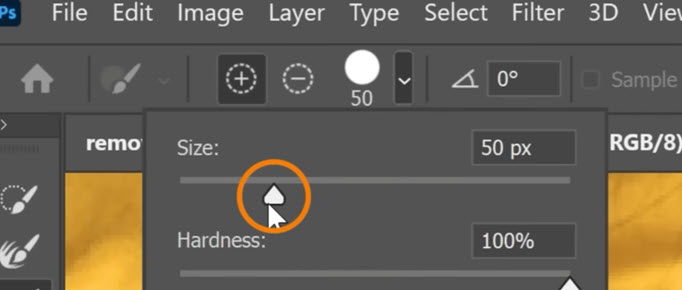
2. How to adjust the size of the brush tool for fine selection?
Click the down arrow next to the Brush Tool to adjust its size or use the keyboard shortcuts [] left and right brackets for quick adjustments.
3. How do I go inside the Select and Mask editing panel again?
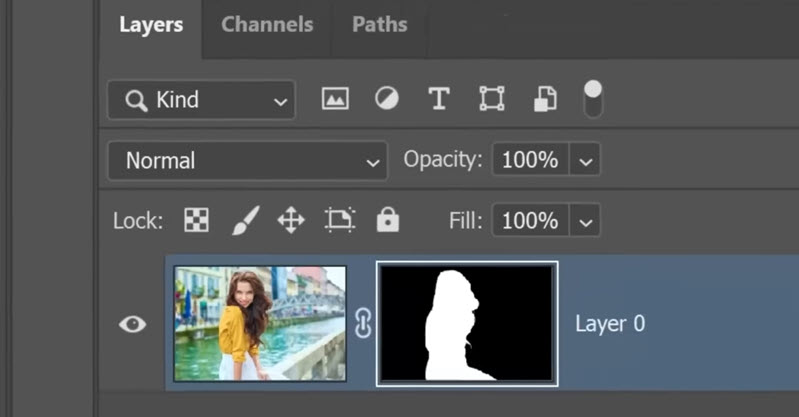
Double-click the layer mask thumbnail to access the Select and Mask workspace.
4. Why I cannot find Select and Mask button/Select Hair/Select Subject features?
Some of these AI features are only available in Photoshop 2021 and later versions. You can check your Photoshop version by going to the menu: Help > About Photoshop (On Mac: Photoshop > About Photoshop).
If you prefer not to upgrade to the latest version—for instance, my friend Helena is still a fan of Photoshop CS—then you can refer to other methods mentioned in this article.
3. Using the Pen Tool
The Pen Tool is intended for creating paths around the subjects you want. It is effective when selecting complex areas or subjects with distinct boundaries.
Step 1. Choose the pen tool from the tool bar.
Step 2. Select the layer, and click to create a starting anchor point.
Step 3. Following the shapes of the subject, click to create more anchor points around the subject.
- Click and drag your cursor away from the first point. As you drag, you'll see a curved line forming.
- You can convert anchor points between corner points (sharp angles) and smooth points (curves) by right-clicking on the point and selecting the desired option.
Step 4. Once you've outlined the subject, click on the first anchor point to close the path.
Step 5. Right-click and choose Make Selection to complete the cutout.
4. Using the Color Range Tool
As its name suggests, the Color Range tool is handy for making selections based on color ranges within an image. You can use it to fine-tune the edges of a selection made with another tool. For instance, you can use it to select large areas of similar color, like a blue sky or a body of water.
Now that we have the Select and Mask Feature on newer versions of Photoshop, beginners might not need the color range tool for quick tasks. Still, we included the video tutorial here for your reference.
Step 1. Go to Select > Color Range from the menu.
Step 2. Use the eye dropper to click on the subject.
Step 3. Use the [-] [+] eye droppers to refine your selection.
Always remember, Black conceals and white reveals.
Once you are satisfied with the selection, you can continues to remove background from Photoshop: Ctrl+J to copy the selection to a transparent layer, and export this transparent layer as PNG.
5. Using the Magic Wand
The Magic Wand Tool is handy for selecting areas based on color. Click on the area you want to select, and adjust the Tolerance level to include more or fewer shades. This method is best for images with solid backgrounds and distinct contrast between the foreground (subjects) and the background.
The steps are more or less the same as using the Quick Selection tool, you can refer to the tutorials above.

