Removing the background from an image is one of those game-changing skills. Whether you're creating eye-catching graphics, product shots, or personalizing a holiday card, having a clean background can make your visuals pop.
Before diving into the steps on how to remove background in Canva, here's the catch: the background remover is only available on Canva Pro. Should you invest in the $120 yearly pro plan? Before making decisions, here are aspects worth noting.
💡 Problems Using Canva Background Remover:
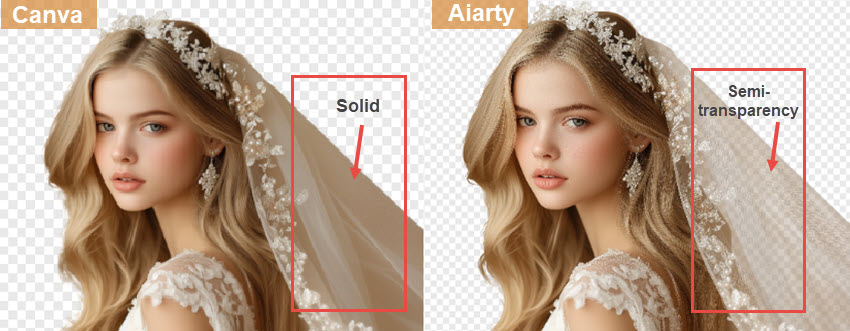
- Canva struggles with semi-transparent subjects, leaving background color remnants on the subject.
- Canva processes the image in low-resolution, and compresses the image files on its server.
- No batch background removal options, thus it is not suitable for E-commerce.
- As an online service, there are privacy and data security concerns.
Want to Achieve Perfect Background Removal in Batch with Transparency Details?
Aiarty Image Matting is the life-saver choice to batch remove image backgrounds, keep clear edges with details, and it runs offline for utmost data security. Redeem free license code for this background remover >
Download Aiarty Image Matting to remove image backgrounds precisely:
How to Remove Image Background in Canva
The BG Remover option is only available for Canva Pro users. If you don't want to subscribe to Canva, you can jump to Part 3 for an easier method with AI-driven matting.
Step 1. Create a new project and upload your image.
Create a blank project or use Canva templates. Drag and drop your file in the left-hand panel.
Step 2. Use the Background Remover Tool in Canva.
In the Uploads panel, click your image to add it to the canvas.
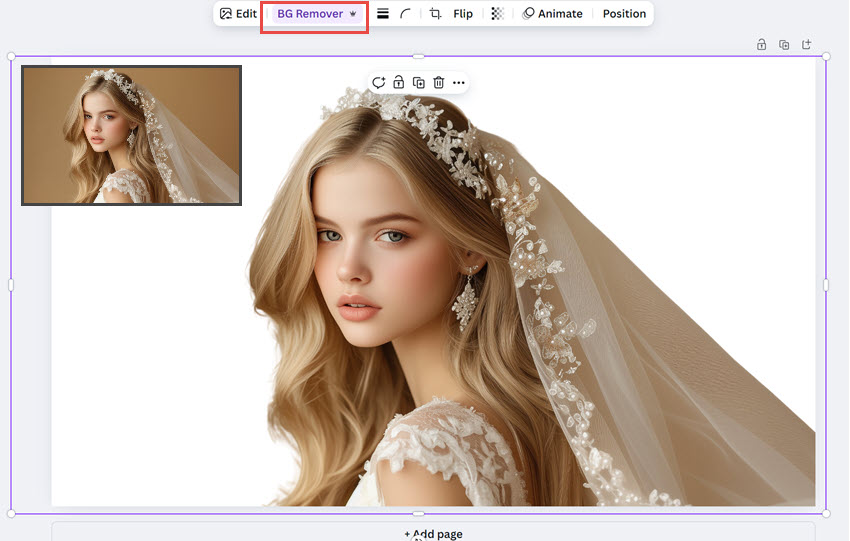
Click the image to make sure it is selected, then hit the BG Remover option on the toolbar.
Step 3. Refine Using Brush Tools.
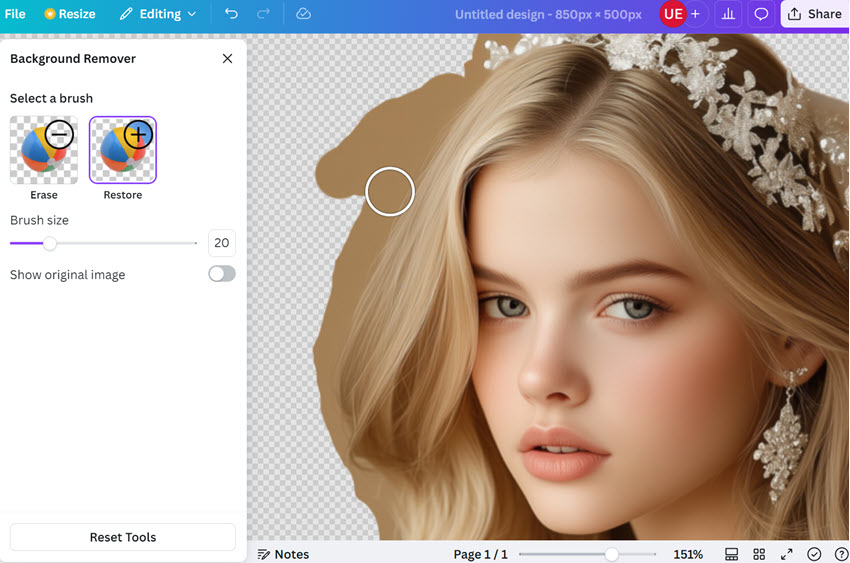
If you prefer to make some detailed adjustments, hit the BG Remover button again to open the brush tools:
- Erase to remove areas you don't want.
- Restore to bring back parts that were accidentally erased.
Adjust the brush size for precision work on smaller or larger areas.
Tips for Better Workflow
- Quick Preview: Press the Spacebar to toggle the original image and see your edits in real-time.
- Navigation: Scroll your mouse up and down to move around the image.
- Zoom In/Out: Hold Ctrl and scroll your mouse to zoom in and out for finer control.
Step 4. Export the transparent background.
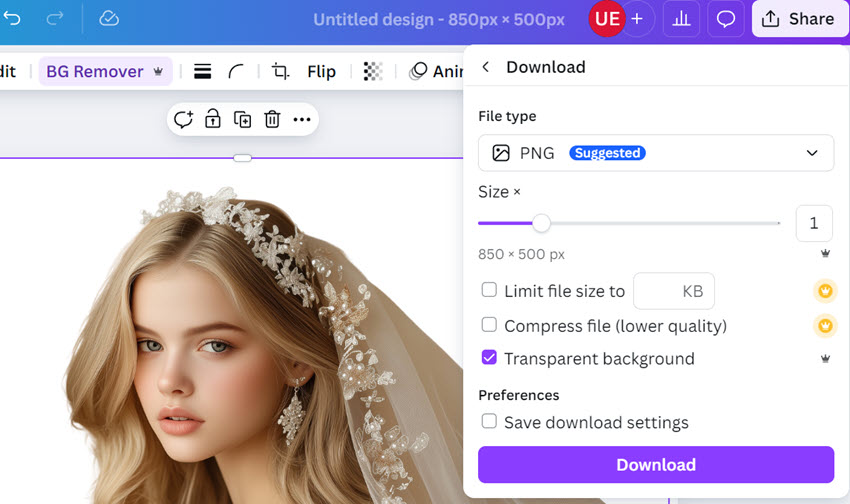
Click the Share button, choose PNG file type, and make sure the Transparent background option is ticked.
Otherwise, the exported image will have a white background, instead of a transparent background, even if you have already used the BG Remove option.
How to Remove and Add a New Background in Canva
While some of you prefer transparent cutouts, others may want to remove and replace backgrounds in Canva. Here's how:
Step 1. After removing background in Canva, upload or Choose a Background Image.
You can upload your own background image or browse Canva's library of stock images.
Step 2. Add the Background Image to Your Design.
Click the background image that you want to make it transparent in Canva. Then add it to your canvas.
Step 3. Adjust Layers.
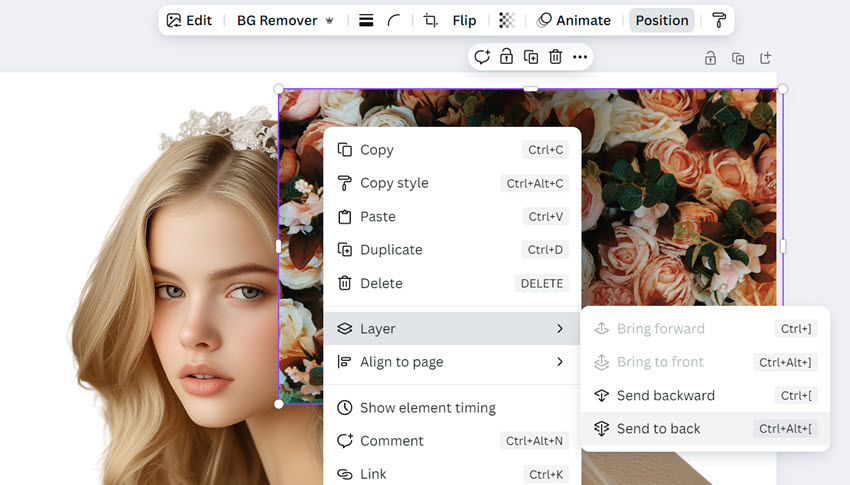
To move the new background behind your subject, right-click the image and select Layer > Send to Back, or use the Position button in the toolbar to drag the image into place.
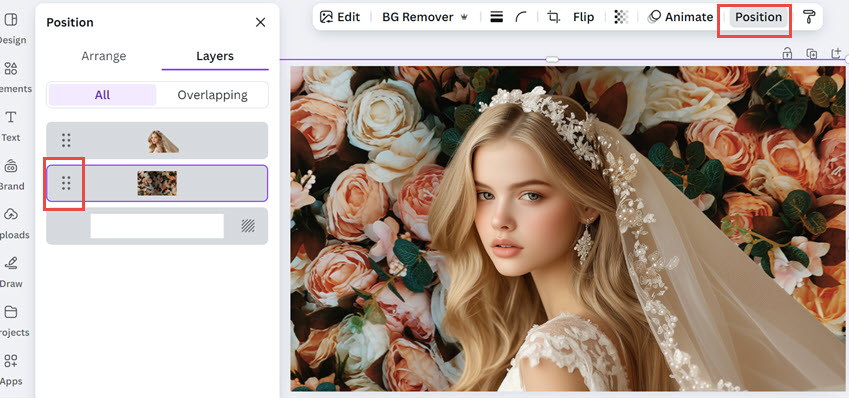
Shortcut Keys for Layering:
- Bring forward: Ctrl+]
- Bring to front: Ctrl+Alt+]
- Send backward: Ctrl+[
- Send to back: Ctrl+Alt+[
How to Remove Background in Canva Alternative for Better Results
If you are frustrated with removing background in Canva, you will find Aiarty Image Matting a life saver.
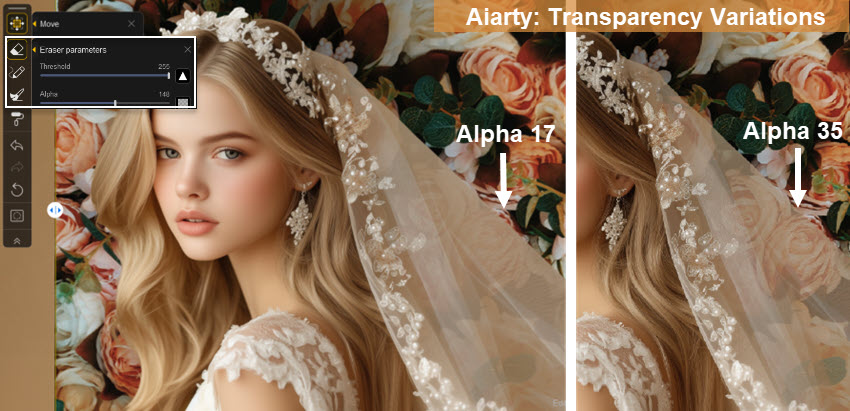
Running safely offline, Aiarty Image Matting supports batch processing 3,000 images, with 4K/8K quality results. It can precisely mask out subjects, remove background neatly, and keep transparency variations with details for edges.
No matter it's for hair, semi-transparent lace, or complex backgrounds, the built-in state-of-the-art (SOTA) AI models will give you clean and sharp masks.
Before getting started, install and launch Aiarty Image Matting.
Step 1. Drag and drop your images into the working panel.
Step 2. Hit the Start button in Image Matting to remove the image background.
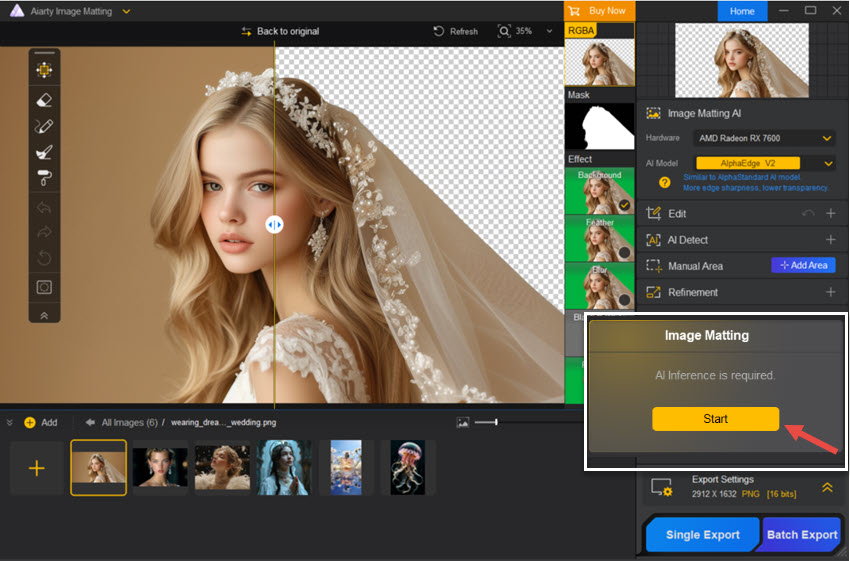
Aiarty's AI models will automatically matte the image, providing a clean, transparent background with natural edges.
Shortcut:
- You can use mouse scroll to zoom in on a specific part.
- Press Space and drag your mouse to move the image.
- Hold down Control or command plus mouse scroll to adjust the brush size.
Tips: After removing the image background, you can add custom images or colors as the new background.
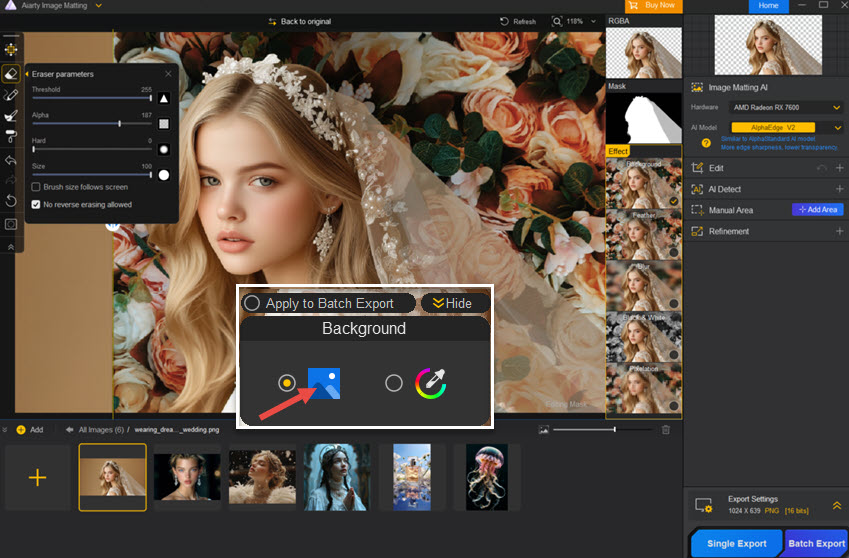
Aiarty also supports batch processing, so you can export up to 3000 images at once for efficiency.
Step 3. Export the image with a transparent background.

Tips: Refine Background Removal with Edit Tools
Aiarty Image Matting has 4 edit tools built-in, you can use the eraser to remove unwanted parts, the brush to bring back pixels, and the dodge and the burn tools for a natural image blend with new backgrounds.
For instance, Canva fails to refine the semi-transparency tulle of the bridal's headpiece lace, resulting in the original beige background being a remnant on the new background, which feels unnatural.
See comparison below:

Watch video tutorial to remove background using Aiarty Image Matting:
 FAQs
FAQs
1. Where is the background remover in Canva?
The background removal feature is called BG Remover in Canva. It is located on the toolbar just above your image, but the background remover is only applicable in Canva Pro paid plans.
2. How do you export the transparent background in Canva?
Make sure to tick the option "Transparent Background" upon the exporting panel (share > download). Otherwise, the exported image will have a pure white background.
3. Why there are background remnants on isolated subjects in Canva?
Canva doesn't support fine-tuning the transparency levels when isolating subjects from the backgrounds. To solve the problem, you can turn to Aiarty Image Matting, a standalone AI matting software with alpha matte estimation. It can properly tackle semi-transparent items, lace, hair, fuzzy fabric, and other tricky scenarios.