Sometimes, we need to make a background transparent to seamlessly blend an image into another design. To perform this task, we can use Photoshop. This powerful image editing program offers various ways to achieve a transparent background, from quick tools like the AI-powered Remove Background tool and Magic Wand to more precise methods like the Pen Tool.
In this tutorial, we’ll take you through the step-by-step process of how to make background transparent in Photoshop using these tools.
But before any further, we want to remind you that Photoshop’s background removal tools come with certain limitations that can make the process challenging, especially for beginners, designers racing against tight deadlines, and e-commerce sellers needing bulk edits.
💡 The Challenges of Making Background Transparent in Photoshop
- Tools like the Pen Tool require practice to master, making it difficult for users who are not familiar with precise selections.
- Refining edges manually can be tedious, especially when working with complex subjects like hair or fur.
- Photoshop’s AI-powered Remove Background tool may struggle with low-contrast images or intricate details, leading to jagged or incomplete selections.
Looking for an Easier, Faster and More Accurate Alternative?
If Photoshop feels too complex, Aiarty Image Matting offers a simpler, AI-powered solution. With its beginner-friendly interface, you can remove backgrounds in just a few clicks, saving time and effort. Compared to Photoshop, Aiarty ensures more precise cutouts, even for low-contrast images and intricate edges. It also supports batch processing for up to 3,000 images, making it ideal for large-scale projects.
If you’re interested in this alternative, you can get a free license code to have a try.
Download Aiarty Image Matting to change image backgrounds to transparent quickly and precisely:
How to Make Background Transparent in Photoshop
Method 1: Using AI-Powered Remove Background Tool
If you want to make a background transparent with minimal manual effort, Photoshop’s built-in Remove Background tool is a great option. Powered by Adobe Sensei, this AI-driven feature automatically detects and removes backgrounds directly from the Layers panel, saving you time and effort.
Also learn: Detailed Guide to Make Image Transparent Instantly
Availability: Photoshop 2021 (v22.5) and later (requires a Creative Cloud subscription).
Best for:
- High Subject-Background Contrast – Works best when there is a clear separation between the subject and background (e.g., studio product shots, portraits against solid walls).
- Defined Edges – Ideal for objects with sharp outlines (e.g., furniture, electronics, logos).
Step 1: Open Your Image
Launch Photoshop and open your image by selecting File > Open, or simply drag and drop the file into the workspace.

To ensure you have access to all necessary tools, make sure the Layers panel is visible by going to Window > Layers.

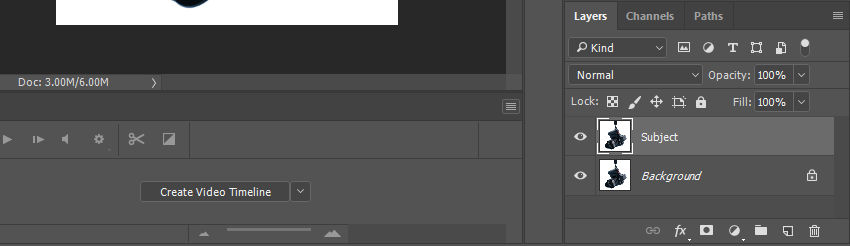
Step 2: Duplicate the Background Layer
Before making any changes, it's best to work on a copy of your image. In the Layers panel, select the original layer (named “Background”) and press Ctrl/Cmd + A to select everything, then Ctrl/Cmd + C to copy and Ctrl/Cmd + V to paste it onto a new layer. Rename this new layer (e.g., “Subject”) to keep your workspace organized.
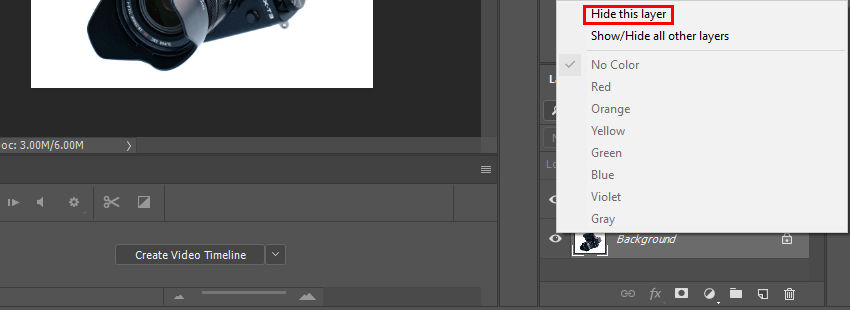
Step 3: Hide the Original Background
To preserve the original file while you edit, hide the background layer by clicking the eye icon next to it in the Layers panel. This ensures you can always go back to the original if needed.
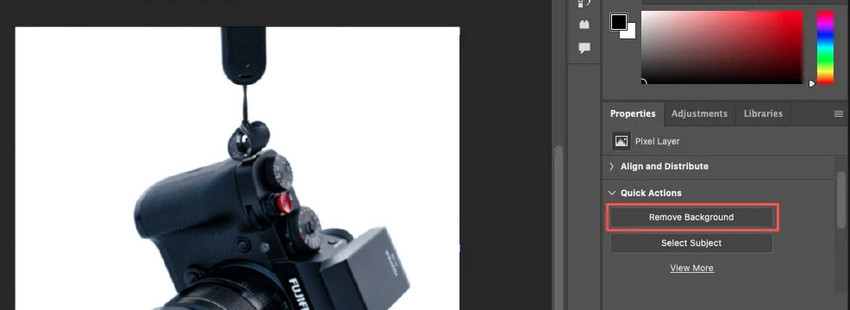
Step 4: Remove the Background Automatically
With the duplicated layer selected, open the Properties panel by going to Window > Properties. Under Quick Actions, click Remove Background. Photoshop’s Adobe Sensei AI will analyze the image and remove the background, automatically creating a layer mask.
At this stage, areas that have been removed will appear as a checkerboard pattern, indicating transparency.
Step 5: Refine Edges (Optional)
If small bits of the background remain, use the Brush Tool (B) to clean up the edges.

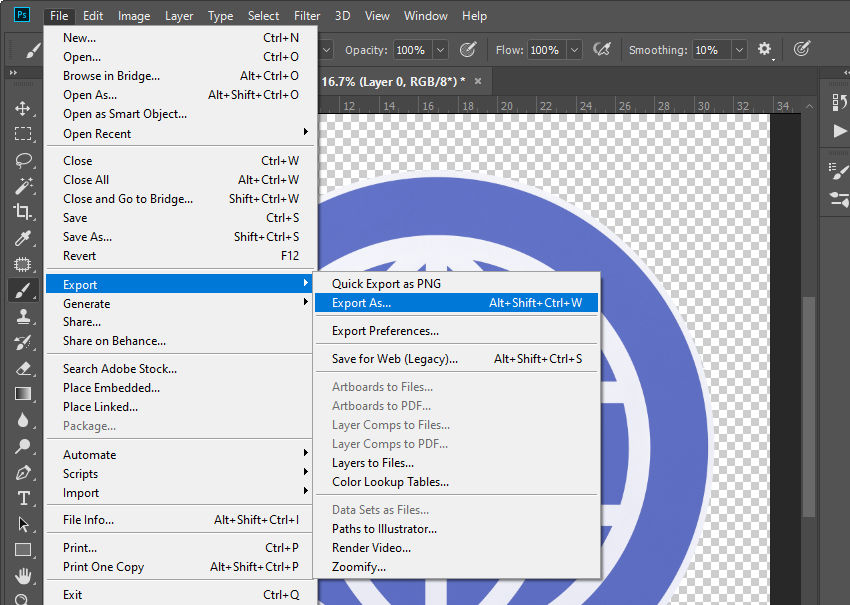
Step 6: Save with Transparency
Firstly, go to File > Export > Save for Web (Legacy).
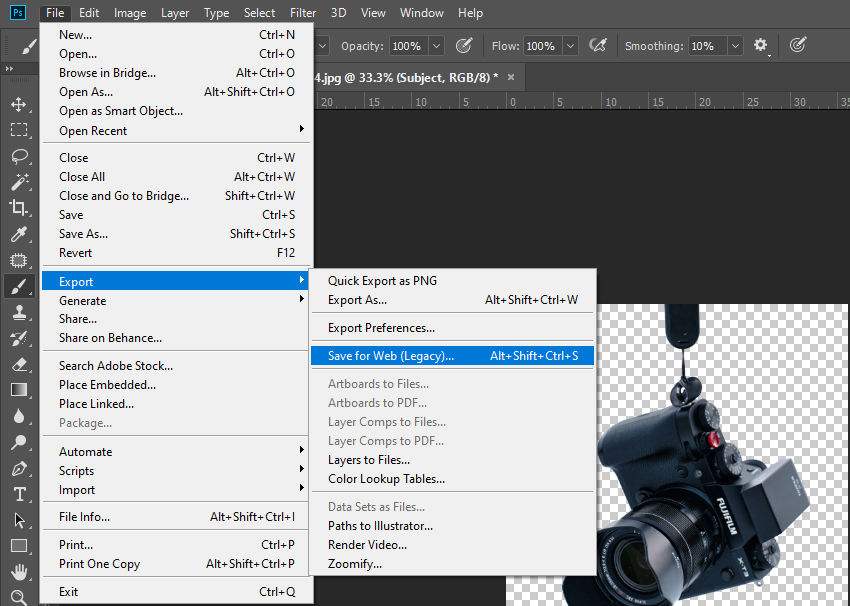
Then, you should select PNG-24 and make sure the Transparency box is checked.
Important tips: Don’t save as a JPG, as it will replace transparency with a solid white background.

Method 2: Using the Magic Wand Tool
If you're using an older version of Photoshop that doesn't support the AI-powered Remove Background tool, you can still make a background transparent with the Magic Wand Tool. This method is especially useful for images with solid or high-contrast backgrounds, allowing you to remove them with just a few clicks.
Available in: All Photoshop versions.
Best for:
- Images with solid or uniform backgrounds (e.g., product photos on white backgrounds).
- Subjects with clear, well-defined edges (e.g., logos, text, or objects with sharp contrast).
Step 1: Open Your Image
Launch Photoshop and open your image by selecting File > Open, or drag and drop the file into the workspace.
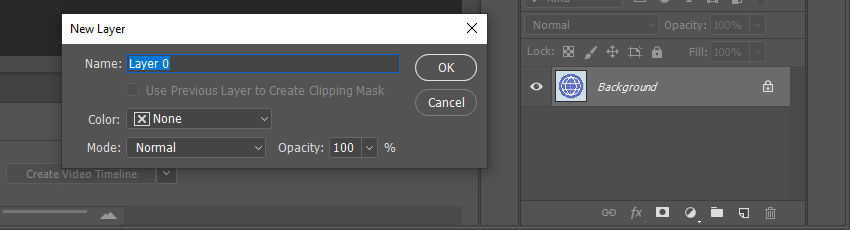
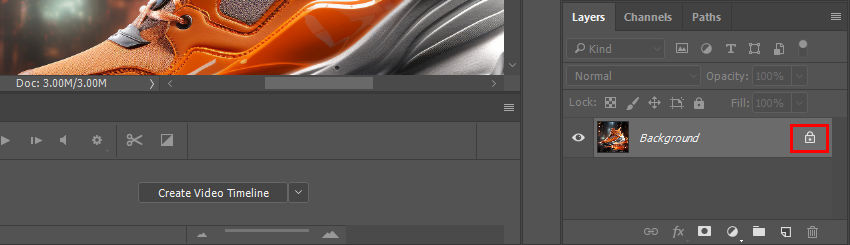
Step 2: Convert the Background Layer to a Normal Layer
If your image's background layer is locked (indicated by a lock icon next to it in the Layers Panel), you need to unlock it before you can make edits. Simply double-click the Background layer in the Layers Panel, and a dialog box will appear. Click OK to convert it into a normal layer (it will be renamed to "Layer 0" by default).
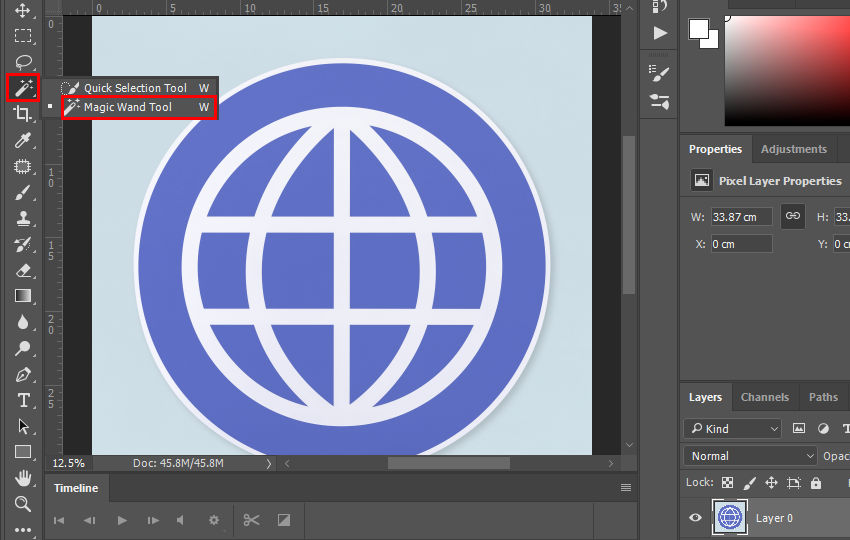
Step 2: Select the Magic Wand Tool
Go to the Toolbar and select the Magic Wand Tool (W). If you don’t see it, right-click the Quick Selection Tool and choose Magic Wand Tool from the dropdown menu.
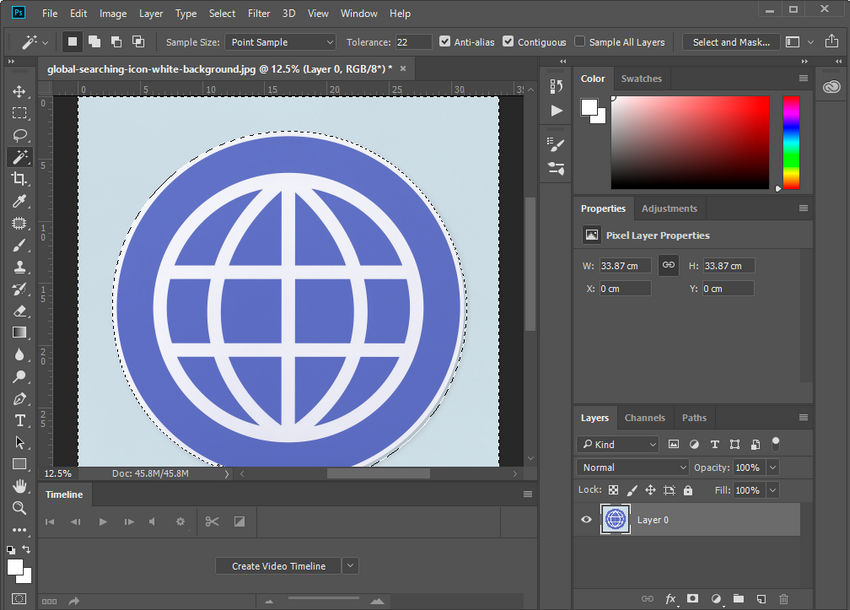
Step 3: Adjust the Tolerance
In the Options Bar at the top, locate the Tolerance setting.
- A lower value (e.g., 10-30) selects fewer similar colors, which is useful for high-contrast backgrounds.
- A higher value (e.g., 50-100) selects a broader range of colors, helpful for slightly uneven backgrounds.

Step 4: Select the Background
Click anywhere on the background. The Magic Wand Tool will highlight similar colors with a selection outline (marching ants). If needed, hold Shift and click other areas to add to the selection.
Step 5: Delete the Background
Press Delete (Windows) / Backspace (Mac) to remove the selected background.
Step 6: Refine the Edges (Optional)
You can use the Eraser Tool (E) or the Brush Tool (B) on a layer mask for manual refinements.

Step 7: Save with Transparency
To keep the background transparent, go to File > Export > Export As, and select PNG from the dropdown menu. Make sure to enable the Transparency option.
Method 3: Using the Pen Tool
If you're looking for the most precise way to make a background transparent in Photoshop, the Pen Tool is your go-to option. This method offers a high degree of control, perfect for detailed work, such as isolating objects with complex shapes or intricate edges. Though more manual, the Pen Tool ensures that your selections are pixel-perfect, allowing you to remove backgrounds and achieve a transparent effect with utmost accuracy.
Available in: All Photoshop versions.
Best for:
- Images with intricate details or complex shapes (e.g., clothing folds).
- Users who need to refine edges and want to ensure their cutout is perfect.
Step 1: Open Your Image
To begin, open your image by selecting File > Open, or drag and drop your file into Photoshop.
Step 2: Unlock the Background Layer
If your background layer is locked, simply click the lock icon next to the Background layer in the Layers Panel. This will unlock the layer, making it editable.
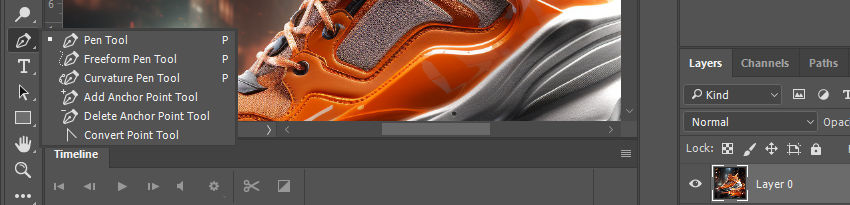
Step 3: Select the Pen Tool
In the Toolbar, select the Pen Tool (P). If it’s hidden under the Shape Tool, right-click and choose Pen Tool.
Step 4: Create a Path Around the Subject
To make the background transparent in Photoshop, begin by creating a path around your subject. Click to create anchor points along the edges of your subject. For curves, click and drag to create smooth curves. This process is key for ensuring a clean and precise cutout.
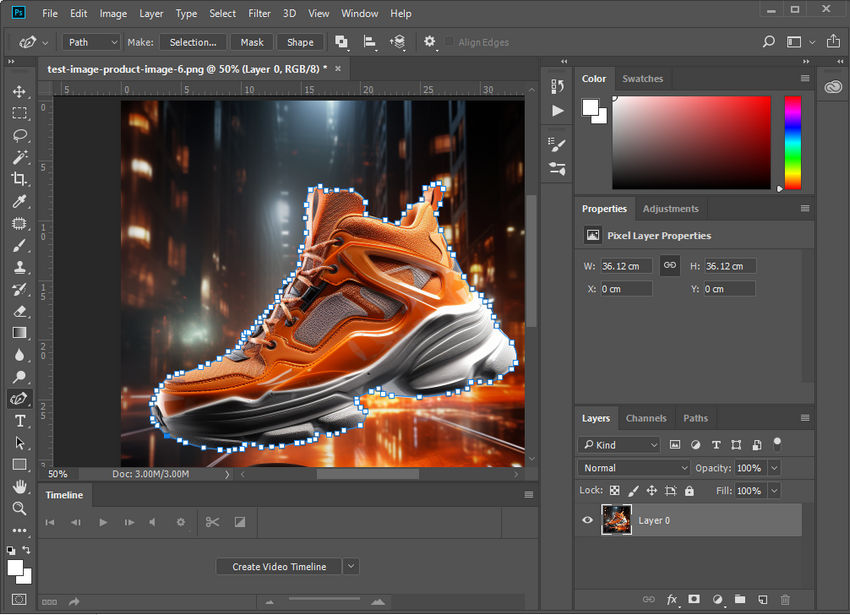
Step 5: Close the Path
Once you’ve traced around the subject, click the first anchor point to close the path, forming a loop that will be used to create a selection.
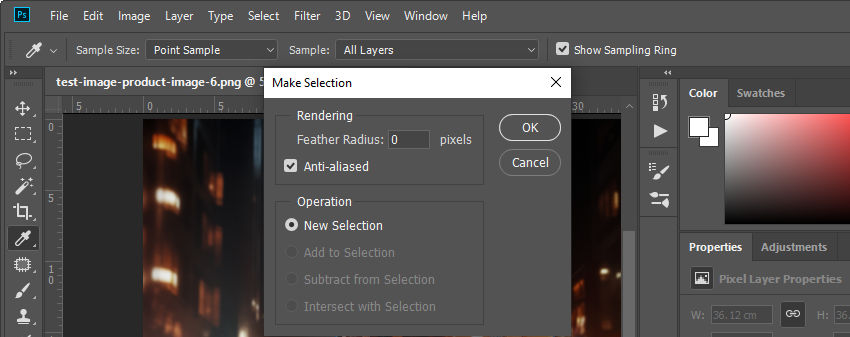
Step 6: Convert the Path to a Selection
Right-click on the path and select Make Selection.

In the dialog box, choose a Feather Radius of 0 for sharp edges, or use a small value (1-2px) for softer transitions, depending on your image.
Step 7: Refine the Selection (Optional)
If you need to refine your selection, go to Select > Modify > Expand or Feather to adjust the edges. Alternatively, use Select > Select and Mask to further fine-tune the selection, especially if you’re working with fine details like hair.
Step 8: Delete the Background
Now that you have a clean selection, press Delete (Windows) or Backspace (Mac) to remove the background. You’ll now see your subject isolated on a transparent background in Photoshop.
Step 9: Save with Transparency
To retain the transparent background, go to File > Export > Export As and choose PNG. Additionally, don’t forget to enable the Transparency option.
Best Photoshop Alternative to Make Background Transparent
Were you able to make background transparent in Photoshop smoothly? If not—or if you did, but it took way too much time—then maybe it’s time to try an easier alternative: Aiarty Image Matting.
Unlike Photoshop, where you might struggle with selection tools, jagged edges, or tedious manual refinements, Aiarty Image Matting does all the hard work for you. This AI-powered tool removes background precisely in just one click—no learning curve, no frustration.
Why Choose Aiarty Over Photoshop?
- One-Click Background Removal – No need to trace edges or adjust selections manually. Just upload and let the AI handle it.
- Handles Complex Edges Flawlessly – Struggling with hair, fur, or detailed objects? Aiarty ensures smooth, natural results.
- Batch Processing for Large Projects – Process up to 3,000 images at once, making it perfect for e-commerce, designers, and content creators.
- Easy Manual Adjustments – Aiarty provides tools like Erase, Brush, Dodge, and Burn, allowing you to fine-tune details effortlessly.
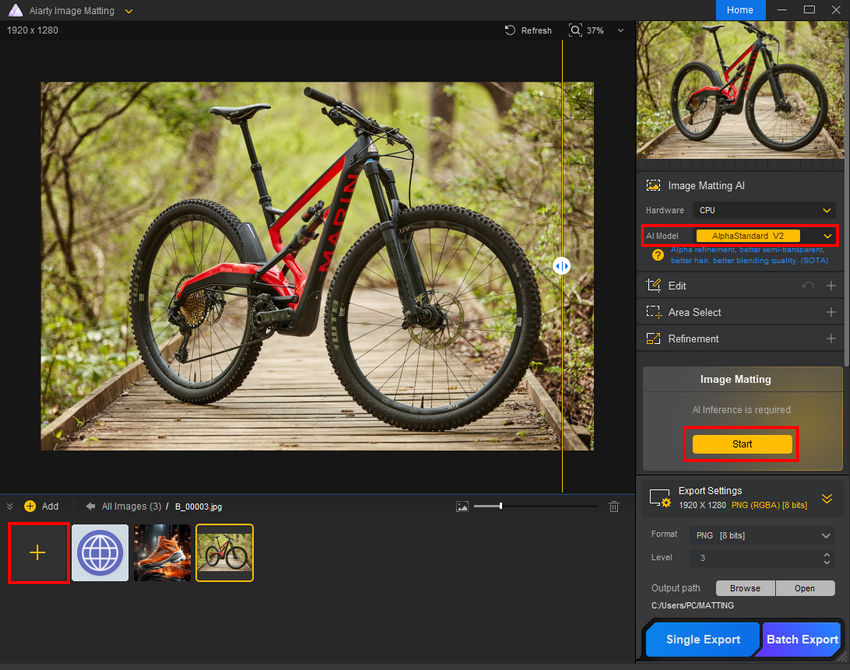
How to Make Background Transparent with Aiarty?
Step 1. Download and install Aiarty Image Matting.
Step 2. Open this tool and then drag and drop your image into the workspace.
Step 3. Choose an AI model and then click Start button. Aiarty’s AI will instantly process your image.
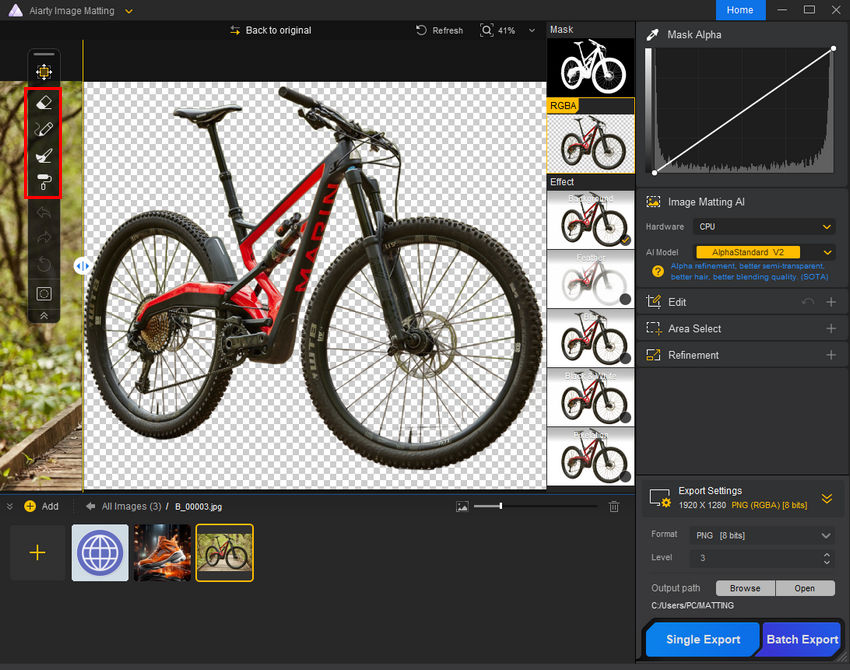
Step 4. Preview the result and refine it if needed.
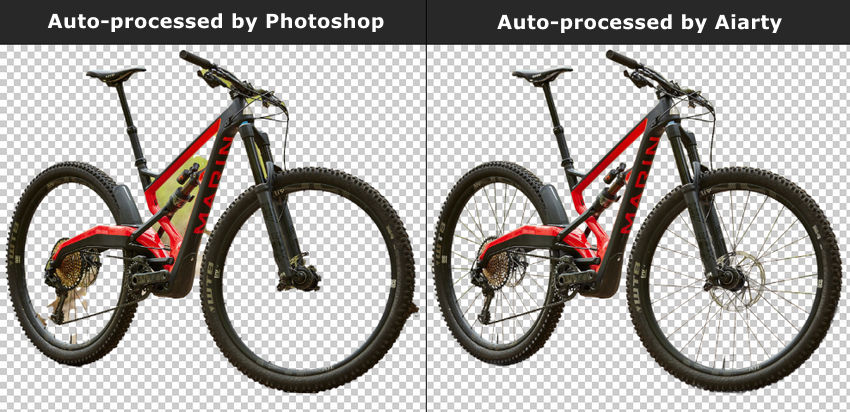
Aiarty typically delivers great results, even for images with detailed backgrounds.
Take this bicycle photo as an example. The background is complex, with various overlapping branches and textures that could be difficult to separate manually. Additionally, the bicycle itself features intricate elements like thin spokes, a detailed chain mechanism, and subtle shadows cast by the frame and tires.
Despite these challenges, Aiarty’s AI efficiently isolates the bike, preserving fine details without leaving jagged edges or losing important parts of the subject.
In case of further refinements needed, Aiarty provides Erase, Brush, Dodge, and Burn tools. Thus, users can remove any unwanted leftover areas, restore any mistakenly removed details, and adjust transparency for a more natural transition.
Step 5. Check the export settings, select PNG as the output format, and click Single Export or Batch Export to save your file.
 FAQs
FAQs
You need to save your image in a format that supports transparency. PNG is the best format for this purpose because it retains transparency, unlike other formats like JPG, which replace transparent areas with a solid color (usually white).
Photoshop offers several methods to save your image as a PNG, each providing different levels of control.
- Quick Export as PNG: For a fast and simple solution, go to File > Export > Quick Export as PNG. This method will automatically save your image with the transparent background, making it a convenient choice for quick tasks.
- Export As > Select PNG Format: If you need more control over your image’s export settings, go to File > Export > Export As. In the export dialog box, select PNG as your format and adjust image dimensions, resolution, and other settings as needed.
- Save for Web (Legacy) > PNG-24: The Save for Web option gives you the most control over the file’s compression and quality. To use it, go to File > Export > Save for Web (Legacy), select PNG-24 from the format menu, and make sure the Transparency box is checked. This method is especially useful for optimizing images for the web.
If you don't see the transparent checkerboard pattern after removing the background, make sure you’ve hidden the original background layer and are working on a separate layer with transparency. Additionally, ensure that you save your image as a PNG format, as JPG will not preserve transparency.
This can happen if your image has been saved in the wrong format or with incorrect settings. Ensure that your image was saved as PNG-24 and that the Transparency box was checked in Photoshop when saving. Also, double-check that you're using a compatible platform that supports PNG transparency.
If your transparent background turns white after saving, it's usually due to one of the following reasons:
- Saving in the wrong format: Make sure you're saving your image in a format that supports transparency, such as PNG. Formats like JPG do not support transparency and automatically replace transparent areas with white or another solid color.
- Not selecting the right export settings: If you’re using Photoshop, ensure you’ve selected PNG-24 when exporting and checked the Transparency box. If you use PNG-8, it might not properly handle transparency.
- Background layer not hidden: If you forget to hide the original background layer before exporting, Photoshop might assume the background is solid and replace the transparent areas with white. Double-check that the background layer is hidden before saving.
To confirm whether the background of your image is genuinely transparent, you can follow these methods:
- Check in Photoshop: In Photoshop, a transparent background will be displayed as a checkered grey-and-white pattern. If you see this pattern, the background is transparent.
- View the image against different backgrounds: Drag the image onto different background colors (e.g., white or black). If the transparent areas show as the background color (white or black), it means the image truly has a transparent background.
- Export and check: Export the image as a PNG format and open it in a web browser. If the transparent areas remain clear without being filled with any color, then the transparency is correctly preserved.
If you notice jagged edges (also known as "aliasing") around your subject after exporting your image with a transparent background, there are a few things you can do to fix it:
- Anti-Aliasing: Make sure anti-aliasing is enabled when making selections (this smooths jagged edges). For Magic Wand, you can find the anti-aliasing option in the options bar at the top. Ensure that it is checked.
- Refining Edges: After selecting your subject, use Select and Mask (found under Select > Select and Mask) to refine the edges and smooth them out. The Feather slider in this tool can help soften hard edges.
- Export as PNG-24: When exporting, always choose PNG-24 over PNG-8. The latter has lower quality and can cause edges to appear more jagged.
- Brush Tool Refinement: If necessary, you can refine the edges manually using the Brush Tool (with a soft round brush) on the layer mask to smooth out rough areas.
If you want to start with a transparent background from scratch, here’s how to create a new document with transparency.
Step 1: Open Photoshop and go to File > New. This will open the New Document dialog box.
Step 2: In the dialog box, you'll see a section labeled Background Contents. From the dropdown menu, select Transparent. This ensures that the background of your new canvas is transparent.
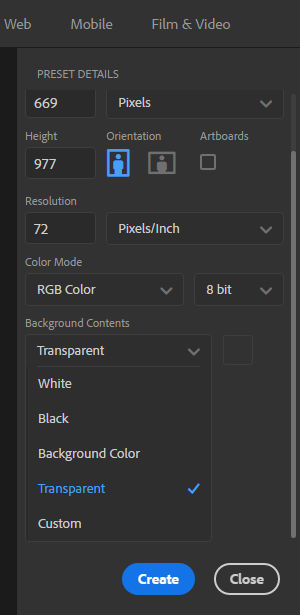
Step 3: Enter the width, height, and resolution for your new document based on your project needs. Once done, click Create.
Step 4: You now have a new Photoshop file with a transparent background. You can start adding layers, images, text, or drawings, and the areas without any content will remain transparent (shown as a checkerboard pattern).
Step 5: Once you're done, you’ll need to save the file in a format that supports transparency. The best format for this is PNG or PSD (if you want to retain layer information). To save as PNG, go to File > Export > Export As, choose PNG, and make sure to check the Transparency box.
External resources:
- PNG, Wikipedia
- Optimizing images for the PNG-24 format, Adobe
- Optimizing images for the GIF or PNG-8 format, Adobe
You May Also Like
This post was written by Brenda Peng who is a seasoned editor at Digiarty Software who loves turning ordinary photos into extraordinary works of art. With AI assistance for brainstorming and drafting, the post is reviewed for accuracy by our expert Abby Poole for her expertise in this field.