It's one of the most frequently asked questions on platforms like Reddit and StackExchange: how to make background transparent in GIMP - a free and open-source photo editor? Some users are looking to create a transparent background for new projects, while others want to make the background of an existing image—like a logo, product photo, or other types of graphics—transparent.
Despite GIMP being a powerful tool, many newcomers find this process a bit tricky at first. But don't worry, we’ve got you covered with a detailed guide to help you master it in no time.
Before we jump into the how-to, let’s set the stage with a quick heads-up. GIMP is a fantastic tool, but it has some limitations you should know about upfront.
💡 The Limitations of Using GIMP to Make Background Transparent:
- GIMP doesn’t provide an AI background remover, meaning you have to remove the background manually.
- Manual selection and edge refinement can be difficult, especially for subjects with complex outlines like hair, fur, or irregular shapes.
- The process is time-consuming and requires practice to achieve clean results, often leading to rough edges, uneven cuts, or jagged borders.
- GIMP doesn’t support batch processing, making it impractical for removing backgrounds from large numbers of images efficiently.
Looking for a Faster, Smarter Way to Make Background Transparent?
Aiarty Image Matting could be just what you need. This AI-powered tool automatically removes backgrounds and makes them transparent, ensuring accurate edge detection and a clean separation of the subject with smooth, natural edges. It even supports batch processing, allowing you to process up to 3,000 images at once, saving you time and effort.
Want to give it a try? Redeem a free license code for Aiarty Image Matting here >
Download Aiarty Image Matting to make backgrounds transparent quickly and precisely:
How to Create a Transparent Background from Scratch in GIMP
Creating a transparent background from scratch in GIMP is ideal when you're starting a new project that requires full control over the background. Whether you're designing logos, icons, or custom graphics, this method ensures you have a clean slate with no background interference. It’s particularly useful for projects that involve layering multiple elements, such as text or shapes, without worrying about unwanted backgrounds.
Steps to create a transparent background in GIMP
Step 1: Download GIMP from the official website. And then, install it.
Step 2: Open GIMP and navigate to File > New.

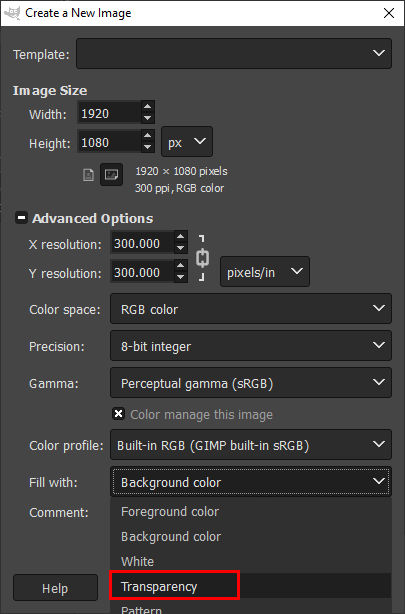
Step 3: In the Create a New Image dialog box, set your desired dimensions under Template or manually input values.

Step 4: Expand Advanced Options at the bottom.
Step 5: Under Fill with, select Transparency to enable the Alpha channel (this ensures your background starts fully transparent).
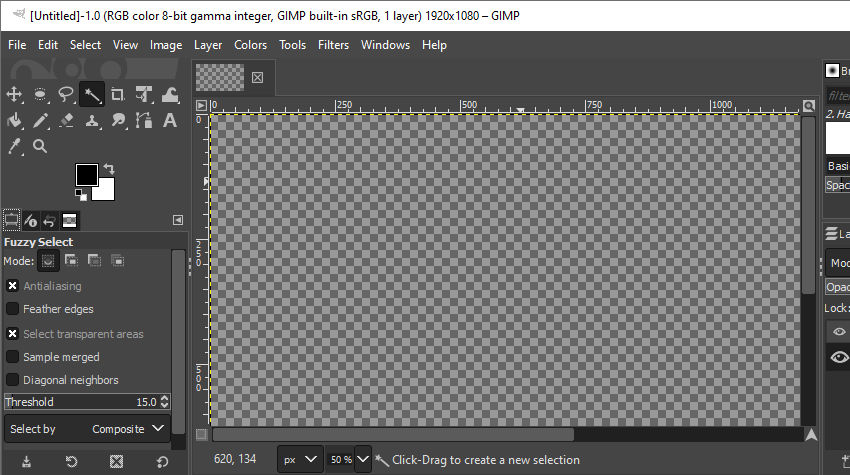
Step 6: Click OK to create the new image. You'll notice the background appears as a checkerboard pattern, which indicates it's fully transparent. Now you can start designing on this blank canvas, adding text, icons, or other elements as needed.
Pro Tip: When you’re done, make sure to export your work as a PNG to keep that transparent background intact. Formats like JPEG will automatically fill any transparent areas with solid white, so it’s best to avoid them if transparency is important.

How to Make the Background of an Existing Image Transparent in GIMP
In addition to creating a transparent background from scratch for new designs, many users are looking to make the background of an existing image transparent—whether it's a product photo, portrait, or other graphic designs. This process is a bit more complex, but with the right steps, you can isolate your subject and change the background to transparent with ease.
In this section, we'll guide you through how to make backgrounds transparent in GIMP 2.10.38, whether they're solid colors like white and black, patterns, or any other type.
Steps to make background of exiting image transparent
Step 1: Open Image
Open the Image in GIMP by going to File > Open and selecting your image file.

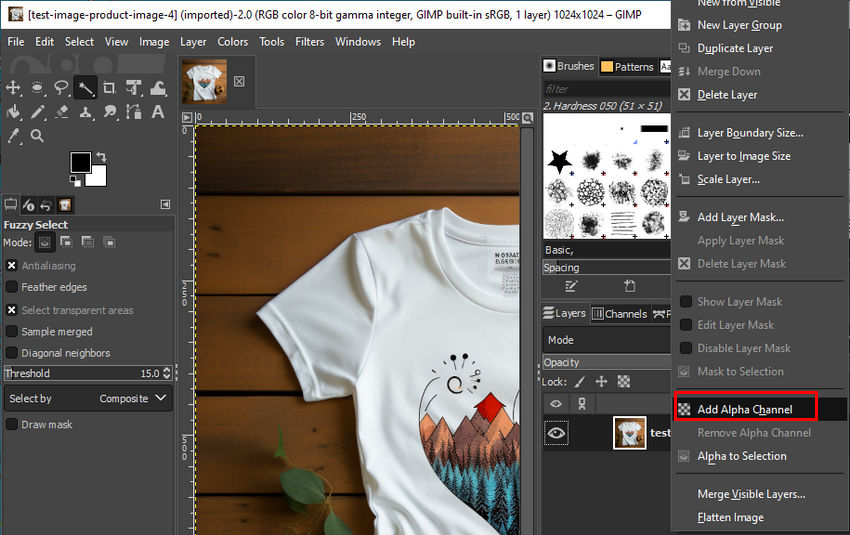
Step 2: Add an Alpha Channel
Right-click on the image layer in the Layers panel and select Add Alpha Channel. This will enable transparency for the image if it doesn’t already have it.
Step 3: Select the Background
Use the Fuzzy Select Tool (Magic Wand) from the Toolbox or press U and then click on the background area to select it.
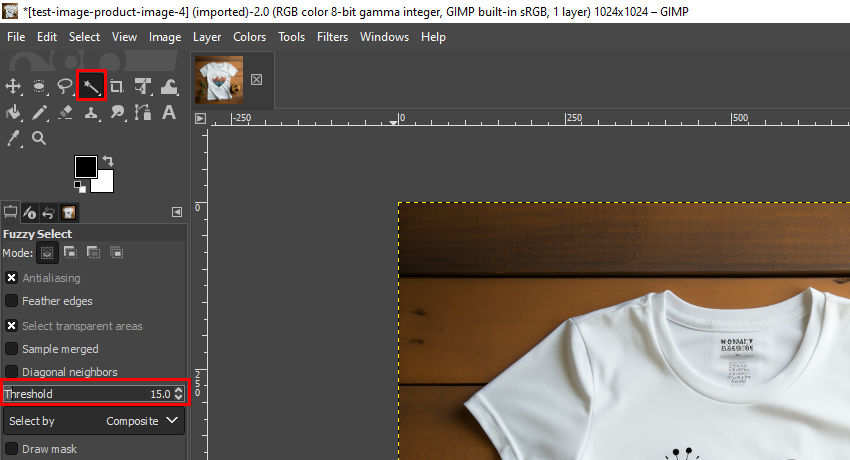
You can adjust the Threshold in the tool options to refine your selection.
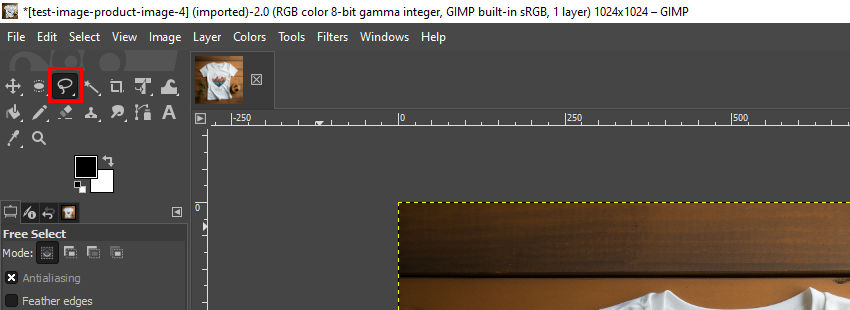
If the background is more complex, try the Free Select Tool to manually trace the edges.
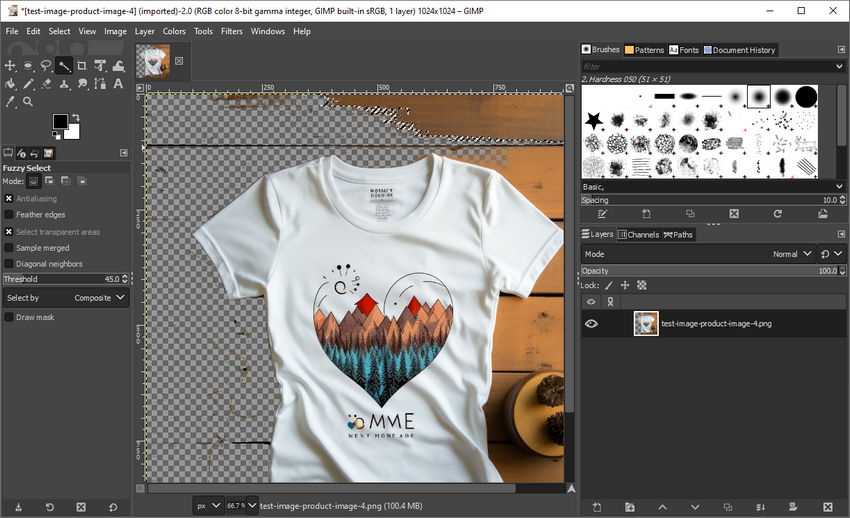
Step 4: Delete the Background
Once the background is selected, press the Delete key on your keyboard to remove it. You should see the transparent checkerboard pattern in place of the background.
If you're using the Fuzzy Select Tool, you may need to repeat the process multiple times to remove all of the background.
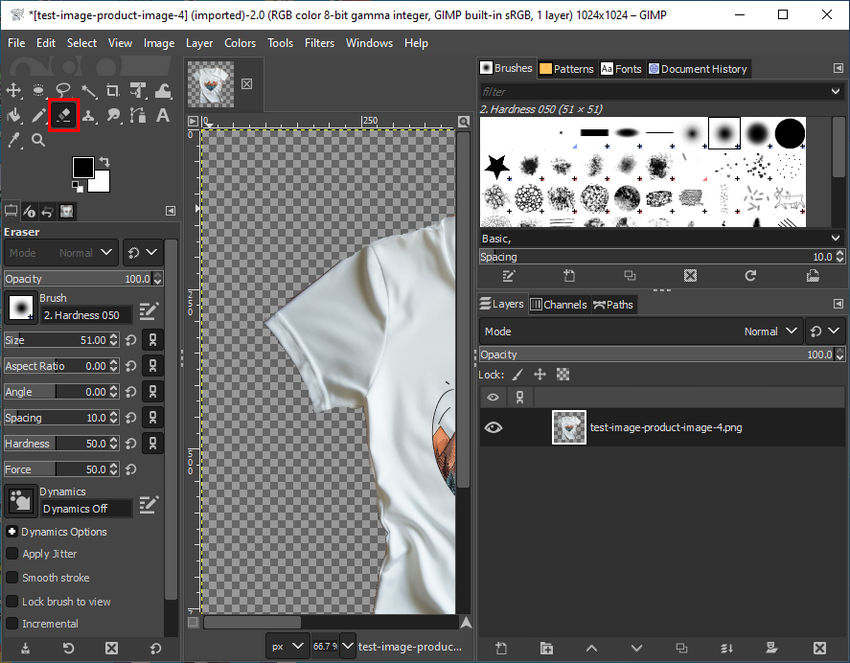
Step 5: Refine the Edges
If the edges of your subject are rough or have leftover bits of background, use the Eraser Tool or add a Layer Mask to fine-tune the removal.
Step 6: Deselect the Selection
You can do this by pressing Shift + Ctrl + A.
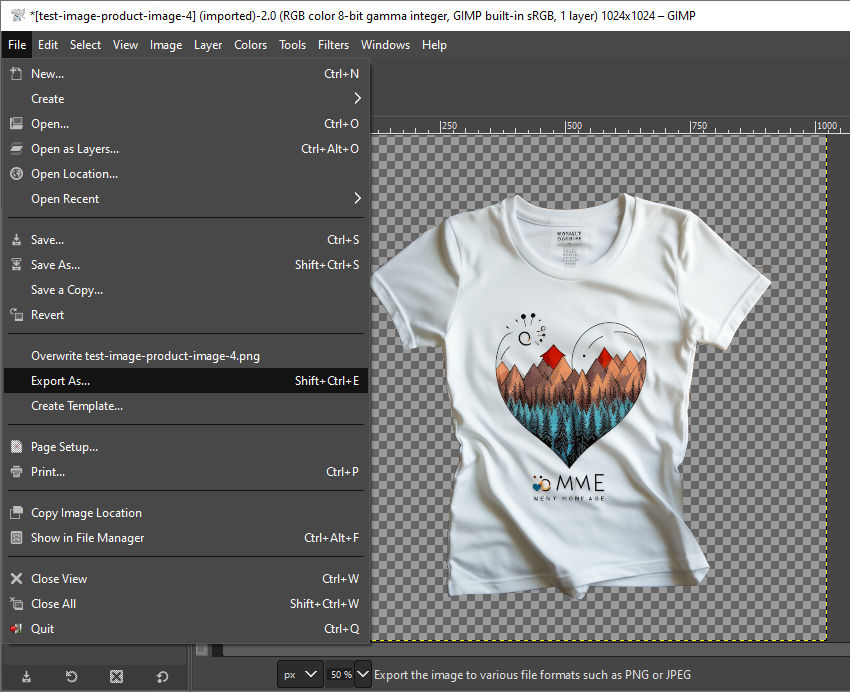
Step 7: Export the Image
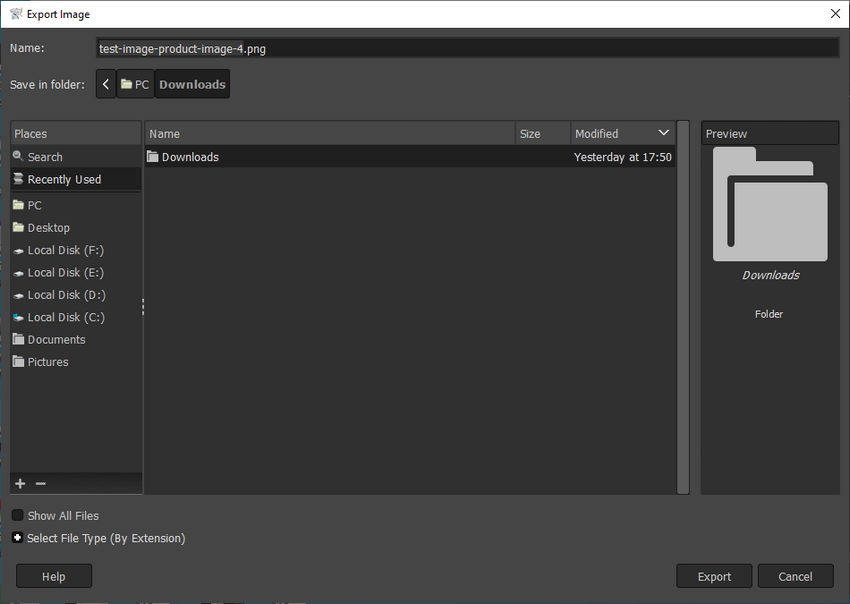
To export the image with a transparent background, go to File > Export As and make sure the file extension is png. PNG preserves transparency.
Additionally, you need to customize the file name and storage location. The default file name will be the same as the original, so if you don’t want to overwrite the original file, don’t forget to give it a new name.
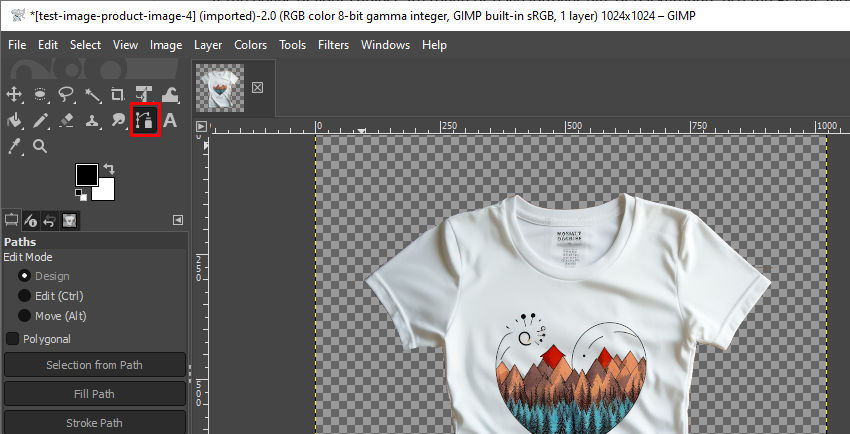
Pro Tip: If you find that some parts of your image are difficult to select or cleanly remove, you can use the Paths Tool to manually trace the edges of the subject for a more precise selection.
Hate Manual Editing? Automate Background Transparency with AI
While GIMP offers powerful tools for creating and making transparent backgrounds, manually removing complex backgrounds—especially from detailed images like hair, fur, or intricate objects—can be time-consuming and technically challenging.
Moreover, GIMP doesn’t support batch processing. So, if you’ve got a stack of images to edit—like for an e-commerce store—it could turn into a time-consuming slog.
For individuals, designers, marketers, or business owners who need fast, precise, and hassle-free background removal, AI-powered Aiarty Image Matting provides a smarter solution.
Why choose Aiarty Image Matting to make the backgrounds of existing images transparent?
- Speed: With the help of 4 advanced AI models, Aiarty can remove the background from images automatically and quickly. Just seconds, not hours.
- Accuracy: Aiarty can detect edges automatically, even around fine details like hair or translucent fabrics.
- Batch Processing: It can make the backgrounds of up to 3000 images transparent at once.
- Ease of Use: No manual selections, layer masks, or technical expertise are needed—although Aiarty also supports manual adjustments if you want to fine-tune the results.
How to Use Aiarty Image Matting to change background to transparent?
Step 1: Download and install Aiarty Image Matting on your computer.
Step 2: Click the + button at the bottom left corner to import your image.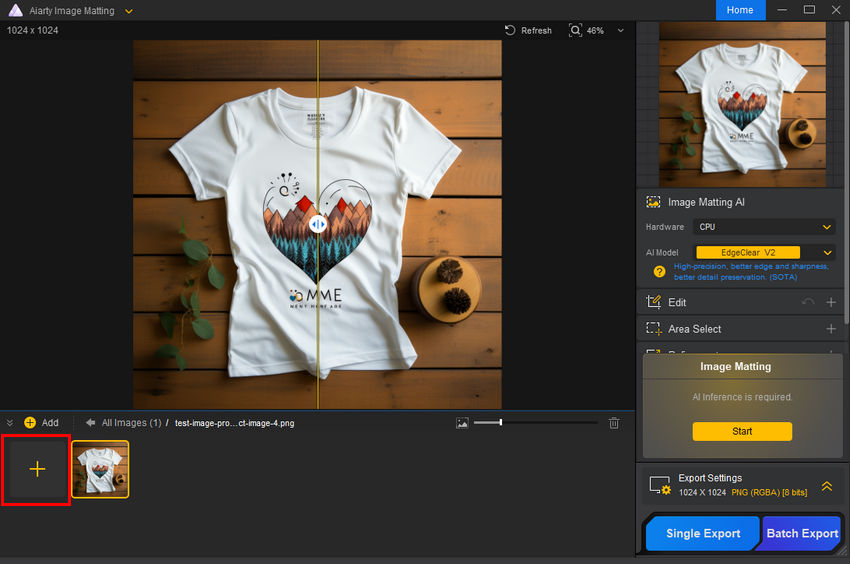
Step 3: Select the AI model that best fits your image, then click Start to let the AI automatically detect and remove the background.
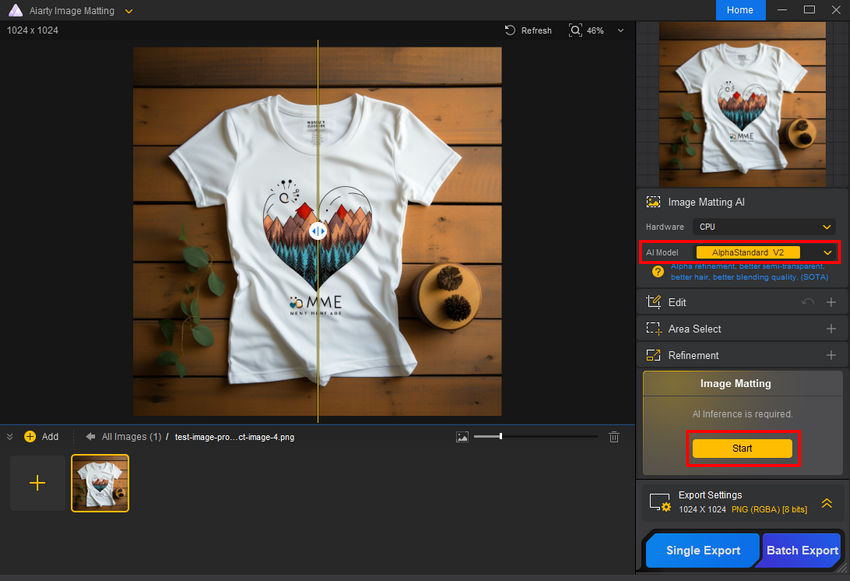
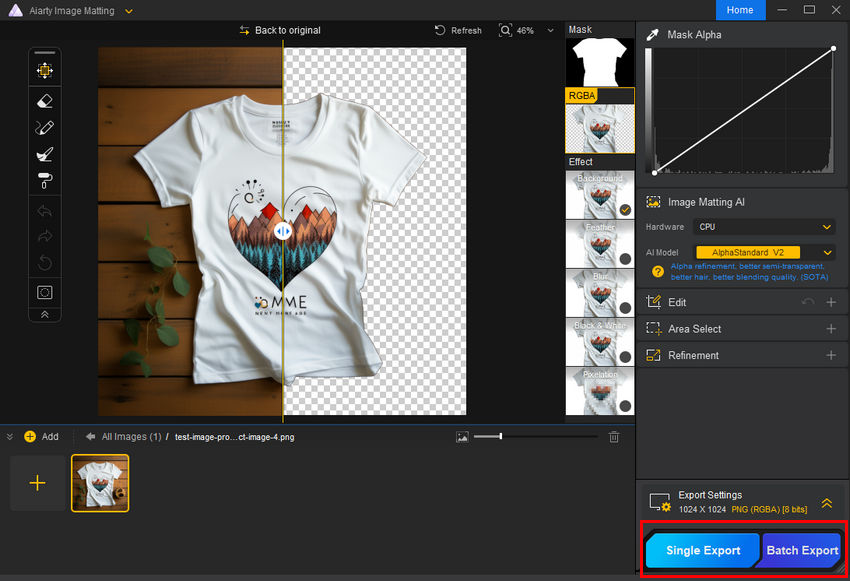
Step 4: Click either Single Export or Batch Export depending on whether you're processing a single image or multiple. You'll receive your image with a transparent background in just moments.
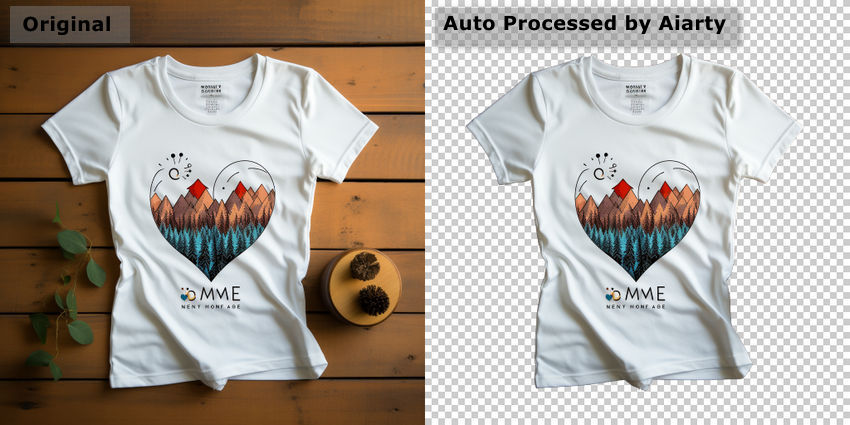
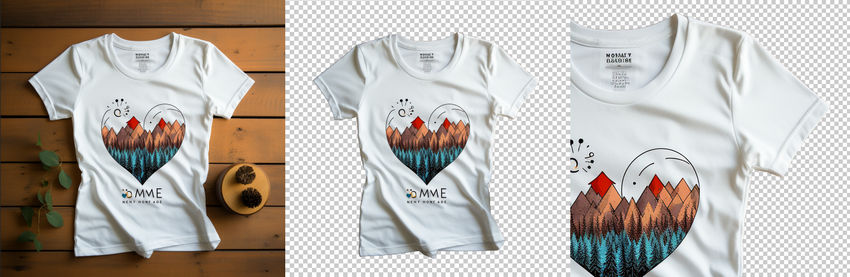
Now, let's compare the original image with the one processed by Aiarty Image Matting. The subject is cleanly extracted, the background is completely removed, and the edges look smooth and natural without any leftover artifacts. Looks pretty good, doesn’t it?
Conclusion
If you need to manually remove backgrounds from individual images and enjoy full control over the editing process, GIMP is a solid free option. It’s ideal for small projects, personal designs, or learning graphic editing basics.
However, for high-volume tasks like e-commerce product catalogs, marketing materials, or batch processing thousands of images, Aiarty Image Matting is the smarter choice.
| Feature | GIMP | Aiarty Image Matting |
|---|---|---|
| Automation | Manual selection required | Fully automatic AI processing |
| Batch Processing | Not supported (requires plugins) | Supports 3,000+ images at once |
| Speed | Time-consuming (minutes to hours) | Instant results (seconds per image) |
| Ease of Use | Steep learning curve | No technical skills needed |
| Edge Precision | Requires manual refinement | AI-optimized smooth edges |
 FAQs
FAQs
If your transparent background appears black in GIMP, it’s likely due to one of these common issues:
- Your layer may be missing an Alpha channel. Transparency requires an Alpha channel to work. To check, right-click the layer in the Layers panel and see if Add Alpha Channel is available—if so, select it.
- The image might be exported in the wrong format. Formats like JPEG and BMP don’t support transparency. To preserve it, export your image as a PNG.
- GIMP’s view settings could be hiding transparency. If the checkerboard pattern isn’t visible, go to View > Show Layer Boundary and make sure View > Show Transparency is enabled.
- The background may have been accidentally filled. If you recently used the Bucket Fill tool or pasted content, check if the background was unintentionally filled with black. Try pressing Ctrl+Z to undo.
This usually happens if the file wasn’t saved in a format that supports transparency or if you accidentally selected "Save background color" while exporting.
Here’s how to check:
- First, make sure you’re exporting in PNG format.
- If there’s an option for Save background color, uncheck it.
- Double-check that your image layer has an Alpha channel added before exporting.
Sometimes, directly deleting the background can leave rough, jagged edges.
To soften the transition, try feathering the selection before removing the background—right-click the selection, go to Select > Feather, and set it to 1–5 pixels. If the edges still look harsh, you can manually refine them using the Blur Tool or a soft Eraser. Another option is to add a Layer Mask and use the Gradient Tool for a smoother fade.
Some software and platforms automatically fill transparent areas with white, which can be frustrating.
GIMP doesn’t support native batch processing, but you can still make it work with a few extra steps.
You can install the BIMP plugin for batch processing in GIMP or write a Python-Fu script to automate the task. If that sounds like too much trouble, you might want to try an AI tool like Aiarty Image Matting, which makes bulk background removal quick and easy.
This can happen when the background color bleeds into the subject, especially around fine details.
To fix it, you can try the Color to Alpha tool (under Colors > Color to Alpha) to remove any leftover color. And you can also use the Smudge Tool or Clone Tool to clean up the edges manually.
External resources:
- PNG, Wikipedia
- Transparency (graphic), Wikipedia
- Comparing Transparent Image File Types: Which One Should You Use?, Cloudinary
- Alpha (alpha channel), Mozilla
You May Also Like
This post was written by Brenda Peng who is a seasoned editor at Digiarty Software who loves turning ordinary photos into extraordinary works of art. With AI assistance for brainstorming and drafting, the post is reviewed for accuracy by our expert Abby Poole for her expertise in this field.