Let’s be real—your background is not always Instagram-ready. Maybe it’s a chaotic bedroom, a suspiciously messy desk, or that one weird relative photobombing your perfect shot. Luckily, background blur is here to save the day, and protect you from the internet's harsh glare.
Scrolling through Adobe, Reddit, and other forums, I’ve seen countless users asking things like “How do I blur the background in Photoshop without making it look fake?” or “What’s the easiest way to get that pro DSLR look in Photoshop?” Whether you’re an e-commerce seller trying to make your product pop, a social media creator aiming for that cinematic depth, or just someone looking to clean up a cluttered background, Photoshop has the tools to get the job done. In this guide, I’ll walk you through different Photoshop background blur techniques, from quick fixes to pro-level refinements, without the cringe.
💡 Achieving a Flawless Blurred Background in Photoshop Requires You to:
- Be patient - You need to use Photoshop's 'Select and Mask' workspace, specifically the edge refinement brush for those tricky areas and zoom to meticulously check for any missed spots.
- Set aside enough time – According to Photoshop users on Reddit, expect to dedicate 20-45 minutes, especially for images with complex backgrounds (e.g., foliage, patterned walls), translucent elements (hair, veils, glasses), and low contrast between subject and background.
- Be open to experimentation – You'll likely need to explore various Photoshop blur tools (Gaussian Blur, Lens Blur, etc.), density settings, layers, and other options to achieve the optimal result.
Want to Blur Image Background Faster and Easier?
Tired of the tedious manual selections of blurring backgrounds in Photoshop? Aiarty Image Matting’s AI-powered tool intelligently detects and isolates the subject with unparalleled accuracy, even handling complex details like hair and translucent materials. 8 blur types with flexible settings create natural background blur. Achieve in seconds what takes 30+ minutes of manual Photoshop work.
Download Aiarty Image Matting to Blur Image Background in One Click

How to Blur a Photo Background in Photoshop?
Now, let's get into the nitty-gritty. Achieving that perfect, dreamy background blur in Photoshop involves a few key steps. We'll walk you through the most effective techniques, from precise subject selection to applying the right blur filters.
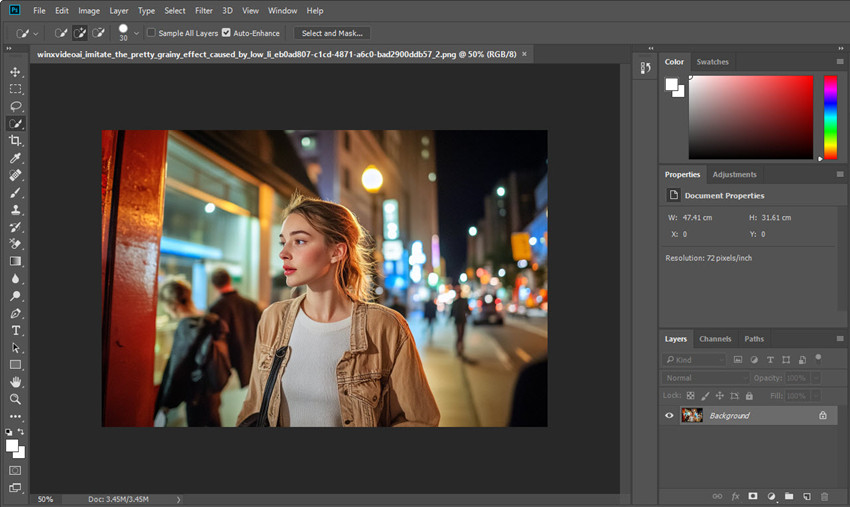
Step 1. Duplicate Your Original Image
Open Photoshop and click File to load in your image. Then right-click the background layer in the Layers panel and duplicate it. You can do this quickly with the keyboard shortcut Cmd + J (Mac) or Ctrl + J (Win). Rename the duplicate layer to “Foreground” or others.
Step 2. Make a Selection Out of the Main Subject
To blur the background in Photoshop, you’ll need to select and mask the subject on the top layer. There are different tools in Photoshop for this task:
- Adobe Sensei - Photoshop's AI) to analyze and select your main subject
- Quick Selection Tool- For simple backgrounds, these tools are fast and efficient.
- Lasso/Pen Tool- For intricate subjects, these tools provide precise selection. The Pen Tool is excellent for sharp, clean edges.
- Select and Mask - This refines edges, especially for complex details like hair.

Tips: To prevent edge halos, you can expand the selection for more correct results. Go to Select > Modify > Expand. Then choose an appropriate pixel value (typically 3-5px depending on image resolution). Click OK to create a gap between the selection and your subject's edges.
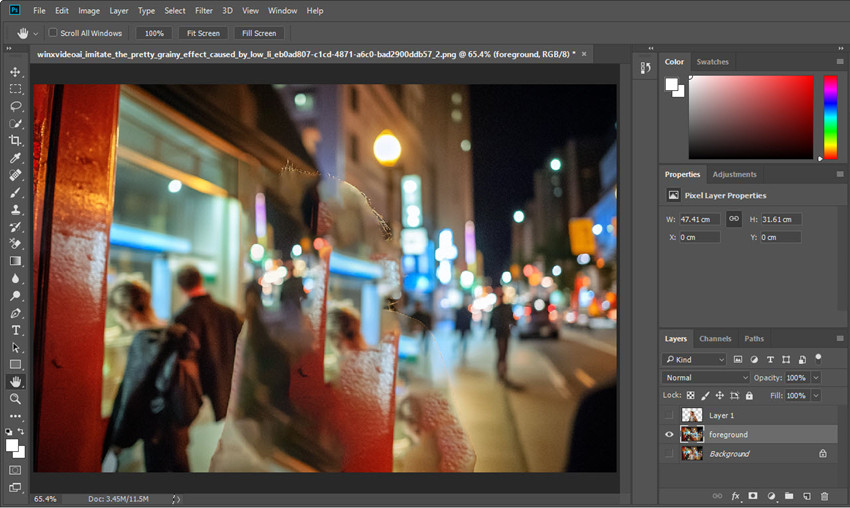
Step 3. Remove the Main Subject with Generative Fill
To ensure the cleanest background blur in Photoshop, you can remove the main subject with Generative Fill. If not, there may be halo effect around the subject when Photoshop blurs the whole image.
Right-click on the selected subject, choose Layer via Copy to copy the main subject to a new layer.

Back on the original layer, right-click on the selected subject and choose Fill. Then select Content Aware. The area of the main subject will then be placed by content similar to the surrounding areas.
Step 4. Blur Background in Photoshop
Now you can blur the image in Photoshop as you need. Click Filter on the toolbar and there are different Photoshop photo blur tools to choose from. Below we will show you how to blur background in Photoshop with 4 most common ways:

1. Gaussian Blur
Gaussian Blur is widely used by Photoshop users to create a soft, dreamy effect.
In the settings, you simply need to adjust the "Radius" slider to control the blur intensity. Higher values mean more blur (usually 5–15 pixels works best).
For a natural look, avoid over-blurring. If edges look too sharp, feather the selection before applying the blur (Select > Modify > Feather > 2-5 px).

2. Len Blur
Lens Blur works great when you want an authentic DSLR-like blurred background in Photoshop. It’s commonly used to create realistic lens blur and bokeh for portraits and product photography.
In the Lens Blur section, you may need to adjust the settings:
- Radius: 10-30 (higher for stronger blur).
- Blade Curvature: 50-100% for rounder bokeh.
- Specular Highlights: Adjust brightness to enhance light spots.
- Fine-Tune with a Mask – Erase blur from areas that should remain sharp.

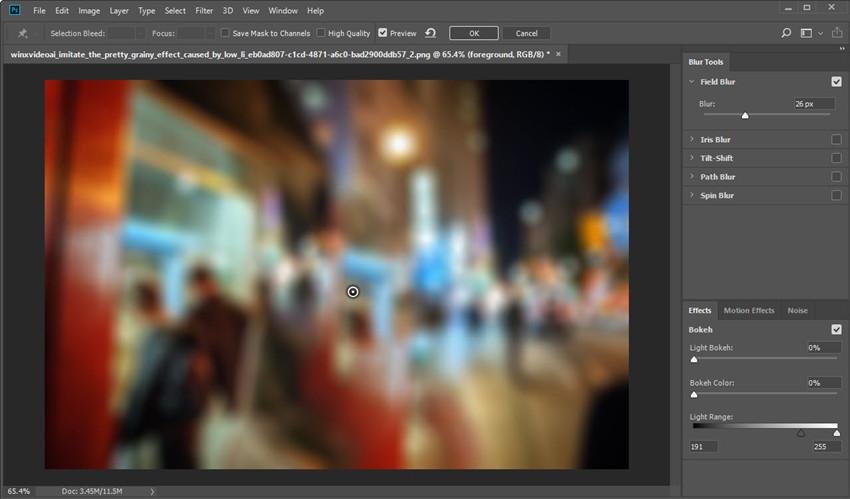
3. Field Blur
Field Blur is a good choice if you want Photoshop to blur the background gradually for portraits, landscapes, and product photography without affecting the subject.
Click on the background to add a blur point and adjust the Blur slider (10-30 works best).
4. Tilt-Shift Blur
The Tilt-Shift Blur is usually used to create a miniature or toy-like effect for aerial shots, cityscapes, or images taken from a high vantage point.
In the Tilt-Shift Blur section, you may need to adjust the settings:
- Adjust the Blur Strength – Increase the Blur Amount to around 15-30px for a realistic effect.
- Position the Blur Lines: The center area remains sharp. Drag the outer lines to control the transition area.
- Rotate for Perspective: Click on the blur effect and rotate it to match the natural angle of the image.

Step 5. Refining and Optimizing
After Photoshop adds blur effects to the photo, you can fine-tune the mask using Layer Masks. It lets you fine-tune blur edges and control blur intensity in specific areas. You can also enhance the overall image with brightness/contrast, color balance, etc., to ensure the blurred background complements the subject.

Step 6. Export the Blurred Image
For the final result, make sure that both the layer containing your extracted subject and the layer with the blurred background are enabled (visible). Afterwards, go to File > Save As to save your blurred image from Photoshop.
Challenges when Blur Background in Photoshop
Blurring the background in Photoshop can be a powerful way to make your subject stand out, but many users face challenges when trying to achieve a realistic and high-quality blur. Below are some of the most common issues users discuss on forums like Reddit and Adobe Community.
You may be interested in: different ways to blur photo background
1. Inaccurate Selection
- "The edges of my subject still have sharp outlines or weird halo effects after blurring."
- "Even with Select Subject, I have to manually refine the mask, and it’s tedious."
AI selection tools (e.g., "Select Subject") often miss fine details like hair, fur, or translucent objects (e.g., glasses, veils). You need to manually refine selections with Select and Mask (Edge Detection Brush) or the the Pen Tool (P) for precise paths on hard edges.
2. Unrealistic or Artificial-Looking Blur
"The blur effect makes my subject look pasted on top, not naturally integrated with the background."
"The Photoshop background blur doesn’t have real depth—it just looks like a soft glow."
Gaussian Blur can appear flat and digital, unlike natural lens bokeh. A uniform blur across the whole background makes the image look unnatural. You can use Lens Blur (Filter > Blur Gallery) for depth simulation or add slight noise (0.3%) to match the original image grain.
3. Too Time-Consuming, Especially for Complex Backgrounds
"It takes me 30-40 minutes just to blur a background properly, even with all the selection tools."
"I have to keep redoing my selection because I notice small mistakes after applying the blur."
There is no one-click background blur in Photoshop, requiring manual selection and adjustments. Complicated backgrounds (trees, glass, hair) take extra time to refine. Manual refinements (e.g., hair masking) can take 30+ minutes per image.
4. Blur Effects and Settings
Difficulty in determining the optimal blur settings for specific images. Confusion regarding the differences between various blur filters (Gaussian Blur, Lens Blur, Field Blur, etc.).
An Easier Way to Blur Background of Photos
Struggling with the complex Photoshop background blur process? Aiarty Image Matting simplifies professional-quality background blur with AI-powered precision—saving you time while delivering stunning results.
- AI instantly isolates subjects with perfect edges, even for complex details like hair, fur, and translucent objects (glasses, veils).
- No more manual refinements or "halo effects"—just clean, natural cutouts.
- Choose 8 blur effects: Gaussian Blur, fast blur, dynamic blur, etc. to match your creative vision.
- Adjust blur strength, focus point, and depth falloff for realistic depth-of-field effects.
- Blur image background in one click, significantly reducing the 30-40 minute manual process down to mere seconds.
Step 1. Download and install Aiarty Image Matting on your computer. Launch the software and drag and drop the photos you want to blur into the interface. Need to process multiple photos? Different to Photoshop, it supports batch image background blur.

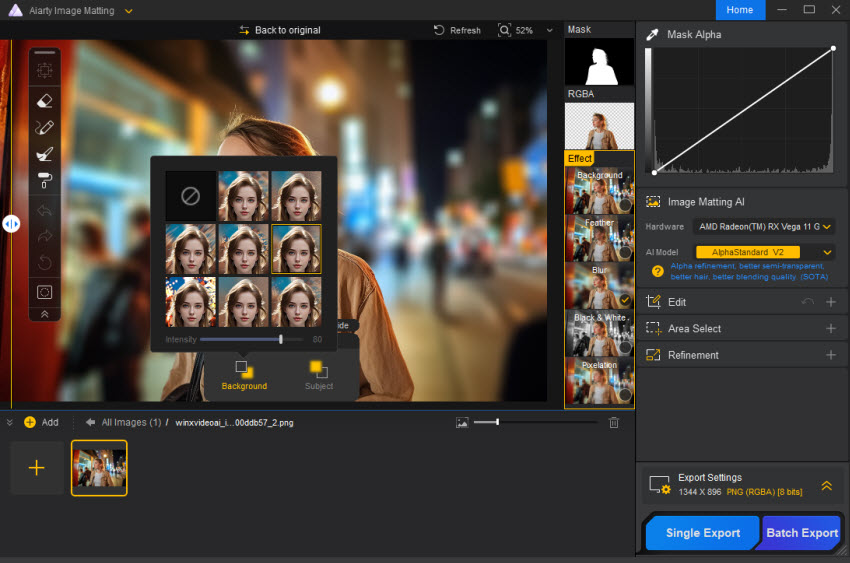
Step 2. In the right-hand panel, you'll see four AI models optimized for different image types. Select the AI model that best suits your photo.
Then click the "Start" button and let Aiarty Image Matting's intelligent AI engine automatically extract your subject. Aiarty Image Matting accurately identifies and extracts subjects, even handling complex details like hair, fur, and translucent objects with professional precision.

Step 3. Once the subject is extracted, you'll have a photo with a transparent background. In the "Effects" menu bar on the right side of the interface, enable the "Blur" option.
Aiarty Image Matting will display the blur settings panel, offering eight distinct blur types, including Gaussian Blur, Fast Blur, Dynamic Blur, and more. Choose the blur type that aligns with your creative vision. Use the slider to adjust the blur intensity and preview the blur effect in real-time.
Step 4. Click "Export Settings" to select your desired file format: PNG (to retain transparency) or JPG (for smaller file sizes). Click "Single Export" to save a single photo or "Batch Export" to save multiple photos. Aiarty Image Matting will quickly export your images with professional background blur effects.
Conclusion
In conclusion, Photoshop remains a powerful and versatile tool for achieving professional-level background blur. However, it's important to acknowledge that the Photoshop background blur process can be complex and time-consuming, particularly when dealing with intricate selections and achieving natural-looking results. Users often encounter challenges in navigating the software's extensive features and finding the optimal settings.
For those seeking a more streamlined and efficient workflow, Aiarty Image Matting offers a compelling alternative. By leveraging advanced AI technology, it simplifies the process of background blur, enabling users to achieve stunning results with greater speed and ease. This can be especially beneficial for individuals who prioritize efficiency and ease of use.
Ultimately, to blur background with Photoshop or Aiarty Image Matting depends on individual needs and preferences. Photoshop provides extensive control and customization, while other AI tools prioritize speed and simplicity.
 FAQs
FAQs
When you need to blur a precise part of your image in Photoshop, you have a few excellent options. The most straightforward is the "Blur Tool," located in the toolbar. This tool functions like a brush; you select it, adjust its size and strength in the options bar, and then paint over the area you want to soften.
However, for more refined control, especially when dealing with complex shapes, using blur filters in conjunction with selections or layer masks is preferred. First, you create a selection around the area you wish to blur, employing tools like the Lasso, Quick Selection, or Pen Tool. Alternatively, you can use layer masks to selectively apply the blur.
Once the area is isolated, you can then apply blur filters found under "Filter > Blur," such as Gaussian Blur, which allows you to precisely control the blur's intensity. For very specific and realistic blur effects, particularly those simulating depth of field, the "Blur Gallery" is invaluable. Tools within, like "Iris Blur" and "Field Blur," offer sophisticated controls using pins and sliders, giving you the ability to create natural-looking blur transitions.
Finding the blur tools in Photoshop is quite simple. The most direct tool, the "Blur Tool," is located within the main toolbar on the left-hand side of the Photoshop interface. It shares space with the "Sharpen Tool" and the "Smudge Tool," all of which are used for manipulating the sharpness and texture of pixels.
If you are looking for the blur filters, these can be located by navigating to the top menu bar, and then by selecting "Filter," from the dropdown menu, and then "Blur." This submenu will then display all of the various blur filters that photoshop has to offer. In this same "filter" menu, is also where you will find the "Blur Gallery." This tool offers more advanced blur options.
Achieving a blurred background can be accomplished both during the photo capture and in post-processing with Photoshop. To get a naturally blurred background while taking a photo, you should use a wide aperture (a low f-number), increase the distance between the subject and the background, and use a longer focal length lens. This method is the ideal way to capture a natural-looking shallow depth of field.
However, if you need to blur a background after the photo has been taken, Photoshop provides excellent tools. To do this, you will need to select the background, by using selection tools, or layer masks, and then apply a blur filter. The "Blur Gallery" is also a great tool for this.
You May Also Like
This post was written by Brenda Peng who is a seasoned editor at Digiarty Software who loves turning ordinary photos into extraordinary works of art. With AI assistance for brainstorming and drafting, the post is reviewed for accuracy by our expert Abby Poole for her expertise in this field.