How to Blur Background on iPhone Without Portrait Mode
Key Takeaway: Forgot to use Portrait Mode but want that DSLR-like bokeh? No problem. Aiarty Image Matting transforms any iPhone photo into a professional-grade image with buttery-smooth background blur—even if your shot lacks depth data or has tricky details like frizzy hair or translucent fabrics. Ready to elevate your iPhone photos? Try Aiarty Image Matting and blur backgrounds in seconds.
Portrait Mode on iPhones is a game-changer—it mimics professional DSLR cameras by softening backgrounds to make your subject pop. But have you ever snapped a photo on your iPhone and wished the background looked softer, but didn't use Portrait Mode? Maybe your device doesn't support it, or you forgot to enable it at the moment. Or the effect didn't quite nail the edges (like frizzy hair or a wagging tail)? Don't worry—you are not stuck with that distracting background!
In this guide, we'll show you how to blur background on iPhone without Portrait Mode retroactively, even if your photo wasn't taken in Portrait Mode. Whether you are editing vacation pics, product photos, or pet portraits, you'll walk away with actionable steps to make your subject pop.
Method 1: Aiarty Image Matting – AI-Powered Precision Blur
Aiarty Image Matting isn't just another background blur tool—it's a desktop AI powerhouse designed to handle even the trickiest edges, from frizzy hair to translucent fabrics. Its advanced alpha matting excels at separating the subject from the background, even in tricky areas like hair or semi-transparent objects. So you can seamlessly blur the background whether it has depth data or not. Plus, its customizable blur settings let you fine-tune the effect to match your creative vision.
Aiarty Image Matting is trusted by photographers, e-commerce sellers, and designers for its ability to deliver studio-quality edits in seconds, even if your original photo lacks depth data or was taken without Portrait Mode.
- Advanced Edge Refinement: AI models to detect and refine complex edges (e.g., hair, fur, lace) with pixel-perfect accuracy. Cutting-edge Alpha Matting technique handles semi-transparent objects like glass, wedding veils, or water droplets seamlessly.
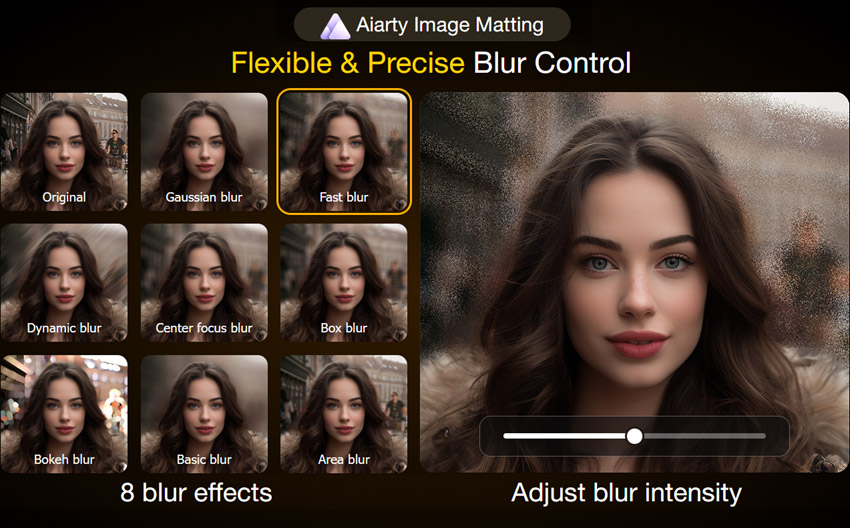
- Background Customization: Replace backgrounds with blur effects, gradients, solid colors, or custom images. Adjust blur intensity, add motion effects, or apply textures for natural blending.
- Batch Processing: Process up to 3,000 images in one session—ideal for editing vacation albums or e-commerce product photos.
- Built-In AI Image Enhancer: Upscale low-resolution images by 2x before blurring to improve AI accuracy.
Free download Aiarty Image Matting to blur background without portrait mode.
How to Blur Background of Photo Already Taken
After downloading and installing Aiarty Image Matting, follow the steps below to blur the background of your photo already taken.
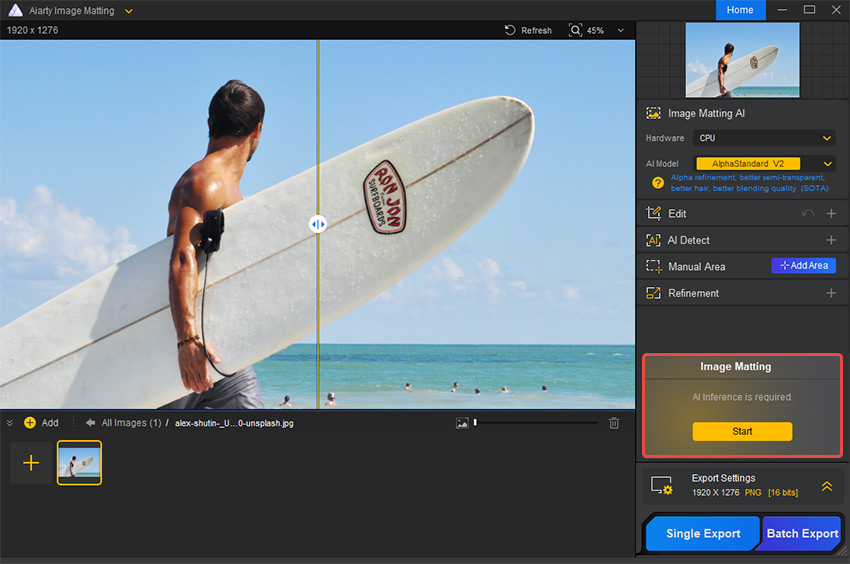
Step 1. Import your photos and click Start on the right for AI inference.
Drag and drop your photos into the main interface. It supports formats like HEIC, PNG, JPG, TIFF, RAW, etc.
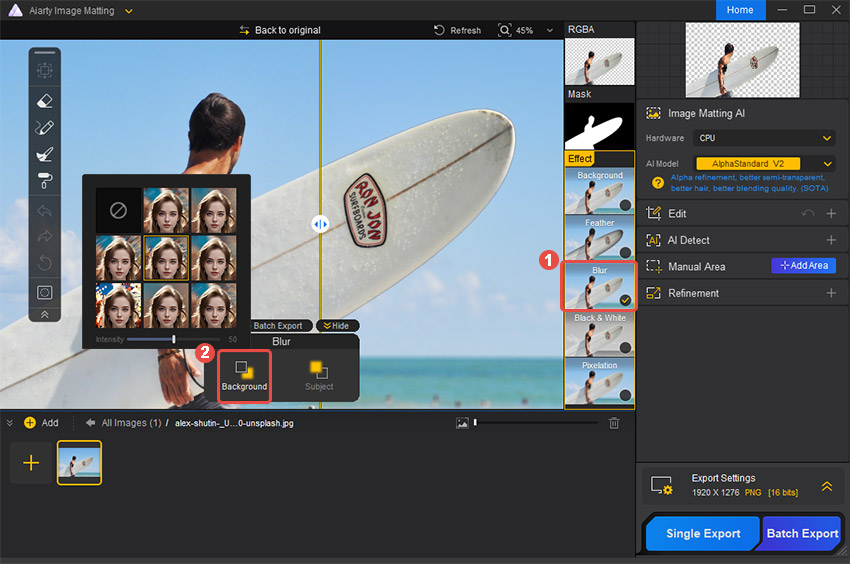
Step 2. Blur the background of your photo.
Enable the Blur feature on the right side in the preview window. Select Background in the pop-up Blur dialog box. Choose a blur effect like Gaussian or Center Focus Blur, then adjust the intensity as needed.
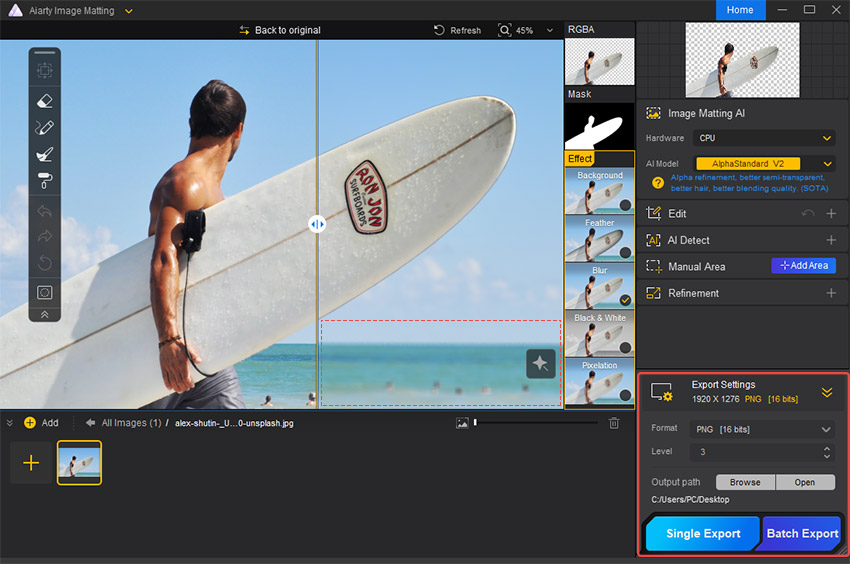
Step 3. Export and save the photo with a blurred background.
Set the export format and compression level. Click Single Export to save your photos to your specified path.
Read more: Top 10 Apps to Blur Backgrounds of Photos on iPhone
Method 2: Edit with Depth Control in Photos App
As you might know, the bokeh effect results from controlling the depth of field (DoF) in your photograph. Controlling the DoF allows you to blur the background or not.
So if you are editing a photo taken on a newer iPhone (15 or later), you might apply the Portrait effect to photos already taken in Photo mode, and thus use Depth Control in Portrait mode to adjust the intensity of the background blur. This built-in iOS feature lets you retroactively blur backgrounds, even if you didn't use Portrait Mode.
But there's a catch: it only works on photos with depth data (typically images taken in good lighting with clear foreground/background separation). See detailed steps of using the Photos App's Depth Control.
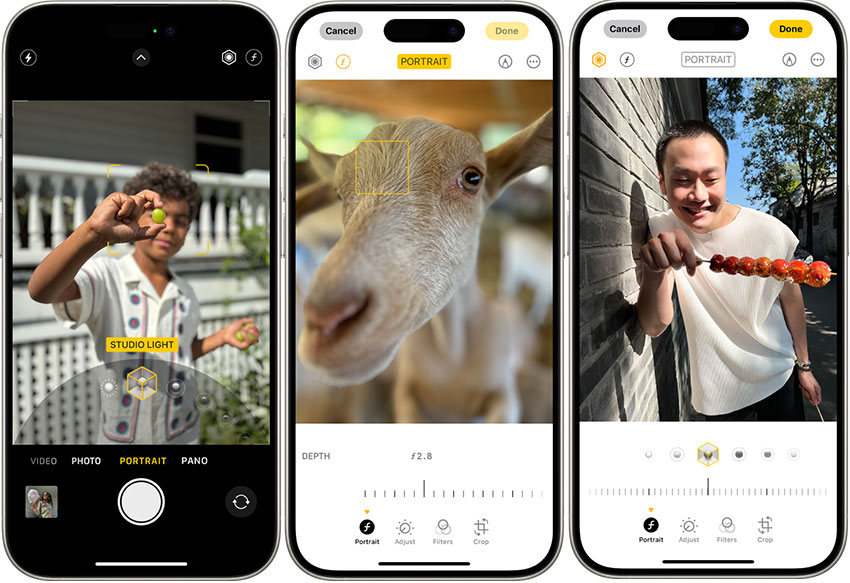
Pro Tip: If it shows no Depth Control slider (no depth data), blurring the image background on iPhone with the Photos App would be impossible. You'll need to switch to Aiarty Image Matting to apply a natural blur.
Method 3: Third-Party Photo Editing App for Background Blur
If you need more flexibility than the Photos app offers but aren't ready to invest in desktop software, third-party iPhone apps can bridge the gap. But please also note that these mobile photo apps often come with various limitations.
Focos is a popular iOS app designed to mimic the depth effects of professional DSLR cameras. Unlike basic blur tools, it uses AI to analyze your photo and simulate realistic bokeh. Focos shines when you want to add playful or artistic blur effects—like hearts, stars, or hexagons—for creative, artistic flair. Its AI depth mapping works surprisingly well for photos with clear foreground-background separation.
The app's limitations become obvious with tricky subjects. For example, photos with overlapping elements (like someone wearing glasses or a pet peeking through foliage) often result in messy edges. The AI sometimes misidentifies foreground and background, requiring manual corrections. Additionally, unlocking HD resolution and advanced tools requires a subscription.
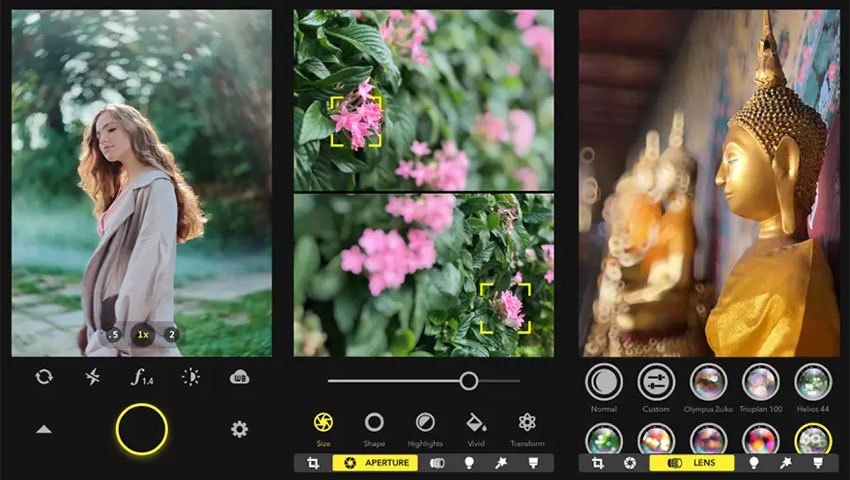
Step 1: Install Focos and tap the + icon to import your photo.
Step 2: Go to Aperture > Enable AI Depth. Wait 2-3 seconds for the app to map the foreground and background.
Step 3: Adjust the aperture slider (lower = stronger blur) to customize the blur effect.
Step 4: Change the bokeh shape under Effects.
Step 5: Tap 3D Mask > Paint over areas to protect.
Step 6: Save as JPEG (4K requires a subscription).
Pro Tip: While Focos is fantastic for creative experimentation, switch to Aiarty Image Matting when precision matters. Aiarty handles complex edges without the halo artifacts Focos sometimes creates. Plus, Aiarty beats Focos if you are editing bulk photos for work, like product listings or client portfolios.
Conclusion
That's all about how to blur background on iPhone without Portrait Mode. If you are new to editing, start with free tools like Focos to get a feel for blur effects. But for pixel-perfect precision, Aiarty Image Matting is your go-to. With the stable computing power of the desktop software, its AI-powered edge refinement handles frizzy hair, lace, and even translucent objects better than any app, and batch processing saves hours for bulk edits.
Ready to level up your edits? Download Aiarty Image Matting for a free trial.
This post was written by Brenda Peng who is a seasoned editor at Digiarty Software who loves turning ordinary photos into extraordinary works of art. With AI assistance for brainstorming and drafting, the post is reviewed for accuracy by our expert Abby Poole for her expertise in this field.