When removing a background from an image, there are two main approaches: destructive and non-destructive editing.
Destructive background removal permanently deletes parts of an image, such as using the Eraser Tool or directly cutting out a selection in Photoshop. While quick, this method limits flexibility—if you make a mistake or need adjustments, you may have to start over.
In contrast, non-destructive background removal preserves the original image, allowing for easy modifications and refinements. Techniques like Layer Masks and selection tools in Photoshop or GIMP, or AI-powered tools like Aiarty Image Matting, provide more control and ensure you don’t lose image quality.
So, what is the best way to non-destructively remove the background selected? The answer depends on your needs. In this guide, we’ll explore:
- Three non-destructive ways to remove backgrounds in Photoshop, ensuring flexibility and precision.
- How Aiarty Image Matting provides an AI-driven alternative, simplifying the process while maintaining quality.
- A comparison of Photoshop and Aiarty, helping you decide which tool best suits your workflow
Now, let’s get started.
💡 Pain Points with Traditional Non-Destructive Background Removal:
- Time-consuming: Traditional tools require multiple steps and advanced skills, which can slow down your workflow.
- Lack of precision: Fine details like hair, fur, or semi-transparent subjects can be difficult to handle, leading to imperfect results.
- No batch processing: Many tools don’t support batch processing, making them inefficient for handling large quantities of images.
Looking for a Faster and Precise Solution for Non-Destructive Background Removal?
Aiarty Image Matting makes background removal easier with AI-powered precision, providing clean, non-destructive cutouts for even the most detailed images. It offers batch processing to save time, making it perfect for large projects or e-commerce businesses.
Download Aiarty Image Matting to remove image backgrounds precisely and non-destructively:
The Best Non-Destructive Ways to Remove the Background in Photoshop
When removing a background in Photoshop, using non-destructive methods ensures that the original image remains intact. This allows for easy adjustments and refinements without losing any data. Here are the three best approaches.
Method 1. Using Layer Masks
Layer masks are one of the most effective and flexible ways to remove a background while keeping the original image untouched. Instead of erasing parts of an image permanently, a layer mask hides selected areas, allowing you to modify or restore them at any time.
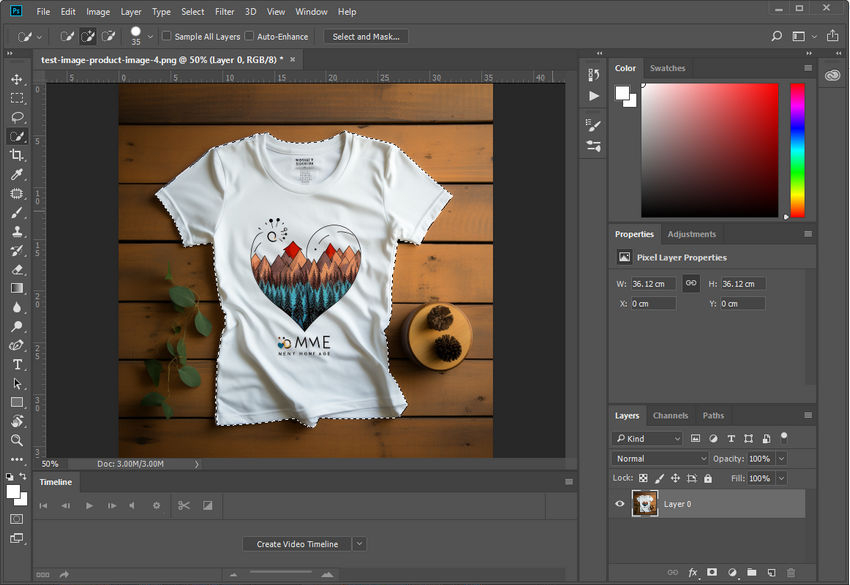
Step 1: Open Your Image and Unlock the Layer
Open your image in Photoshop and check the Layers panel. If the layer is locked, click on the lock icon to unlock it.

Step 2: Make a Selection
Use a selection tool to outline the subject. The best options include:
- Select Subject (found under the "Select" menu) for an automatic AI-based selection.
- Quick Selection Tool for manually selecting the foreground with brush strokes.
- Pen Tool for precise, path-based selections.
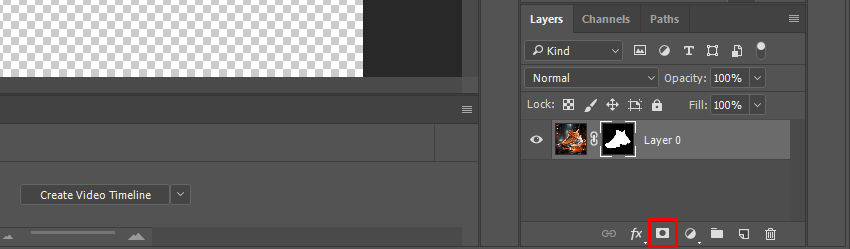
Step 3: Apply a Layer Mask
Once the subject is selected, click the Add layer mask button at the bottom of the Layers panel.
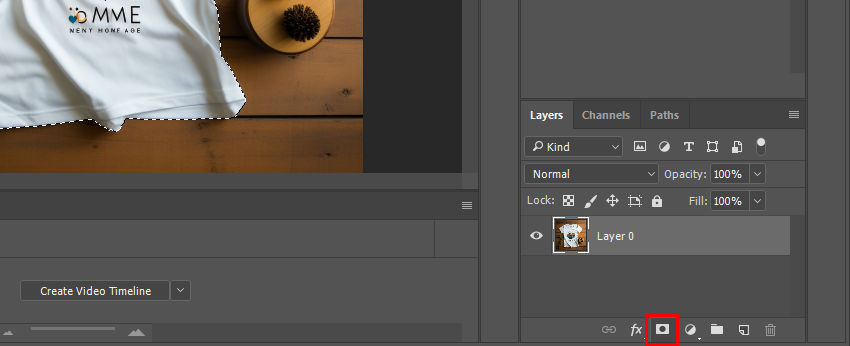
The background will disappear, but it's not deleted—it’s simply hidden. You can edit the mask at any time.

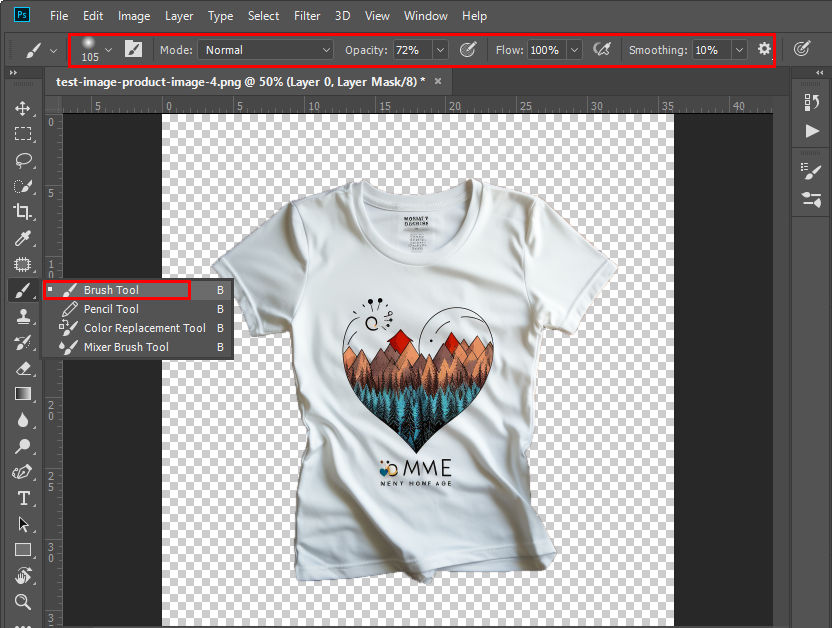
Step 4: Refine the Mask
To fine-tune the edges, select the layer mask thumbnail and use the Brush Tool. You can adjust the following settings for better control:
- Size: Adjust based on the level of detail needed.
- Hardness: A soft brush creates smoother transitions, while a hard brush maintains sharper edges.
- Opacity & Flow: Lower values allow for gradual blending.
Step 5: Export the Image
Once you’ve refined your mask and are satisfied with the background removal, it’s time to export the image. Here’s how you can do that without overwriting your original file:
- Save your project first by going to File > Save As and choosing a PSD format. This keeps your layers and masks intact for future editing.
- To export a final image with a transparent background, use the PNG format. Go to File > Export > Export As, select PNG as the file format, and make sure the Transparency option is checked. This will ensure that only the subject is visible, and the background remains transparent.
- If you need the image in another format, such as JPEG, simply choose JPEG from the export options. However, note that JPEG doesn’t support transparency, so you’ll need to flatten the image before saving it as a JPEG.
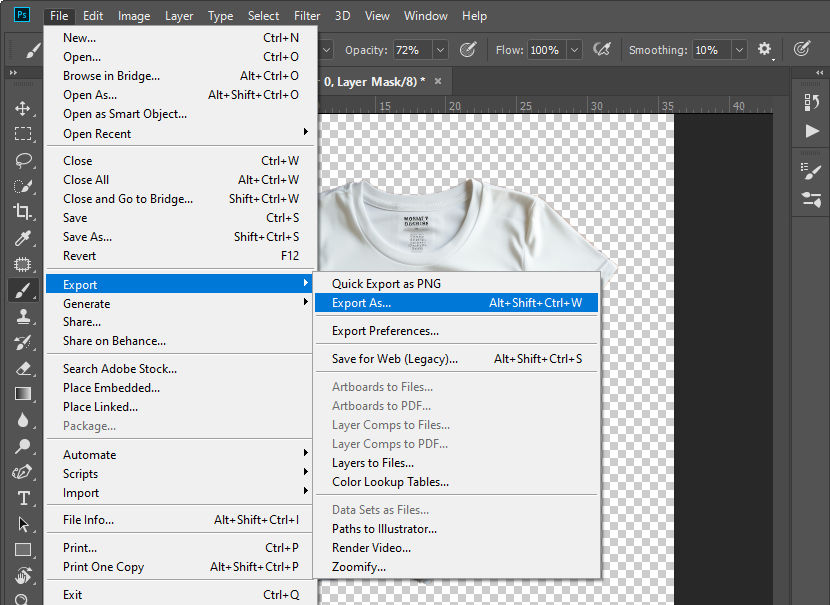
By exporting your file this way, you preserve the original image and can easily revisit the project to make adjustments at any time.
Why It’s Non-Destructive
Since the pixels are hidden and not deleted, you can easily modify the mask, refine the edges, or remove the mask altogether to restore the original image.
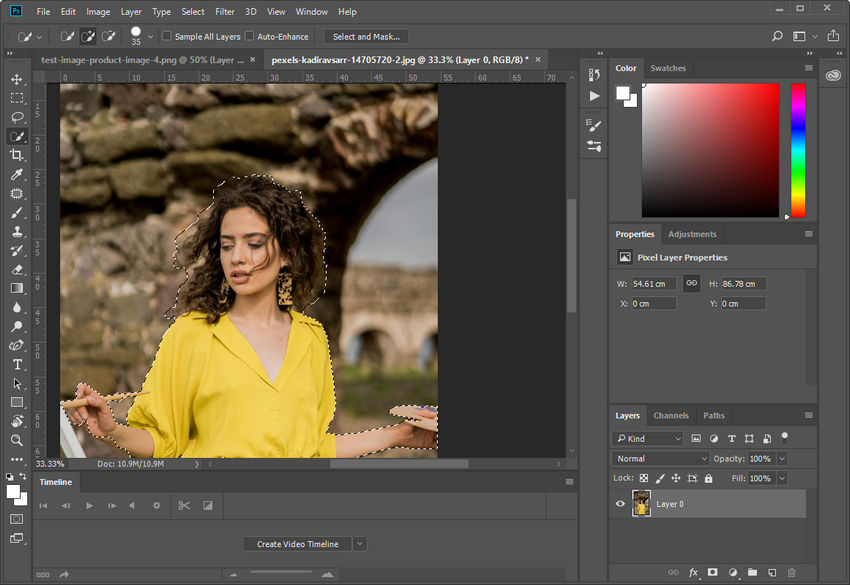
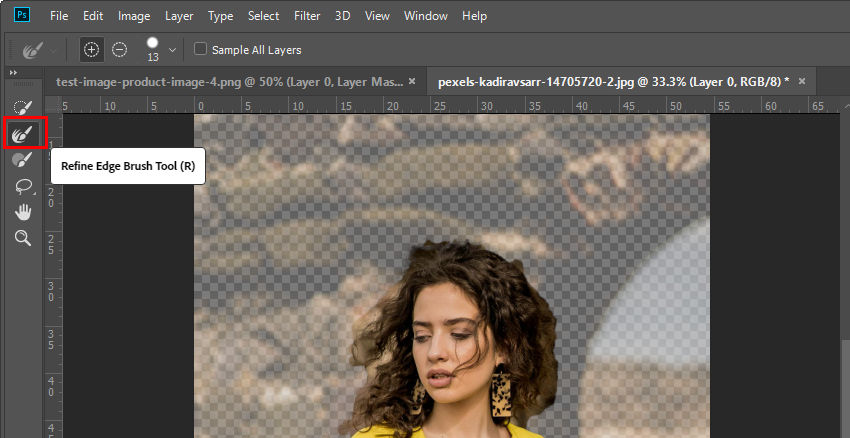
Method 2. Using Select and Mask for Complex Edges
For subjects with detailed edges, such as hair, fur, or transparent objects, the Select and Mask feature provides advanced refinement tools.
Step 1: Make an Initial Selection
Start by selecting the subject using Select Subject, Quick Selection Tool, or the Lasso Tool. The goal is to get a rough selection of the foreground.
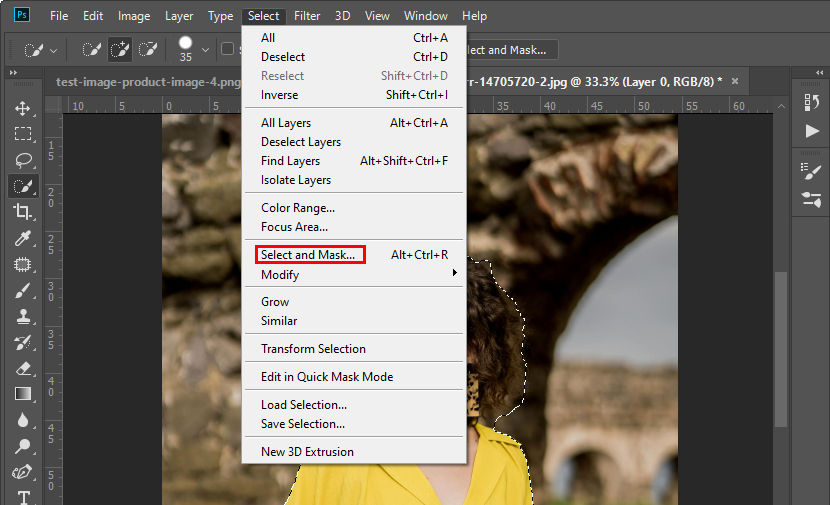
Step 2: Open the Select and Mask Workspace
With the selection active, go to Select > Select and Mask. This opens a new workspace where you can refine the selection.
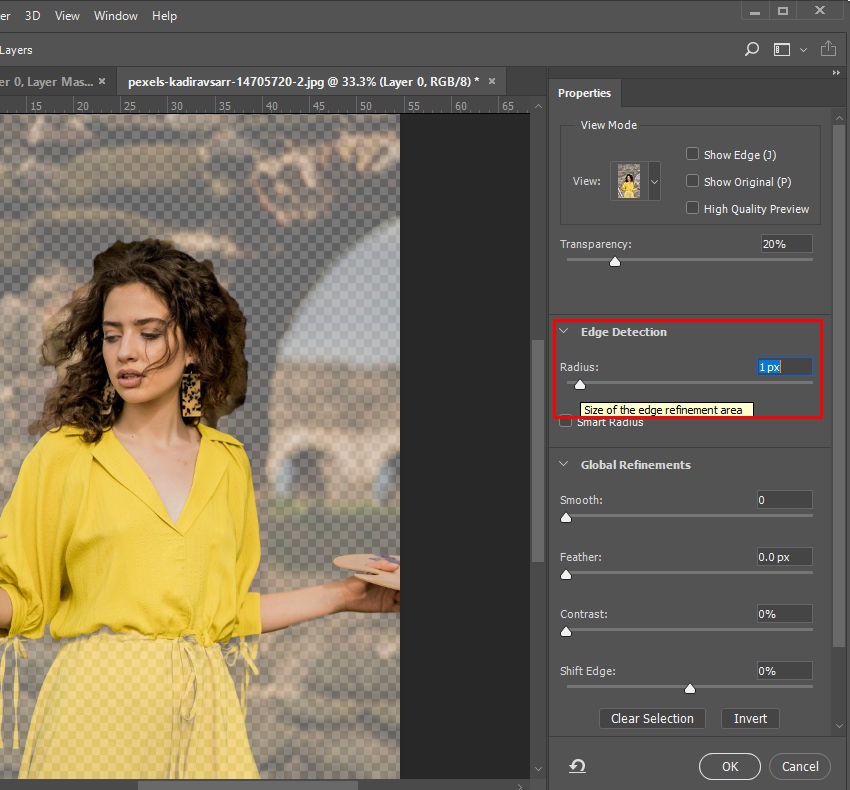
Step 3: Adjust Edge Detection
On the right panel, adjust the Radius slider under "Edge Detection." This helps Photoshop detect fine details, such as strands of hair or soft edges.
Step 4: Use the Refine Edge Brush Tool
Select the Refine Edge Brush Tool from the left toolbar and paint over areas where you need better edge blending. This is particularly useful for soft textures like fur or fabric.
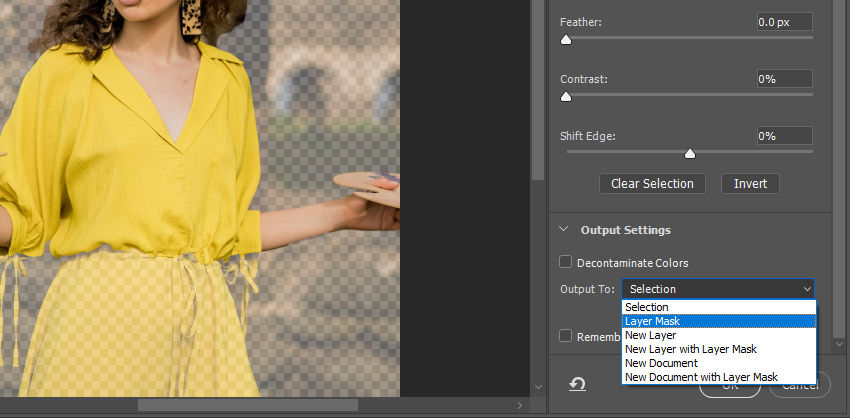
Step 5: Output to a Layer Mask
In the Output Settings panel, set the output to Layer Mask before clicking OK. This applies the refined selection as a mask, keeping the original image untouched.
Once you're satisfied with the result, just export it following the Step 5 in Method 1.
Why It’s Non-Destructive
Since the mask preserves all original pixels, you can continue refining the selection without losing any image data. If needed, you can go back to Select and Mask to make further adjustments.
Method 3. Using the Pen Tool and Vector Masks
For subjects with sharp, clean edges, such as products, logos, or architecture, the Pen Tool provides the most precise way to remove the background while maintaining full editability.
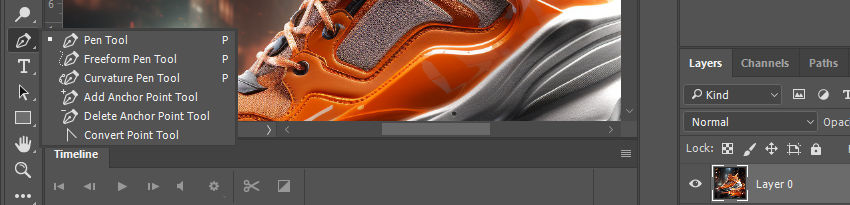
Step 1: Select the Pen Tool
Choose the Pen Tool (P) from the toolbar. Make sure the mode is set to "Path" (not "Shape") in the top menu.
Step 2: Draw a Path Around the Subject
Click around the edges of the subject to create a precise outline. Adjust the curve of each point by dragging the handles. Zoom in for accuracy, especially around corners.
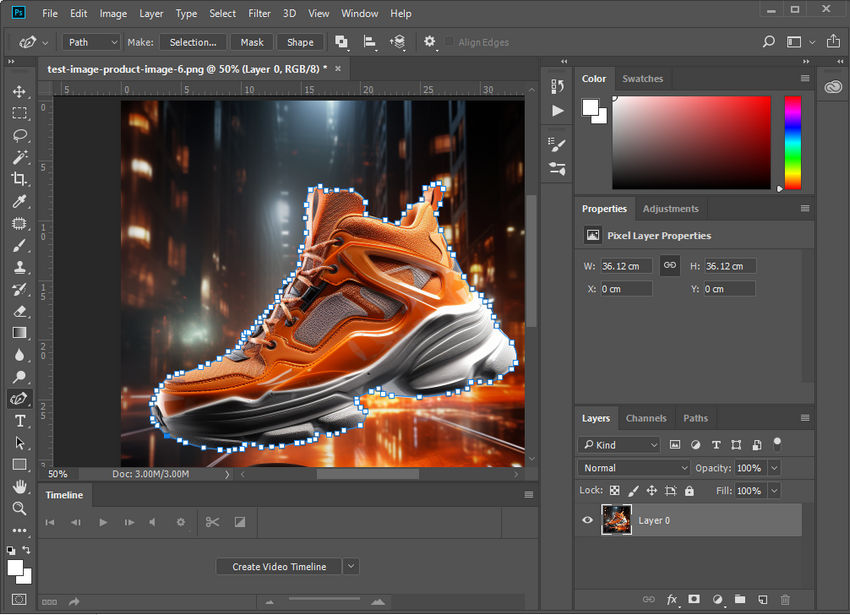
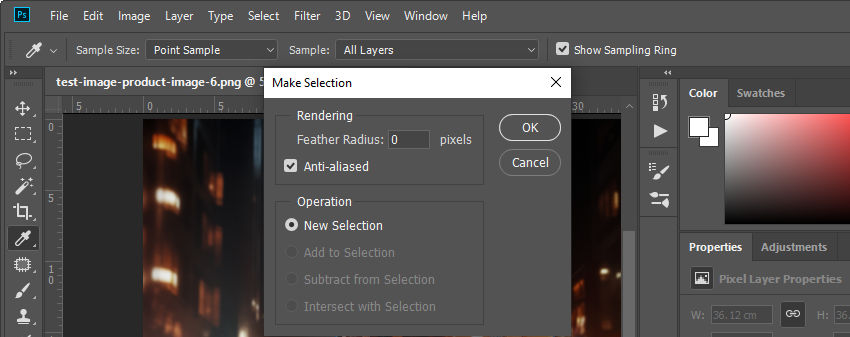
Step 3: Convert the Path to a Selection
Once the path is complete, right-click inside the path and choose Make Selection.

Then, set the "Feather Radius" to 0 pixels for a sharp cutout.
Step 4: Apply a Vector Mask
With the selection active, click the Add Layer Mask button. Photoshop will create a vector-based mask, which remains fully editable.
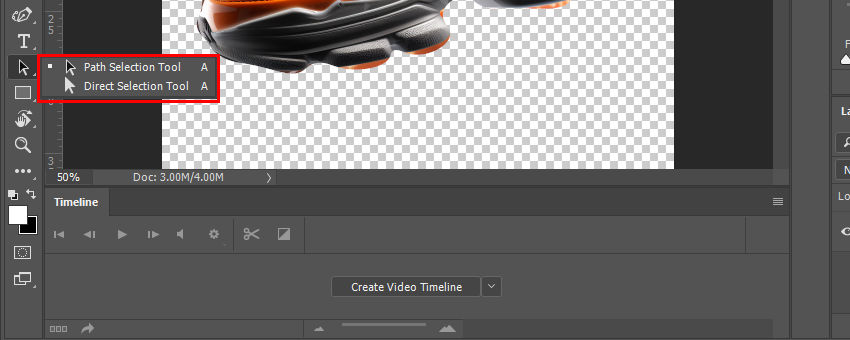
Step 5: Modify the Path if Needed
To adjust the mask, select the Path Selection Tool (A), click on the path, and modify the anchor points. This allows you to fine-tune the selection without affecting the original image.
Why It’s Non-Destructive
Since the vector mask is based on paths, it can be edited infinitely without affecting the original pixels. Unlike raster-based masks, vector masks ensure crisp edges and are ideal for high-resolution work.
Removing Backgrounds Non-Destructively with AI Tool
While Photoshop provides powerful tools for non-destructive background removal, the process can still be time-consuming—especially for beginners or those working with complex images. If you're looking for a faster and more automated solution, AI-powered tools like Aiarty Image Matting offer an efficient alternative.
Aiarty Image Matting is designed to make background removal both fast and precise, eliminating the need for complex manual mask or selection. Unlike traditional methods that require intricate adjustments, Aiarty leverages AI algorithms to detect and extract subjects automatically while ensuring that the original image remains untouched.
Let’s explore how Aiarty Image Matting simplifies background removal while maintaining a non-destructive workflow.
Before getting started, make sure to install and launch Aiarty Image Matting.
Step 1: Upload Your Image
Click the + Add button to upload the image you want to remove the background from. Aiarty supports various file formats, allowing you to work with different image types effortlessly. You can even batch add multiple photos for processing in bulk.
Step 2: Remove the Background with AI
Once your image is uploaded, select an AI model from the drop-down menu and click Start. Aiarty’s AI will automatically analyze the image and remove the background in just a few seconds. The AI intelligently detects subjects, including people, animals, objects, and even fine details like hair or fur, creating a clean cutout without requiring manual selections.
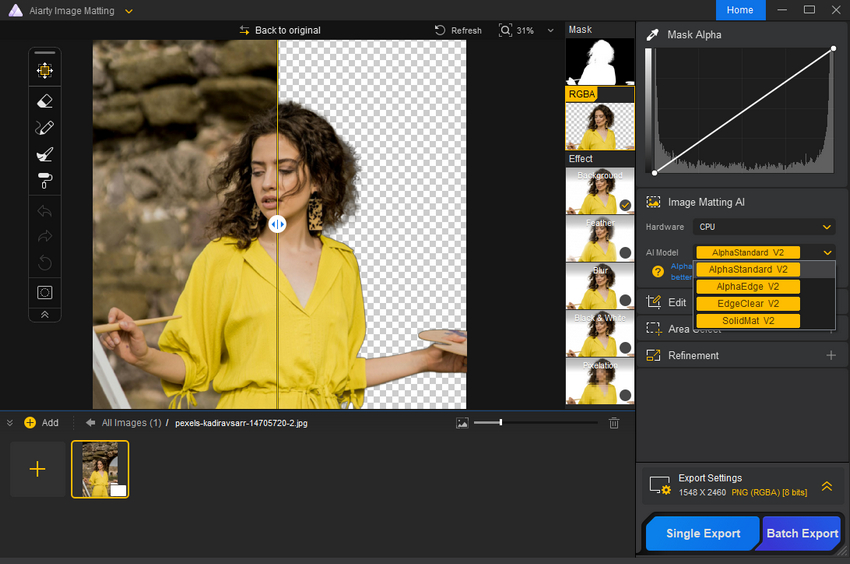
Step 3: Fine-Tune with Manual Adjustments
If the automatic cutout isn't perfect, Aiarty provides Eraser, Brush, Dodge, and Burn tools for further refinement. These tools allow you to restore missing details or erase unwanted areas, all while ensuring the original image remains intact.
And if you make a mistake, you can easily undo any action or click Back to Original to restore the image to its original state.
Step 4: Save Without Overwriting the Original
Once you are satisfied with the result, you can export the image in PNG format with a transparent background or replace the background with a new one. Aiarty never modifies the original file, so you can always revisit and refine the image as needed.
Why Aiarty is a Non-Destructive Background Removal Tool
- Original image remains untouched – Edits are applied separately, ensuring the source file is preserved.
- Adjustments can be made anytime – Users can refine the cutout without losing data.
- AI enhances accuracy, reducing manual work – The automated process saves time while maintaining high-quality results.
By combining automation with manual control, Aiarty Image Matting offers a quick yet flexible solution for background removal, making it ideal for users who need professional results without the complexity of traditional methods.
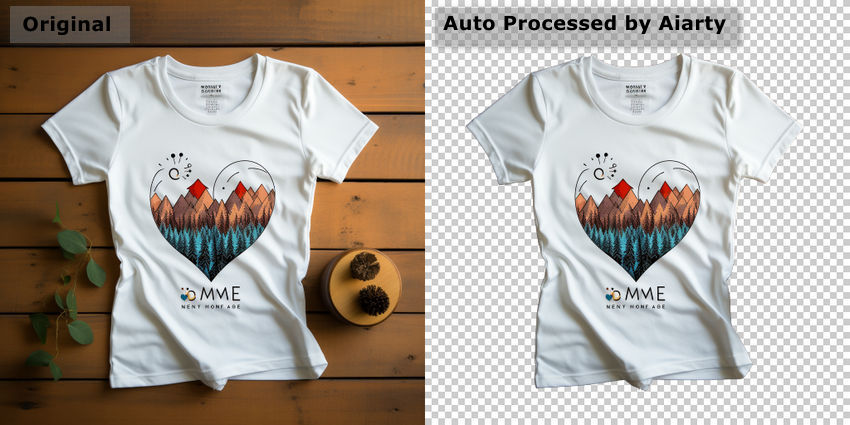
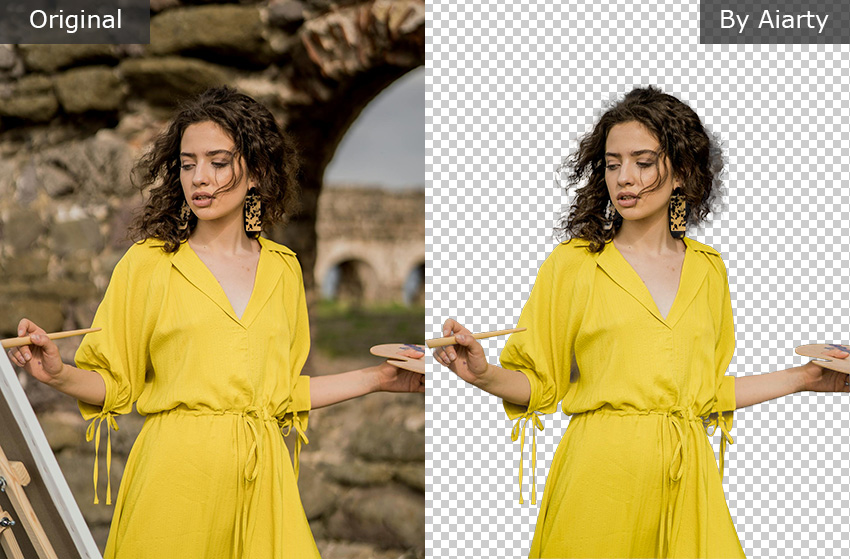
Here’s a before-and-after comparison of the automatic background removal with Aiarty.
Conclusion: Aiarty vs. Photoshop – Which One Should You Use?
Both Photoshop and Aiarty Image Matting offer non-destructive background removal, but they cater to different user needs. If you prefer manual precision and full control, Photoshop provides powerful tools like Layer Masks and Select and Mask, allowing for detailed adjustments. However, this approach requires time and experience to achieve professional results.
On the other hand, Aiarty Image Matting is designed for efficiency, making it an excellent choice for users who need a quick and easy solution. With AI-powered automatic background removal and manual refinement tools, Aiarty offers a balance between automation and flexibility. It ensures that the original image remains untouched, allowing users to refine the results without permanently altering their files.
Which One Should You Choose?
- Use Photoshop if you need precise control over complex backgrounds and are comfortable with manual editing.
- Use Aiarty if you want a fast, AI-powered solution that simplifies background removal while maintaining high-quality results.
Ultimately, the best choice depends on your workflow. If you need quick and effective background removal without the complexity of Photoshop, Aiarty is the ideal alternative.
You May Also Like
This post was written by Brenda Peng who is a seasoned editor at Digiarty Software who loves turning ordinary photos into extraordinary works of art. With AI assistance for brainstorming and drafting, the post is reviewed for accuracy by our expert Abby Poole for her expertise in this field.