Best Stable Diffusion Pose Prompts with ControlNet Tips
Updated on
Are you struggling to find the best Stable Diffusion pose prompts to make your character stand out?

If you search AI images using pose keywords on Civitai or other AI communities, you may find that some well-crafted images don't contain some "magic" pose keywords at all. The secret is, besides incorporating posing descriptions in the prompts, you may need ControlNet and other tricks to nail down everything.
That is what I will be covering below, let's go!
Part 1. How to Find the Best Stable Diffusion Pose Prompts
Option 1. Use pose keywords in prompts.
For simple poses, you can describe them in the prompts. If the generated image doesn't fulfill your requirement, you can add weight to the words regarding the pose. For instance, (leg crossed) will increase the weight of "leg crossed" by a factor of 1.1, while ((leg crossed)) means 1.21 (= 1.1 * 1.1).
Option 2. Use ControlNet.
Sometimes, we can't solemnly rely on the prompts.
If the generated image still won't work - as some dramatic poses are hard to describe - then the best way is to use the ControlNet extension in Stable Diffusion WebUI A1111. It allows you to better manipulate the poses and gestures (see detailed tutorial in Part 2 below).
Must-have Tool:
Since Stable Diffusion is computing intensive and can throw CUDA out of memory error at high resolution, it is recommended to set base resolution around 512px, 768px, or no larger than 1K.
Then, you can either go with Highresfix+SD Ultimate upscale workflow (see detailed tutorial here) or use a much simpler and high-quality AI image upscaler: Aiarty Image Enhancer.
Below is a demonstration of an image upscaled by Aiarty Image Enhancer vs the base 512px base resolution.
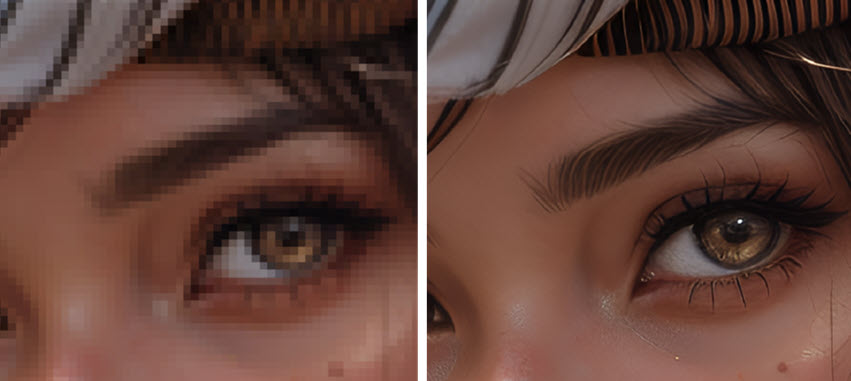
Aiarty Image Enhancer can deliver a similar and even better result in 3 easy steps, which saves tons of time and effort compared to the native method inside Stable Diffusion.
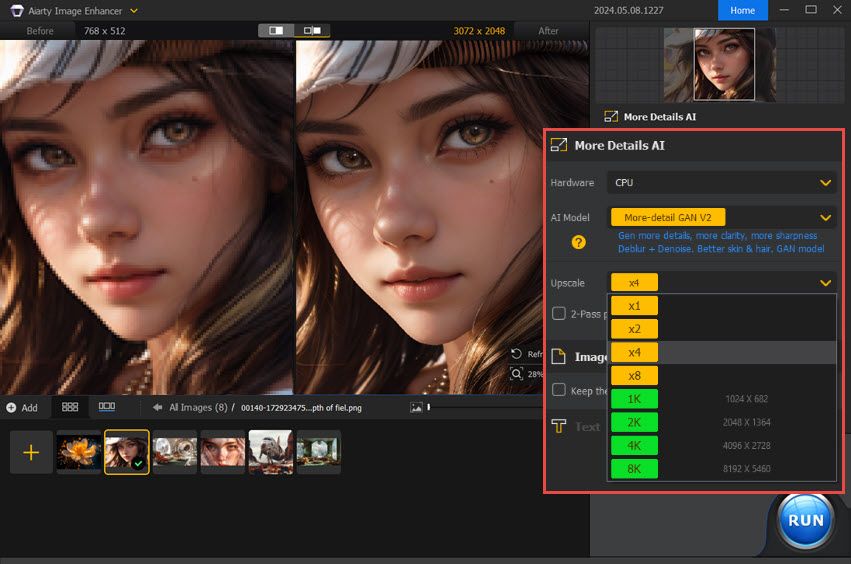
Part 2. Use ControlNet for Any Desired Pose
Method 1. Use OpenPose in ControlNet
Step 1. Install the ControlNet extensions:
Extensions > Install from URL: https://github.com/Mikubill/sd-webui-controlnet.git
Hit the Install button
Go to the Installed tab and make sure ControlNet is enabled. Plus, you can regularly hit "check for updates" option for these extensions and make sure they are the latest version.
Step 2. Download the ControlNet models.
Download models from Huggingface: https://huggingface.co/lllyasviel/ControlNet-v1-1/tree/main
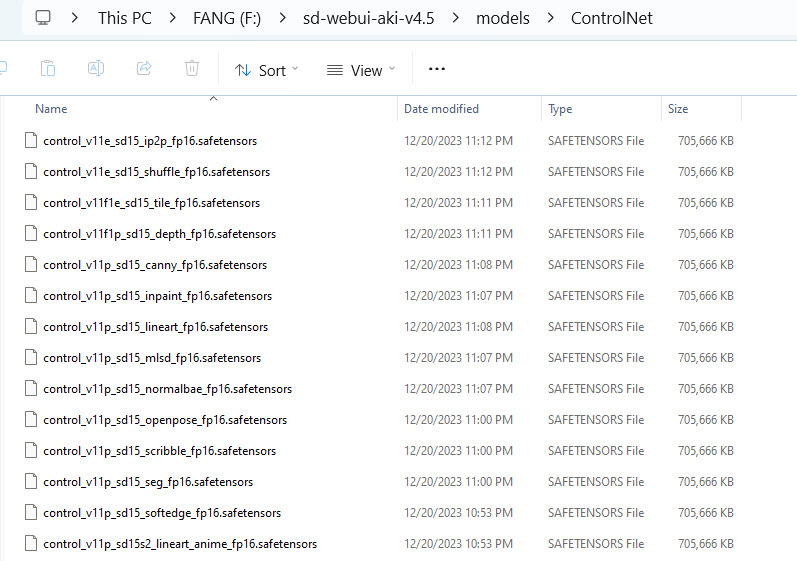
Put models in: stable-diffusion-webui/extensions/sd-webui-controlnet/models
Or in: stable-diffusion-webui/models/ControlNet
Step 3. Install the OpenPose editor.
Inside A1111, go to Extensions>Install from URL: https://github.com/fkunn1326/openpose-editor
You can find it here: stable-diffusion-webui\extensions\sd-webui-openpose-editor
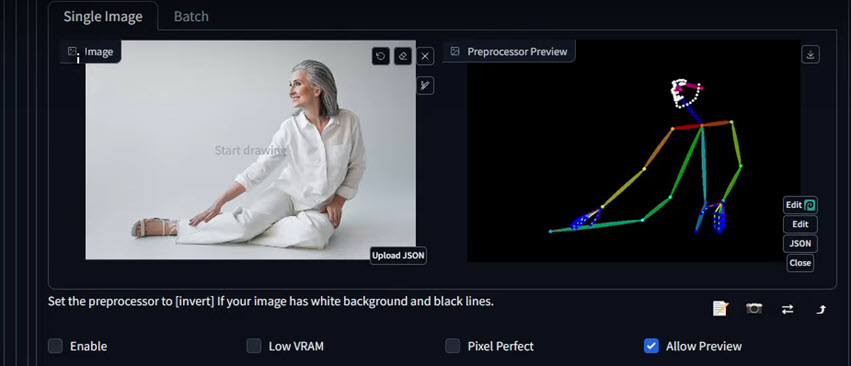
Now you can enable ControlNet, add the image with the pose, and use the OpenPose editor to adjust the poses as you want.
Method 2. DesignDoll+Photoshop+A1111
Sometimes, it's hard to describe an impactful and dynamic pose of the character merely with language. That's when we need images for pose reference. We can import the image with the desired pose into ControlNet in Stable Diffusion A1111 WebUI.
But firstly, we need to prepare the image with poses. One method is to use 3D modeling tools. I found a handy tool named DesignDoll, developed by Terawell Inc. You can also use other tools that you are familiar with.
Step 1. Free download DesignDoll from its official site: https://terawell.net/
Step 2. Pose your character easily.
Inside the DesignDoll software, you can flexibly manipulate the sketch doll's body, adjust the pose of the character, and reproduce any perspectives with intuitive operations.
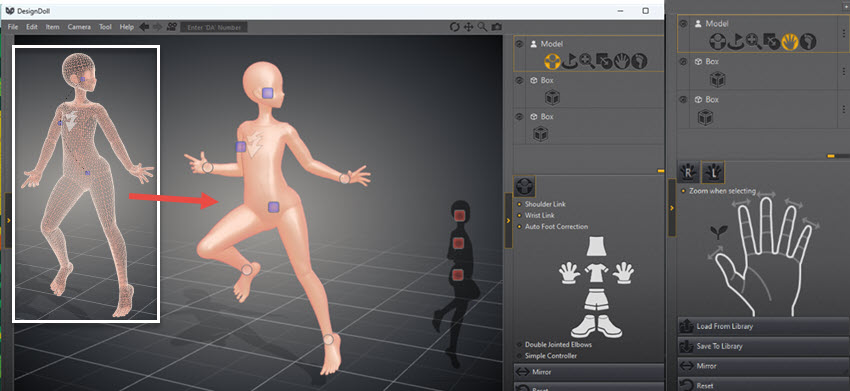
You can also visit the post library (https://doll-a.net/), find a desired pose, and copy its DA number. Then inside the DesignDoll software, paste the DA number on the menu bar (next to the camera icon).
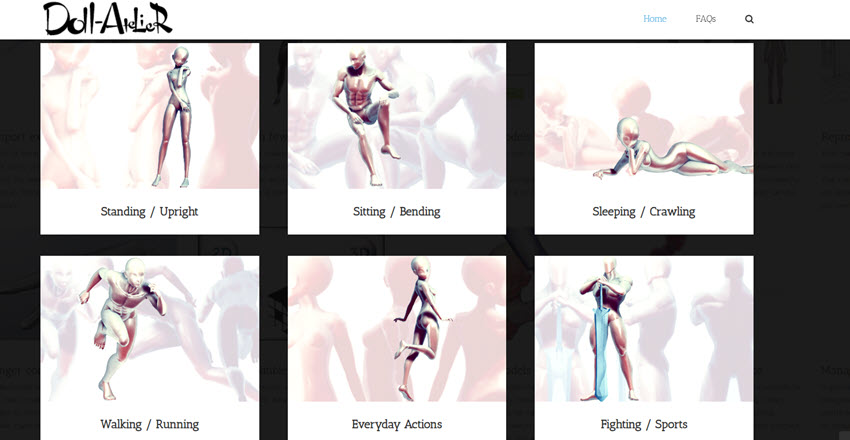
Step 3. Export the image with a transparent background in PNG.
Note: Even if you select the transparent background option in the exporting window, but you forget to select PNG, leave it as BMP or another format, you may end up with an image with solid background colors.
Step 4. Edit the image in Photoshop or other image editing software.
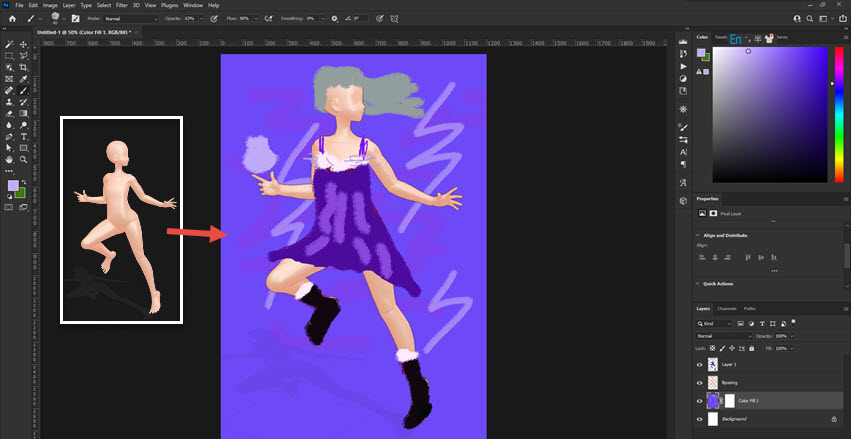
Taking Photoshop as an example, I roughly cover the character with cloth and boots, with something above her hand as the would-be crystal ball, and some stokes in the background for lighting and abstract swirling purple stuff.
Step 5. Use Stable Diffusion A1111 WebUI to generate an image with the desired pose.
Prompt:
1 girl jumping in the air with a dynamic pose, long curly hair, silver hair, shiny hair, cleavage, makeup, eyeliner, sheer silver blue robe, full body shot, holding a crystal ball on left hand, athletic legs, narraow_waist, wearing an elegant purple dress adorned with silver patterns, gorgeous costume:1.2, boots, surrounded by swirling purple and blue smoke, thunder lightning in background, burning sky, flames around, vibrant colors, masterpiece, cinematic angle, cinematic lighting, photorealistic, fire magic:1.1,
Negative Prompt:
Nsfw, nude, naked, low quality, normal quality, worst quality, lowres, bad_pictures, badhand, muscular, monochrome, blurry, watermark, signature, artist name, Twitter username
Resolution: 448 640
Sampling steps: 20; CFG scale:7; Sampling Method: DMP++2M
You can change the parameters to your preferences.
Below is the generated image without using ControlNet.
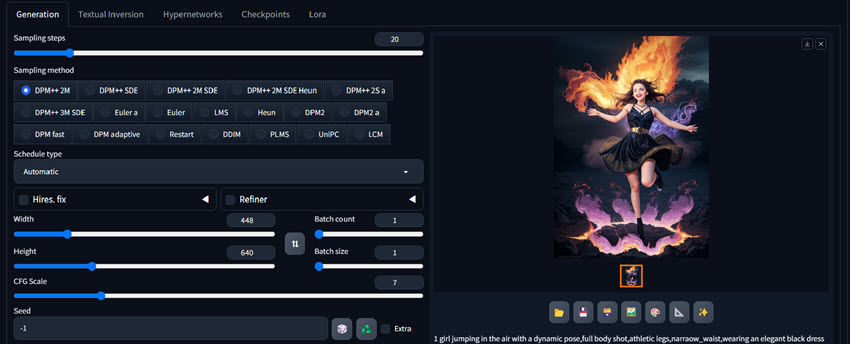
If we import the pose reference image into ControlNet, the output will be as follows. The generated image has the identical pose as the reference image. Let's see how to configure the ControlNet in Step 6.
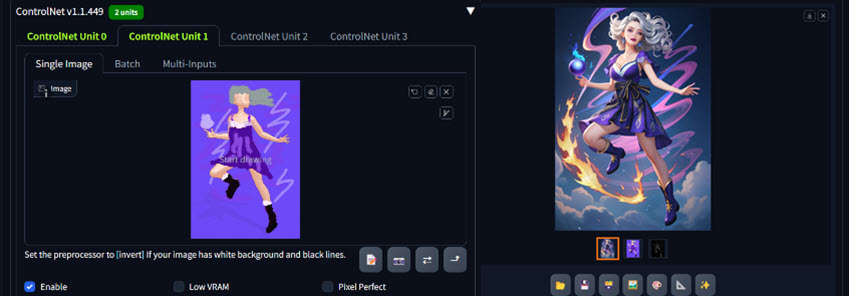
Step 6. Use ControlNet in Stable Diffusion A1111 WebUI.
Assuming you have already installed ControlNet extension for Stable Diffusion, follow the steps below.
Part 1: Enable ControlNet Unit 0
- Import the pose reference image we prepared with Photoshop.
- Tick "Pixel Perfect".
- Control Type: Tile.
- Control Mode: My prompt is more important.
Part 2: Enable ControlNet Unit 1
- Again, drag and drop the pose reference image.
- Tick "Pixel Perfect"
- Control Type: Lineart; Preprocessor: lineart_realistic
- Lowering the Control Weight and Ending Control Step (e.g. at 0.5 each).
Step 7. Start to generate the image.
You can experiment and finetune other parameters, and generate in batch until you find a favorite seed. Then you can freeze the seed, use LoRA Add Detail to improve the face, etc.
Part 3. Tips and Tricks
1. Find Stable Diffusion Poses library for reference.
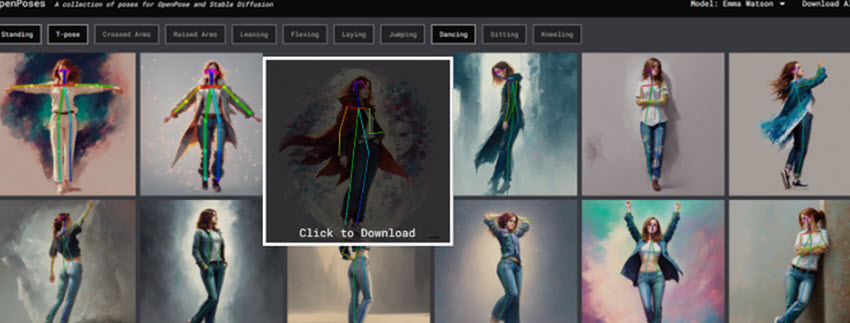
OpenPoses website has a collection of poses for Stable Diffusion and ControlNet OpenPose. You can click the tabs to filter among poses such as standing, T-pose, crossed arms, laying, jumping, etc.
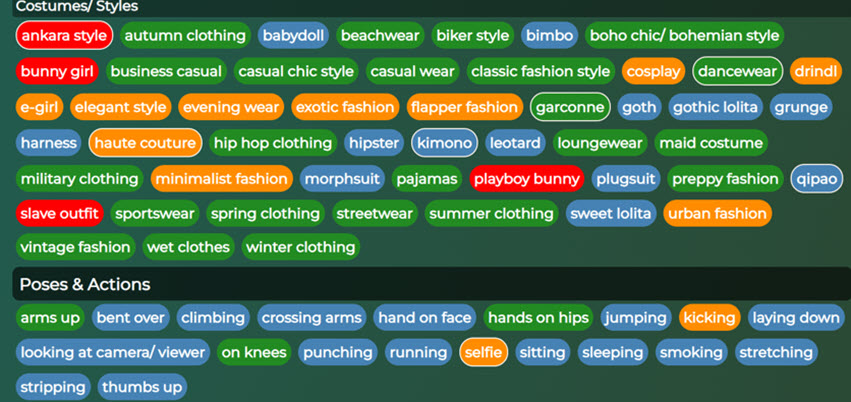
Another good resources is a Stable Diffusion prompts lists curated by CDcruz. Besides poses, you can also find useful categories such as facial characteristics, expressions, hairstyles, clothing, and more on that site.
2. Use Stable Diffusion extension to help find popular prompts.
My recommendation is using Tagcomplete extension, which has 2.5k stars on Github. It suggests anime-style tags from Danbooru and other similar "image boorus", including poses.
You can type the __ (double underscore) to trigger this extension. Please note that NSFW tags are included in this extension, you may want to use them with caution.
Find more information and install from here: https://github.com/DominikDoom/a1111-sd-webui-tagcomplete