How to Use Stable Diffusion Tiling to Generate Seamless Textures
Updated on
Imagine turning words into seamless textures — no coding, no manual editing. Thanks to AI and tools like Stable Diffusion Tiling, that’s now a reality. Whether you type “swirling galaxies,” “geometric tiles,” or “intricate brickwork,” the AI instantly generates a perfectly tileable, repeatable image. It’s a game-changer for designers, 3D artists, game developers, and anyone who needs high-quality textures for wallpapers, virtual environments, or digital art.
Ready to turn your imagination into infinite patterns? This guide will walk you through how to create seamless tiled images using Stable Diffusion models like Automatic1111, SD Forge, and Replicate Material. Let’s dive in and unlock the power of AI-generated textures.
Boost Your Tileable Textures Before You Start
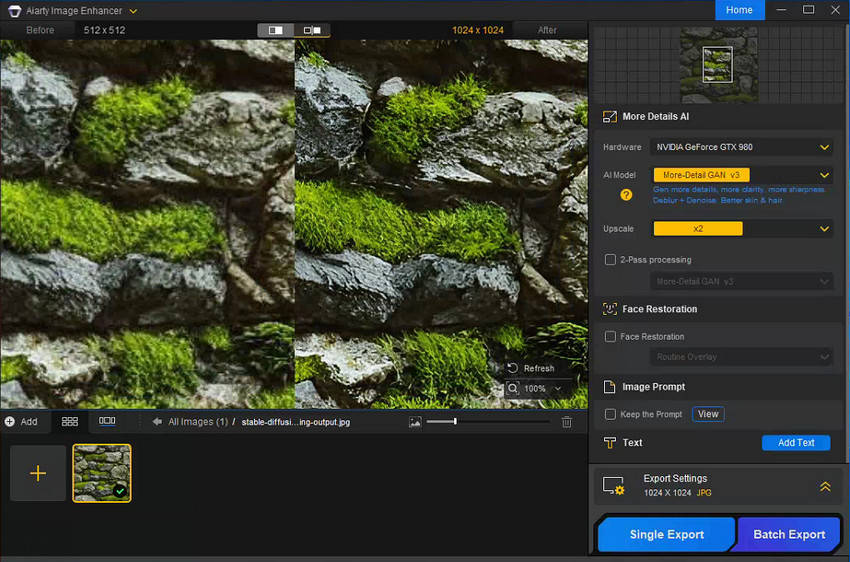
Even with the Tiling feature in Stable Diffusion, tileable images may lose clarity or sharpness at larger sizes. If you're creating textures for game assets, 3D models, wallpapers, or digital art, it's crucial to ensure your images are clean, crisp, and scalable.
That’s where Aiarty Image Enhancer comes in. This powerful tool lets you easily upscale your tileable textures to 4K, 8K, or even 32K, while also removing noise, sharpening details, and preserving quality. Plus, it supports offline processing, batch enhancement, and watermark-free exports (paid) — ideal for creators who need high-resolution textures without compromise.
Now that you have a solution to maximize texture quality, let’s explore what is Stable Diffusion tiling and how to create seamless tileable images using Stable Diffusion.
What Is Stable Diffusion Tiling?
Stable Diffusion, at its core, utilizes diffusion models to generate realistic images. Imagine a noisy image gradually becoming clearer until it reveals the desired picture. Stable Diffusion Tiling takes this a step further. It incorporates text descriptions into the process, ensuring the generated image can be seamlessly repeated to create a perfect tile.
How Does Stable Diffusion Tiling Work?
To be frank, tileable Stable Diffusion and Stable Diffusion work on the same principle, except for the addition of a tiling process. You’ll walk through writing Stable Diffusion prompts, converting prompts into latent representation, feeding latent representation and a randomly initialized image into Stable Diffusion models, and generating a tiled image via Stable Diffusion tiling. To be specific:
- Text Encoding: You provide a text prompt describing the desired pattern or texture. This could be anything from "marble floor" to "geometric shapes" to "starry night sky."
- Latent Representation: A neural network called a text encoder analyzes the text prompt and converts it into a latent representation. Think of it as a mathematical code capturing the essence of your description.
- Diffusion Model Magic: The latent representation is then fed into the diffusion model, along with a randomly initialized image. The diffusion model iteratively refines the image based on the latent representation, gradually removing noise and ensuring it adheres to the described pattern.
- Seamless Tiling: The final step involves ensuring the generated image can be seamlessly repeated to create a perfect tile. This is achieved by carefully analyzing the edges of the image and ensuring minimal to no visible discrepancies.
After that, you’ll get a beautiful, high-quality, and endlessly repeatable tiled image texture based on your text description.
How to Create Seamlessly Tiled Image in Stable Diffusion Automatic1111?
Now that you've grasped the magic behind Stable Diffusion tiling, it's time to turn those poor verbal textual descriptions into stunning, seamless patterns! Here, we'll introduce you how to create tiled image textures in Stable Diffusion Automatic1111, allowing you to tap into the power of Stable Diffusion tiling without needing to code.
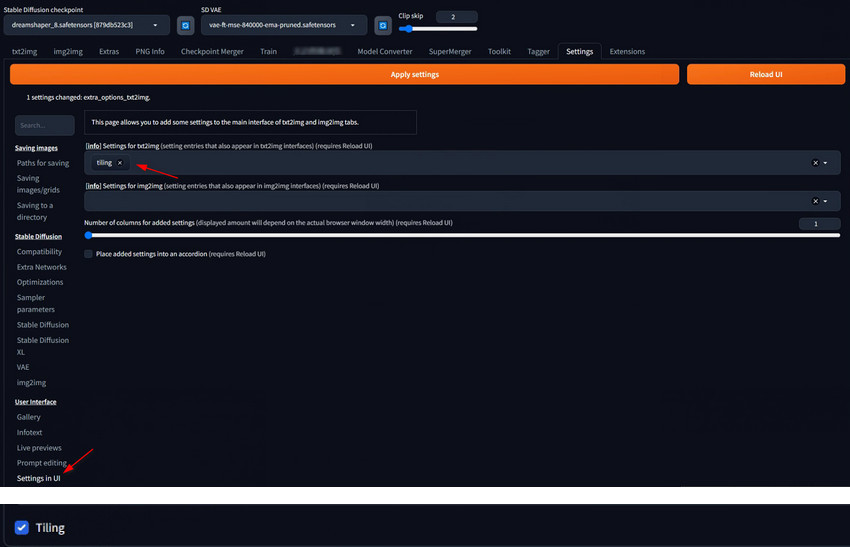
Step 1. Enable Tiling in Stable Diffusion.
Open Stable Diffusion and go to Settings, then Settings in UI. Add Tiling to text2img UI. Apply settings and reload UI when you’re done. You will find a Tiling option in the reloaded UI, tick on it.
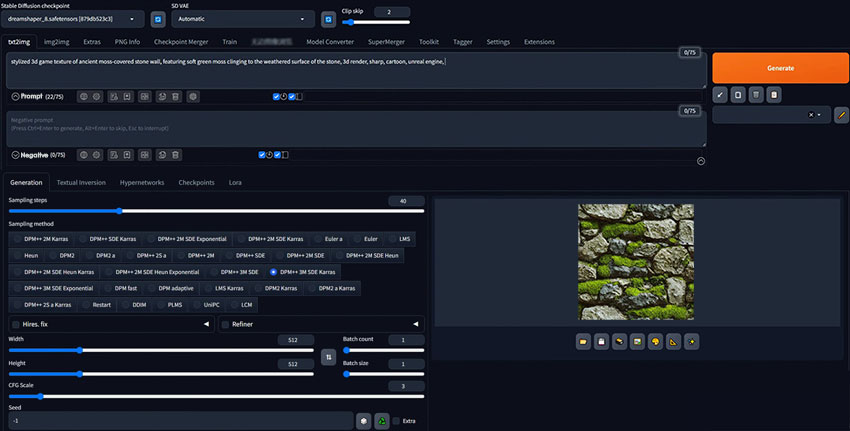
Step 2. Type in prompts for tiled image.
In the prompt box, type in the prompt to describe the desired pattern or texture you want to generate. Be as specific as possible to achieve the best results. For example:
Prompt: stylized 3d game texture of ancient moss-covered stone wall, featuring soft green moss clinging to the weathered surface of the stone, 3d render, sharp, cartoon, unreal engine
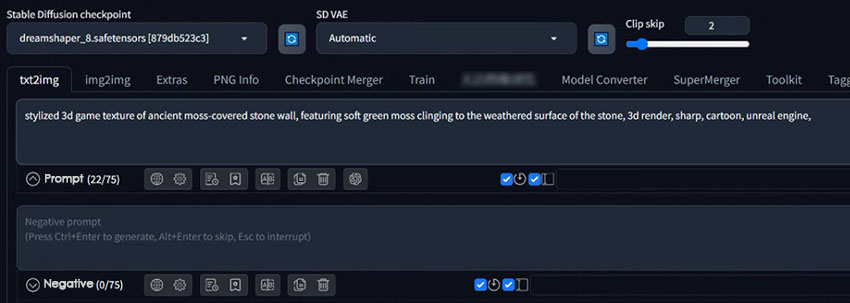
Ensure that you have the prompt, image size, and other necessary settings populated in the img2img tab.
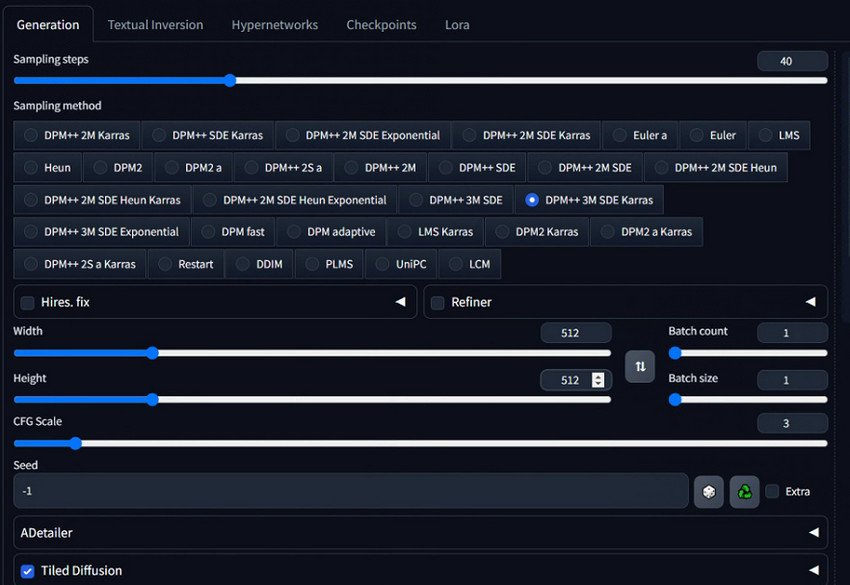
Step 3. Adjust settings.
While not strictly necessary, these settings can influence the final pattern's appearance and detail:
- Image Size: This defines the resolution of the generated image. Consider using smaller sizes (e.g., 256x256 pixels) for better repeatability.
- Seed: This value influences the randomness of the generated image. Experiment with different seeds to achieve variations within your desired pattern.
- Steps: This controls how many iterations the diffusion model takes to refine the image. Higher steps lead to sharper details but also take longer to compute. Start with a moderate number (e.g., 50) and adjust as needed.
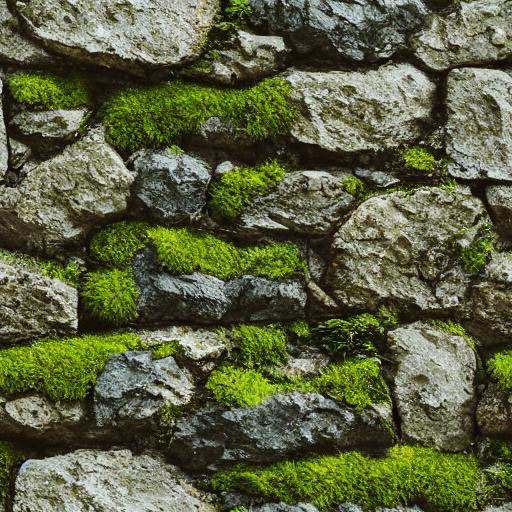
Step 4. Generate tiles images.
Once you're satisfied with your text prompt and settings, click the Generate button in Stable Diffusion. The Automatic1111 model will then begin processing your request and generate the tiled image. Depending on the complexity of your prompt and settings, this may take a few minutes.
Step 5. Evaluating the results.
Once the image generation is complete, Automatic1111 will display the generated tile. Carefully examine the edges of the image to ensure there are minimal to no visible discrepancies.
If the tiling isn't perfect, you can try:
- Refining your text prompt for better clarity.
- Adjusting the tiling settings (if available).
- Running the model again with a different seed value.
Step 6. Saving your tiled image.
If you're happy with the generated seamless pattern, you can save it to your computer for further use in your projects. Simply click on the Save button to make it done.
Best Stable Diffusion Prompts & Tips for Tileable Images
Using the Tiling option is a great start, but getting high-quality seamless textures requires the right prompts, models, and settings. Here are some expert tips to help you create flawless tileable images with Stable Diffusion.
Best Prompts for Tileable Images
- Use keywords like "seamless pattern", "tileable texture", "loopable", "repeating background".
- Combine with material descriptions: "marble texture", "wood grain", "fabric pattern", "geometric tiles".
- Write negative prompts like "worst quality", "signature", "watermark", "unappealing", "pixelated", "grayscale", "blurry", "jpeg artifacts", "low quality", "lowres".
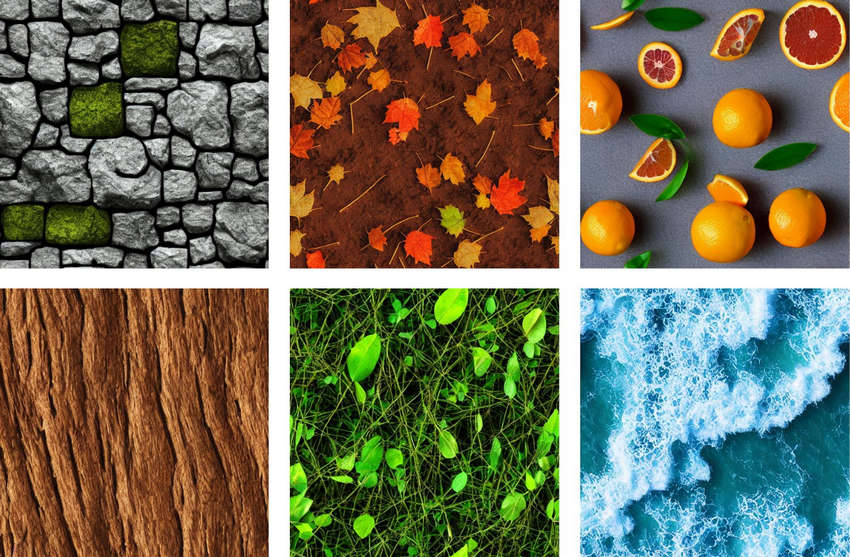
Here are some tiled image prompt examples for your reference:
- Seamless watercolor peonies pattern — cascading florals with soft brush strokes, elegant and visually captivating for fabric or wallpaper designs.
- Tileable zebra stripe pattern — bold black and white stripes, clean and graphic, inspired by African wildlife.
- Minimalist pink marble texture — soft blush veins on a pale pink background, perfect for romantic, elegant designs.
- Seamless terrazzo pattern — colorful flecks on a neutral base, capturing playful mid-century modern vibes.
- Carrara marble texture — pristine white marble with elegant grey veining, evoking timeless luxury.
- White horizontal brick texture — clean, minimalist brick pattern with a pristine finish.
- Minimalist brick facade texture — simple, elegant brickwork with crisp edges and clean joints.
- Maple wood texture — smooth, clean surface with light, natural tones.
- Dark walnut wood texture — rich, dark hues with smooth surface and subtle grain patterns.
- Polished walnut wood texture — chocolate brown tones, elegant grain, and luxury finish.
- Rusted iron surface texture — weathered, aged metal with rich rusty patina and industrial charm.
- 3D glossy organic forms — fluid, flower-like shapes on a black background with smooth surfaces and vibrant colors.
- 3D iridescent opalescent texture — shimmering pearlescent colors that shift like precious gemstones.
Recommended Models & Resolution Settings
- Models: Use Stable Diffusion SDXL or texture-specialized models from CivitAI.
- Resolution: Start with 1024x1024 or higher. For better quality, use 2048x2048 or upscale later.
Common Issues and How to Fix Them
When generating tileable images with Stable Diffusion, users often face three common problems:
- Seams still visible
- Blurry or low-detail textures
- Distortion or misalignment in patterns
To fix visible seams, always make sure the Tiling option is enabled, use neutral backgrounds, and work with a higher resolution, which helps smooth the edges when the image repeats. If your textures come out blurry, simply enhance your prompts with terms like “ultra-detailed,” “highly detailed,” or “sharp focus” to guide the AI toward producing crisper results. For distortion or misaligned patterns, include structure-related keywords such as “symmetrical,” “even pattern,” or “perfectly aligned”. This helps the AI generate balanced designs that tile seamlessly without awkward breaks or shifts.
 FAQs about Stable Diffusion Tiling
Tiling, also known as swizzling, is a technique for organizing the pixels on a surface. It aims to place pixels that are close to each other in the image (based on their 2D distance) close together in memory as well. This improves efficiency by reducing the distance the computer needs to access related pixels during processing.
Tiled Diffusion isn't a separate program to install. It's an extension for Stable Diffusion frameworks like Automatic1111. Go to Github to download and install Automatic1111. Tiled Diffusion functionality is often built-in. You might need to activate it with keywords in your prompt (e.g., "tile" or "tiling") or through toggling the "Tiling" option if available.
- Forge UI
- tommoore515/material_stable_diffusion
- NightCafe Creator
- Dream by WOMBO
- ...
Yes, some advanced tools like ControlNet Tile allow specifying areas for repetitive elements within the tile.
The Tiling option forces the AI to generate images that seamlessly repeat across horizontal and vertical edges. In contrast, ControlNet Tile is a guidance tool that helps control the layout or structure of the image, but it does not inherently produce seamless, tileable textures unless combined with the Tiling setting.
If you’re still seeing seams, double-check that Tiling is correctly enabled. Also, use higher resolutions, add structured prompts like “symmetrical” or “even pattern,” and avoid complex backgrounds that disrupt edge blending. For the highest quality, consider using an AI upscaler like Aiarty Image Enhancer to sharpen details, clean artifacts, and ensure a perfectly seamless result.
You May Also Like
Rico Rodriguez is an experienced content writer with a deep-rooted interest in AI. He has been at the forefront of exploring generative AI tools like Stable Diffusion. His articles offer valuable insights into the world of AI, providing readers with practical tips and informative explanations.