Adobe InDesign is a powerhouse for layout design, but when it comes to removing backgrounds from images, many users hit roadblocks. It doesn't have a dedicated background remover built-in, only workarounds because it is not designed for image editing. Then, how do you achieve clean cutouts for polished brochures, magazines, or social media graphics?
This guide covers tried-and-true workarounds to remove background in InDesign — plus a smarter AI-powered solution that overcomes the limitations of native methods.
I love InDesign for its powerful layout design features, but since it is not for dedicated image editing, removing background is troublesome based on my own experience and fellow Redditors.
💡 InDesign is Not Designed for Removing Image Background
- Its native tool cannot deal with soft, detailed, or low contrast edges.
- The pen tool is time-consuming and not precise to manually draw out the clipping mask.
- You can't do fine adjustments later, nor does it support batch tasks.
Quick Solution: Remove Background from Picture with Aiarty Image Matting
Aiarty Image Matting is a dedicated AI background remover with precise edge detection. It uses AI to mask out subjects in batch, remove backgrounds, create transparent, white backgrounds, or custom canvas – and it always keeps details even for complex hair, fur, or soft and semi-transparent lace, glass, textile, saving you hours of work easily.
For fine-tuning, you can manually refine edges after AI processing, adjust the mask alpha, and use brushes to clean up or soften edges for a natural blend.
Download Aiarty Image Matting to Batch Erase Background for InDesign:
1. Remove Image Background in InDesign with Clipping Path
While InDesign offers a native clipping path feature, it is best suited for simple images. This method works well when the image has a sharp contrast and clear edges — perfect if you're looking for a way on how to delete white background in InDesign.
However, if your image features complex subjects or soft edges, the clipping path method won't work at all.
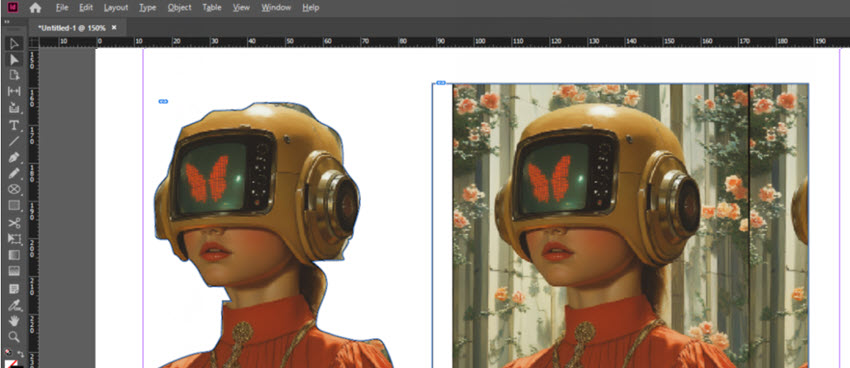
Here is a quick demonstration:
Step 1. Launch InDesign, add a placeholder, then drag and drop the image into the placeholder.
Step 2. Make sure you hit the image to select it.
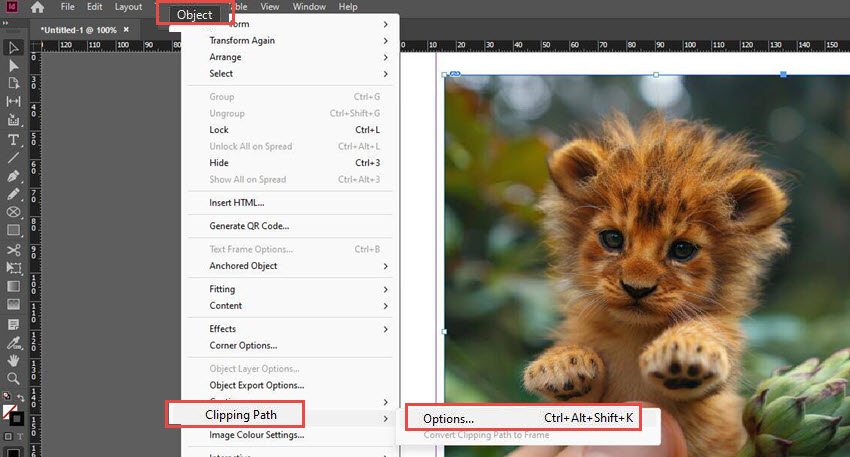
Step 3. Go to Object > Clipping Path > Options.
The shortcut key is Ctrl+Alt+Shift+K. For Mac users: Cmd is equivalent to Ctrl, and Option equals Alt.
Step 4. Adjust Clipping Path parameters.
In the pop-up window, enable Preview for real-time adjustments and choose Detect Edges from the Type menu. Adjust the Threshold and Tolerance values visually until you achieve the desired effect.
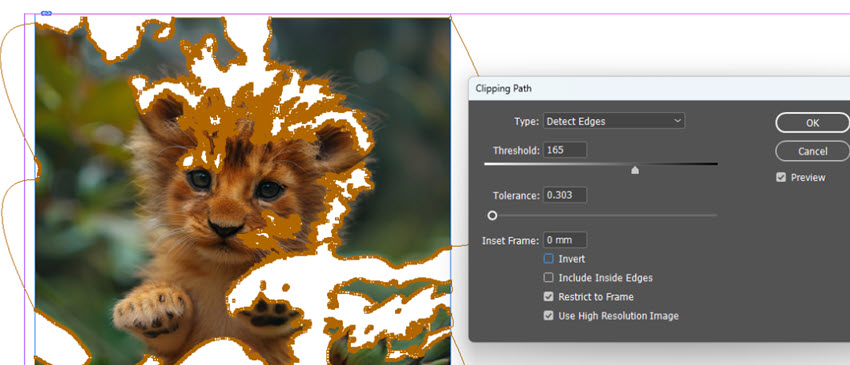
If your source image is larger than the placeholder and you only want the masking applied to the visible part, tick the "Restrict to Frame" option.
Step 4. Hit OK to remove background from a picture in InDesign.
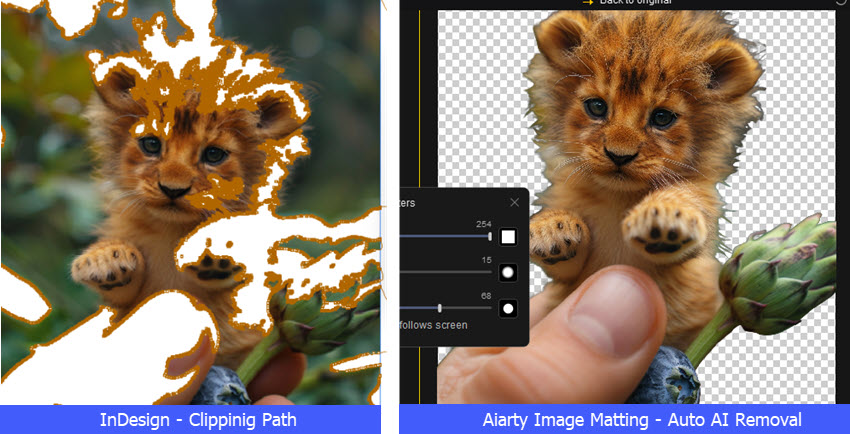
Note: For images with complex subjects or low contrast—like the little lion image above—InDesign might fail to discriminate the foreground from the background. This limitation is why many designers ask, how do I make a background transparent in InDesign using more advanced techniques.
So the better solution is to handle the background removal tasks to a dedicated AI Image Background remover tool, as shown in Method 3 below.
2. Remove Image Background in InDesign with the Pen Tool
The Pen Tool is another method to remove background in InDesign, but it's time-consuming and requires precision, especially when handling intricate subjects.
How to Erase Background in InDesign:
Step 1. Create a placeholder and drag your image into the frame.
Step 2. Draw a path.
Use the Pen Tool to outline the area you want to keep, such as around the main subject.
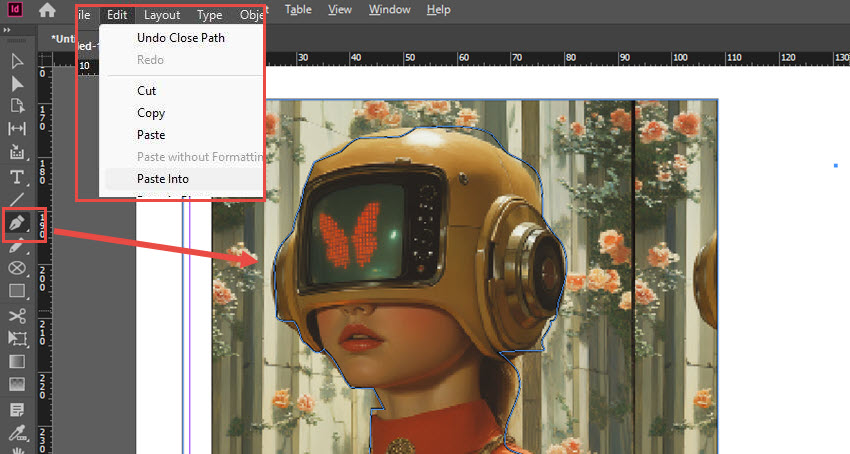
Step 3. Make sure the path is closed, hit on the path to select it, and go to menu: Edit > Paste Into.
This action pastes the selected subject back into its original location.
How do I make a background transparent in InDesign?
After using the pen tool to create the path, and hit that "Paste Into" option mentioned above, you can move the image to another position on the Canvas. Now you shall see the subject is masked out, i.e., you have deleted the background in InDesign and make it transparent.
Tips: How to use the pen tool to mask out the subjects
- Hold Shift while clicking to constrain lines to 45°/90° angles.
- Hold the Alt/Option while dragging a handle to adjust one side independently, thus better controlling the curves.
- After selecting endpoints, hit Ctrl/Cmd + Shift + Alt/Option + J to close the path.
Keep in mind, manually masking complex or fuzzy edges is time-consuming, and it won't keep the transparency variations across the edges. If you are wondering about how to delete background in InDesign for intricate subjects, this method won't yield the best results.
3. Use Aiarty to Precisely Remove Image Background for InDesign
InDesign's tools work for basic tasks but frustrate designers needing speed and precision. Imagine if you could bypass all these tedious adjustments with a single, intelligent solution. That's where Aiarty Image Matting steps in.
Aiarty Image Matting leverages AI to automatically detect edges, mask out subjects, and remove the image background. Its advanced alpha matte preserves details around semi-transparent areas and complex boundaries—hair, fur, lace, glass, fuzzy sweater, etc.
How to Use Aiarty to Remove Background for InDesign:
Step 1. Download Aiarty Image Matting on your computer, and import the image assets you want to use in InDesign.
[Download Button] [Learn More]
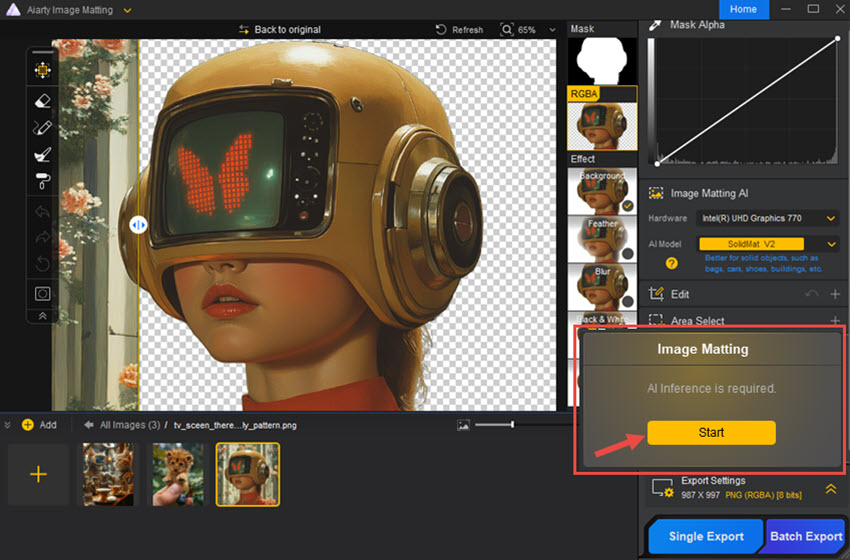
Step 2. Hit the Start button to remove the image background.
Thanks to AI inference, it delivers precise results automatically.
If you want to include more subjects, you can manually frame out the desired subjects, and Aiarty will automatically mask them out too.

Step 3. Hit the Export button.
If you have hundreds of images, you can batch-process them, and hit the Batch Export button. It saves you tons of time and delivers precise background removal with clean edges.
Why Choose Aiarty to Remove Background for InDesign?
- AI-powered precision: auto detects and masks out the subject with incredible accuracy.
- Keep details in edges, even for complex hair, soft boundaries, semi-transparent textiles and fur.
- Batch removal backgrounds: auto delete backgrounds for 3,000 images in batch.
- 4K/8K high-quality output: HQ mask with alpha adjustment, 2X AI upscaling with details.
- Fine-tuning brushes: keep sharp edges or refine for a better blend into the new background.
While InDesign offers built-in methods to remove backgrounds—from clipping paths to the pen tool—the process often demands precision and time. To boost the quality and efficiency when designing in Adobe InDesign, use Aiarty Image Matting as the best companion.
Download Aiarty Image Matting to precisely remove background for InDesign:
Watch Video Tutorials: Use Aiarty to Remove Image Background:
You May Also Like
This post was written by Brenda Peng who is a seasoned editor at Digiarty Software who loves turning ordinary photos into extraordinary works of art. With AI assistance for brainstorming and drafting, the post is reviewed for accuracy by our expert Abby Poole for her expertise in this field.