How to Add a Background to a Photo: 3 Easy & Effective Methods
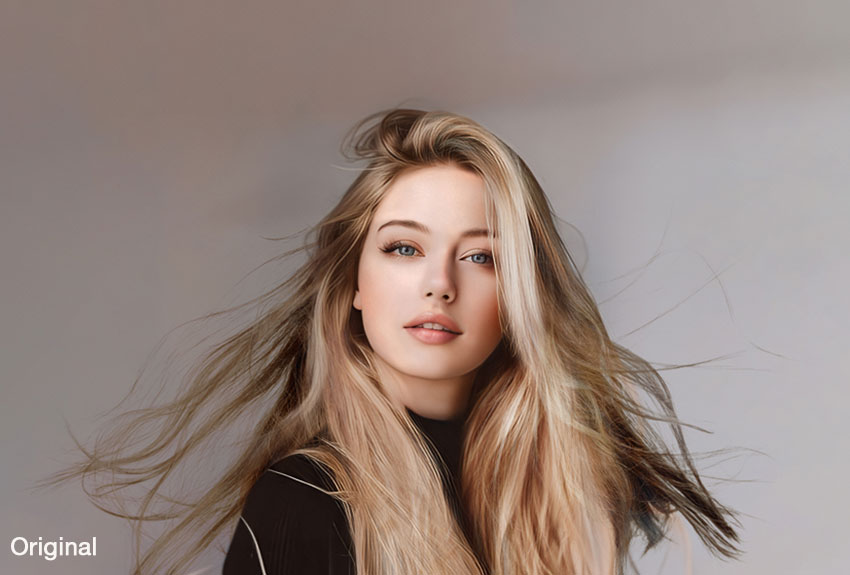
Adding a background to a photo is a crucial step for photographers, designers, and e-commerce sellers who want to enhance images for professional use. Whether you’re changing a plain background to a scenic one, replacing an unwanted background, or creating a consistent theme for product photos, background changing tools can help achieve high-quality results efficiently.
However, challenges like inaccurate background removal, rough edges, and poor blending between subject and background often arise. To address these challenges, we examine top photo background changers like Aiarty Image Matting, to add background to photos with natural look.
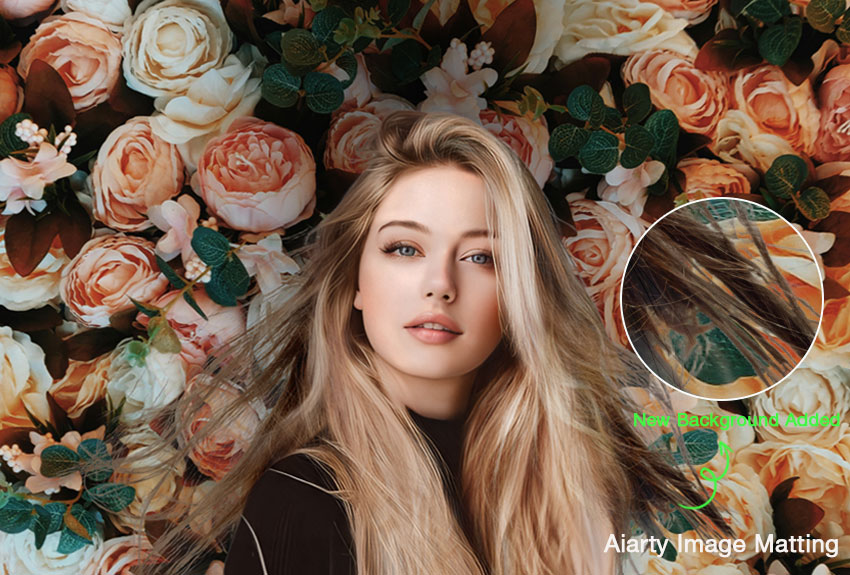
Take a look at how flawlessly Aiarty added a new background to a photo!
Have you ever struggled with these background adding issues?
- Jagged edges, annoying "halos" and residual artifacts, especially for complex details like hair, fur, transparency after background removal.
- A stark, unnatural line between the subject and the new background while adding background to photos.
- Time-consuming manual selections, limited batch processing and professional skill required
No worries. There is a better way to upscale low-res images into 32K masterpieces with sharp details.
Aiarty Image Matting leverages advanced AI to deliver precise subject isolation, ensuring smooth edges and clean background removal without halos. It also offers natural blending for background additions and efficient bulk processing, significantly enhancing workflow efficiency.
Free download Aiarty Image Matting to add a new background to your photo!
3 Best Ways to Add a Background to a Photo
To help you choose the right tool to add background to photos, we're going to explore three effective methods—Aiarty Image Matting, Picsart, and Photoshop, taking a close look at their features, ease of use, and overall performance. Here we go for the step-by-step process of each method.
How we test:
- We selected these three software options based on Google search results, user reviews, software ease of use, background removal accuracy, and compatibility, then spent several hours testing them.
- We used a Windows 10 PC with an Intel i7-13700K processor, 32GB RAM and AMD Radeon RX 7600 Graphics.
- The sample image included a portraits with complex hair details. Get the source image for test >>
Method 1: How to Add Background to a Photo Using Aiarty Image Matting
- Rating:

 4.6/5 from TheWindowsClub
Aiarty Image Matting is an AI background changer that specializes in precise background removal and seamless replacement. With its AI model trained on over 320K high-quality 4K images, it extremely excels in handling complex elements like hair, transparent objects, and intricate edges, ensuring a natural and professional look.
Key Features That Make Aiarty Image Matting Different:
- AI-Powered Background Removal: Accurately detects and removes backgrounds even for detailed hair/transparency handling. No manual selection.
- Custom Backgrounds & Batch Processing: Allows users to add consistent backgrounds (color/gradation/contextual) to multiple images simultaneously.
- Alpha Mask for Seamless Blending: Provides adjustable transparency control for a natural merge.
- Offline Mode for Privacy: Ensures data security without requiring an internet connection.
Ready for a new background? Download Aiarty Image Matting for free and get started!
How to add a background to a photo in Aiarty Image Matting
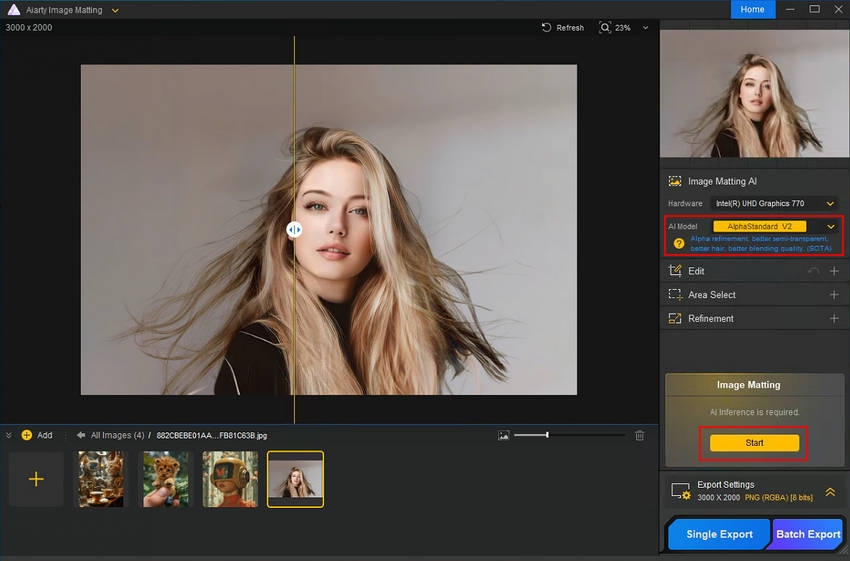
Step 1. Download and Install Aiarty Image Matting. Import your photo(s) through drag-n’-drop.
Step 2. Choose an AI model and click “Start” to auto-remove background with AI. Fine-tune edges using the Alpha Mask curve and manual options if needed.
Step 3. Tick on “Background” option under “Effect”. Select a new background color or upload a lifestyle background as you need.
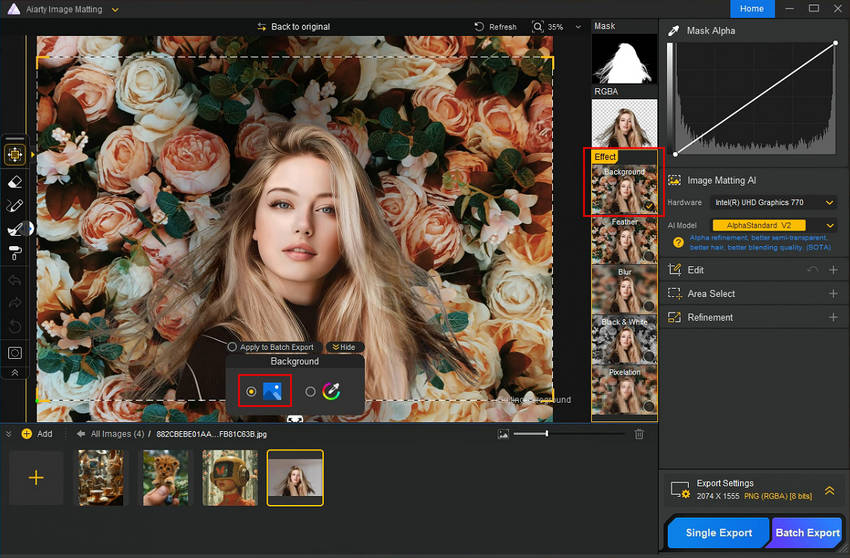
Step 4. Expand Export Settings to choose format, quality, and folder path. Then click “Single Export” or “Batch Export” to export individually or in batch.
Test Results:
I was genuinely blown away by this tool. Honestly, I threw a bunch of tricky product photos at it, and it cleanly removed the backgrounds, leaving absolutely zero jagged edges. The new backgrounds? They blended seamlessly, like they were always there. And the speed! I'm talking batches of hundreds of images processed in minutes. As a small business owner, I need results fast, and this delivered without sacrificing quality.
Method 2: How to Add Background to Photo Using Picsart
- Rating: 4.5/5 from G2
Picsart is a versatile and easy-to-use tool that's perfect for quick background changes and social media content. It uses AI for automatic subject detection, which can be fine-tuned manually, and offers a library of pre-made backgrounds and effects. You'll also find basic editing tools like filters, stickers, and overlays. Plus, its availability on iOS/Android and web browsers makes it a great option for editing on the go.
How to add a background to a photo online with Picsart
Step 1. Go Picsart background changer page and upload an image. The AI algorithm will automatically delete the original background.
Step 2. Select a new background from the library or click “Customize” option to enter the workspace for more choices, even uploading a custom one.
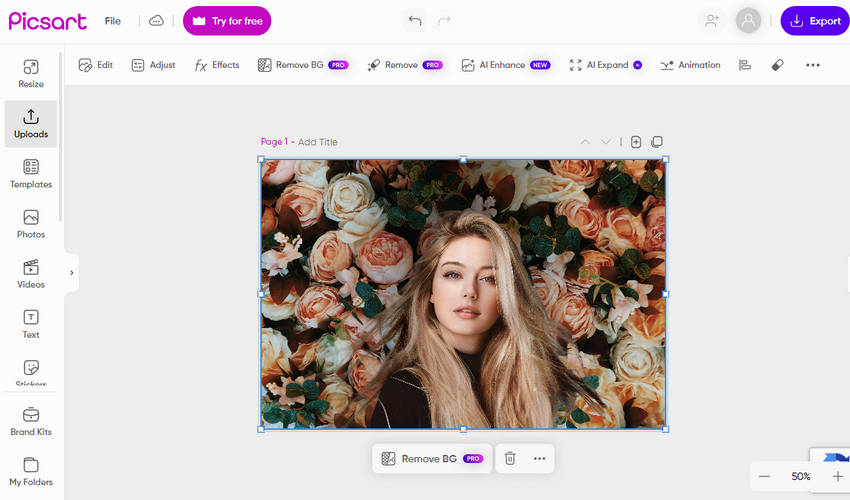
Step 3. Adjust the position and blending.
Step 4. Click “Export” to save the final image with a new background added.
Test Results:
Picsart delivers respectable background changes for straightforward images, though it can falter with intricate details. Blending is acceptable, but often necessitates manual tweaking for a polished look. While individual image processing is swift, it lacks the efficiency of batch editing.
Method 3: How to Add Background to a Photo Using Photoshop
- Rating:
 4.8/5 from Capterra
Adobe Photoshop is a powerful, professional-grade photo editing tool that provides unmatched customization and precise control for background editing. It offers a combination of manual and AI-driven background removal options, including the Select Subject, Quick Selection, and Pen Tool, alongside advanced layering and blending capabilities with layer masks. Furthermore, it boasts a comprehensive suite of professional editing tools, granting users extensive control over shadows, lighting, and textures for truly refined results.
How to insert a background into picture using Photoshop
Step 1. Open Photoshop and import the image.
Step 2. Use "Select Subject" under “Select” to isolate the subject and background.
Step 3. Refine edges using Layer Masks.
Step 4. Add a new background as a separate layer. This can be a solid/gradual color or contextual background locally.
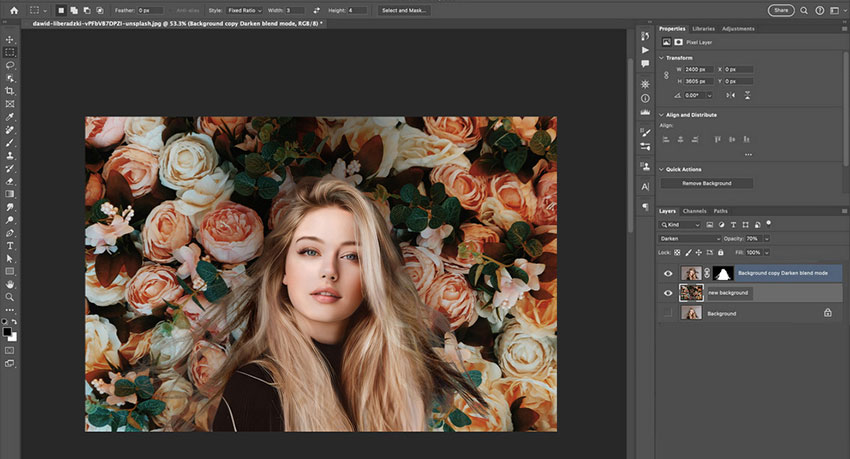
Step 5. Adjust shadows and lighting for a natural effect.
Step 6. Save and export the image.
Test Results:
Photoshop gets you incredibly accurate results with background changes, but you'll have to put in more of the work yourself. Blending looks fantastic, but it's going to take some time and patience to get it just right. It's also slower than those AI-powered tools that do a lot of the work for you.
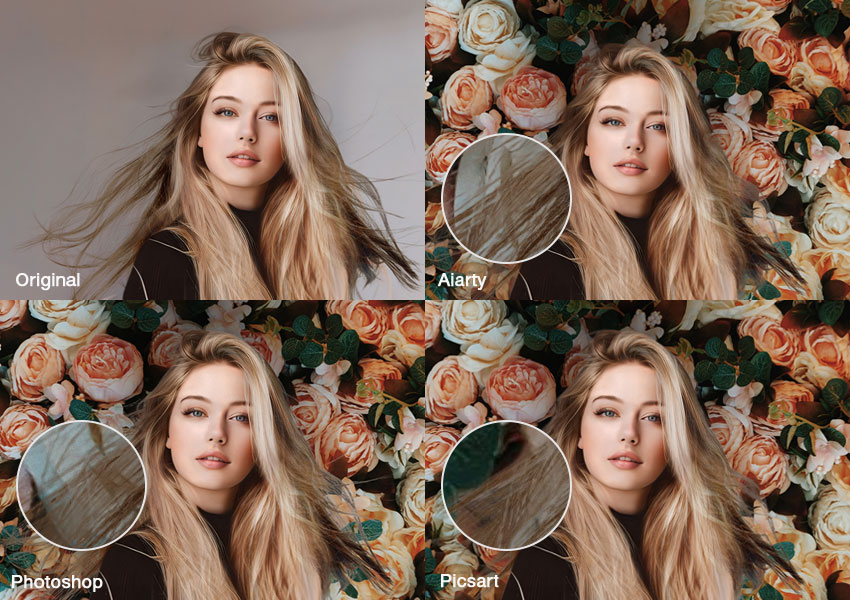
Test Results & Comparison
We've conducted a feature-by-feature comparison of Aiarty Image Matting, Picsart, and Photoshop, to guide you in choosing the optimal background adding tool
Observe the before-and-after images to of the new added background for the photo by the 3 tools.
Which Tool is Best for You?
- Aiarty Image Matting is the top choice for professional and e-commerce image matting with high quality.
- Picsart is ideal for casual editing and social media needs.
- Photoshop offers the best advanced customization options for professional users.
With these three methods, you can effortlessly add stunning backgrounds to your photos based on your needs and skill level. However, for the best overall performance, considering factors like background removal precision, blending quality, speed, and ease of use, Aiarty Image Matting is the most highly recommended.
Free download Aiarty Image Matting to insert a new background to your photos now!
 FAQs
FAQs
Aiarty Image Matting offers the easiest and most accurate AI-powered background replacement.
Yes, Picsart offers free background-changing features with limited options.
Photoshop allows full customization, but Aiarty Image Matting provides professional results with less effort.
External sources:
- "How do you add a background on photo". from r/photoshop of Reddit
- "Explore the Coolest Ideas to Add Background to Any Photo | Blog". Picsart blog
- "How to create a new background in Adobe Photoshop"
You May Also Like
This post was written by Brenda Peng who is a seasoned editor at Digiarty Software who loves turning ordinary photos into extraordinary works of art. With AI assistance for brainstorming and drafting, the post is reviewed for accuracy by our expert Abby Poole for her expertise in this field.