How to Remove Motion Blur from Photos: A Step-by-Step Guide
Ever snapped a perfect photo only to discover it looks like your subject sprinted through a wind tunnel? You're not alone. Motion blur plagues beginners and pros alike—but don't trash those shots just yet. Let's unpack why it happens and when you can salvage your work, i.e. remove the motion blur from your photo.
What Causes Motion Blur?
Imagine trying to paint a speeding car with a slow-drying brush. That's essentially what your camera does in these three common scenarios:
1. Camera shake: The #1 culprit in handheld shots, especially in dim lighting. Your hands aren't as steady as you think—even a slight tremor blurs the shot.
2. Fast-moving subjects: Kids, pets, or rally cars don't pose for pictures. If your camera can't freeze their motion, you get streaky results.
3. Mismatched shutter speed: A slow shutter (like 1/30s) invites blur by leaving the sensor exposed too long. It's like asking your camera to track a hummingbird with a leisurely yawn.
What Causes Motion Blur?
Here's the deal: Some blur is fixable, some isn't. Let's play a quick game of Save or Sobs.
- Save: Photos with mild blur and visible edges stand a chance.
- Sobs: Shots where details are completely smeared—like a bride's face reduced to a ghostly haze—are often beyond repair. No amount of AI wizardry can recreate missing nostrils or eyelashes.
- Pro Tip: Zoom in. If you can still trace the outline of a subject's ear or shirt collar, there's hope. If it looks like abstract art? Start planning a reshoot.
Now that you know why blur happens and when it's fixable, let's dive into the how. (Spoiler: It involves less crying over keyboards than you'd think.)
How to Remove Motion Blur from Photos: 2 Working Methods
Let's tackle blur head-on with two proven techniques.
Method 1: Remove Motion Blur from Photos with Aiarty Image Enhancer
Aiarty Image Enhancer is an advanced generative AI software designed to significantly improve image quality through various sophisticated features. It serves as a comprehensive solution for enhancing photo quality, whether they are professional images, AI-generated artwork, or older compressed photos.
Aiarty Image Enhancer effectively removes motion blur from photos using these features:
- Deblurring Function: It intelligently restores sharpness to blurred images, correcting moderate blur and enhancing clarity.
- Versatility: It addresses blur caused by camera shake, motion blur, and focus issues.
- Generative AI Technology: It is a state-of-the-art generative AI tool designed for transforming image quality and ensuring images appear natural and sharp.
- Detail Preservation: The AI distinguishes between blur and important image details, avoiding over-sharpening and loss of critical information.
- Batch Processing: Can handle up to 3000 photos per hour, ideal for quickly enhancing large collections of photos.
- User-Friendly Interface: Designed for both professionals and beginners.
Step-by-Step Guide:
Step 1. Download Aiarty Image Enhancer on your computer.
Step 2. Select the AI model that best suits your image's characteristics.

- More-Detail GAN v3/v2 can create more details, making the image sharper and clearer. These models are ideal for photos with textures like skin, hair, fur, feature, fabric, etc.
- AIGCsmooth v3 is tailored for AI-generated images, providing enhanced clarity, smoother textures, and overall better quality. This model works best with AI art, anime, line art, and images with smooth textures or glass surfaces.
- Smooth Diff v2 prioritizes smoothness while restoring clarity. It is suitable for images with less detail like cartoons, glass surfaces, or line drawings.
- Real-Photo v3 is specially used for photo restoration, giving your photos better fidelity and more clarity.
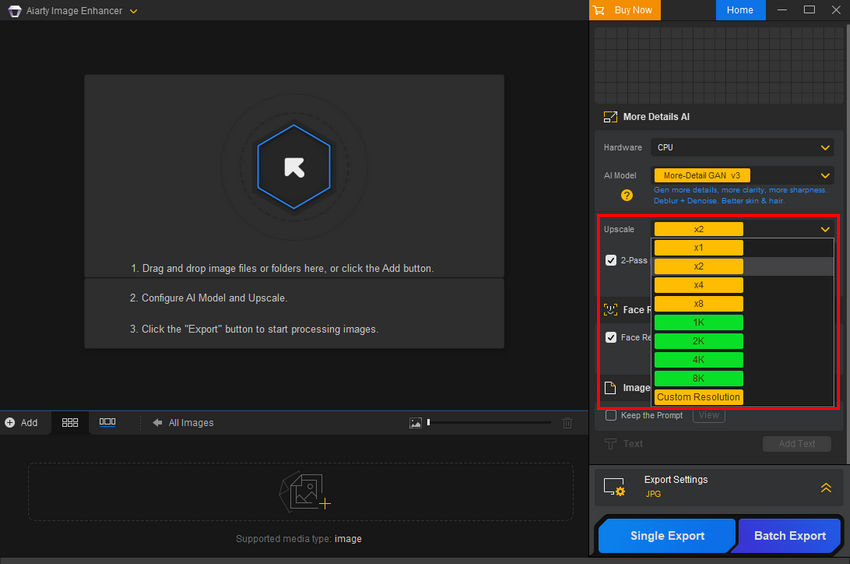
Step 3. Click the Upscale dropdown menu and choose the magnification level (1x, 2x, 4x, or 8x) or the resolution you want to upscale to (1k, 2k, 4k, 8k, or a custom resolution). If you don't want to change the image size, simply select 1x.
Step 4. Open Aiarty Image Enhancer and drag and drop the blurry image you want to fix into the file window of Aiarty. Once the image is loaded, Aiarty will automatically begin processing it with the selected AI models. No manual action is required to remove the blur; the software handles the unblurring process automatically. After the processing finishes, you can preview the result. If you're not satisfied with the result, you can try another model.
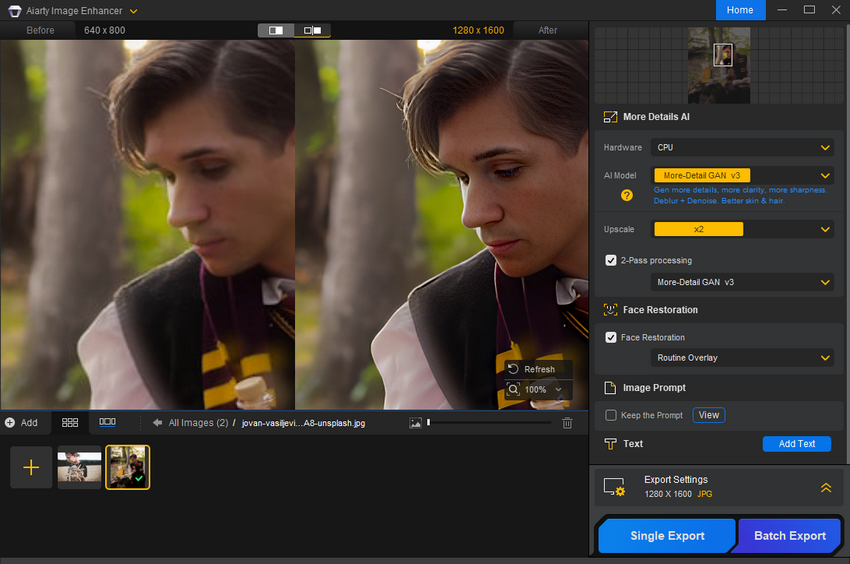
Step 5. When you feel satisfied with the result, just clikc the Single Export or Batch Export to save your unblurred photo(s).
Method 2: Remove Motion Blur from Photos with BeFunky (Your 5-Minute Blur Fix)
Got a photo where your dog looks more like a fluffy comet than a pupper? BeFunky's online Deblur Tool is here to help—no PhD in editing required. It is a beginner-friendly web tool that's faster than saying, "Wait, was that even in focus?"

Why BeFunky Rocks (and When to Pass)
Pros
- No-Sweat Setup: Zero downloads—just Chrome and optimism.
- AI That Gets It: Enhance DL focuses on faces and textures, not just randomly sharpening pixels.
Cons
- Resolution Roadblock: Free users get watermarked, low-res saves—invest in a plan if this becomes your go-to.
- One-Size-Fits-All: Struggles with complex blur patterns (e.g., rotating Ferris wheels or confetti storms).
Step-by-Step Guide:
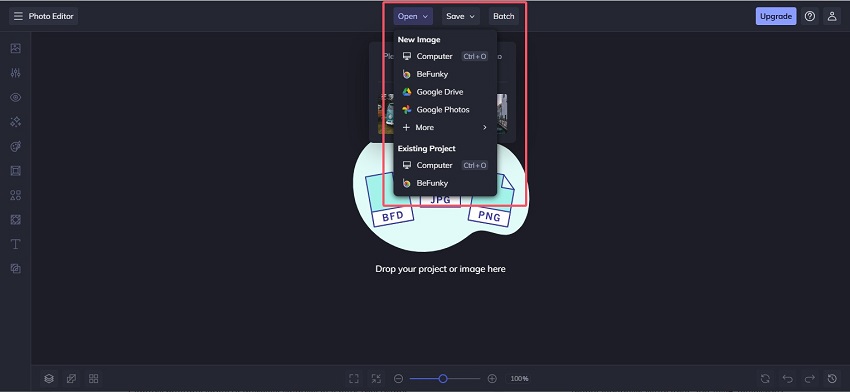
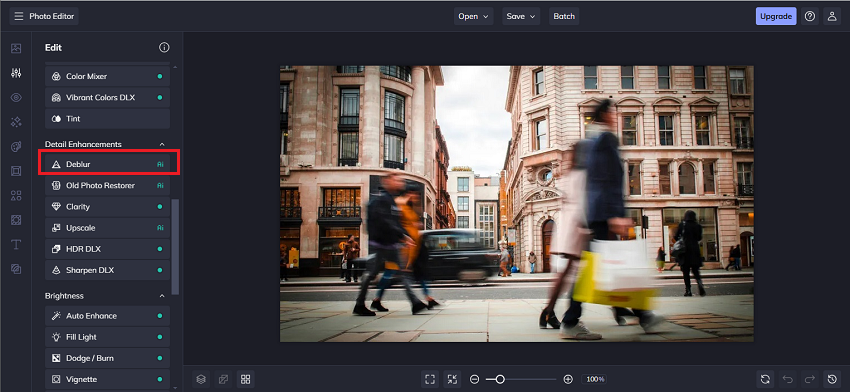
Step 1. Open Befunky's Photo Editor tool in your browser. And then import the photo which you want to remove motion blur from.
Step 2. After importing the blurry photo, head to the left panel and find the Deblur feature. Click on it and the tool will automatically process your photo, i.e. deblurring your photo. This will take you dozens of seconds, and then you can see the before and after slider to compare.
Step 3. If you are not quite happy about the result, no worries, Befunky also gives you some other features to adjust. For example, the Blur Type feature, under it you can select the Motion option to specially process the photos with motion blur issues, obviously. And there are more options waiting for you to explore.
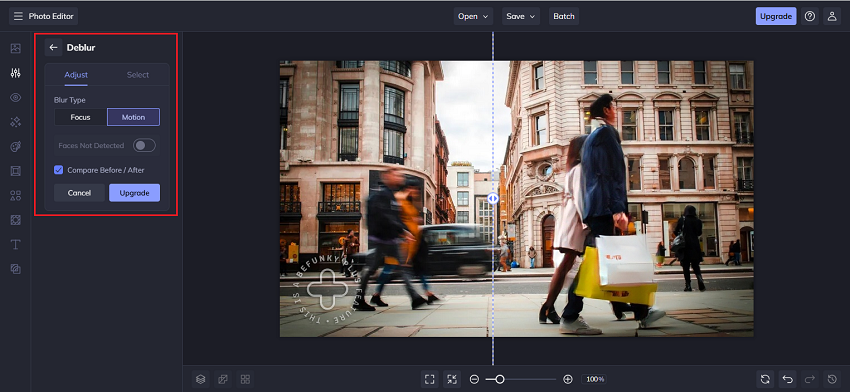
Step 4. After all adjustments finishes and you feel satisfied with the result, now just click on the Save button, which is next to Open button, to download the processed photo to the location that you prefer.
Tips to Prevent Motion Blur in Future Photos
Even though we have told you two working methods to remove motion blur from photos, scrambling to fix blurry photos after they're shot feels like closing the barn door after the horse has bolted. Why not keep that door shut to begin with? Here's how to avoid motion blur disasters before you even hit the shutter.
1. Master Your Camera Settings (Your New Best Friends)
Think of your camera as a car—great features, but you need to know how to drive it. Adjust these three settings to freeze action like a pro:
1. Shutter Speed: The Motion-Freeze MVP
- For kids, pets, or anything that moves faster than a sloth on sedatives: 1/250s or faster.
- Low-light compromise: If you must drop to 1/125s, pair it with a tripod.
2. ISO: Brightness with Boundaries
- Cranking ISO brightens dark scenes, but push too high (like ISO 3200+), and you'll trade blur for grainy digital confetti.
- Brenda's Rule of Thumb: Keep ISO under 1600 unless you're shooting Bigfoot at midnight.
3. Image Stabilization: Your Anti-Shake Ally: Turn it on! Modern cameras and lenses have built-in stabilizers that forgive shaky hands, especially in dim light.
2. Stabilize Like a Surgeon: Tripods Aren't Just for Nerds
I get it—lugging a tripod feels like packing a parachute for a elevator ride. But here's when it's non-negotiable:
- Low-Light Landscapes: That sunset over the mountains? Blur-free details demand stability.
- Long Exposures: Shooting waterfalls or star trails? Even a mini-tripod on a rock beats hand-holding.
- Hybrid Hack: No tripod? Press the camera against a wall, table, or your forehead (yes, really—it works).
3. Burst Mode: The Shotgun Approach to Sharpness
Spray and pray isn't just for action heroes. When shooting fast-moving subjects (kids, sports, hyperactive squirrels), burst mode is your secret weapon:
- How It Works: Hold the shutter button to capture 5–10 shots per second. Statistically, at least one will be blur-free.
- Pro Tip: Pair burst mode with back-button focus for tack-sharp results every time.
When All Else Fails… Blame the Subject! (Just Kidding)
Even with perfect settings, some scenarios are blur magnets:
- Indoor Sports: Basketball under flickery gym lights? Crank ISO and pray (or invest in a f/2.8 lens).
- Windy Days: Fluttering leaves or hair? Embrace the chaos or wait for a lull.
You May Also Like
This post was written by Brenda Peng who is a seasoned editor at Digiarty Software who loves turning ordinary photos into extraordinary works of art. With AI assistance for brainstorming and drafting, the post is reviewed for accuracy by our expert Abby Poole for her expertise in this field.