How to Remove Background from Any Image in Stable Diffusion
Updated on
Have you ever struggled with the tedious task of removing backgrounds from images? Want to quickly isolate the subject from its background but can't find an efficient way? Now, with the powerful AI tool Stable Diffusion, this can be done easily. In this article we’ll walk you through the steps of using Stable Diffusion to remove background from image, regardless of whether your image originated from Stable Diffusion or elsewhere.
Install Background Removal Extension for Stable Diffusion
To remove background from image in Stable Diffusion, you need to install the Rembg extension in AUTOMATIC1111. To install this extension, just follow these steps.
- Open the WebUI as you normally would.
- Locate the "Extension" page within the interface.
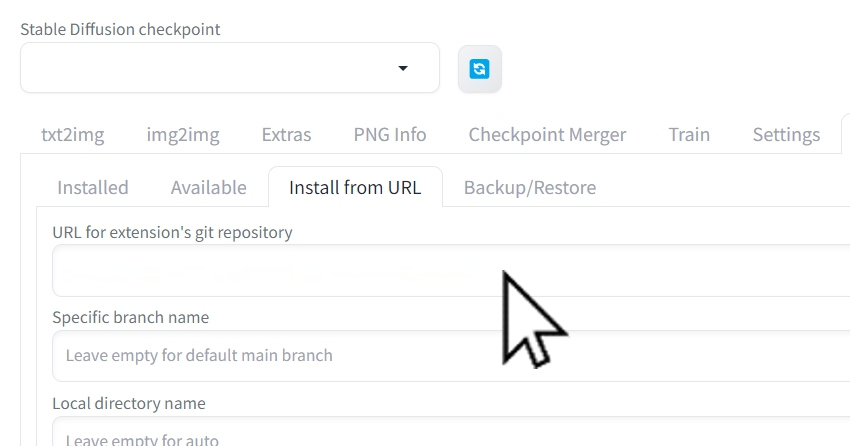
- Click on the "Install from URL" tab.
- In the URL for extension's git repository field, paste the following URL: https://github.com/AUTOMATIC1111/stable-diffusion-webui-rembg
- Click "Install", wait for confirmation, then restart AUTOMATIC1111 for the changes to take effect.
Now that the extension is installed, you'll find a new "Remove Background" option within the "Extras" page. This powerful tool can handle both real photos and AI-generated images.
Remove Background from a Single Image in Stable Diffusion
Step 1. Prepare your image.
To generate an image, go to the txt2img tab and specify settings based on your own needs.
If you already have a previously generated image, navigate directly to the "Extras" section within Stable Diffusion. Here, you can either drag and drop or upload an image onto the image canvas. Then, proceed to Step 3 and Step 4 to remove the background.
Step 2. Send your image to the "Extras" page.
Once you're happy with your generated image, select it and click the "Send to Extras" button located beneath it. This will send the image to the "Extras" page.

Step 3. Select a background removal model.
Within the "Extras" page, locate the "Remove background" dropdown menu and then choose a background removal model. There are several remove background methods to choose from including u2net, u2netp, u2net_human_seg, u2net_cloth_seg, silueta, isnet-general-use, and isnet-anime. For most images, "u2net" is a great starting point.
If "u2net" doesn't provide the desired results, explore other models listed in the dropdown menu. Each model has its strengths and weaknesses, so experimenting can yield the best results based on your specific image.

Tips:
- If you wish to maintain the original size of the initial image, set the value of Resize to 1.
- If you need to upscale the image at the same time, choose an upscaler. Otherwise, leave the Upscalers to None.
- If Stable Diffusion's upscaler isn't meeting your needs in terms of resolution or quality, consider using Aiarty Image Enhancer. This tool can upscale images to an impressive 32K resolution while preserving fine details and overall image quality.
Step 4. Remove background from image.
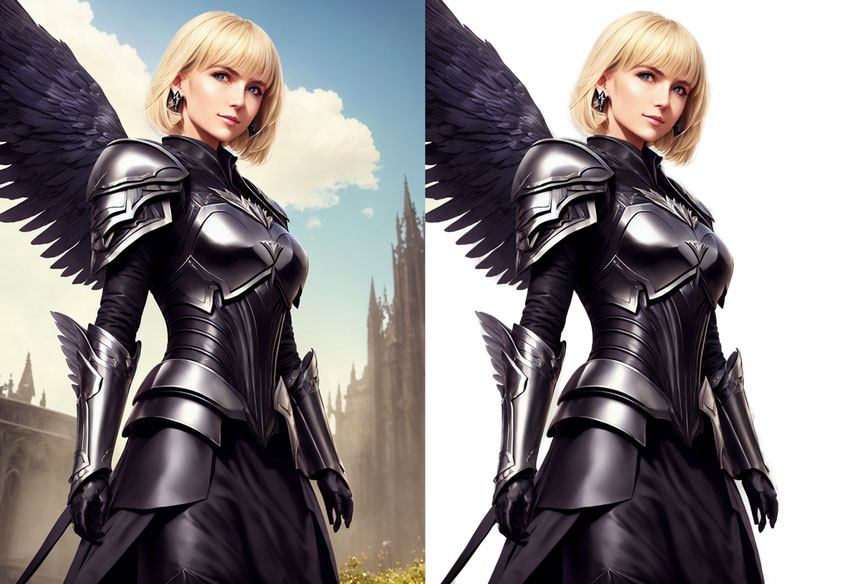
After you have finished all the settings, hit the "Generate" button. Then, you'll have a new image with the background magically removed. You can find it stored in the "outputs\extras-images" folder.
You might notice some imperfections in the background removal, especially near details like hair or clothing. Don't worry, Alpha matting settings allow for fine-tuning!
An alpha matte is a grayscale image that separates the foreground from the background. By adjusting these settings, you can influence how the alpha matte is created.
Here's a breakdown of the options:
- Foreground/Background Threshold: Decreasing these values expands the foreground, potentially recovering details mistakenly removed.
- Erode Size: Reducing this value helps retain fine details on the boundary between foreground and background.
- Experimenting with Background Models: Experimenting with different background models and adjusting these settings can help you achieve the best possible results for your images.
Remove Backgrounds from Multiple Images in Batch
You can also remove backgrounds from multiple images simultaneously. Here's how:
Step 1. Go to the "Extras" section and select the "Batch from Directory" subtab.
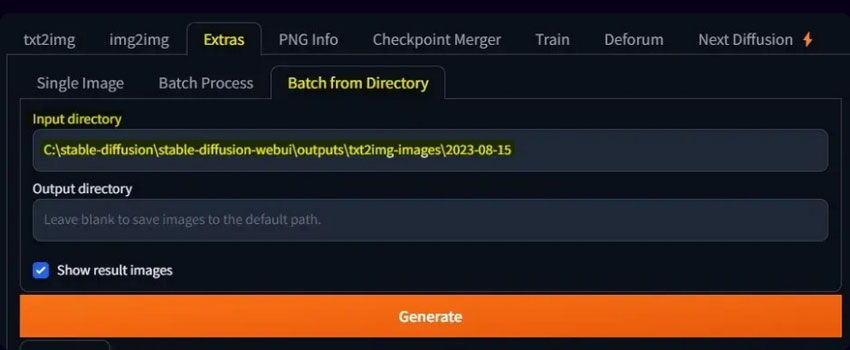
Step 2. Specify the path to the images whose backgrounds you want to remove in the "Input Directory" field.
Step 3. Specify the Output directory. If you leave the "Output Directory" field empty, the background-removed images will be stored in the default output folder (outputs\extras-images).
Step 4. Select a background removal method.
Step 5. Click the "Generate" button. This will remove the backgrounds from all images in your Input Directory.
By following these steps, you can efficiently remove backgrounds from multiple images at once, streamlining your workflow.
Now you possess the knowledge to remove backgrounds from both single images and batches within Stable Diffusion. Don't hesitate to experiment – explore various background removal models and fine-tune Alpha matting settings to achieve optimal results.
Simplify Your Background Removal Process—No Stable Diffusion Setup Needed
While Stable Diffusion offers powerful capabilities for background removal, it's not always the fastest or easiest route—especially for beginners.
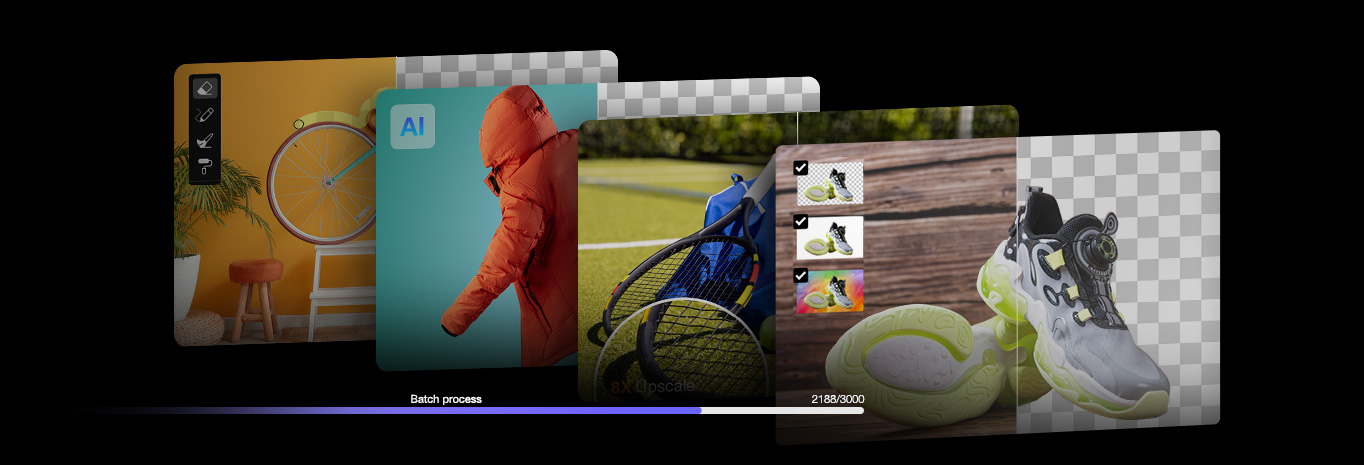
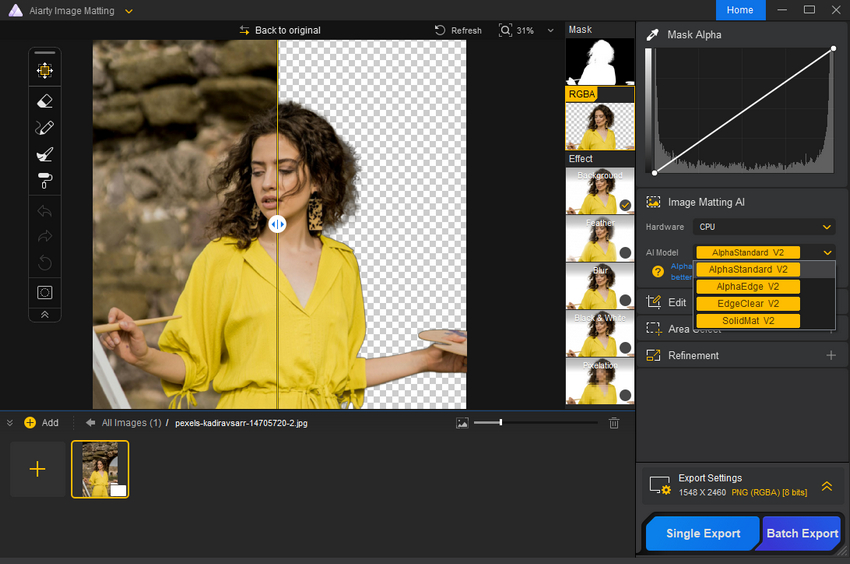
If you're looking for a faster, more beginner-friendly option without diving into extensions and model tweaking, Aiarty Image Matting might be just what you need. It’s a lightweight, intuitive background remover that works great for portraits, product photos, anime art—you name it.
You just upload your image (yes, batch uploads are supported too), pick an AI model, and hit Start. In seconds, the background is gone—clean, accurate, and surprisingly detailed, even around tricky edges like hair or fur. And if the auto cutout isn’t perfect? Aiarty gives you brush and eraser tools to manually tweak the results without affecting the original image.
Once you're happy with the outcome, export it as a transparent PNG or swap in a new background—all without ever overwriting your original file.
Click the download button below to give Aiarty Image Matting a try. It’s a solid sidekick for anyone who wants great results without the technical overhead.
You May Also Like
Rico Rodriguez is an experienced content writer with a deep-rooted interest in AI. He has been at the forefront of exploring generative AI tools like Stable Diffusion. His articles offer valuable insights into the world of AI, providing readers with practical tips and informative explanations.