How to Resize an Image for Printing with Best Quality
Updated on
Ever printed a photo that looked pixelated or stretched? You're not alone. With the rise of digital photography, ensuring your images are resized correctly for printing has never been more crucial. Imagine spending hours capturing the perfect shot, only to see it ruined by poor resizing. The key to a flawless print is understanding the resizing process and applying the right techniques.
Getting a beautiful, high-quality print from your favorite digital photo can be tricky if you need help with how to resize the image to print correctly. Many have faced the disappointment of blurry, pixelated, or stretched images when printing. That's where understanding how to resize an image for printing comes in, and it’s crucial for ensuring sharp, professional-looking prints.
In this guide, we’ll explore how to resize an image for printing without losing quality, important factors like DPI (dots per inch), and even how you can enhance lower-quality images before printing. Let’s dive into how you can get the perfect print every time.
1. Understanding Image Resolution and DPI for Printing
Before you start resizing an image for printing, it’s essential to understand the role of image resolution and DPI (dots per inch). These factors play a crucial part in determining the quality of your printed image.
What Is Image Resolution?
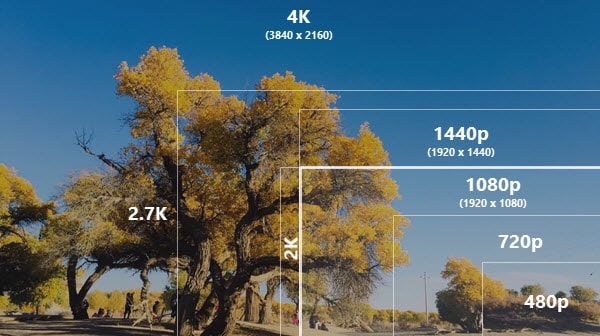
Image resolution refers to the detail an image holds, typically measured in pixels. The more pixels an image has, the higher its resolution. When resizing an image for printing, higher resolution usually results in clearer and more detailed prints. In contrast, low-resolution images often appear pixelated when stretched to fit larger print sizes.
Why Resolution Matters for Print Quality
When you resize an image for printing, the resolution directly affects how the final product will look. An image with low resolution will appear blurry or pixelated when printed, while a high-resolution image will maintain its integrity and detail. Understanding the relationship between resolution and print quality is essential for anyone looking to produce professional-grade prints.
DPI and Its Impact on Print Quality
DPI (dots per inch) determines how many dots of ink a printer uses to create the image on paper. The higher the DPI, the sharper and more detailed the print. For most high-quality prints, 300 DPI is the standard.
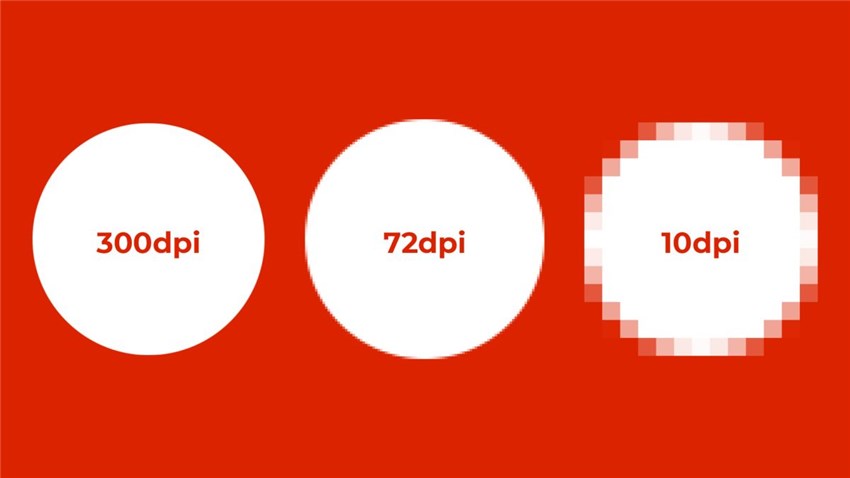
For example, if you have a digital photo that’s 3000x2400 pixels and you want to print it as an 8x10 inch image, you'd need to ensure that your photo is set to 300 DPI for optimal clarity.
Tip: Always aim for images that are at least 300 DPI when resizing for printing to avoid blurry results.Also read: Why Is My Printer Printing Blurry Images and Text? 10 Fixes
2. How to Resize an Image for Printing Without Losing Quality
Now that you understand the basics of resolution and DPI, let’s dive into the step-by-step process of resizing an image for printing without sacrificing quality.
Step 1: Choose Your Editing Software
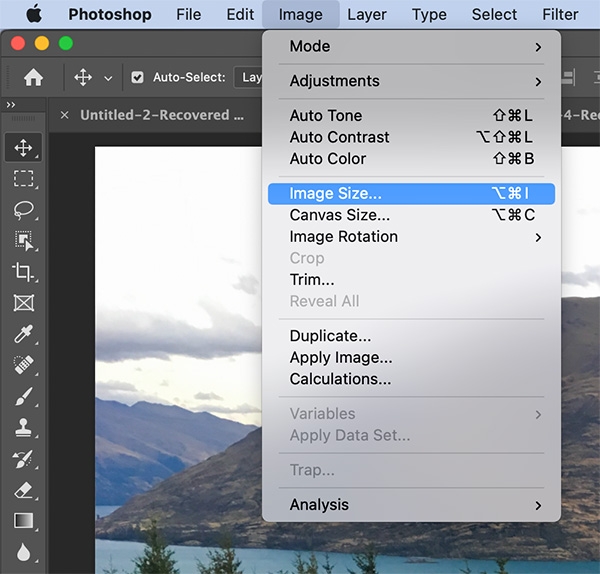
The first step in resizing an image for printing is selecting the right software. Popular options include:
- Adobe Photoshop: A professional tool with comprehensive features.
- Biteable: A free online alternative with robust editing capabilities.
- iMovie: A basic and comprehensive video editing tool for Apple users.
Step 2: Choose Your Desired Print Size
The first step is deciding what size you want your final print to be. Popular print sizes include 4x6, 5x7, and 8x10 inches. Knowing the dimensions beforehand allows you to properly adjust the image size and ensure it prints correctly.
Dive Deep: How to Print 2x3 Wallet Size Photos from iPhone >>
Step 3: Set the Correct DPI
Once you’ve chosen the print size, it’s time to ensure your image has the correct DPI. Most photo editing software, such as Adobe Photoshop, GIMP, or even online tools, will allow you to adjust the DPI setting.

Step 4: Maintain Aspect Ratio
When resizing, it’s important to maintain the aspect ratio of your image to avoid distortion. Aspect ratio is the proportional relationship between an image’s width and height. If you change this ratio, your image might end up looking stretched or squished in the print.
Most image editors will have an option to "constrain proportions" or "maintain aspect ratio" — ensure this box is checked when resizing your image.
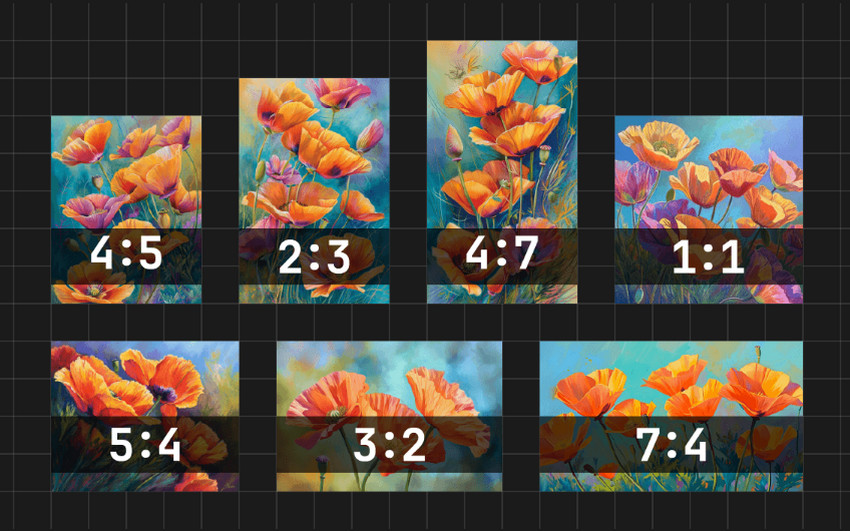
Step 5: Adjust Image Dimensions
Next, adjust the image’s physical dimensions (in inches or centimeters) to match your desired print size. For example, if you want to print an 8x10 photo, enter these dimensions in the image resizing tool. Make sure the image's DPI remains at 300 or above to preserve quality.
Tip: If your image doesn’t have enough resolution to print at the desired size, you may need to upscale or enhance the image before resizing, which we’ll cover in the next section.
Also See: How to Print Photos from Google Photos
Step 6: Enhance Image Quality Before Printing
Sometimes, the image you want to print doesn’t have the necessary resolution to produce a high-quality print. This is especially common with images taken from social media or older digital cameras. Fortunately, Aiarty Image Enhancer can help you upscale and enhance your images to ensure they print beautifully.
Aiarty Image Enhancer is a powerful tool designed to upscale images without losing quality. Whether you’re working with a low-resolution image or need to sharpen details for a larger print, Aiarty enhances your image by increasing its resolution and improving clarity through AI-powered technology.
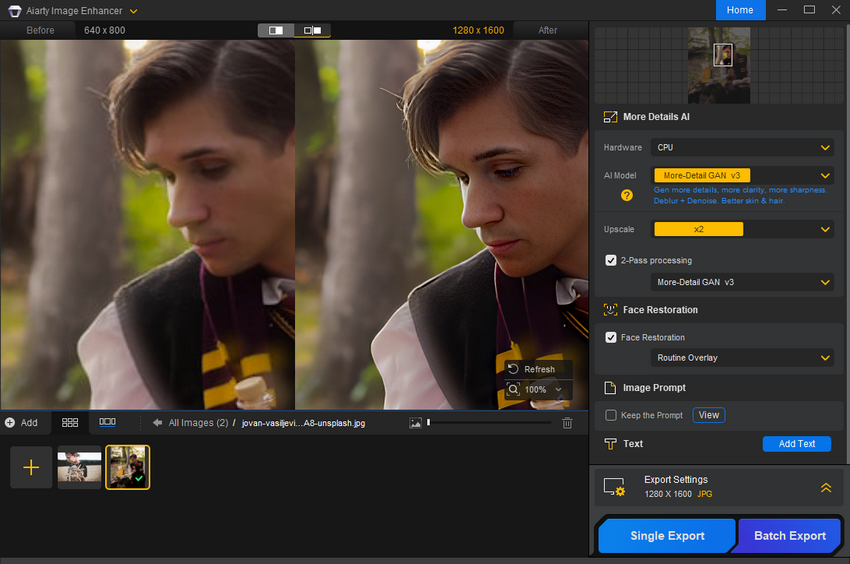
Aiarty Image Enhancer - Enhance Image Quality Before Printing
- Upscale images to 4K/8K/16K and higher with realistic details and texture.
- Auto AI inference to denoise, deblur, restore, and enhance icon images easily.
- Achieve max quality for print and display, 800% zoom-in without pixelation.
- 3 AI models, 6.78 million images trained, optimized for Nvidia/AMD/Intel/CPU
Tip: Aiarty is especially useful for images that you want to blow up to poster size, canvas prints, or other high-detail formats.
3. Common Mistakes to Avoid When Resizing Images for Print
Resizing an image for printing seems straightforward, but there are a few common pitfalls to watch out for. Avoiding these mistakes will help you achieve the best print quality possible.
Mistake 1: Using Low-Resolution Images
One of the biggest mistakes is using a low-resolution image and expecting it to print well. If the resolution is too low, your print will end up pixelated or blurry, no matter how carefully you resize it.
Mistake 2: Ignoring DPI Settings
Many people need to remember to adjust the DPI setting before resizing an image for print. If the DPI is too low, your print won’t be sharp, even if the pixel dimensions seem large enough.
Mistake 3: Distorting the Aspect Ratio
Resizing without maintaining the aspect ratio can lead to stretched or squished images. Always lock the aspect ratio when changing dimensions to avoid this.
Mistake 4: Over-Compressing the Image
If you save your resized image in a compressed format like JPEG with too high compression, you’ll lose important image details. Consider using less compressed formats like PNG or TIFF for best results. Or try some solid compressing tools to make it.
Tip: Always preview your resized image before sending it to print, ensuring that the resolution and dimensions are correct.