
How to Add Realistic Shadow to Product Photos in 4 Ways
Updated on
How to add shadows to an image so that it doesn't look like it's floating? Is it possible to add shadow to the image to make it look more realistic and natural, as if photographed?
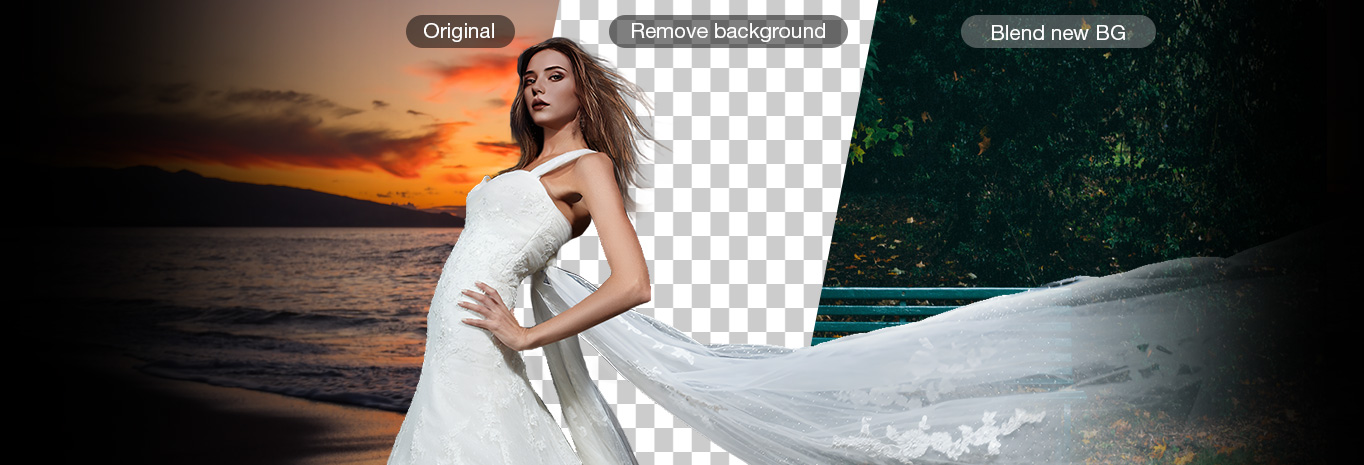
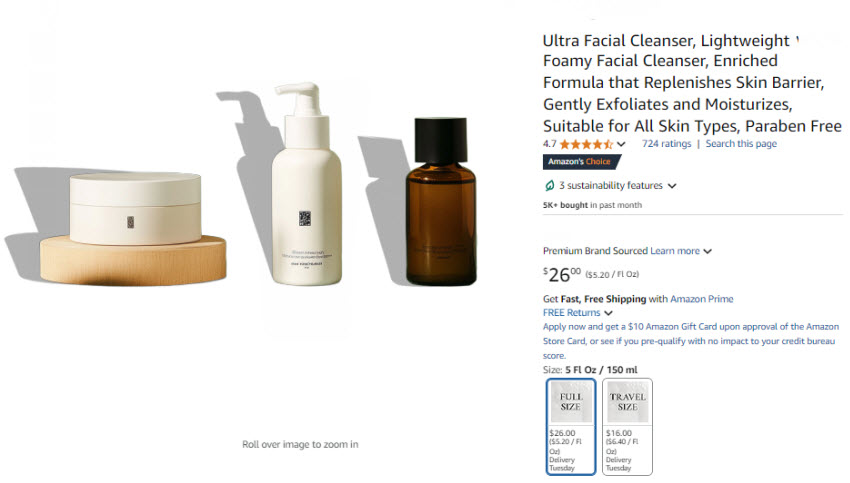
Clean product images are essential for e-commerce. However, a common challenge arises when removing backgrounds to achieve this clean look: the process can also strip away natural shadows. This often leaves the product looking flat, detached, and ultimately, unrealistic. A product floating against a stark white background, devoid of any grounding shadow, loses its sense of dimension and presence.
Adding shadows back into the product images is a simple yet powerful way to bridge this gap, bringing back the crucial element of realism and making your listings significantly more engaging. In this detailed guide, we'll walk you through the various ways to add shadows to your photos using different methods.
Removing the background is often the first and most important step. This creates a clean, uncluttered look and allows the product or subject to stand out. Aiarty Image Matting can accurately identify and remove complex backgrounds from product images, keeping intricate details such as texture, transparent objects, and fine edges. This clean slate makes adding realistic shadows to photos easier and more effective.
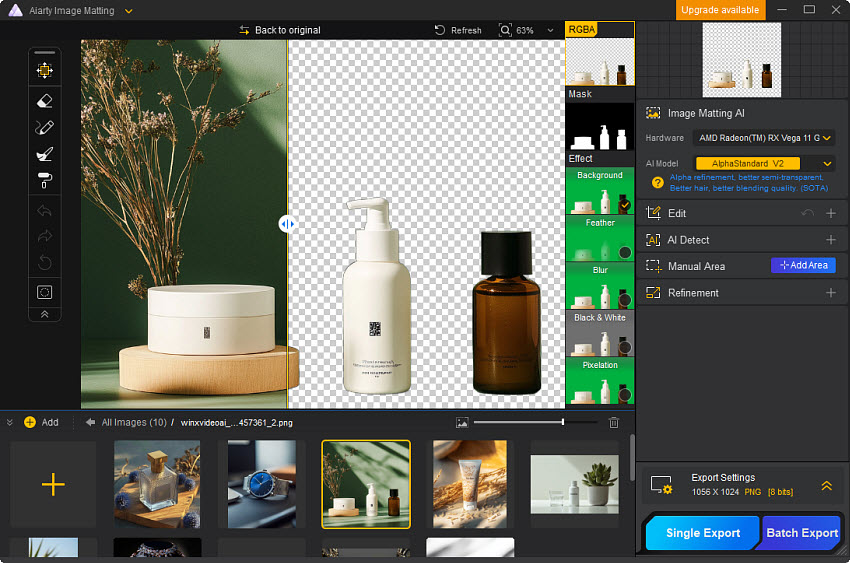
Key Features of Aiarty Image Matting:
- Remove backgroudn from photo with clear subject and intricate details like hair and fur.
- Delicate AI models tailored to handle any photos and seamlessly blend with likewise backgrounds.
- Advanced alpha matting for precise subject isolation & edge refinement.
- Upscaling for enhanced resolution, up to 4K/8K/10K. Keep fine details and clear edges.
Why Add Shadows to Your Photos?
Before we get into the methods, it’s important to understand why adding shadows can elevate your photos:
- Enhanced Depth and Realism: Shadows help give the image a three-dimensional feel by creating contrast between light and dark areas.
- Better Focus on the Subject: By adding shadows, you can draw attention to specific areas of the image and create a more balanced composition.
- Professional Look: Shadow effects give photos a polished, sophisticated look, making them more eye-catching on websites or social media platforms.
Method 1. Add Shadow to a Photo Using Photoshop
Photoshop's ability to add shadows to photos is one of its most powerful and flexible features. It provides for professional, customizable results. The effect allows for significant customization, including shadow distance, spread, size, and opacity. The ability to adjust the angle of the shadow is especially useful for matching the direction of light in the image. Users can also manually paint shadows, soften the shadow edges, and refine shadows to make them more realistic.
How to Add Shadow to Photo with Photoshop?
Step 1. Open Your Photo in Photoshop
Launch Adobe Photoshop and open the photo you want to edit by clicking on File > Open and selecting your image.
Step 2. Select the Layer
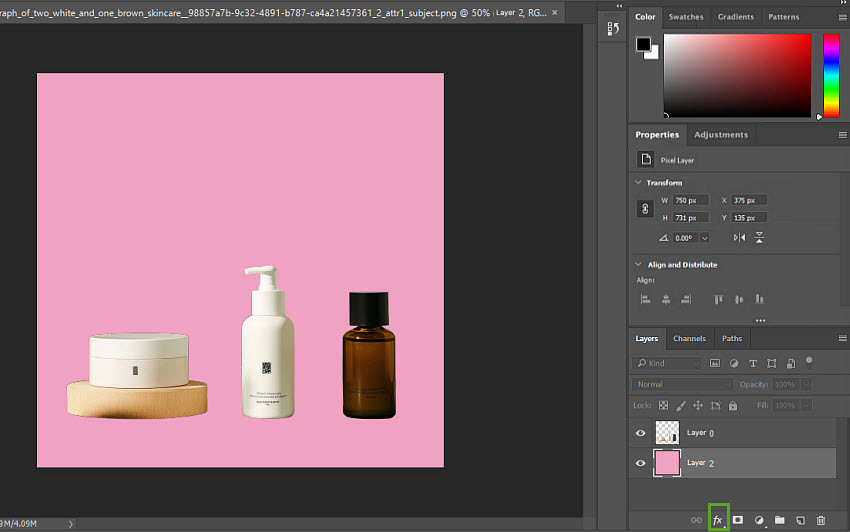
To make the background invisible, click on the eye icon next to the background layer. At this stage, your object is present with only a transparent background.
Step 3. Create a New Layer for Shadow
Create a new layer for shadow by clicking on Layer > New > Layer. You can also do it by pressing shift+control+N. This ensures your shadow is added independently and doesn’t alter the original photo.
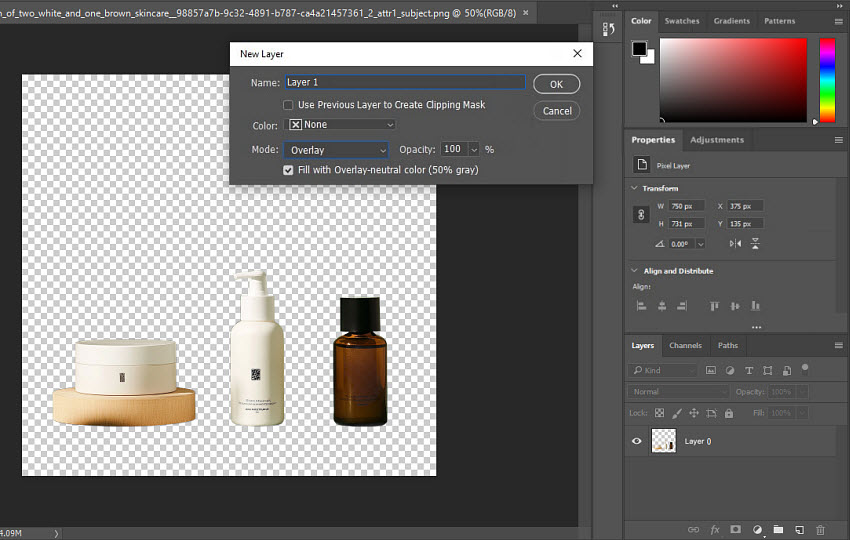
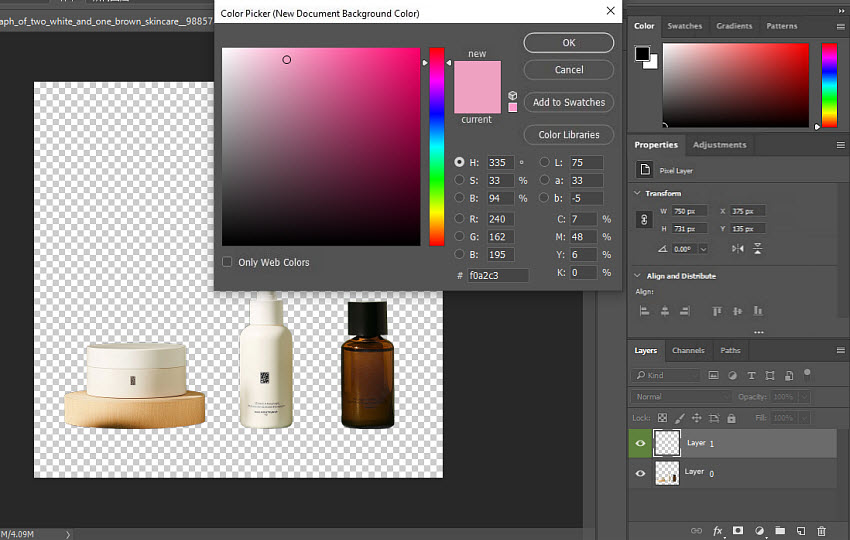
Then choose the created new shadow layer, click Edit on the top menu bar and choose Fill to fill the new layer with a color.
Step 4. Add a Drop Shadow for the Product Photo
Select the layer of the product and click the “fx” option at the end of your layer palette.
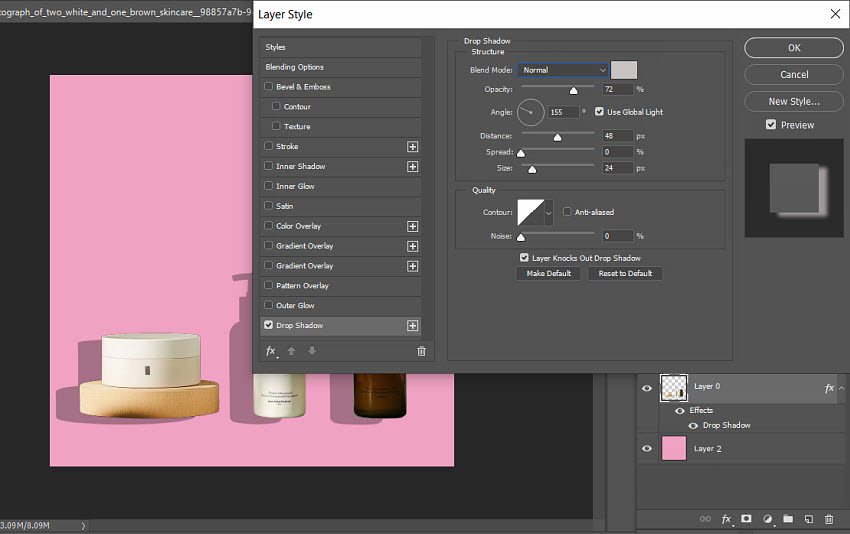
Then choose the drop shadow on the dialogue box. Right-click or double-click on Drop Shadow and the settings for the shadow will pop up. Then you can adjust the following settings:
- Opacity: 50–75% (for subtlety).
- Angle: Match your light source (e.g., 120° for natural light).
- Distance: 10–30px (depends on image resolution).
- Spread/Size: 5–15px to soften edges.
Step 5. Adjust Realistic Drop Shadow
Because the angle of light varies, the direction of an object's shadow also changes. For a more realistic effect, you can further refine the added shadow in Photoshop.
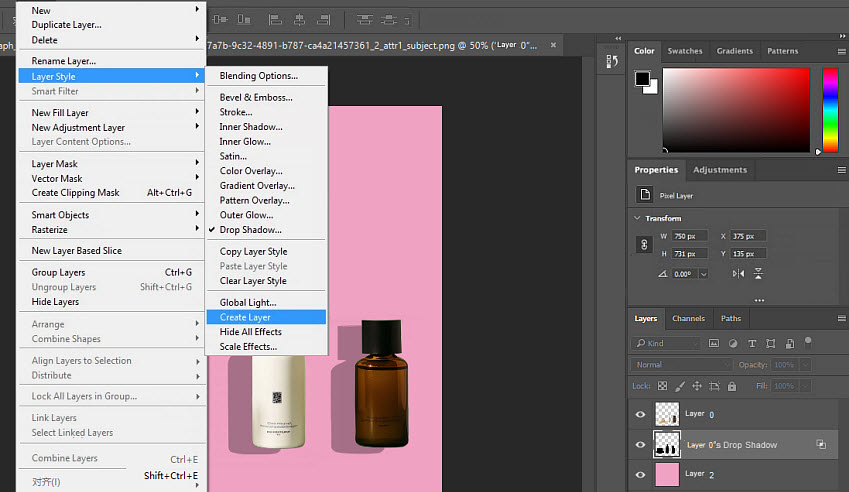
First, go to Layer in the top menu bar and click Layer Style. Then click Create Layer and it will create a new layer that will isolate your drop shadow from its layer. Then you can change the shadow of the object.
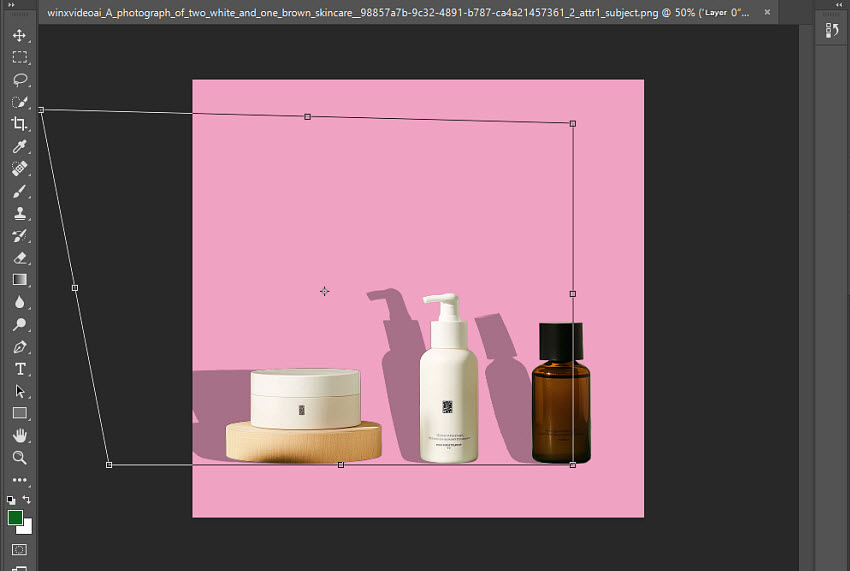
Next, choose the newly added drop shadow layer. Click Edit in the top menu bar and choose Transform. Then click Distort and you can drag the line around the shadow to adjust how the shadow should fall innately.
Step 6. Export the Photo
After all the settings, enable the eye icons of the drop shadow layer and the product image, then click on File > Save As. To keep the transparency, choose PNG from the format dropdown menu. Then you can upload the product photo with added shadow to your e-commerce platform or add a new background to it.
Method 2. Add Shadow to a Photo Using Canva
Canva empowers you to effortlessly enhance your images, graphics, and text with diverse shadow effects. To add a shadow to a photo or graphic, simply select the element, click "Edit image," then choose "Shadows." Here, you can select from various shadow types, including classic "Drop Shadows," and customize settings such as size, intensity, blur, distance, and angle to achieve your desired look.
How to Add Shadow to Photo with Canva?
Step 1. Open Canva and Upload Your Image
Visit Canva and log in to your account. Click on the Create a design button in the top left corner of the screen and Upload files. Select the product photo that you would like to add shadow. Once uploaded, click Edit Image.
You can aslo do it by clicking the Add New button on the right corner of the screen, uploading your image, then clicking on the image you just uploaded to place it on your design canvas.
Step 2. Apply the Shadow Effect
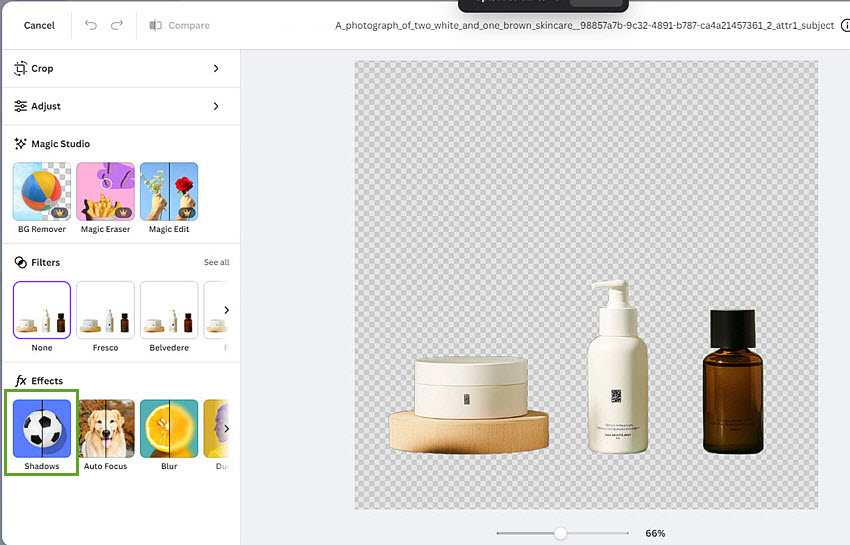
Now the image editing window will open. To add shadow to the photo, find and click Shadows under fx Effects on the left toolbar. Next, choose from the shadow types like Glow, Drop, Outline, Curved, etc. based on your needs.
- Glow: Adds a soft, luminous halo, enhancing visibility against similar backgrounds.
- Drop: Creates a classic drop shadow, giving the illusion of depth and elevation.
- Outline: Defines the image with a contour shadow, creating a striking silhouette.
- Curved: Applies a wraparound shadow, adding a distinctive 3D effect.
- Page Lift: Simulates a curled page edge, adding a touch of tactile realism.
- Angled: Projects a shadow at a customizable angle, creating dynamic depth and perspective.
- Backdrop: Gives the product a grounded look, and help the customer understand the product is in a 3d space.
Step 3. Customize the Shadow
After selecting your preferred shadow style, you can customize it using the following settings:
- Blur amount : Control how soft or sharp the edges of the shadow appear.
- Angle: The direction the shadow falls in.
- Distance: Adjust the distance between the object and the shadow to achieve the desired effect.
- Intensity: How dark the shadow is.
- Color: The color of the shadow you'd like to add to your product photo, normally based on the color of the background.
Step 5. Save Your Design
You can apply drop shadows to graphics and other image-based elements in Canva in the same way. Once you’re happy with the shadow effect, simply click Save > Download in the top right corner to save your image to your local computer.

Method 3. Add Shadow to a Photo Using Fotor
Leveraging advanced AI, Fotor's image shadow maker simplifies shadow creation. It automatically removes backgrounds and adds diverse shadow effects to photos, allowing anyone to achieve natural and professional-looking results without prior photo editing experience. You can fine-tune your shadows by adjusting default settings, transparency, blur, distance, and angle to create the perfect drop shadow.
It also intelligently distinguishes text, adding shadows that make it stand out and capture attention. The resulting 3D effect ensures clarity and readability, facilitating effective communication.
How to Add Shadow to Photo with Fotor?
Step 1. Upload Your Photo
Open Fotor photo editor online and log into your account to save the output image. Then click Open Image and add the photo to the editor.
Step 2. Add Shadow to Product Photo
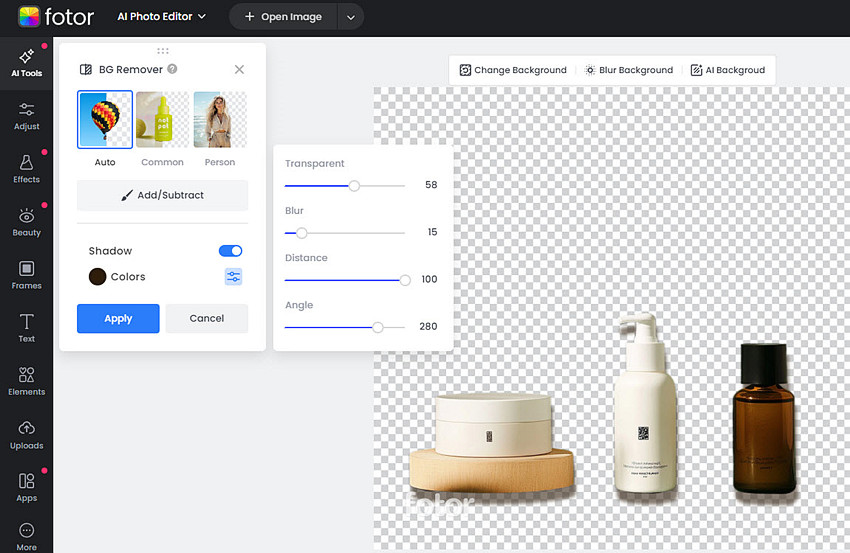
To access the feature to add shadow, click AI Tools on the left column and choose BG Remover. The background removal process will begin automatically. If the background is already removed, no changes will be visible. Then enable the Shadow option on the left panel.
Step 3. Adjust the Product Shadow
Click the settings button below the Shadow option to customize the shadow's effect. Adjust the blur, distance, transparency, and angle to achieve the desired look.
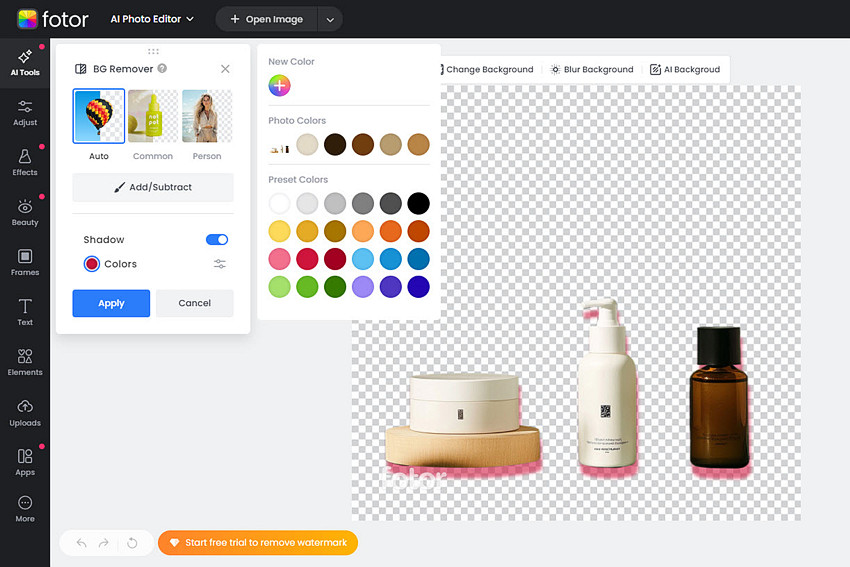
You can also adjust the color of the shadow to better match the background of your photo. Once finished, click the Download button on the top menu, then choose to save the photo in JPG or PNG.
Method 4. Add Shadow to a Photo Using Photoroom
Photoroom offers a wide range of AI tools, including the ability to add realistic shadow to product photos. You can customize every aspect of your shadows, from blur and distance to transparency, angle, and color. Easily create soft, hard, floating, or colored shadows to perfectly complement your images. And for maximum efficiency, our batch processing feature allows you to add shadows to multiple product photos simultaneously, ensuring a consistent and professional look across your entire image collection.
How to Add Shadow to Photo with Photoroom?
Step 1. Add Your Photo
Visit the Photoroom instant shadows site and click on Select a picture. Then choose the product photo from your computer.
Step 2. Add Shadow to the Photo
Next, it will enter into the editing window. Then click the AI Shadows button on the top menu bar. There are 3 different AI shadow types, soft, hard, and floating shadow. On the right panel, it will bring up the Shadows settings. Adjust the shadows settings like intensity, blur, softness, and color.
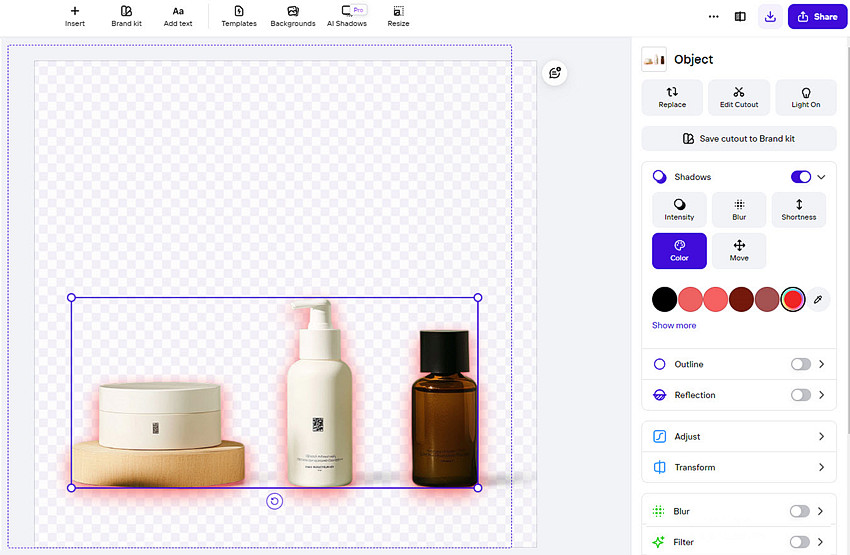
Step 3. Fine-tune the Added Shadow
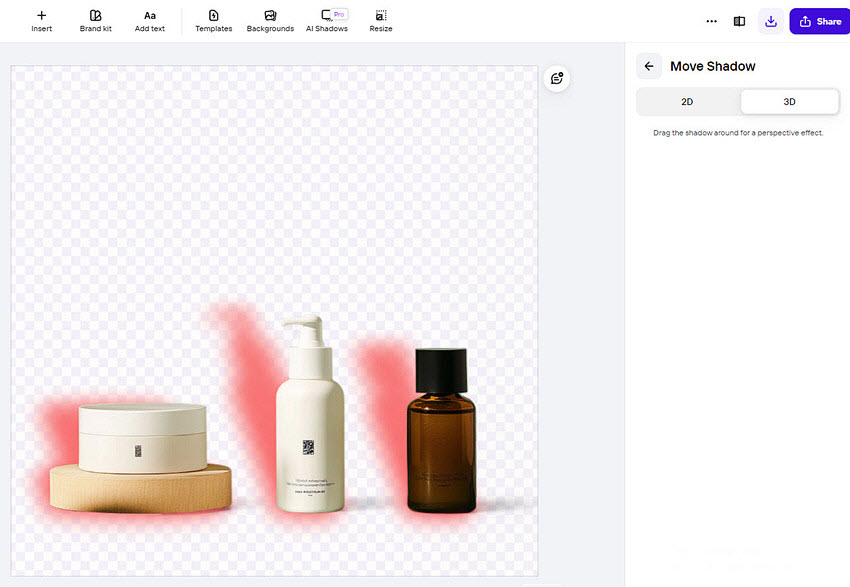
Compared to many other online tools for adding shadows to photos, Photoroom allows users to move the shadow to the in 2D or 3D, namely moving the shadows in two dimension or around the subject. This is extremely useful for creating realistic shadows for product photos.
Step 4. Export the Photo
To export the photo with added shadow, click the download button on the right upper corner. Select an output format like PNG, JPG, or WebM for the photo. To export in high quality, you need to get a Pro account.
Conclusion
Adding shadows to product photos is a subtle yet powerful way to enhance their visual appeal and create a more realistic representation of the product. By grounding the product in its environment, shadows add depth and dimension, making the image more engaging and trustworthy for potential customers.
As we've explored, there are various tools and techniques available to achieve this effect, each with its own strengths and weaknesses. Photoshop is the most commonly used way to add shadow to photos, as it allows for precise manipulation of shadows to match any lighting condition. However, it comes with a steeper learning curve and a higher cost. For those seeking a simpler and more accessible solution to add photo shadows, online tools are a great option for quick and effective shadow enhancement.
Ultimately, the best tool for adding shadows to product photos depends on your specific needs and preferences. Consider factors such as your budget, technical skills, and the level of control you require. Whether you opt for the advanced capabilities of Photoshop or the user-friendly online tools, mastering the art of shadow manipulation will undoubtedly elevate your product photography and enhance your online presence.
 FAQs
FAQs
To add shadow to product photos for professional use, you can follow the steps above in Photoshop for creating drop shadows. For quick, casual edits, online tools provide an easy and comparable workflow.
While the native Photos app lacks a dedicated "shadow effect" for adding drop shadows, you can adjust the "Shadows" slider to modify existing shadows within your image. In addition, you can also use third-party apps like PhotoRoom, Fotor, or Snapseed to achieve this effect.
You May Also Like
Brenda Peng is a seasoned editor at Digiarty Software who loves turning ordinary photos into extraordinary works of art. With years of experience behind the lens and in front of the computer, Brenda shares her passion for photography, image enhancement, and editing through easy-to-follow tutorials.