9 Ideas for Creative Food Photography to Inspire You
Updated on
Food photography has become an essential tool for chefs, restaurants, and home cooks alike, not just the photographer only. A captivating food image can entice viewers, evoke emotions, and even inspire culinary adventures. Whether you're sharing your culinary creations on social media or promoting a restaurant's menu, the art of food photography can significantly influence how people perceive and appreciate food.
However, capturing the essence of a dish goes beyond simply pointing and shooting. It requires creativity, an understanding of composition, and a keen eye for detail. In this post, we'll explore a variety of innovative and creative ideas that will help you elevate your food photography skills. From dramatic lighting techniques to playful styling concepts, these tips will inspire you to experiment and develop your unique photographic style. So grab your camera and let's dive into the delicious world of food photography!
- Accurate subject separation with transparent details and fine edges in a click
- Produce smooth, gradient-based alpha edges for natural background blending
- Obtain the original quality. Upscale/enhance images to maximize quality with AI
- Provide an AI-powered brush for quick, easy, and flexible manual adjustments
- Bulk processing. Run entirely locally to ensure user data privacy and security
Creative Food Photography Idea 1. Dark Food Photography
Dark food photography has become increasingly popular, captivating audiences with its moody and atmospheric aesthetic. This style emphasizes deep shadows and rich textures, creating images that evoke a sense of drama and intimacy. While it may seem challenging to achieve, mastering dark food photography can elevate your culinary images to new heights.
To establish a dark and moody atmosphere, start with dark, non-reflective surfaces and backdrops. Materials like black foam board or dark wood can significantly alter the mood of your shots, allowing the colors of the food to pop against the dark background. Additionally, incorporating dark props such as plates, utensils, and fabrics can enhance the overall aesthetic. For example, a black plate can make vibrant salads or colorful desserts stand out beautifully.
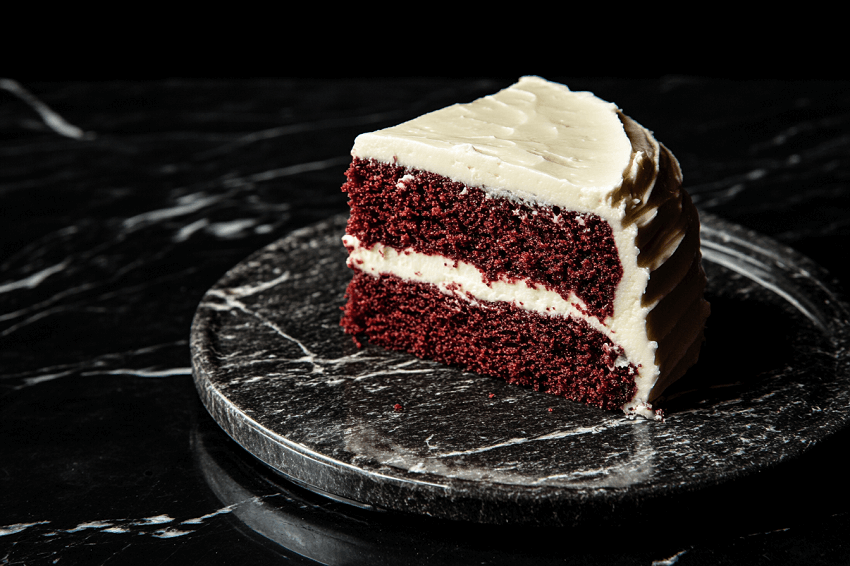
Lighting is crucial in dark food photography. Aim for directional lighting that creates contrast between light and shadow. Position your light source strategically; backlighting or side lighting works well to highlight textures while maintaining a moody atmosphere. Using reflectors can help bounce light onto your subject without overwhelming the scene. Don't shy away from underexposing your images slightly; this technique can deepen shadows and emphasize highlights, enhancing the dramatic effect.
Utilizing a shallow depth of field can also draw attention to specific elements of your dish while allowing the background to fade into darkness. This approach helps create a focal point in your composition, emphasizing textures and details that might otherwise be lost in a brighter setting. Additionally, using negative fill techniques can add depth to your images by absorbing light rather than reflecting it back onto your subject. This method enhances contrast and helps define shapes within your composition.
Composition plays a vital role in dark food photography as well. Experiment with different angles, framing techniques, and negative space to create visually compelling images. A well-composed shot will guide the viewer's eye to the most important elements of the dish while maintaining balance within the frame. Finally, post-processing is an essential step in refining your dark food photographs. Use editing software to adjust contrast, brightness, and color saturation to enhance the mood of your images further.

Creative Food Photography Idea 2. Light Painting
Light painting is a creative technique that can add a unique and artistic flair to your food photography. This method involves using a steady camera and a long exposure time, allowing you to "paint" with light sources, such as flashlights or other light-emitting devices. The result is a visually striking image that can showcase your culinary creations in an entirely new way.
To begin with light painting, set up your camera on a tripod to ensure stability during the long exposure. A slow shutter speed, typically ranging from 10 to 30 seconds or longer, is necessary to capture the movement of the light. This setup allows you to move the light source around the food while the camera captures the scene. You can experiment with different light sources, such as colored LED lights or traditional flashlights, to create various effects.
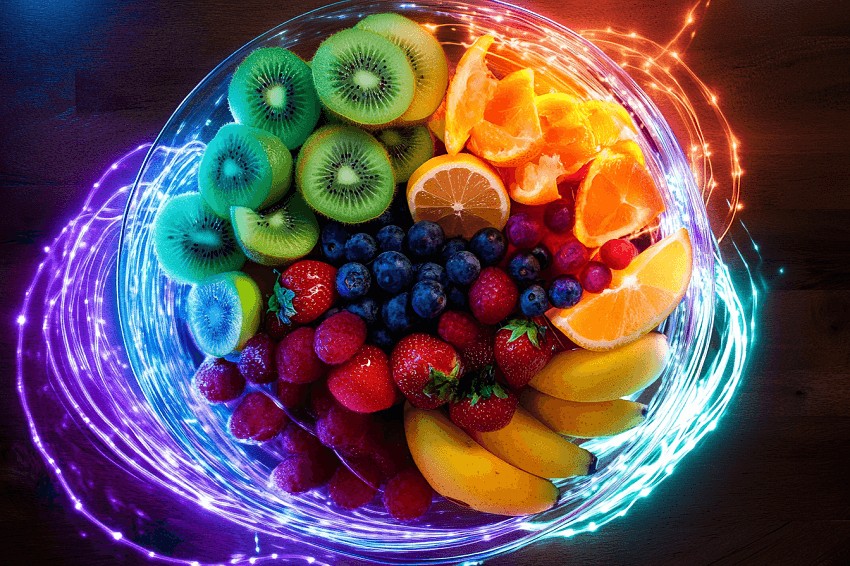
When planning your shot, consider the composition and elements you want to highlight. Position your food in a way that allows the light to accentuate its features. For instance, you might want to focus on textures or specific details of the dish. As you move the light source around, think about how it interacts with the food and its surroundings. You can create dramatic highlights and shadows that enhance the overall mood of the image.
Backlighting is a popular technique within light painting that involves placing the light source behind the subject. This approach creates a moody and dramatic effect, emphasizing depth and dimension in your food photography. By using backlighting, you can make certain elements of your dish glow while casting intriguing shadows that add interest to the composition.
In addition to backlighting, you can experiment with side lighting or even colored lights to create different atmospheres. For example, using warm-toned lights can evoke a cozy feeling, while cool-toned lights might lend a more modern or fresh vibe. The choice of color and intensity will significantly impact the mood of your final image.
Creative Food Photography Idea 3. Reflective Surfaces
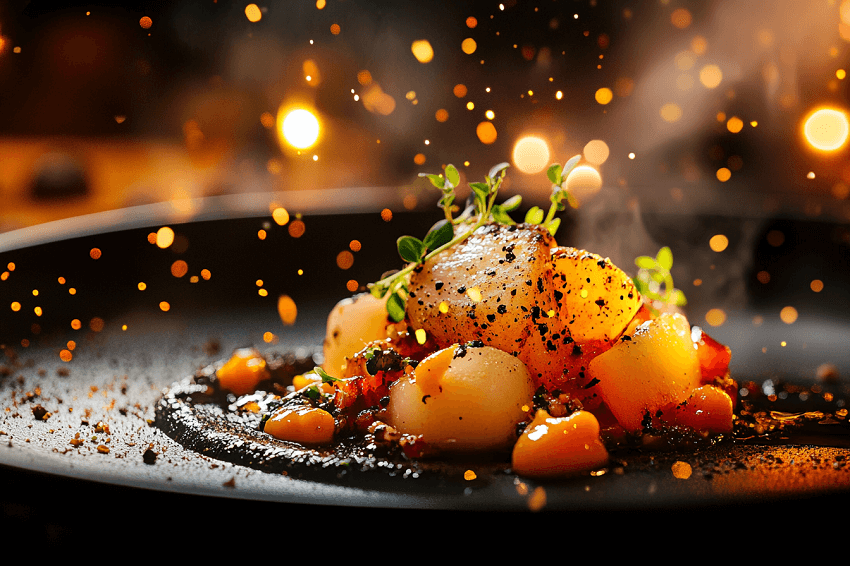
Using reflective surfaces in food photography can create stunning and dynamic images that draw the viewer's eye. Reflective elements, such as glass, metal, or glossy surfaces, can enhance the visual appeal of a dish by adding depth and interest. However, working with these surfaces requires careful consideration to avoid unwanted glare and distractions. Here are some tips for effectively incorporating reflective surfaces into your food photography.
To start, choose the right type of reflective surface that complements your dish. Black plexiglass is a popular choice for its ability to create dramatic reflections while maintaining a sleek appearance. This type of surface works particularly well with colorful foods, as it enhances the contrast and makes the colors pop. If you prefer a lighter look, white or light-colored reflective surfaces can also work well, providing a softer reflection that brightens the overall image.
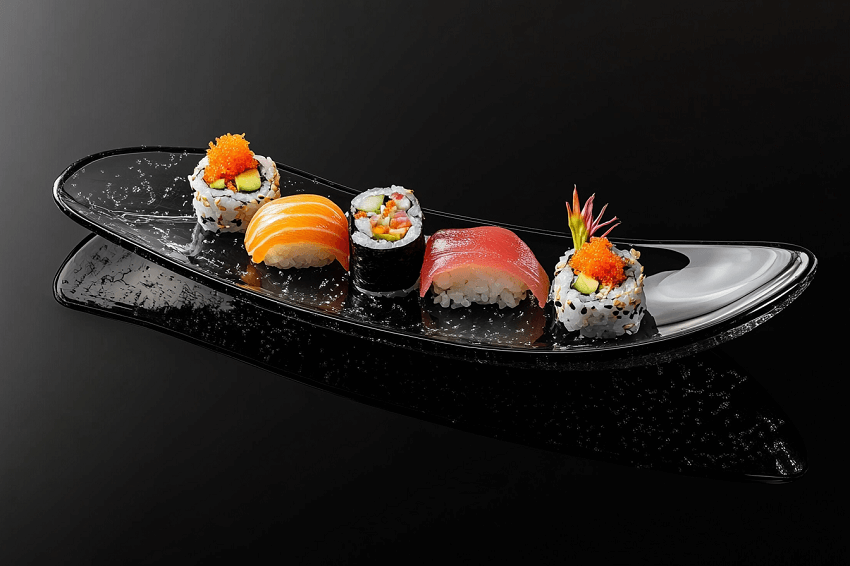
When setting up your shot, pay close attention to lighting. The placement of your light source is crucial when working with reflective surfaces. Positioning the light at an angle can help control reflections and prevent unwanted glare. Using diffusers can soften the light and reduce harsh highlights, allowing for a more balanced exposure. Additionally, consider using reflectors to bounce light back onto the food, enhancing its features while controlling the overall brightness of the scene.
Experimenting with different angles can also yield interesting results when photographing food on reflective surfaces. Shooting from a low angle can create dramatic reflections that add depth to your images. This perspective allows viewers to see both the food and its reflection simultaneously, creating a more engaging composition. On the other hand, shooting from above can provide a clean and simple look while still showcasing the reflective qualities of the surface.
It's important to be mindful of any distractions in your frame when using reflective surfaces. Reflections can sometimes pick up unwanted elements from the environment, such as lights or objects in the background. To minimize these distractions, consider using controlled lighting setups that limit ambient light from bouncing around the scene. This approach helps maintain focus on the food itself while reducing clutter in the reflections.
Creative Food Photography Idea 4. Framing with Props
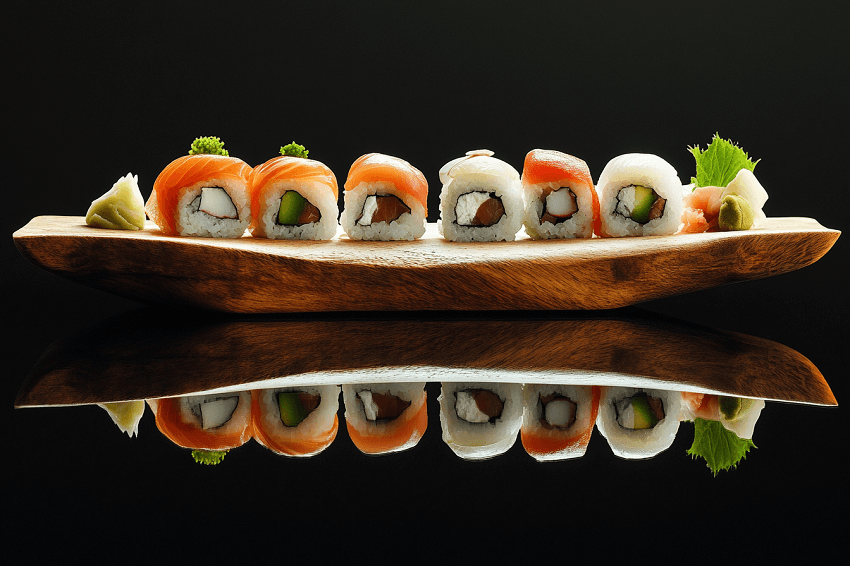
Framing with props is a powerful technique in food photography that helps direct the viewer's eye to the main subject while adding context and storytelling elements to the image. This method involves strategically placing objects around your dish to create a visual frame, enhancing the overall composition and making the food stand out. Here are some effective ways to use framing with props in your food photography.
To begin, select props that complement your dish without overwhelming it. A few well-chosen items can enhance the story you want to tell while keeping the focus on the food. For example, if you are photographing a bowl of soup, consider using a rustic spoon or a textured napkin nearby. These elements can provide context and make the image feel more inviting. It's important to avoid clutter; too many props can distract from the main subject and confuse the viewer.
When arranging your props, think about how they can create lines that lead toward your dish. Lines are a powerful compositional tool that can guide the viewer's eye directly to the focal point. For instance, you might position utensils or ingredients in a way that directs attention to the plate of food. This technique not only enhances visual interest but also adds a sense of movement to your composition.
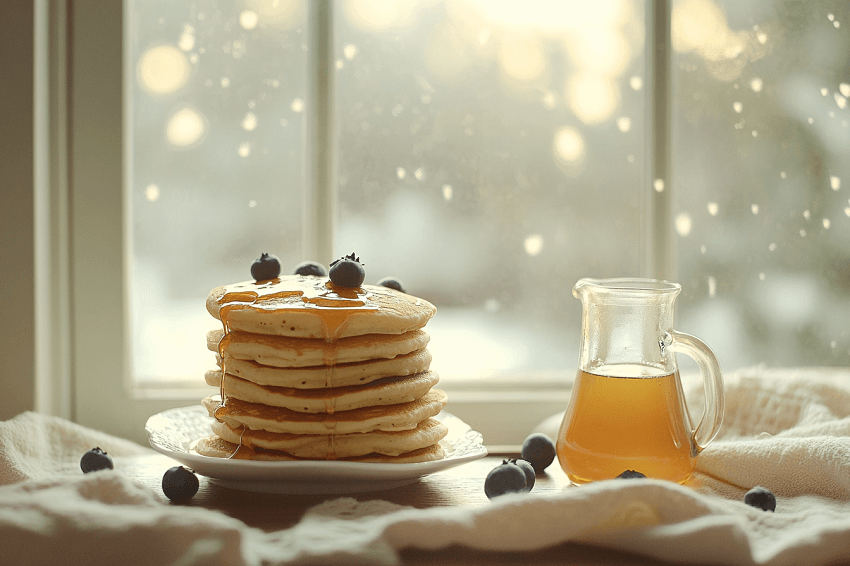
Another effective way to frame your subject is by using negative space strategically. Negative space refers to the empty areas around your main subject, which can help isolate it and draw attention. By placing props around your dish while leaving some areas clear, you create a balanced composition that emphasizes the food without making it feel cramped.
Incorporating layers into your composition can also add depth and dimension. By placing props in the foreground, middle ground, and background, you create a sense of three-dimensionality that engages viewers. For example, if you are photographing a cake, you might include some decorative flowers in the foreground and a blurred background of kitchen tools or ingredients. This layering effect helps tell a more complete story about the dish.
When selecting props, consider their textures and colors. Textured items like wooden boards, linen napkins, or ceramic dishes can add visual interest and warmth to your images. Additionally, using colors that complement or contrast with your food can enhance its appeal. For instance, if you are photographing vibrant fruits, consider using neutral or earthy tones for your props to make the colors pop.
Creative Food Photography Idea 5. Floating Food Shots
Floating food photography is a captivating technique that creates the illusion of food items suspended in mid-air. This style has gained popularity for its fun and dynamic visuals, making it a favorite among food photographers looking to add a creative twist to their images. While it may seem like a spontaneous action shot, floating food images typically involve careful planning and some clever techniques. Here's how to achieve stunning floating food shots.
To start, you'll need a clean background that complements your dish. A solid color backdrop, such as white or black, works well to keep the focus on the food. The simplicity of the background allows the floating elements to stand out without distractions. Once you have your background set up, consider using a block of Styrofoam or other support structures to hold your food items in place while you photograph them. For example, you can insert a fork into the Styrofoam block and place your food item on the fork, creating the illusion that it is floating.
When photographing floating food, composition is key. Arrange your items thoughtfully to create an engaging layout. You can use multiple items to enhance the effect; for instance, if you're capturing a sandwich, consider stacking the ingredients in mid-air as if they were tossed together. This not only looks visually appealing but also tells a story about how the dish is made.
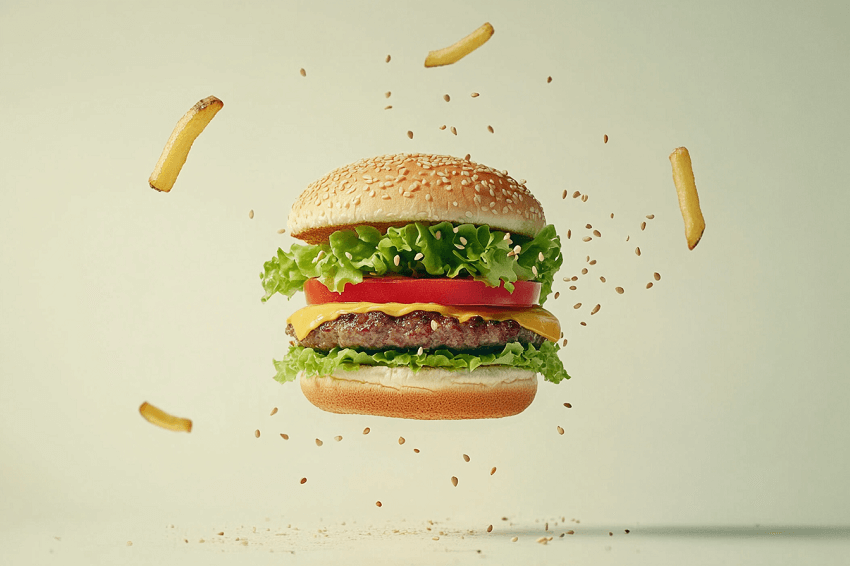
Lighting plays an essential role in achieving great floating food shots. Natural light is often ideal for this style, as it enhances colors and textures without creating harsh shadows. Position your light source strategically to illuminate the food while minimizing reflections on any shiny surfaces. If you're using artificial lighting, softboxes or diffusers can help create even lighting that flatters your subject.
Once you've captured your base image with the food positioned on supports, you can enhance the floating effect in post-processing. Use photo editing software like Photoshop to remove any visible supports or wires from your final image. This step is crucial for creating a seamless look that emphasizes the illusion of levitation. You can also adjust brightness, contrast, and saturation during editing to make your floating food shots more vibrant and eye-catching.
Another technique involves using transparent rods or fishing line to suspend larger items without visible supports. This method allows for more control over positioning and can create stunning effects with minimal distractions in the final image. Just be sure to carefully plan your shot so that any supports used are out of view when capturing the final composition.

Creative Food Photography Idea 6. Splash Photography
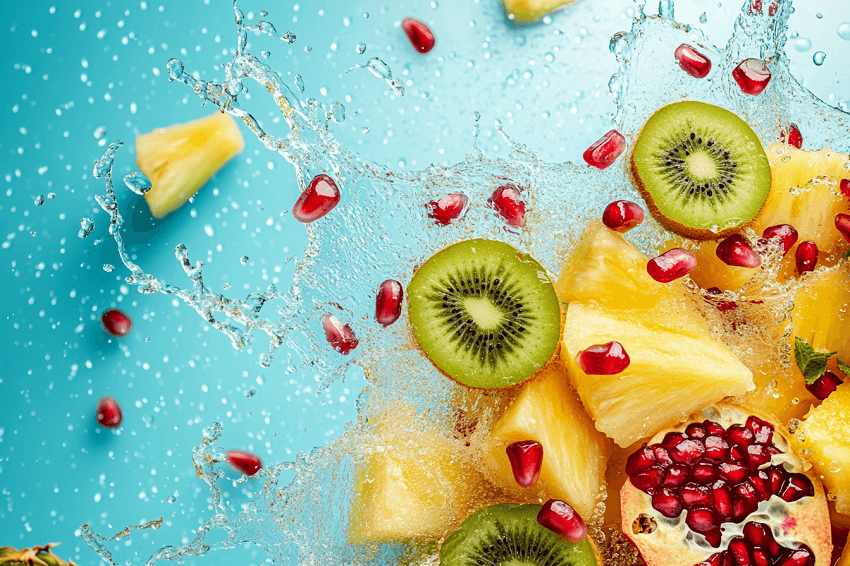
Splash photography is an exciting technique that captures the dynamic moment when an object interacts with a liquid, creating visually stunning images filled with energy and movement. This style is particularly effective in food photography, where splashes can evoke freshness and excitement, making dishes appear more enticing. Here's how to effectively incorporate splash photography into your food photography projects.
To start, you'll need to set up your shot carefully. Choose a clean background that complements your dish, such as a solid color or a simple textured surface. This will help the splash stand out without distractions. When photographing food splashes, consider using a transparent container filled with water or another liquid. The container should be nearly full to allow for significant splashes when you drop an object into it.
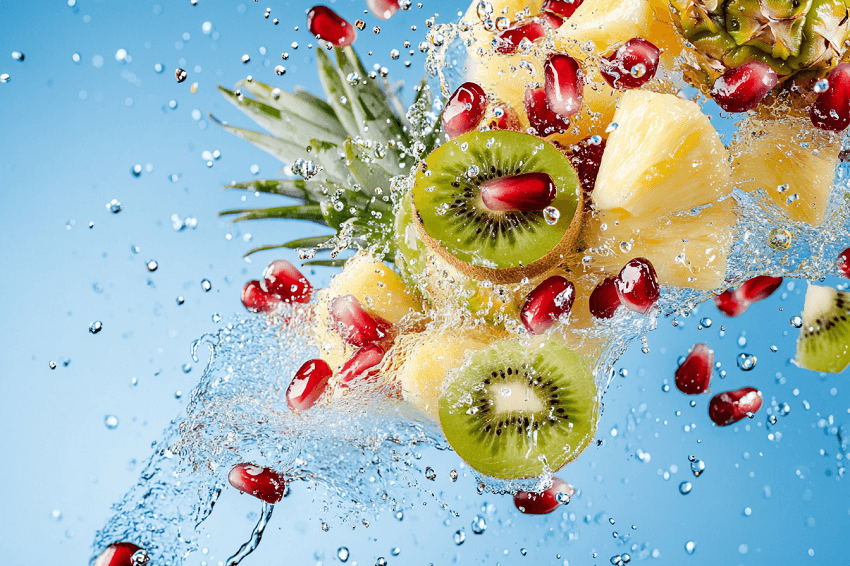
Lighting is crucial in splash photography. Use high-speed flash sync to freeze the action and capture sharp images of the splash. Position your light sources strategically to illuminate the scene without casting harsh shadows. Typically, using multiple flash units can help distribute light evenly and create dramatic effects. For instance, place one light source behind the subject to create a backlight effect, which can enhance the visibility of the splash and add depth to your images.
When it comes to the actual splash, timing is everything. You can use a remote shutter release or a camera timer to minimize vibrations when capturing the moment. Focus on your subject manually before starting the shoot to ensure it remains sharp throughout the process. If you're dropping an object into the liquid, such as fruit or ice cubes, try different heights and angles to see which produces the most visually appealing splash.
Experimenting with various objects can also yield interesting results. Larger items tend to create bigger splashes, while smaller ones can produce delicate droplets. Consider using colorful ingredients like berries or citrus fruits, as they will stand out against a darker background and make your images pop. Additionally, washing your subjects before photographing them helps keep the water clear and enhances the overall quality of your shots.
Creative Food Photography Idea 7. Pattern Creation
In food photography, the use of patterns can significantly enhance the visual appeal of your images. Patterns guide the viewer's eye, create rhythm, and add a sense of harmony to your compositions. By thoughtfully incorporating patterns into your food photography, you can create images that are not only aesthetically pleasing but also engaging and dynamic.
To begin with, it's essential to recognize the different types of patterns that can be found in food and props. Natural patterns exist in many foods, such as the texture of a loaf of bread, the arrangement of berries, or the swirl of a creamy sauce. These inherent patterns can be highlighted by using close-up shots or macro photography techniques. Capturing these details allows you to showcase the beauty of the food itself while drawing attention to its unique characteristics.
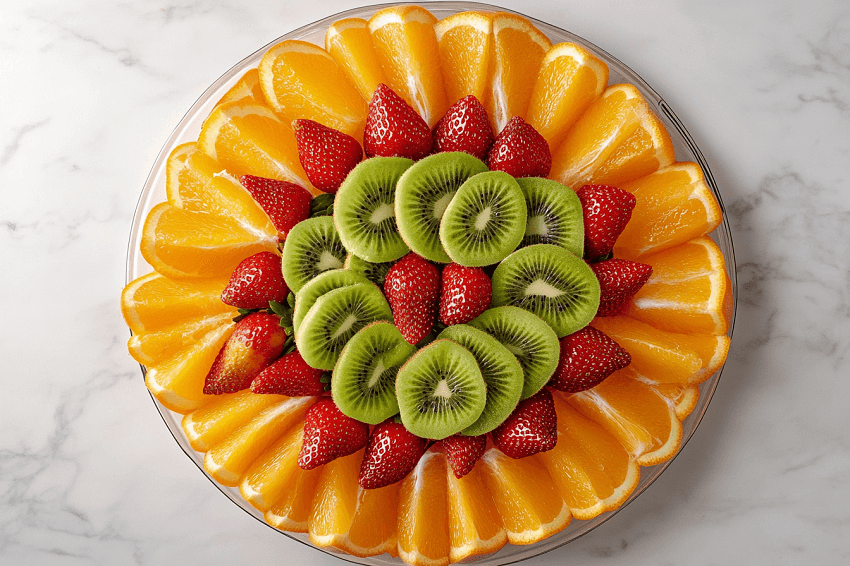
When creating your own patterns, repetition is a powerful technique. Arranging similar items in a way that emphasizes their shapes or colors can create a strong visual impact. For example, if you're photographing cupcakes, arranging them in a grid pattern can draw the viewer's eye across the image. This method works well with any group of similar items, such as fruits or vegetables, where their uniformity can create a cohesive look.
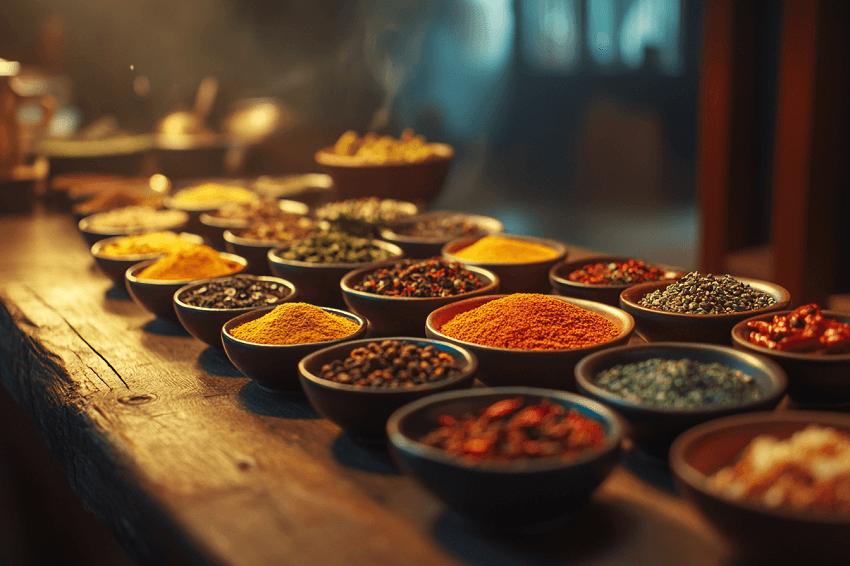
Mixing different shapes and sizes can also add interest to your compositions. For instance, combining round fruits with rectangular plates or bowls creates contrast and visual intrigue. This approach helps prevent monotony and encourages exploration within the image. Additionally, consider using props with patterns—such as patterned tablecloths or plates—to enhance the overall composition without overwhelming the food itself.
When incorporating patterns into your food photography, balance is key. Too many competing patterns can distract from the main subject—the food—so it's crucial to maintain focus on what you're trying to highlight. If you choose to use a bold pattern for your background or props, pair it with simpler elements that allow the food to remain the focal point. For example, if you have a colorful patterned plate, consider using neutral-colored napkins or utensils to keep attention on the dish.
Another effective technique is to create evolving patterns within your composition. This could involve arranging items in a way that changes their size or color as they progress across the frame. For example, you might start with whole fruits on one side and transition to sliced pieces on the other, guiding the viewer's eye through the image while telling a story about preparation or consumption.
Lighting also plays an important role in enhancing patterns in food photography. Using hard light can create strong shadows and highlights that emphasize textures and shapes within your composition. Experiment with different lighting angles to see how they affect the visibility of patterns and textures in your images.
Creative Food Photography Idea 8. Lived-In Aesthetics
Lived-in aesthetics in food photography embrace a more authentic and relatable approach, moving away from the overly polished and staged images that have dominated the genre. This style reflects the realities of everyday life, showcasing food in settings that feel comfortable, inviting, and genuine. By incorporating elements that suggest a story or context—such as partially eaten dishes, messy countertops, or casual dining environments—photographers can create images that resonate with viewers on a personal level.
To achieve a lived-in aesthetic, start by creating a scene that feels natural and unforced. This could involve styling your food in a way that suggests it has just been enjoyed or is about to be shared among friends and family. For instance, capturing a plate of pasta with a fork resting beside it or a half-empty glass of wine can evoke a sense of warmth and familiarity. These details help convey the idea that the food product is part of a lived experience rather than just an isolated product.
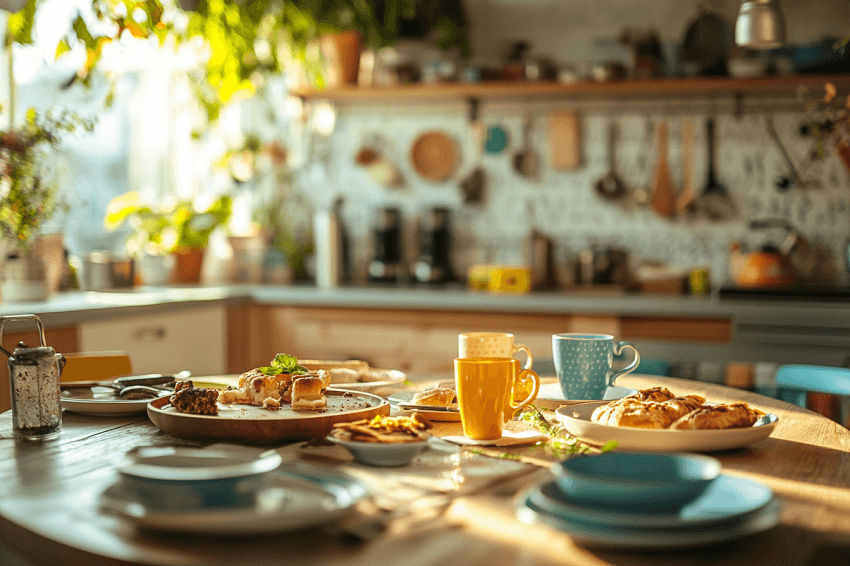
Incorporating everyday items into your compositions can also enhance the lived-in feel. Consider using casual tableware, like mismatched plates or rustic utensils, to create an informal atmosphere. Background elements such as cookbooks, fresh ingredients scattered around, or even kitchen tools can add context and depth to your images. This approach not only tells a story but also invites viewers to imagine themselves in the scene, enjoying the food alongside the photographer.
Lighting plays an essential role in achieving a lived-in aesthetic. Natural light is often preferred for this style, as it creates soft shadows and highlights that enhance the warmth of the scene. Position your setup near a window to take advantage of diffused sunlight, which can bring out the colors and textures of the food while maintaining an inviting ambiance. Avoid harsh artificial lighting that can make the scene feel sterile or overly staged.
Another important aspect of lived-in aesthetics is embracing imperfection. Rather than striving for flawless compositions, allow for some messiness in your shots. A sprinkle of flour on the countertop or crumbs around a plate can add authenticity and charm to your images. This approach reflects real-life cooking experiences, where not everything goes perfectly according to plan.
Creative Food Photography Idea 9. Natural Elements
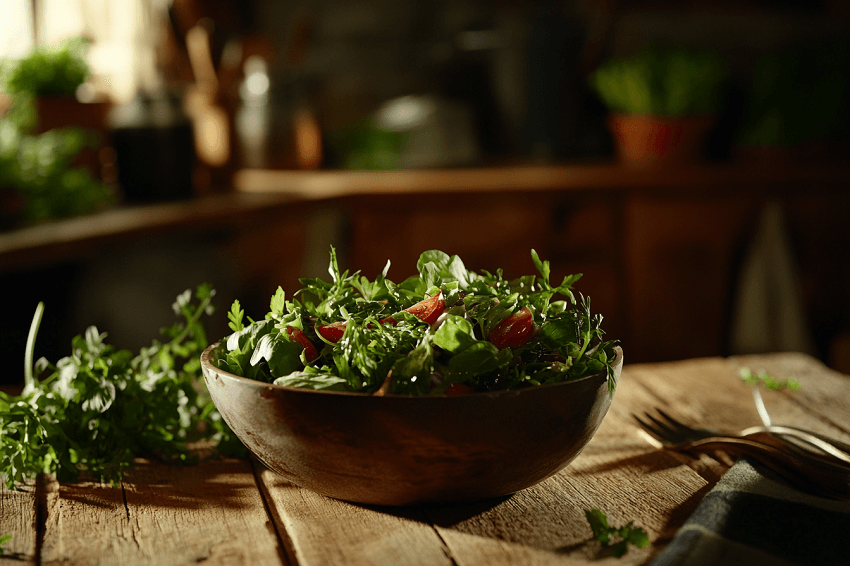
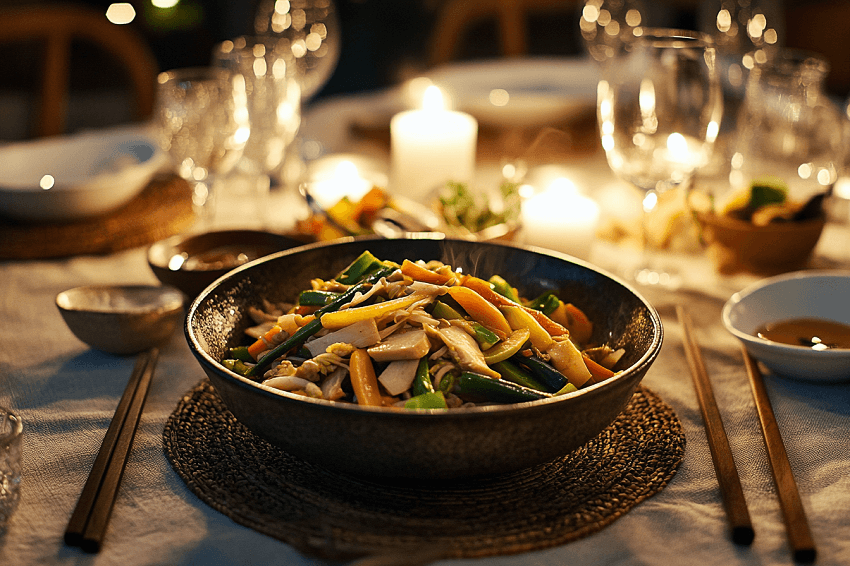
Incorporating natural elements into food photography can significantly enhance the visual appeal and storytelling aspect of your images. Natural elements such as fresh herbs, flowers, fruits, and organic materials not only add color and texture but also create a sense of authenticity and connection to the food. Here's how to effectively use natural elements in your food photography.
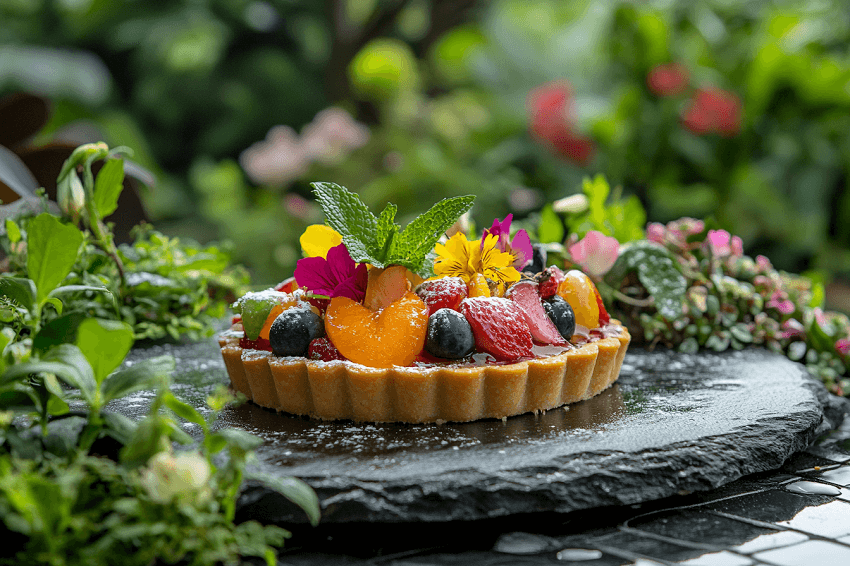
To start, consider using fresh herbs and edible flowers as key components in your compositions. Herbs like basil, mint, or cilantro can add vibrant green hues and a sense of freshness to your dishes. Similarly, edible flowers such as nasturtiums or pansies can introduce pops of color and create a visually stunning contrast against the food. When styling your shots, scatter these elements around the main dish to create a more dynamic and inviting composition.
Using fruits and vegetables as props can also enhance your food photography. Incorporating whole fruits or vegetables in the background or foreground can help tell the story of the dish while adding depth and interest. For example, if you're photographing a salad, consider placing a few whole tomatoes or cucumbers nearby to emphasize the freshness of the ingredients. This approach not only enhances the visual appeal but also provides context for the dish being presented.

Natural textures play a crucial role in creating engaging food photographs. Consider using rustic wooden boards, textured linens, or ceramic dishes to complement your food. These materials add warmth and authenticity to your images, making them feel more relatable. Additionally, incorporating elements like branches, leaves, or stones can further enhance the organic feel of your compositions.
Lighting is essential when working with natural elements. Natural light is often the best choice for showcasing these components, as it highlights their colors and textures beautifully. Position your setup near a window to take advantage of soft, diffused sunlight that enhances the overall ambiance of your images. Avoid harsh artificial lighting that can detract from the natural look you want to achieve.
When composing your shots, think about how you can create balance using natural elements. Arrange items in a way that guides the viewer's eye toward the main dish while maintaining harmony within the composition. For instance, if you have a large bowl of soup as your focal point, consider placing herbs or garnishes around it in a way that draws attention without overwhelming it.
Conclusion
When you get here, we've explored a variety of techniques that can elevate your food photography, from utilizing dark aesthetics to incorporating natural elements. Each technique offers unique opportunities to enhance your images, allowing you to express your artistic vision while highlighting the beauty of food.
As you experiment with these techniques, remember that food photography is as much about storytelling as it is about aesthetics. Consider the context of your dishes and the emotions you want to evoke in your viewers. Whether you're shooting for a blog, social media, or a personal project, let your passion for food shine through in every image.
Ultimately, the key to successful food photography lies in practice and exploration. Don't be afraid to try new ideas, adjust your approach, and learn from each shoot. With time and creativity, you'll develop a unique style that reflects your culinary journey and connects with your audience. So grab your camera, gather your ingredients, and start capturing the delicious world around you!

