Midjourney Face Swap Guide (2025): Easiest Way to Swap Faces
Updated on
Face swapping has become one of the most exciting trends among Midjourney users. Whether you want to create consistent AI characters, personalize your AI portraits, or just have fun editing faces, face swapping opens up endless creative possibilities — and you don’t need advanced editing skills to do it! In this tutorial, you’ll learn how to easily swap faces in Midjourney using the InsightFaceSwap bot on Discord. We’ll walk you through everything from setting up your bots to generating stunning, customized AI images — step-by-step.
- Part 1. Midjourney Face Swap Tutorial
- > Step 1. Invite Midjourney and InsightFace bot to your server
- > Step 2. Register the identity using the /saveid command
- > Step 3. Create a portrait image with Midjourney
- > Step 4. Face swap with INSwapper in Midjourney
- > Step 5. (Optional) Use locally stored image
- Part 2. Bonus: Upscale and Enhance Your Midjourney Face Swap 👍
- Part 3. FAQs
Part 1. Midjourney Face Swap Tutorial
Step 1. Invite Midjourney and InsightFace bot to your server
Create a new Discord server by clicking Add a Server > Click My Own > For me and friends, and go through the setup process.
Invite the Midjourney bot to your new server:
- Going to an existing Midjourney room.
- Right-clicking on the Midjourney bot.
- Selecting "Add to Server".
- Choosing your new server.
Then invite the Insight Face Bot to your Discord server by following the provided link.
After following these steps, your new Discord server will have both the Midjourney bot for generating images and the InsightFace bot for performing face swaps on those images.
Step 2. Register the identity using the /saveid command
In your new Discord server, upload a front-facing, high-resolution photo of a face using the "/saveid" command followed by an ID name. E.g. "/saveid her" to register that face identity with the InsightFace bot.

Step 3. Create a portrait image with Midjourney
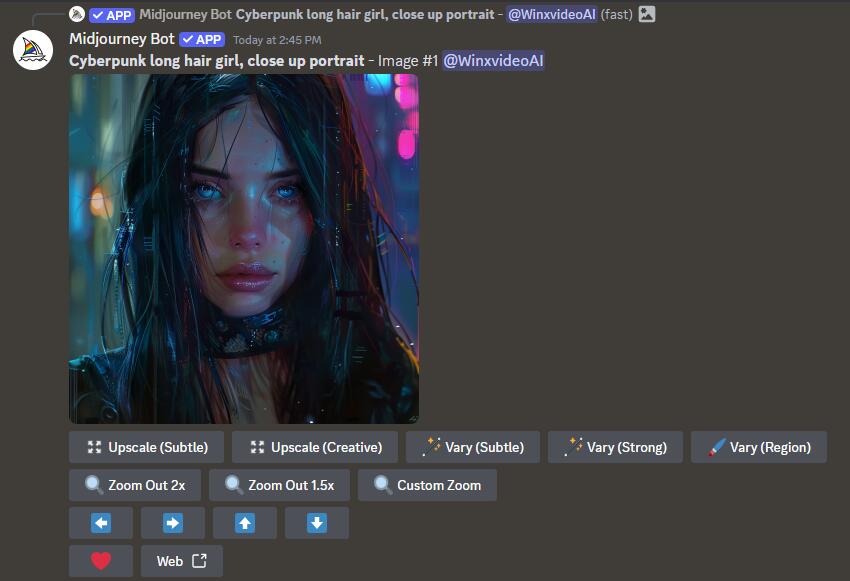
Then generate a portrait image using Midjourney's /imagine command.
E.g. 'Cyberpunk long hair girl, close up portrait'

Select and enlarge the desired image for the face swap.
Step 4. Face swap with INSwapper in Midjourney
Right-click on the upscaled image > App > INSwapper.
There you have it! The face swapping process is complete.
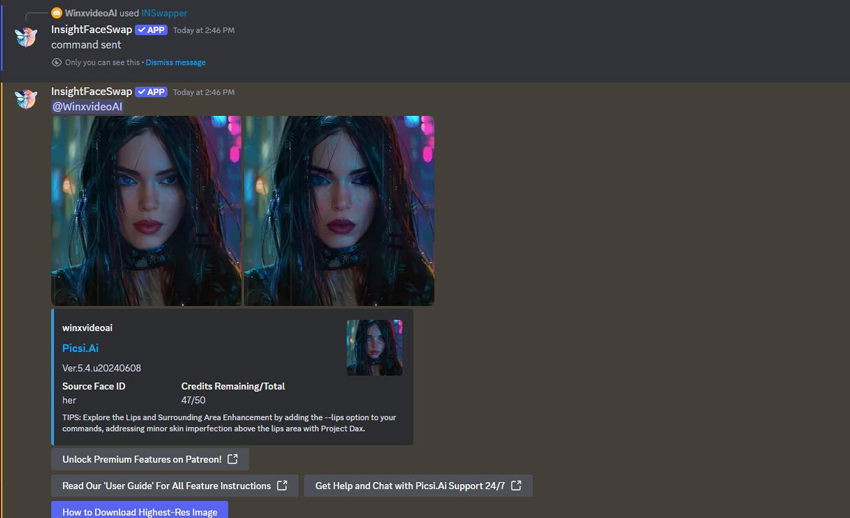
Note: After registering your face ID, it will be used as the default for face swapping in MidJourney. To change the default face ID for future swaps, use the command '/setid name'.

Step 5. (Optional) Use locally stored image
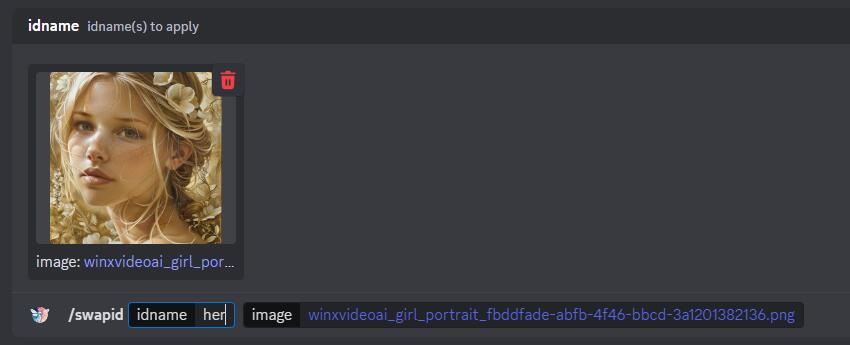
In addition to the images created with Midjourney, Insight Face can process and perform the face swaps on locally stored images.
Just enter the ID name using the '/swapid' command and upload your image.
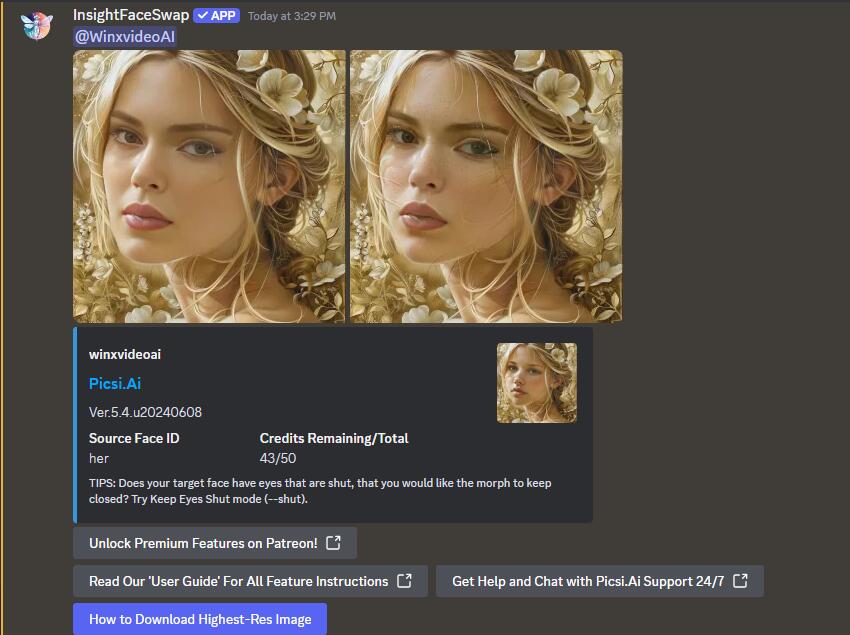
Here is the final look:
Part 2. Upscale and Enhance Your Midjourney Face Swap
The images after face swapping may appear a bit unclear when zoomed in or not large enough for printing and sharing. Additionally, the upscale feature in MidJourney isn't very effective, which is a common issue for other MidJourney users as well. To address this, you can use a dedicated AI image enhancer.
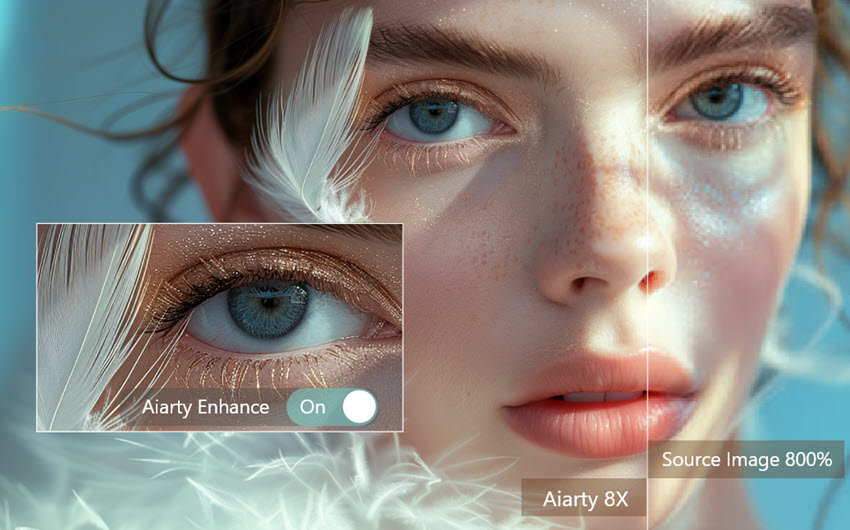
Aiarty Image Enhancer is a cutting-edge image enhancement and upscaling software that uses deep learning technology to upscale and enhance images of any sort to 16K/32K, improving image clarity and detail. It goes beyond basic enhancement and upscaling but also generates lifelike details down to the finest hair, fur, and skin textures. With Aiarty Image Enhancer, you can easily upscale your blurry Midjourney AI art to print-ready masterpieces with exceptional quality for printing and sharing.
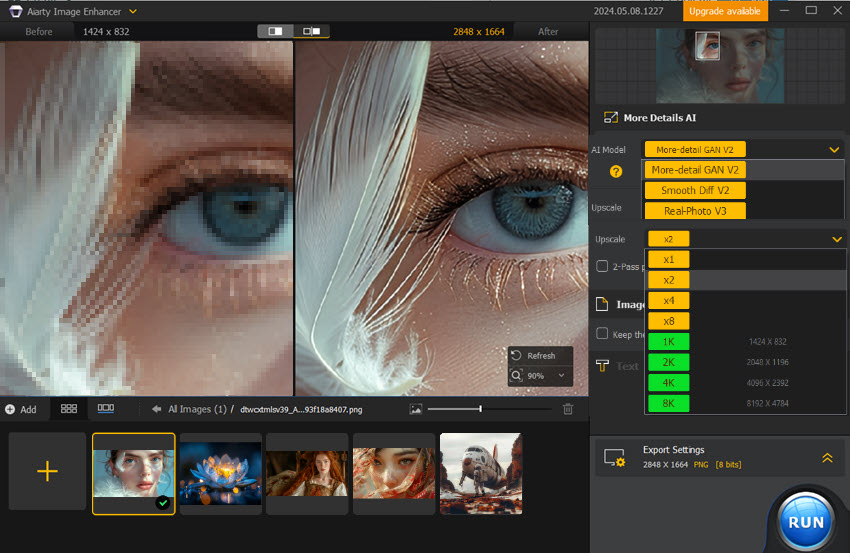
Aiarty Image Enhancer - Best for Midjourney/Stable Diffusion/AI-Gen Images
- Upscale images to 4K/8K/16K and higher with realistic details and texture.
- Auto AI inference to denoise, deblur, restore, and enhance images easily.
- Achieve max quality for print and display, 800% zoom in without pixelation.
- 3 AI models, 6.78 million images trained, optimized for Nvidian/AMD/Intel/CPU
 FAQs
FAQs
While Midjourney itself doesn't have a direct "face swap" feature built into its core image generation commands, it can achieve face swapping through the use of a third-party Discord bot called InsightFace.
The accuracy of the face swap using this method can vary, and the process relies on using Discord and a separate bot. While InsightFace is a common solution within the Midjourney community, dedicated face-swapping tools or image editing software might offer more precise control and potentially better results for this specific task. Remember that tools like Aiarty Image Enhancer could then be used to refine the quality of the face-swapped image.
After swapping, you can upscale and enhance the final image using AI tools like Aiarty Image Enhancer to sharpen facial features and improve overall quality.