How to Make Photos Look Professional
Updated on
Summary: This blog covers key techniques for making photos look professional, from basic adjustments to selecting the right software. For an added boost, Aiarty Image Enhancer offers an AI solution to enhance image quality and achieve professional results with ease.
Ever snapped a photo that looked perfect in the moment, only to realize later it falls flat on screens? You're not alone. In a world where 89% of viewers judge a brand's credibility based on image quality, turning casual shots into polished, professional visuals is no longer optional—it's essential. The good news? Transforming your images into polished, eye-catching shots is easier than you think. In this guide, we'll walk you through simple yet effective tips on how to make photos look professional. From adjusting exposure and contrast to enhancing details and correcting colors, these editing techniques will take your photos from good to stunning. The best part? You don't need expensive software or years of experience to achieve amazing results. By the end, you'll have the tools and knowledge to give your photos that polished, professional look. Ready to dive in? Let's get started!
Part 1. How to Edit Photos like a Professional
1.Set the Stage: What to Keep in Mind before Editing
Before diving into editing, take a moment to clarify your intentions. What is the ultimate goal for your photo? Are you aiming to fix issues like exposure, contrast, or white balance? Or are you looking to enhance its overall aesthetic for a more polished, professional look? If you're editing for social media, you might prioritize vibrant, eye-catching edits. On the other hand, for print, you may need to focus more on preserving fine details and ensuring high resolution.
Consider what you want to convey through your image: Is it a vibrant and bold mood, or do you prefer something softer and more subdued? This initial vision will guide your editing decisions, including how much contrast to apply, what colors to emphasize, or whether to add creative effects. Also, think about your intended audience. If you're working on images for a website, resolution and clarity are essential for showcasing details, while photos for social media might benefit from punchier, more stylized looks. Knowing your audience's expectations can help you tailor your editing choices.
And remember, the style you want to achieve matters too—will your final image be a natural, true-to-life representation or something more artistic and surreal? Understanding this before you begin will ensure your edits stay consistent and aligned with your vision.
Lastly, evaluate your skill level and available resources. If you're just starting with photo editing, begin with simple adjustments like exposure and cropping, and work your way up to more advanced techniques. Don't forget to choose the right software based on both your budget and needs. There are many options out there, from free programs to professional-grade tools.
Once you've reflected on these aspects, you'll be ready to dive into editing with a clear vision, making it easier to choose the right tools and techniques to achieve the desired results..
2. Select the Right Photo Editor
The software you choose plays a huge role in achieving your desired results. For beginners, apps like Adobe Lightroom, Snapseed, or VSCO are great choices, offering simple tools for color correction, exposure, and cropping, along with handy filters and presets for quick edits.
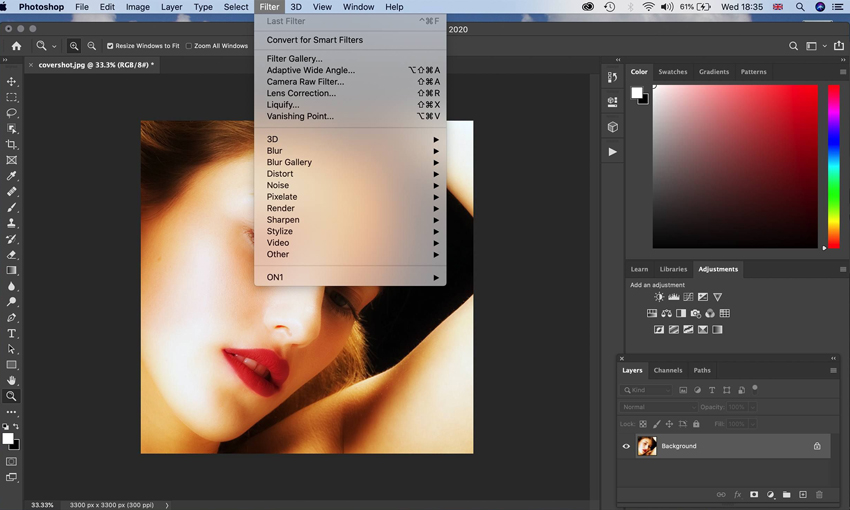
If you're looking for advanced control, Adobe Photoshop is the gold standard, offering powerful features for detailed edits, though it comes with a steeper learning curve. A free alternative is GIMP, an open-source option that's solid but lacks some of Photoshop's polish. For professional photographers, Capture One and DxO PhotoLab are excellent choices, especially for advanced color grading and batch processing, providing robust tools tailored to high-end editing needs.
Consider factors like your editing goals, device compatibility, and budget before making a decision. Many programs offer free trials, so take advantage of these to find what works best for you.
3. Start with Basic Adjustments
The first step in any photo edit is to adjust the basics: brightness, contrast, and exposure. These changes set the foundation for a well-balanced image. Adjust the brightness to control the overall light level of the photo, ensuring it's neither too dark nor too bright. Contrast helps differentiate the light and dark areas, adding depth to your image. Exposure adjustments can fix images that are overexposed (too bright) or underexposed (too dark). You should also play with the highlights and shadows sliders to fine-tune these areas, ensuring the details are visible in both the light and dark regions of the photo. Additionally, adjusting the whites and blacks can refine the overall balance, creating a more dynamic image.
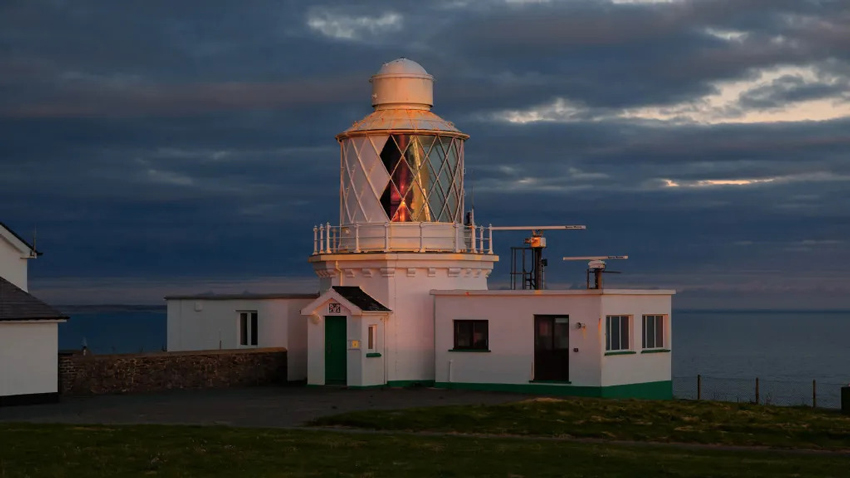
4. Correct the White Balance
One of the most important corrections for achieving natural-looking colors is fixing the white balance. If your photo has a yellowish (warm) or blue (cool) tone, the white balance might be off. This issue often arises from different types of lighting—incandescent or tungsten bulbs, for example, can cause a yellowish cast, while fluorescent lighting can make the image too cool. By adjusting the white balance, you ensure that whites appear true to their natural color, making the rest of the colors in your image look more accurate. In photo-editing software, you can manually adjust the temperature and tint sliders to balance out any color cast.

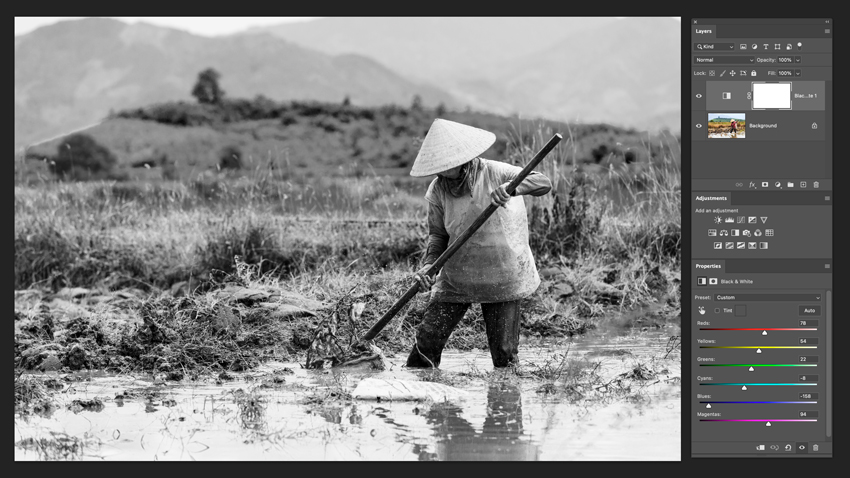
5. Enhance the Colors
Boosting the vibrancy and saturation of your photo can make colors pop and bring the image to life. Vibrancy affects the less saturated colors more than already vibrant colors, preventing an unnatural look. Saturation, on the other hand, enhances all colors equally, but be careful—over-saturating an image can make it look unrealistic. For more precise control, use the HSL (Hue, Saturation, Luminance) sliders to adjust individual colors. You can fine-tune the hues of reds, blues, or greens to match the desired mood or to correct colors that didn't quite come out right when taking the shot.
6. Sharpen and Enhance Details
Increasing the sharpness of your photo can make it look crisper and bring out fine details, especially if you're editing close-up shots or portraits. However, it's essential to use a subtle approach—excessive sharpening can introduce unwanted noise (graininess), making the photo appear artificial. Start by applying a small amount of sharpening and use the radius and detail sliders to control how much edge contrast is applied. If your photo already has some noise, consider using a noise reduction tool before sharpening to maintain clarity without introducing grain.
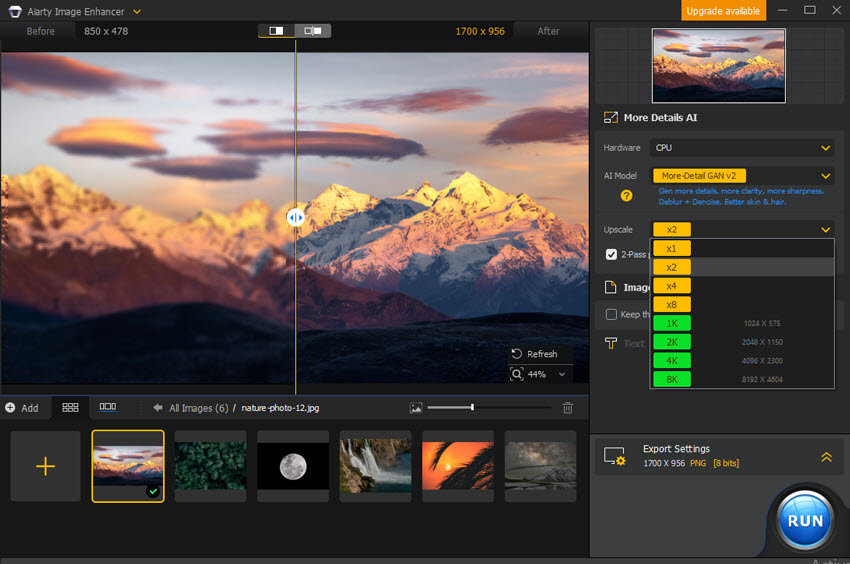
Make Your Photos Look Professional Using AI
Aiarty Image Enhancer is the ultimate AI tool for turning lackluster photos into professional-grade visuals. It effortlessly erases noise, sharpens blurry details, and upscales images to 32K resolution—all with one click. Designed for photographers, designers, and content creators, its AI models intelligently enhance textures, restore authenticity, and batch-process thousands of images in minutes. No technical skills or expensive gear required. Affordable and intuitive, Aiarty outshines competitors by delivering studio-quality results faster, smarter, and without the premium price tag.
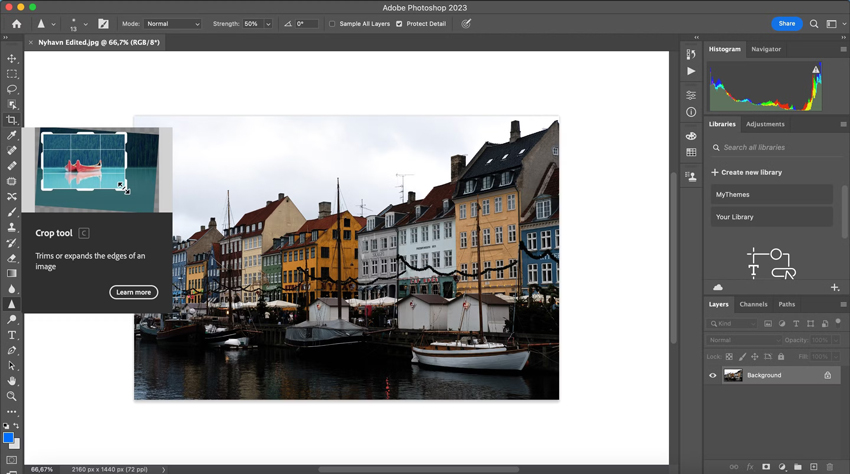
7. Use the Crop Tool Effectively
The crop tool is one of the simplest but most effective tools for improving composition. It allows you to remove distractions from the edges of the photo and can also help adjust the image's framing. A common technique is to apply the rule of thirds, which divides the image into a 3x3 grid and places the focal points along the grid lines or at their intersections. This creates a more visually pleasing composition. Cropping can also help straighten a tilted horizon, remove unnecessary elements, or refocus the viewer's attention on the subject.
8. Apply Subtle Filters or Presets
Filters and presets can instantly give your photo a polished, professional look, but use them sparingly. Filters can enhance the overall mood by applying uniform adjustments across the image, such as boosting contrast or adding a vintage effect. However, avoid heavy, overdone filters that can make your photo look cliché. Presets offer a more nuanced approach, often targeting specific edits like color grading or lighting adjustments. They are great for maintaining consistency across multiple images or achieving a specific look in a short amount of time.
9. Retouch Blemishes
For portraits or detailed shots, retouching can make a huge difference. Use the spot healing tool or clone stamp to remove small imperfections like blemishes, dust spots, or distracting elements (such as stray hairs or background distractions). Be mindful to maintain the natural texture of the skin and avoid over-smoothing, which can lead to an unnatural, airbrushed look. Retouching helps the subject of your photo stand out more and ensures the image looks clean and professional.
10. Enhance the Background
The background of a photo plays a crucial role in emphasizing the subject. If the background is too busy or distracting, it can take away from the focal point of the image. One way to simplify it is by using selective focus, which can blur the background (bokeh effect) and keep attention on the subject. Alternatively, you can use a vignette to darken the edges of the photo, subtly guiding the viewer's eye toward the center. If the background competes with the subject in terms of color or brightness, consider desaturating or dimming it to ensure the main subject pops.
11. Final Check & Save
Before finalizing your photo edit, take a step back and evaluate the image as a whole. Is the composition balanced? Do the colors, lighting, and details look natural and cohesive? Ensure all the adjustments feel subtle yet impactful, without over-editing. Once satisfied, save your edited photo in the highest quality possible, but also keep a copy of the original file in case you need to make further adjustments. Saving multiple versions of your edit (like a JPEG for sharing and a RAW for future editing) will give you flexibility down the road.
Part 2. Conclusion
Editing your photos like a pro doesn't require advanced skills or expensive equipment—just the right approach and tools. By mastering basic adjustments, refining colors and details, and using powerful editing software, you can elevate your images to a professional standard. Whether you're enhancing your social media presence, creating content for a website, or preparing photos for print, these tips will help you achieve stunning results.
For those aiming to elevate their photo editing, Aiarty Image Enhancer is the ultimate tool to unlock professional-grade results with the power of AI. Using advanced algorithms, Aiarty seamlessly enhances image quality, sharpens intricate details, and enhances color accuracy, giving your photos a polished, high-quality finish. Whether you're working with images that need significant improvement or simply want to add that perfect finishing touch, Aiarty delivers exceptional results with just a few clicks.
Brenda Peng is a seasoned editor at Digiarty Software who loves turning ordinary photos into extraordinary works of art. With years of experience behind the lens and in front of the computer, Brenda shares her passion for photography, image enhancement, and editing through easy-to-follow tutorials.