Ultimate Guide to Full Body Photography (How-to, Posing Tips and Ideas)
Updated on
Full body photography is an art form that goes beyond simply capturing a person from head to toe. It's about creating a well-balanced image that highlights your subject's features, personality, and style, while telling a compelling story. Whether you're working on fashion shoots, portraits, or personal projects, understanding the key elements of full-body photography is essential for achieving stunning results. In this guide, we'll break down the essentials of shooting captivating full-body photos, including the best techniques for posing, framing, and lighting. We'll also share expert tips for creating flattering compositions and explore creative posing ideas to make your shots stand out. Mastering these techniques will enable you to capture full-body portraits that not only showcase your subject's unique qualities but also leave a lasting impact, ensuring each image resonates with your audience!
Part 1: What Is Full Body Photography
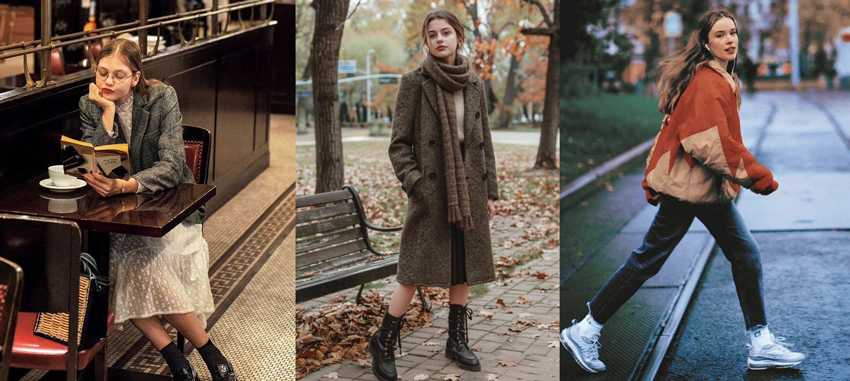
Full body photography is the art of capturing a subject from head to toe in a single frame, offering a comprehensive view that highlights their entire physique, posture, and style within the context of their environment. Unlike portrait photography, which focuses primarily on facial expressions and upper body details, full-body shots aim to portray the subject's full presence, creating a sense of balance and space in the image. This type of photography is especially popular in fashion, lifestyle, and portrait work, where showcasing the subject's clothing, body language, and surrounding context is just as important as their physical features.
Achieving a great full-body photograph involves careful attention to composition, lighting, angles, and posing—each element playing a critical role in framing the subject in the most flattering and dynamic way possible. When executed well, full body photography not only highlights the subject's appearance but also tells a compelling visual story, making it an essential technique for capturing both personality and style.
Part 2: How to Shoot Good Full Body Photography
Shooting compelling full-body photography requires a combination of technical knowledge and artistic flair. To help you elevate your shots, here are 10 key tips to create well-composed, flattering full-body images that showcase your subject in the best light.
1. Select the Right Lens
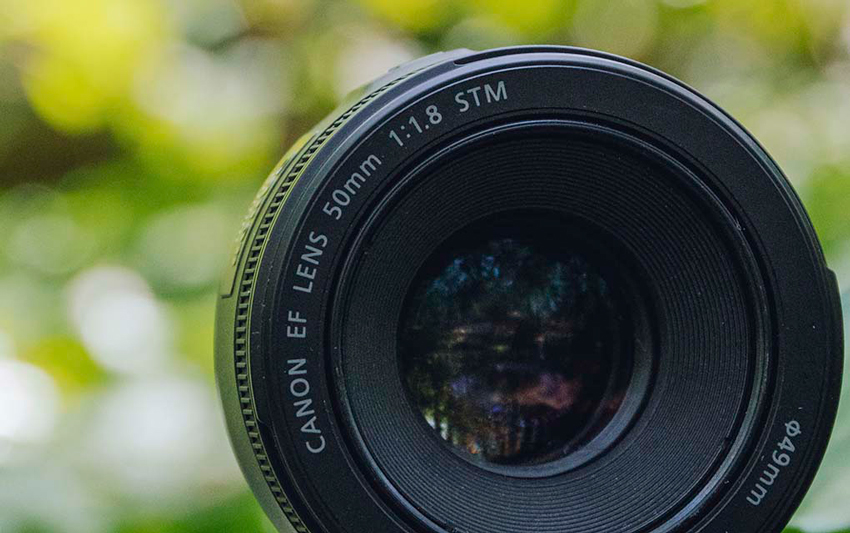
Choosing the correct lens is crucial to capturing flattering full-body shots. A lens with a focal length between 35mm and 85mm is typically ideal for full-body photography. Lenses within this range provide a natural, distortion-free perspective, ensuring the subject's proportions appear balanced and realistic. Wide-angle lenses (below 35mm) can distort the subject, especially around the edges, making features like limbs or facial features appear unnaturally large or stretched. On the other hand, longer lenses (above 85mm) can create a compressed effect, which may cause some elements to appear too close together, making the subject's body look shorter or less proportionate.
Choosing the right focal length allows you to maintain a comfortable distance from the subject while still achieving a flattering perspective. It also gives you the flexibility to experiment with different angles without sacrificing image quality. For example, a 50mm lens is often praised for its versatility and natural look, making it a popular choice for full-body portraits.
2. Position the Subject with Care
The way you position your subject can make a significant impact on the final image. Rather than shooting straight on, try having your subject slightly turn their body to the side. A subtle shift of the torso—typically around 30 to 45 degrees—can create a much more dynamic and visually engaging composition. This simple adjustment introduces depth to the shot, helping to avoid the flatness that often occurs when the subject is directly facing the camera.
Turning the body also allows you to highlight the natural lines and curves of the figure, which can be especially flattering. For example, having the subject position one shoulder closer to the camera will add dimension and give the shot a more relaxed, organic feel. Additionally, the slight rotation can also help avoid awkwardly stiff poses and make the subject appear more comfortable and confident.
Another key aspect of positioning is the placement of the feet. If the body is turned, it's essential to ensure the feet follow suit to maintain natural body alignment. In many cases, having the subject's weight shifted onto one leg, with the other leg slightly forward or bent, can help create a more flattering silhouette and prevent the image from feeling rigid.
By carefully adjusting the angle of the subject's body, you can instantly transform a standard full-body shot into one with more movement, flow, and visual intrigue.
3. Use Soft, Even Lighting
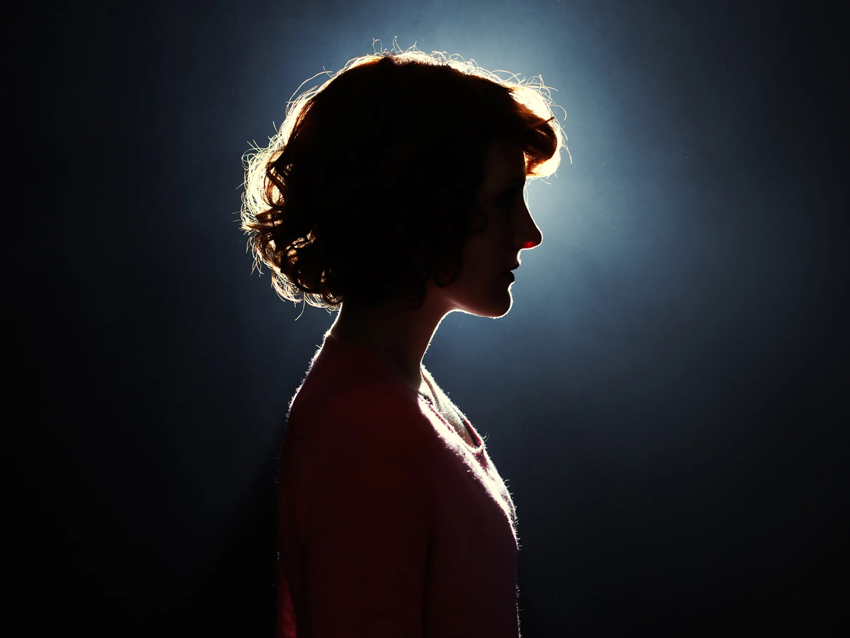
Lighting plays a critical role in full-body photography, as it can either enhance or distort the subject's features. Soft, even lighting is ideal because it minimizes harsh shadows and highlights, creating a balanced, flattering look. Natural light is often the best choice, especially during the golden hour when the light is soft and diffused. If you're indoors, use softboxes or umbrellas to achieve similar results. Avoid harsh, direct lighting, as it can create unflattering shadows. Pay attention to the direction of light—lighting from above highlights the face and body, while side lighting can add depth and dimension. By ensuring your subject is evenly lit from head to toe, you'll capture a well-balanced, professional full-body shot.
4. Mind the Background
The background plays a crucial role in full-body photography, as it can either enhance or detract from your subject. A cluttered or busy background can pull attention away from the main focus, leaving the viewer distracted. To ensure the subject remains the focal point, opt for a simple, unobtrusive backdrop that complements the subject's appearance. Neutral tones, soft textures, or plain walls often work well, as they provide visual balance without overwhelming the subject. If you're shooting outdoors, be mindful of your surroundings—avoid backgrounds with too many distracting elements, such as bright signs or crowded areas. A clean, cohesive backdrop helps to highlight the subject's features and attire, ensuring they stand out in the shot. If needed, you can also use techniques like shallow depth of field to blur the background, further emphasizing the subject while maintaining an aesthetically pleasing environment.
5. Frame Your Shot Thoughtfully
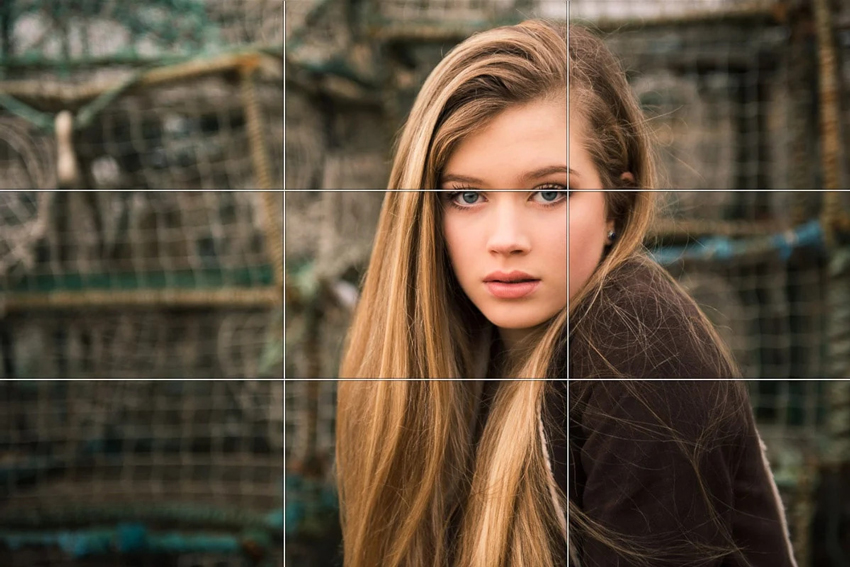
The way you frame your shot can dramatically impact the overall composition and effectiveness of a full-body photograph. It's important to give your subject enough space in the frame to avoid a cramped or cluttered image. Leave some breathing room around the subject, especially above the head and below the feet, to create a balanced and natural look. Cutting off limbs at awkward points, such as at the wrists or ankles, can make the composition feel incomplete or accidental. Proper framing also helps to avoid distortion, especially when using wider lenses. Take a step back and assess the shot from different perspectives—sometimes adjusting your position by just a few inches can make a huge difference in the final image. Additionally, consider the rule of thirds to place the subject off-center for a more dynamic composition. A well-framed shot not only highlights the subject but also contributes to a clean, polished image that draws attention where it matters most.
6. Guide Your Subject's Posing
Posing plays a key role in bringing life and dimension to a full-body shot. Instead of having your subject stand stiffly, encourage them to shift their weight to one leg, which helps create natural curves and adds depth to the image. Subtly bending the arms or hands can also make the pose look more relaxed and less forced. Straight limbs often appear stiff, while soft bends give the body a more natural and fluid feel.
Encourage slight adjustments, like tilting the head or shifting the shoulders, to break away from rigid poses. A slight turn or tilt can make the body look more dynamic and visually interesting. Also, directing your subject to change their gaze—looking to the side or down—can add a sense of movement and emotion to the shot.
These small but effective adjustments can elevate the quality of your full-body portrait. Check below for additional posing tips to make your subject feel comfortable and ensure you capture their best angles.
7. Shoot from Above
Shooting from an elevated angle, just above your subject's eye level, can have a significant impact on the overall composition of a full-body shot. This perspective naturally elongates the body, creating a more flattering and proportionate appearance. When you position the camera slightly above the subject, it helps emphasize the curves of the body and can enhance the length of the legs, making them appear longer and more elegant.
Additionally, this angle helps to avoid distortion, which is common when shooting from below or at eye level. Shooting from above also creates a sense of space in the frame, giving the image a more open, airy feel. It can reduce the prominence of elements like the feet or hands, allowing the subject's body and face to take center stage.
This approach is especially effective in full-body photography, as it allows you to capture the subject's silhouette in a way that flatters their shape and adds depth to the composition. Experimenting with slight variations in height can lead to discovering the most flattering angle for each subject, ensuring the shot feels dynamic and visually appealing.
8. Experiment with Depth of Field
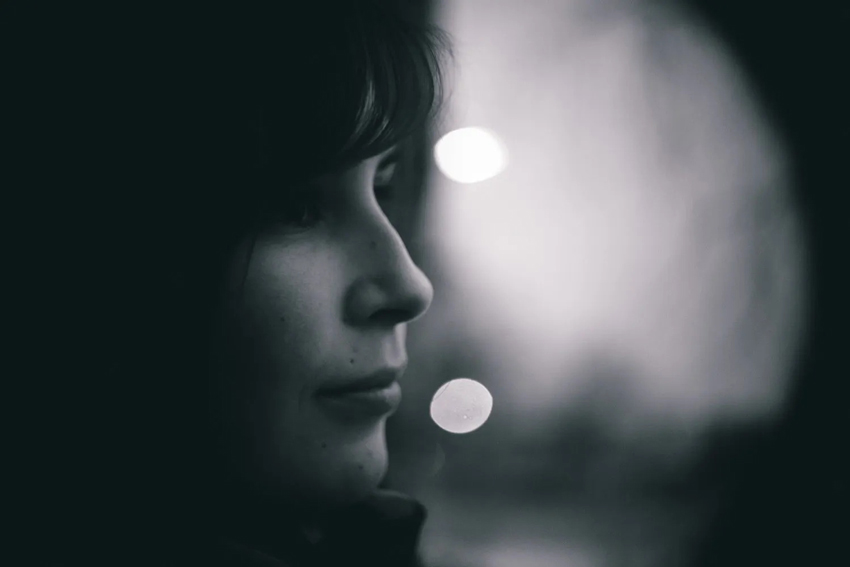
Using depth of field can significantly enhance your full-body shots. A shallow depth of field blurs the background while keeping the subject sharp, helping to isolate them and eliminate distractions. This technique draws the viewer's attention to the subject, creating a clear focal point.
When the background is softened, the subject stands out more, and the overall composition feels more polished. This is especially useful in busy settings where a cluttered background could otherwise take attention away from your subject.
Shallow depth of field also adds dimension to the shot, making the image feel more three-dimensional. By adjusting the lens and aperture, you can control how much of the background remains in focus, allowing you to focus attention where it's needed most.
9. Pay Attention to Foot Placement
Foot placement plays a crucial role in shaping the overall pose and creating a flattering full-body shot. Flat-footed stances can make the subject look stiff, while shifting weight to one leg adds dimension and creates a more relaxed, natural posture. The non-weight-bearing foot can point slightly away from the camera to elongate the legs and enhance the body's natural curves. Avoid having both feet in a stiff, parallel position, as this can make the pose look rigid. Thoughtful foot placement helps create a more fluid and engaging composition, ensuring the subject looks dynamic and well-balanced.
10. Incorporate Subtle Movement
Adding subtle movement to your full-body shots can bring a dynamic, lively element to the image. Even small shifts, like a slight turn of the head or a gentle adjustment of the shoulders, can create a sense of motion, making the subject appear more engaged and natural. This type of movement prevents the shot from feeling stiff or posed.
You can also introduce movement through the subject's clothing. The flow of fabric, such as a swaying dress or a loosely held jacket, can enhance the overall feeling of the shot, making it feel more spontaneous and alive.
Encourage your subject to experiment with slight movements—like shifting their weight or adjusting their stance—rather than standing completely still. These small, organic gestures can give the shot a sense of realism, adding depth and personality to the image without compromising the elegance of a full-body portrait.

By mastering the technical aspects of full-body photography, you're well on your way to capturing stunning images.
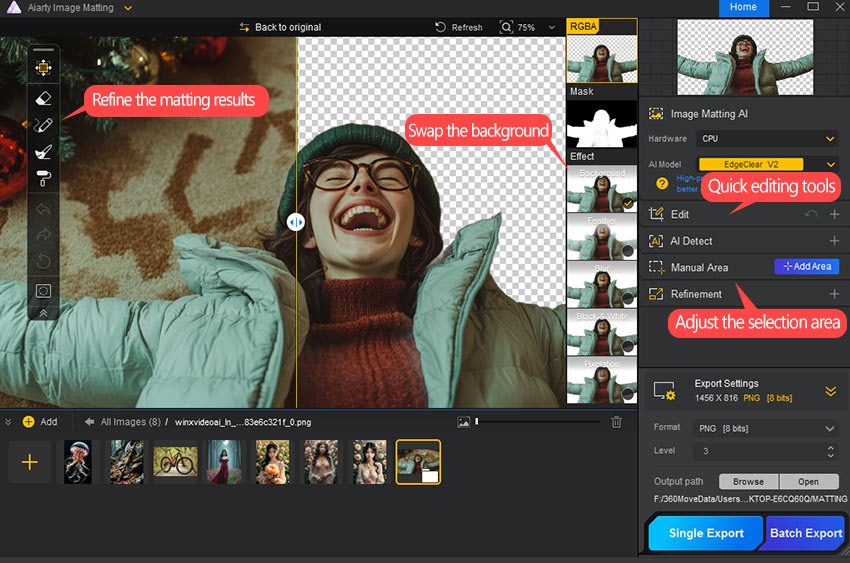
- Accurate subject separation with transparent details and fine edges in a click
- Produce smooth, gradient-based alpha edges for natural background blending
- Obtain the original quality. Upscale/enhance images to maximize quality with AI
- Provide an AI-powered brush for quick, easy, and flexible manual adjustments
- Bulk processing. Run entirely locally to ensure user data privacy and security
Part 3: 8 Best Posing Tips for Full Body Shot
Now that you have a solid understanding of the basics, let's dive into some essential posing tips that will help you create more dynamic, flattering, and memorable full-body shots:
1. Shift Weight to One Leg
To create a more natural, relaxed look, have your subject shift their weight to one leg. This slight change in posture can help elongate the body and emphasize curves, while avoiding the stiffness of standing with equal weight on both legs. The non-weight-bearing leg can be subtly angled outward for added visual interest.
2. Use Angles to Add Dimension
Avoid having the subject face the camera directly. A slight angle—about 30 to 45 degrees—creates more depth in the image, making it feel less flat. Turn the body to the side, but keep the head facing forward, or vice versa, for a more dynamic pose. This also helps accentuate the subject's natural shape.
3. Keep the Body Relaxed
Stiff poses can make your subject look unnatural. Encourage them to keep their posture relaxed by gently bending their arms or legs. A soft, natural stance will create a sense of ease and prevent the pose from appearing rigid. For example, let the arms fall naturally at the sides or have them rest one hand on the hip.
4. Enhance the Neck and Chin
A slight elongation of the neck helps create a more flattering, elegant posture. Ask your subject to gently push their chin forward, which will define the jawline and give the face a more defined look. This small adjustment can make a big difference in the final shot.
5. Introduce Curves to the Body
Curved lines in the body tend to look more flattering than straight ones. Encourage your subject to shift their weight or gently bend the knee to create an S-curve from head to toe. This adds shape and dimension to the shot, making the body appear more fluid and graceful.
6. Position the Hands Thoughtfully
The placement of hands can make or break a pose. Avoid having them hang limply by the sides. Instead, suggest placing one hand on the hip, tucking it into the pocket, or gently resting it at the side. A natural hand position can help convey confidence and ease while complementing the body's shape.
7. Incorporate the Environment
Using the environment to guide your subject's pose can add depth and interest to the image. Have them lean against a wall, sit on a chair, or use any available props to enhance the composition. This not only makes the pose look more casual but also adds layers of context to the shot.
8. Relax the Expression
A tense facial expression can distract from the rest of the pose. Encourage your subject to relax their face, with either a soft smile or a neutral expression. The goal is to ensure their facial expression complements the body language and doesn't feel forced or overly stiff.
Part 4: 10 Posing Ideas for Full Body Photography
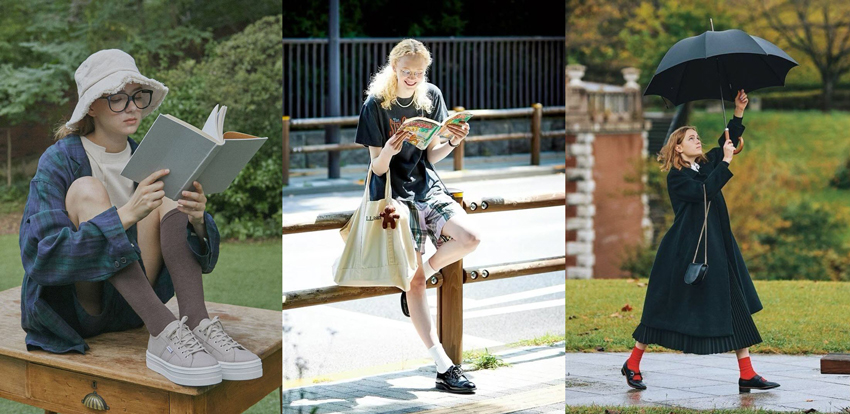
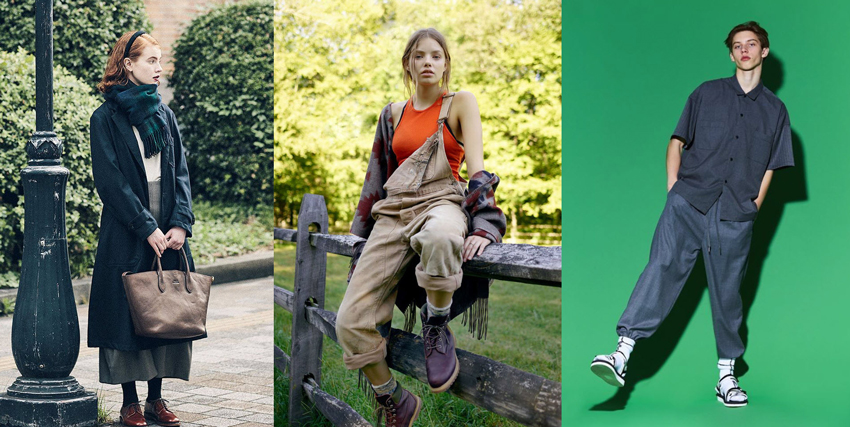
- The Crossed Legs Pose: Have your subject cross one leg over the other while standing.
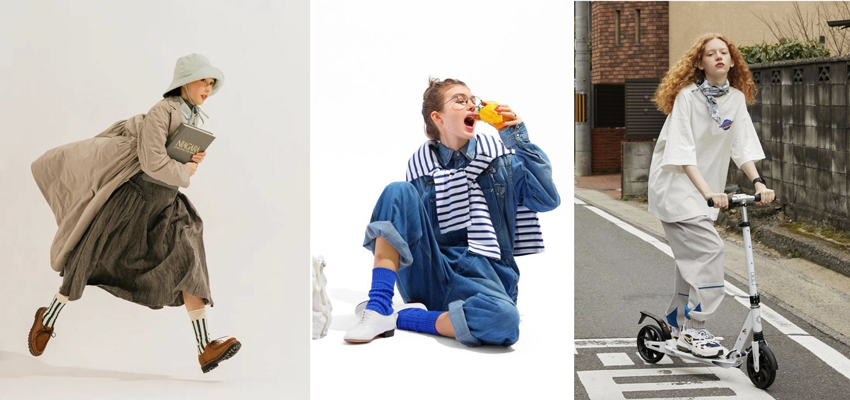
- Walking Shot: Capture your subject mid-step as they walk toward or away from the camera for a dynamic, natural feel.
- Leaning Against a Wall: Have your subject lean casually against a wall with weight on one leg for a relaxed, effortless vibe.
- Sitting Pose: Position your subject sitting on the ground or a ledge, either with crossed legs or one knee up for a laid-back look.
- Twisted Pose: Ask your subject to twist their torso slightly while keeping their feet in place, creating an elegant S-curve in the body.
- Hand-in-Pocket: A simple pose where one hand rests in the pocket and the other falls naturally at the side, giving a casual, confident look.
- Candid Laugh: Capture a moment of genuine laughter or a soft smile to bring warmth and authenticity to the shot.
- Hand in Hair: A playful and dynamic pose where the subject runs their fingers through their hair or touches the back of their neck. This adds movement and a touch of casual elegance.
- Looking Over the Shoulder: Have your subject look over their shoulder while keeping their body facing forward. This creates a flattering angle and adds drama.
- Looking Away from the Camera: Encourage your subject to look off-camera to create a more candid and introspective shot. This subtle change adds a sense of mystery or contemplation.
 FAQs
FAQs
A full-body photo is commonly referred to as a "full-body portrait" or "full-length photo." This type of photograph captures the subject from head to toe, often used to showcase the subject's entire outfit, posture, and body language in a balanced and proportionate composition.
A 3/4 body shot refers to a photograph that captures a subject from the head down to about mid-thigh or just above the knees. In this shot, the subject's full upper body (head, shoulders, torso) is visible, but it doesn't include the full legs or feet, which would be typical in a full-body shot.
This type of shot is often used in portraiture, fashion, and editorial photography because it allows the photographer to focus on the subject's upper body and facial expression while still providing some context and visual interest through the lower part of the frame. It strikes a balance between a close-up portrait and a full-body shot, offering a flattering composition that highlights both the face and the posture or outfit.
Taking a good full-body photo involves a combination of proper technique, lighting, and posing to capture the subject in a flattering way. Here's a step-by-step guide to help you take a great full-body shot:
- Choose the Right Angle:
- Position the subject slightly angled (30-45 degrees) for depth and dimension.
- Keep the camera at eye level or slightly above to avoid distortion.
- Mind the Background:
- Use simple, uncluttered backgrounds to keep the focus on the subject.
- Ensure there's some space between the subject and background for depth.
- Use Good Lighting:
- Opt for natural light, especially during the golden hour.
- Avoid harsh shadows by shooting in the shade or using diffusers.
- If indoors, use softbox or ring light for even lighting.
- Focus on Posing:
- Have the subject shift weight to one leg for a relaxed pose.
- Ask them to elongate the neck and avoid stiff arms.
- Encourage natural hand placements (e.g., pockets, hips).
- Composition Tips.
- Frame the subject fully, leaving space above their head and avoiding awkward cuts.
- Use the rule of thirds for a balanced, dynamic shot.
- Lens Choice:
- Use a 35mm-50mm lens for natural proportions.
- Avoid wide lenses that can distort body shapes at the edges.
- Check the Outfit:
- Choose solid colors or subtle patterns for a clean look.
- Ensure the outfit fits well and complements the subject's body shape.
- Take Multiple Shots:
- Experiment with different poses and angles to capture the best shot.
- Vary facial expressions to add personality and interest.
- Post-Processing:
- Adjust brightness, contrast, and saturation for a polished look.
- Keep editing natural; avoid excessive retouching.

