How to Remove White Background from Image in Procreate
Updated on
Removing the white background from an image using Procreate can greatly enhance your digital art projects. If you need to make a background transparent, Procreate offers several effective tools to help you achieve a clean, professional look. Whether you're working with photos or illustrations, this guide will walk you through easy and advanced methods to get the best results.
You will learn to use Procreate's powerful tools like the Automatic and Freehand selection options. By mastering these techniques, you can isolate your main subject and clear out any unwanted white space around it. This process is straightforward and doesn't require any prior experience with complex editing software.
Once you've removed the background, you can export your work in formats that preserve transparency. This is perfect for creating digital stickers, logos, or any project that demands a clear, distraction-free subject.
Key Takeaways
- Use Automatic or Freehand Selection to remove white background from image in Procreate. Export your finished work in formats that keep the background transparent.
- For complex objects requiring lots of manual adjustments, try Aiarty Image Matting to remove background from image with AI.


Automatic Selection
The Automatic Selection tool in Procreate can help automatically isolate and remove backgrounds in Precreate. You may need to make manual adjustments sometimes, but it's a good place to start.
Step 1. Open the image you want to remove background in Procreate.
Step 2. Tap on the Selection tool in the top-left menu. From the main menu, select Automatic.
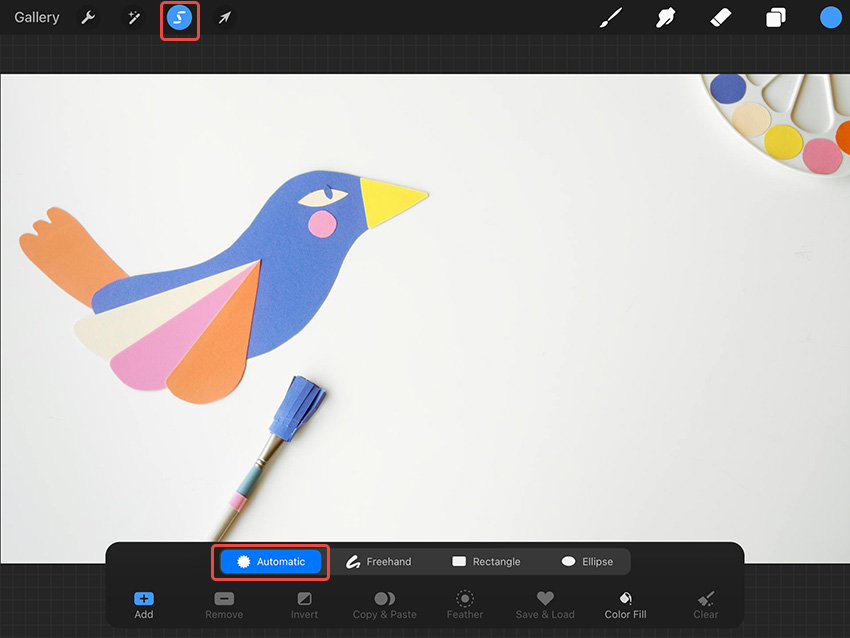
Step 3. Tap on the part of the background you want to remove. If the selection isn't precise, drag your finger around the object to refine it.
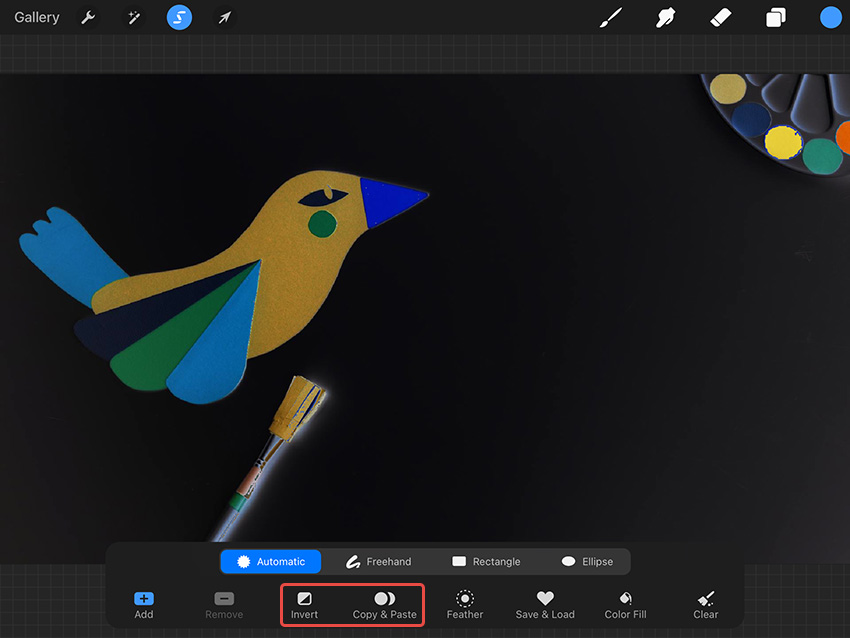
Step 4. After making the selection, tap Invert. Then, choose Copy & Paste. This will create a new layer with your cutout.
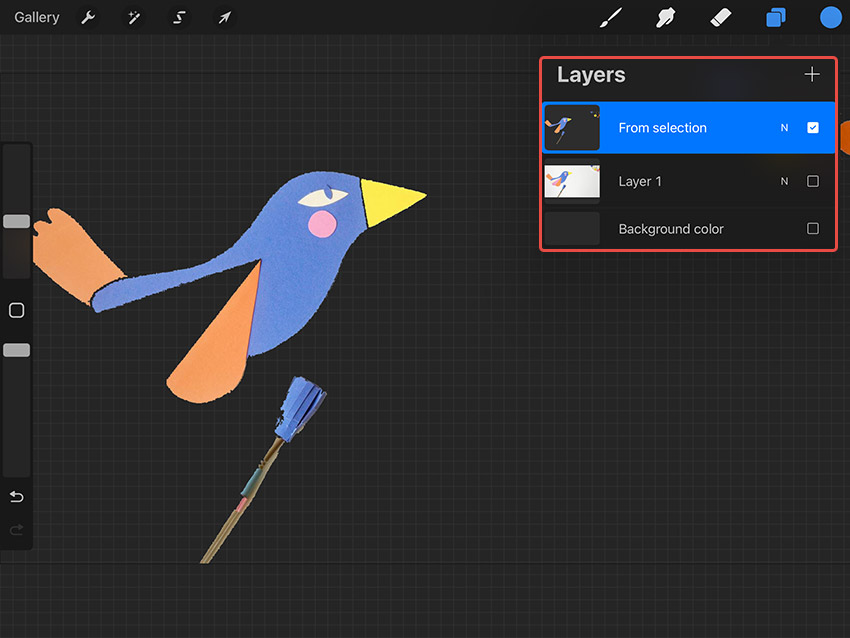
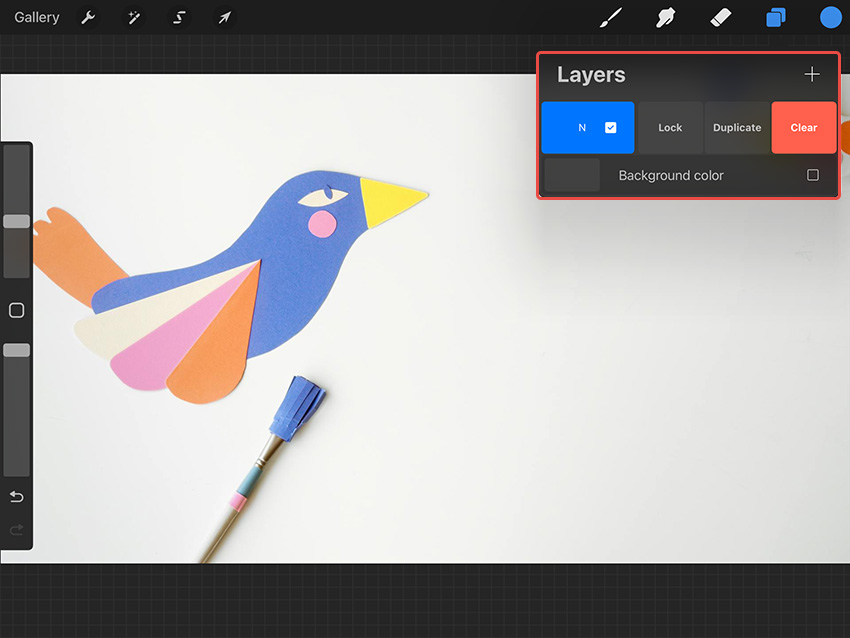
Step 5. Tap on the Layers icon in the top-right menu to manage layers. Deselect the original image and background layers by tapping on the checkboxes, or delete them by swiping left and selecting Clear.
Step 6. Save your image in PNG format for the best results.
Freehand Selection
As said before, the Automatic Selection tool may not always be accurate. This is especially true with complex objects. In these cases, you need to use the Freehand Selection tool to manually trace around the background you want to remove from the image.
Step 1. Toggle off the background color layer.
Step 2. Make a duplicate of the image, then toggle off the second layer.
Step 3. Tap Selection, then make sure Freehand and Add are selected.
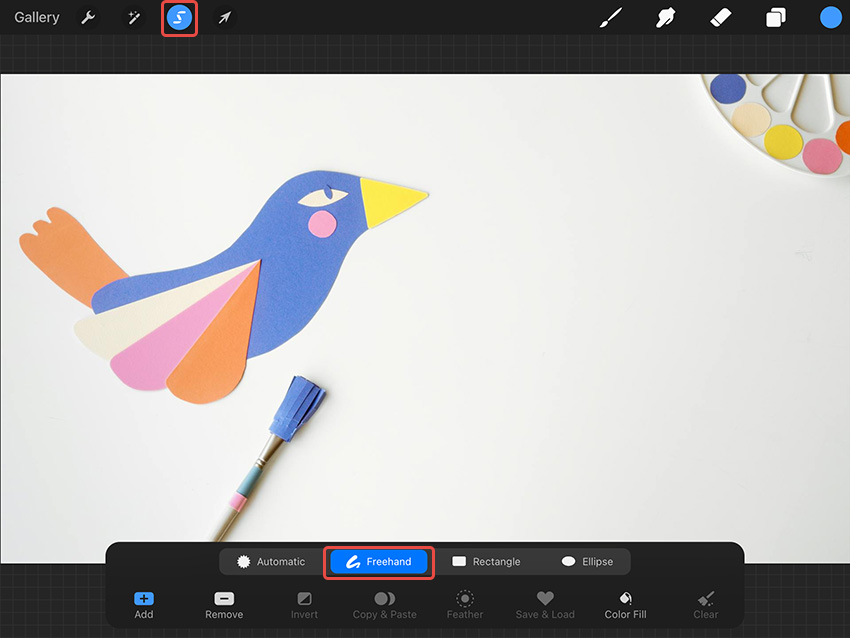
Step 4. Zoom in and outline the part of the image you want to keep.
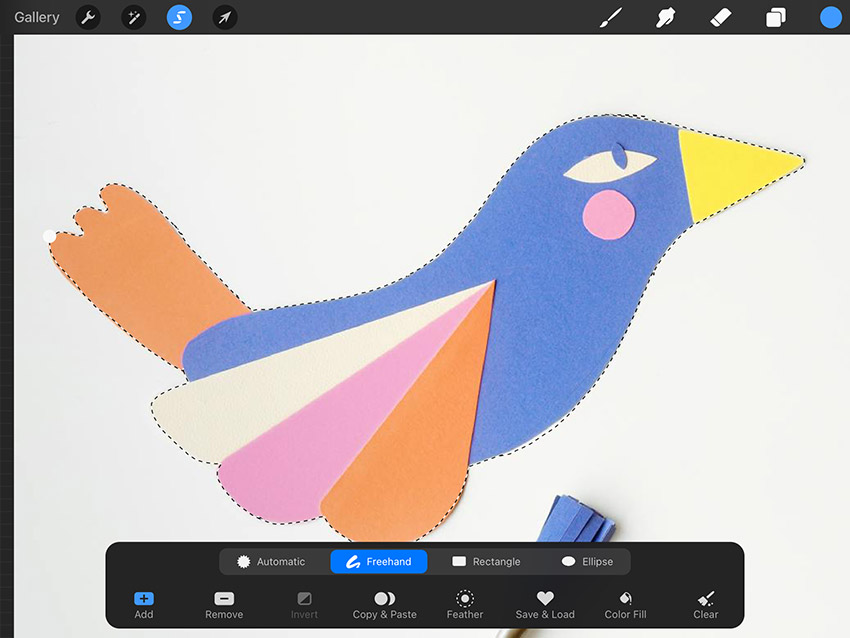
Step 5. Select the image in the Layers menu, then choose Mask.
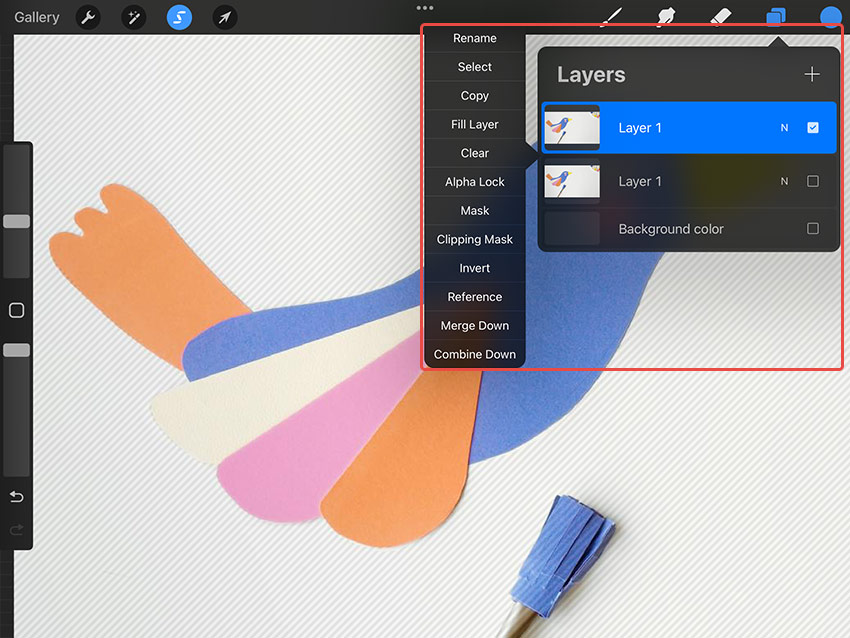
Step 6. Pinch the mask layer and the image layer together.
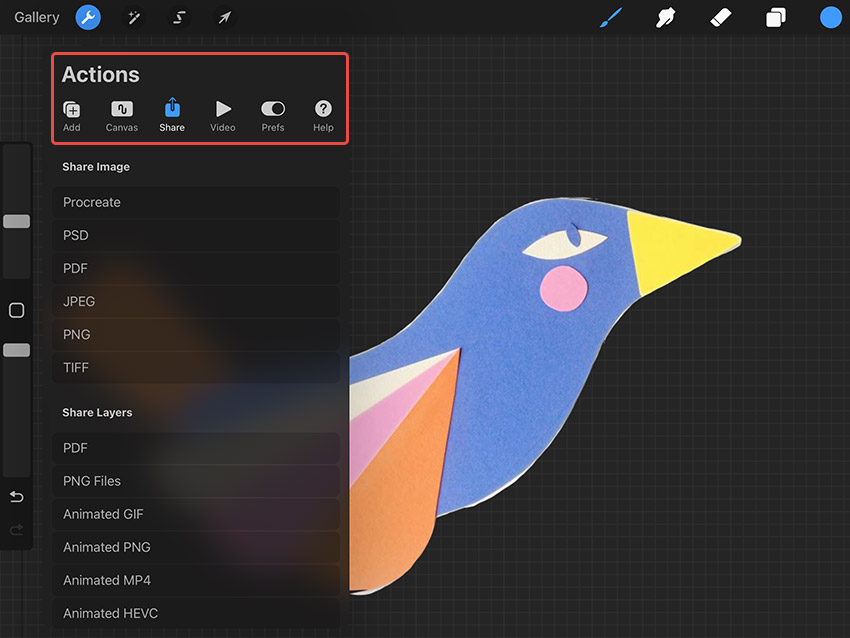
Step 7. Click Actions > share > PNG.
AI Background Remover
Procreate is a great app for sketching, painting, and flat illustration. However, it may struggle with complex illustrations, especially when you have to remove the background from the image in Procreate using Freehand Selection.
That's where Aiarty Image Matting comes into play. This AI background remover features four specialized AI models for different types of images. Whether you are working with an illustration, a photo, or an AI-generated image, it can ensure the most delicate features and remove white background from the image with precision. It's a 1-minute job.
After downloading and installing Aiarty Image Matting, you can follow the steps below to remove background from image with AI. Here's how.
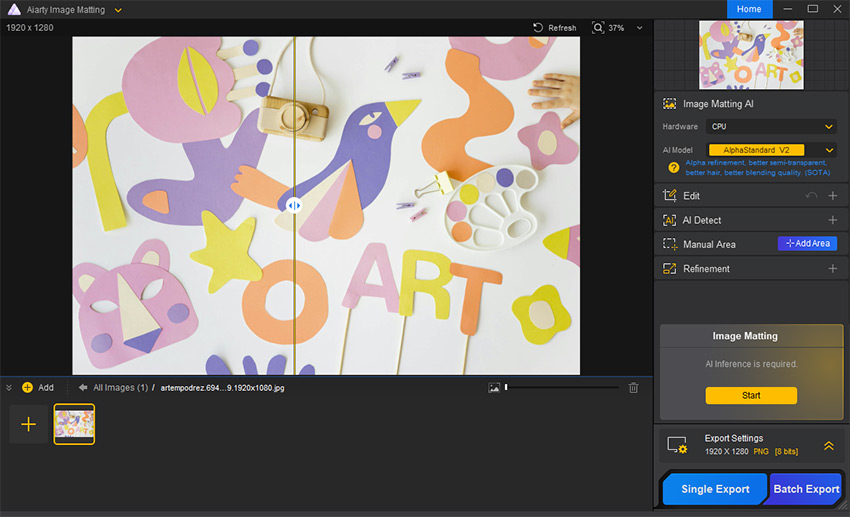
Step 1. Import your images into the program and click Start on the right for AI inference.
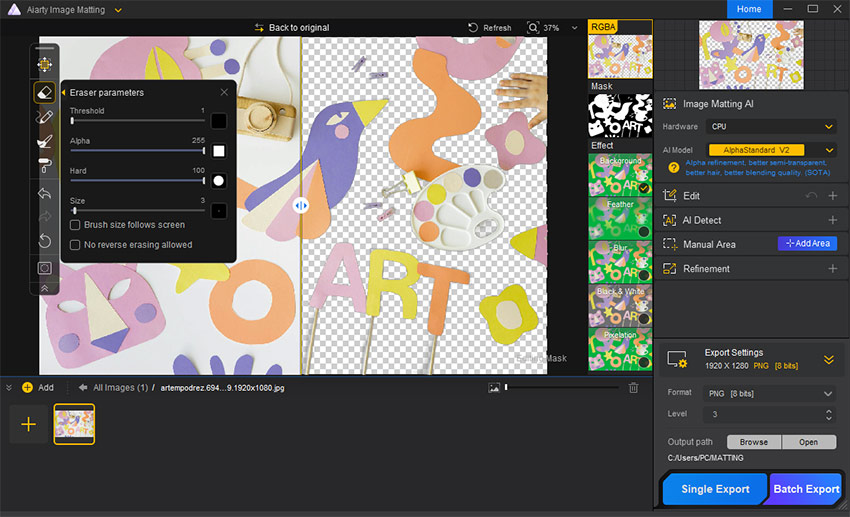
Step 2. Use the eraser tool to edit the parts incompletely removed, and use the brush tool to restore where mistakenly removed by AI.
Note:
Drawing Tools provides some parameters that allow you to fine-tune the effect of the background removal.
- Size defines the brush size.
- Threshold defines the editable area, highlighted in blue during adjustments.
- Alpha refers to the transparency level. The larger the Alpha value, the more opaque it is.
- Hard controls the feathering level. The larger the Hard value, the harder the feathering of the brush edge is closer to the center.
Step 3. Export the image with the white background removed.
Conclusion
That's all about how to remove white background from image in Procreate. It's a straightforward process that can greatly enhance your artwork. But with complex objects that require lots of manual adjustments, try Aiarty Image Enhancer.
