How to Fix a Blurry Picture on iPhone
Updated on
Few things are as frustrating as capturing a precious moment on your iPhone, only to later realize the photo is hopelessly blurry. You're certainly not alone—over 60% of smartphone users admit to losing 'perfect shots' due to motion blur, shaky hands, or focus issues. The good news? That unforgettable memory isn't gone forever. With a blend of iPhone's powerful editing tools, third-party apps, and AI technology, you can revive even the most blurred images. In this guide, we'll show you the simplest, most effective methods to fix a blurry picture on your iPhone. Plus, we'll share expert tips to help you avoid blurry shots in the future, so you can capture your memories with crystal-clear detail every time.
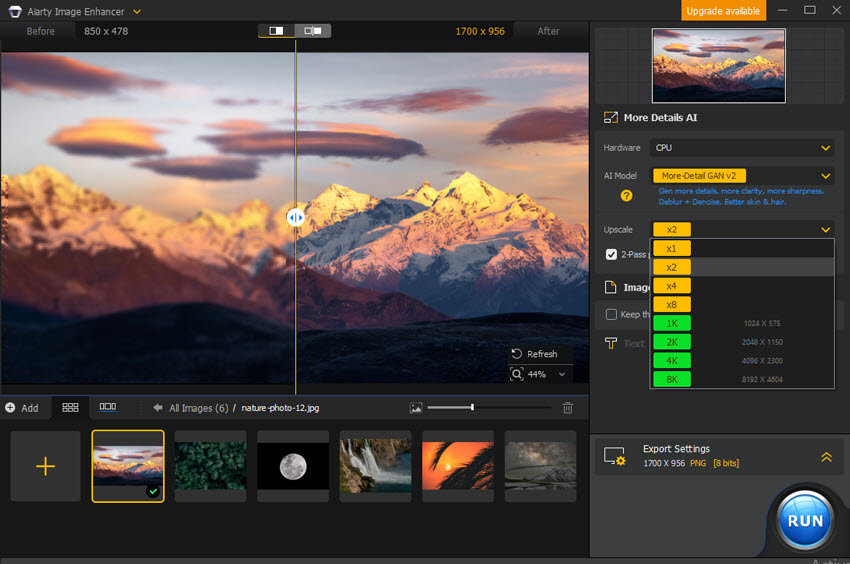
Aiarty Image Enhancer – Best AI-Driven Solution to Fix Blurry iPhone Pictures
- Enhance blurry, grainy, pixelated, or soft images intelligently with AI generating lifelike details.
- Correct motion blur, out-of-focus shots, and compression artifacts with extreme details recovered.
- Offers multiple AI models tailored for different image types, including specialized models for face restoration, photo sharpening, and detail enhancement.
- Elevates images to stunning resolutions up to 32K, perfect for large-format displays and professional-quality prints.
Part 1. Why Your iPhone Photos Are Blurry
There are several reasons why your iPhone photos may turn out blurry, and understanding them can help you improve your photography skills. Here's a deeper dive into the most common causes:
1. Camera Shake
One of the most common reasons for blurry photos is camera shake. When you take a photo, any small movement of your hand can cause the camera to shift slightly, resulting in a blurred image. This is especially noticeable in low-light settings or when using slower shutter speeds, where the camera needs more time to capture light. Even a slight tremor can make the image appear out of focus.
2. Focus Issues
Your iPhone's camera relies on autofocus to capture sharp, clear images. If the focus isn't properly locked onto your subject, the image can turn out blurry. This often happens when you're photographing something too close (like a macro shot) or if there's not enough contrast between the subject and background. Additionally, if the camera is distracted by background elements, it might focus on the wrong area.
3. Motion Blur
Motion blur occurs when either you or your subject moves while the photo is being taken. It's most noticeable when photographing moving objects, such as people walking, cars driving, or animals running. The longer the camera's shutter stays open, the greater the chance of motion blur. This is particularly a problem in low-light situations where the camera needs a slower shutter speed to capture enough light.
4. Low Light and Slow Shutter Speeds
In dim environments, the iPhone camera compensates by using a slower shutter speed to gather more light. While this can help you get a properly exposed photo, it also increases the risk of motion blur. A slow shutter speed means the camera's sensor is exposed for a longer time, and any slight movement will cause blurring.
5. Lens Smudges or Dirt
Sometimes the simplest explanation for blurry photos is a dirty lens. Fingerprints, dust, or smudges on the camera lens can distort the image and create a soft, blurry effect.
Part 2. How to Fix a Blurry Picture on iPhone via Photos App
To unblur an image on iPhone using the default Photos app, here's how you can do it:
- Use the Editing Tools: Open the photo you want to fix in the Photos app > Tap Edit at the bottom of the screen, and you'll see several options for adjustments. The main tools for fixing blur are Exposure, Brilliance, and Sharpness. Adjusting the Exposure can brighten a dark photo to reveal more detail, while Brilliance enhances contrast and sharpness, making the details more vivid, and increasing the Sharpness slider can improve clarity, though excessive sharpening may result in a grainy effect. > Once you've made adjustments, tap Done to save the changes.
- Use Filters to Enhance the Image: Open the blurry photo in the Photos app > Tap the Filters button (three overlapping circles) at the bottom of the screen > Experiment with different filters like Vivid or Dramatic to see if they help improve the image's clarity > Once satisfied, tap Done to save the changes.
Part 3. How to Fix a Blurry Picture on iPhone via Third-Party Apps
1. Adobe Lightroom
Adobe Lightroom is an excellent tool for unblurring pictures on your iPhone, offering advanced editing features like sharpness adjustment, noise reduction, and clarity enhancement. The app allows you to fine-tune your images with precision, correcting focus issues and improving detail, even in photos that were initially blurry. With its intuitive interface and powerful AI-driven tools, Lightroom helps you achieve clearer, more professional-looking results, making it a top choice for iPhone users looking to rescue blurry shots.
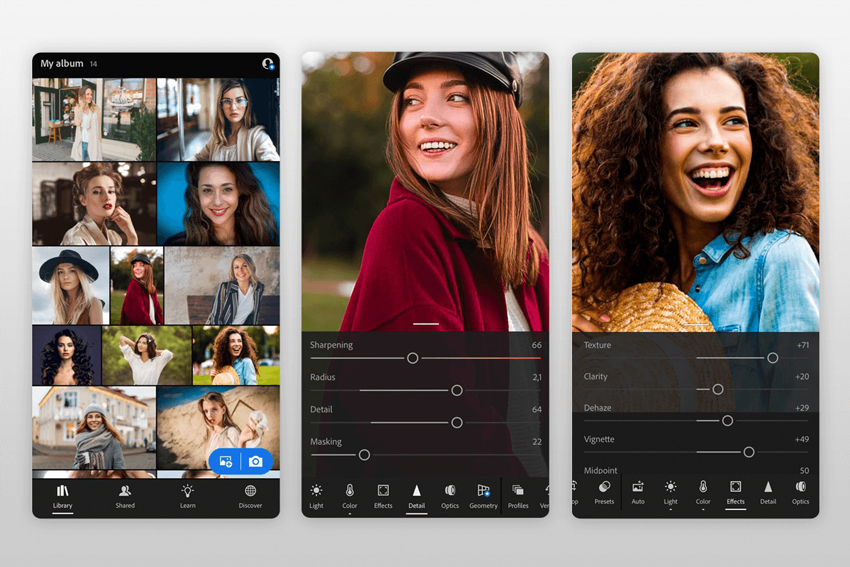
Step 1. Open Lightroom and import the blurry photos. Slide the editing toolbar to the right and select the Detail tab.
Step 2. Adjust the Sharpening, Radius, Detail, and Masking sliders to enhance the sharpness of your image. Increase the Sharpening for finer detail, tweak the Radius for edge definition, and use Detail to bring out textures. The Masking slider helps refine which areas get sharpened.
Step 3. If needed, make additional adjustments using other tools in the app to fine-tune the overall image. Once you are satisfied with the result, click on the Export icon to export your unblurred picture to your iPhone.
2. Snapseed
Snapseed is a powerful photo editing app by Google that offers a range of tools to help fix blurry images on your iPhone.
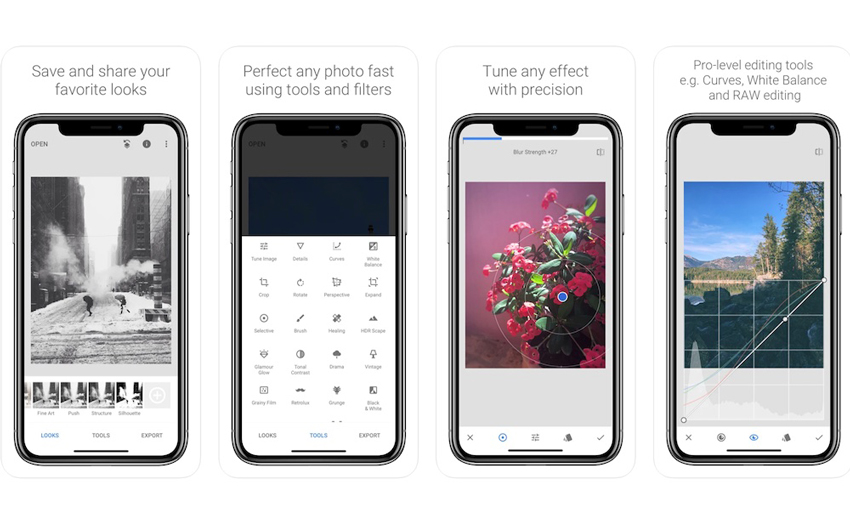
Step 1. Open the Snapseed app and tap the "+" to load your blurry photo from your gallery. Tap on Tools, then choose the Details option to access the sharpening settings.
Step 2. First, adjust the Sharpening slider to enhance the overall sharpness of the image, and then tweak the Structure slider to fine-tune the texture and clarity, focusing on details.
Step 3. Once you're satisfied with the adjustments, tap the checkmark icon to confirm the changes. Tap Export, then choose Save to export the unblurred photo in your gallery.
Part 4. Tips to Prevent Taking Blurry Photos on iPhone
Below are some essential tips to help you take sharp, clear photos every time—so you can make sure every moment is preserved in its best light.
1. Hold Your iPhone Steady
Keep your hands as still as possible when taking a photo to avoid motion blur. Consider using both hands or resting the phone on a stable surface.
2. Enable Grid Lines
Turn on the grid lines in the Camera settings to help with framing and stabilizing your shot. This will assist in aligning your shot and keeping the phone steady.
3. Use a Tripod
For ultra-sharp images, especially in low light, use a tripod to stabilize your iPhone. There are plenty of affordable phone tripods available.
4. Avoid Digital Zoom
Instead of zooming in digitally, try to move closer to your subject or use the iPhone's optical zoom if available (on models with dual or triple lenses). Digital zoom often results in reduced image quality and blurriness.
5. Enable Auto Focus and Lock Focus
Tap on the area of the screen where you want the camera to focus. For extra stability, hold your finger until the focus is locked. This prevents the camera from refocusing unexpectedly during the shot.
6. Increase Shutter Speed (Night Mode)
When taking photos in low light, your iPhone might automatically switch to Night Mode, which uses a slower shutter speed. Be sure to hold your phone as still as possible during the shot to avoid motion blur.
7. Clean Your Lens
A dirty lens can result in cloudy or blurry photos. Regularly wipe your lens with a clean microfiber cloth to ensure clear shots.
8. Enable Image Stabilization
On iPhone models with optical image stabilization (OIS), this feature helps reduce blurriness caused by shaky hands. Make sure it's activated in the camera settings.
Part 5. Conclusion
Blurry photos on your iPhone don't have to be a lost cause. With the right tools, you can effortlessly enhance image clarity and capture crisp, detailed shots. For an even more refined result, try Aiarty Image Enhancer—a powerful AI-driven tool designed to restore sharpness and clarity, transforming blurry images into high-quality, detailed photos.
Brenda Peng is a seasoned editor at Digiarty Software who loves turning ordinary photos into extraordinary works of art. With years of experience behind the lens and in front of the computer, Brenda shares her passion for photography, image enhancement, and editing through easy-to-follow tutorials.